Advertisement
Table of Contents
- 1 Important Safety Instructions
- 2 Fcc Compliance Statement
- 3 Product Details
- 4 Controller Box
- 5 Installations
- 6 Powering up the Controller
- 7 Manual Control
- 8 Fan Mode
- 9 Studio Mode
- 10 Bluetooth Reset
- 11 Remote Control
- 12 Adjusting Brightness
- 13 Channel Selection
- 14 DMX Chart
- 15 Specifications
- Download this manual
Advertisement
Table of Contents

Related Manuals for Aputure Light Storm LS 300x


Summary of Contents for Aputure Light Storm LS 300x
- Page 1 ai15858101745_LS_300x Product_Manual_EN.pdf 1 2020/4/2 下午2:49 LS 300x Product Manual English...
-
Page 2: Important Safety Instructions
7. Always unplug the lighting fixture from the electrical outlet before cleaning and servicing, or when not in use. Never yank the cord to remove the plug from the outlet. Detailed product manual for Light Storm can be found on www.aputure.com . - Page 3 19. The malfunctions caused by unauthorized disassembly are not covered under the warranty. 20. We recommend only using the original Aputure cable accessories. Please note that our warranty for this product does not apply to any repairs required due to any malfunctions of unauthorized Aputure accessories, although you may request such repairs for a fee.
-
Page 4: Fcc Compliance Statement
ai15858101745_LS_300x Product_Manual_EN.pdf 4 2020/4/2 下午2:49 21. This product is certified by RoHS, CE, KC, PSE, and FCC. Please operate the product in full compliance with the operation standards. Please note that this warranty does not apply to repairs arising from malfunctions, although you may request such repairs on a chargeable basis. - Page 5 ai15858101745_LS_300x Product_Manual_EN.pdf 5 2020/4/2 下午2:49 Increase the separation between the equipment and receiver. Connect the equipment to an outlet on a di erent circuit than the receiver is connected to. Consult the dealer or an experienced radio/TV technician for help. RF Warning Statement: This device has been evaluated to meet general RF exposure requirements.
-
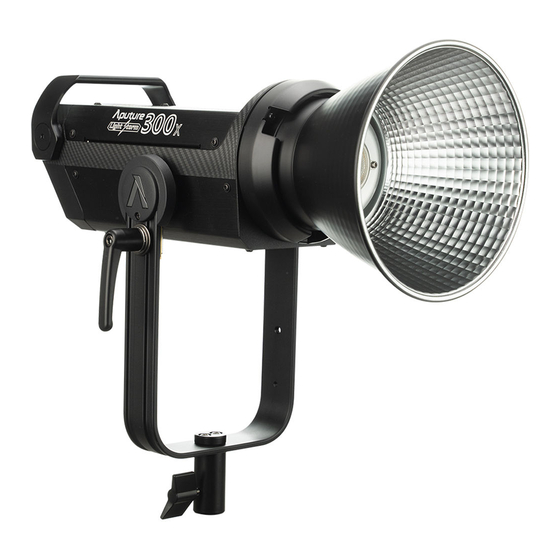
Page 6: Product Details
ai15858101745_LS_300x Product_Manual_EN.pdf 6 2020/4/2 下午2:49 Product Details 1. Light Bowens Mount Release Latch Label Bowens Mount Made in China LED Light Source Optical Blending Prism 55° Hyper-Reflector 5-Pin Male XLR Receiver Yoke Cable Relief Hook T-Handle Baby Pin Receiver/Mounting / Baby Pin Ratcheting Disk Column (5/8in. -
Page 7: Installations
ai15858101745_LS_300x Product_Manual_EN.pdf 7 2020/4/2 下午2:49 5-Pin Female XLR Power Output DMX IN Port Neutrik® DMX OUT Port powerCON Power Input 3. VA-Remote RC1+ Channel Indicators Group A Dimming Controls Group A On/O Group B Dimming Controls Group B On/O Group C Dimming Controls Group C On/O Group C Frequency &... - Page 8 ai15858101745_LS_300x Product_Manual_EN.pdf 8 2020/4/2 下午2:49 2. Attaching/detaching the protection cover Pull back the retaining pin, rotate the cover clockwise, then detach the cover. To reattach the cover, insert it into the Bowens mount and rotate counterclockwise. Notice: Always remove the protection cover prior to turning on the light. Always re-install the cover when packing it away. 3.
- Page 9 ai15858101745_LS_300x Product_Manual_EN.pdf 9 2020/4/2 下午2:49 5. Instructions for the Quick-Release "Lightning Clamp" 1) Clamp the Lightning Clamp onto a light stand. 2) To attach the control box, rotate the release lever to unlock the quick-release baseplate, then mount the control box onto the Lightning Clamp (the release lever will automatically spring back).
-
Page 10: Powering Up The Controller
ai15858101745_LS_300x Product_Manual_EN.pdf 10 2020/4/2 下午2:49 7. Powering up the controller 1) Powering by AC Neutrik® powerCON Male Connector AC 100V-240V Neutrik® powerCON Female Locking Connector To disconnect the Neutrik® powerCon cable, pull back on the yellow release tab on the cable connector, and rotate the connector counterclockwise. -
Page 11: Manual Control
ai15858101745_LS_300x Product_Manual_EN.pdf 11 2020/4/2 下午2:49 8. Insert the button battery to power VA-Remote RC1+ Remove battery compartment Install button battery and insert it into the VA-Remote RC1+ Operations 1. Press the power button to turn the light on and o Battery Level/ Brightness AC Power Symbol... - Page 12 ai15858101745_LS_300x Product_Manual_EN.pdf 12 2020/4/2 下午2:49 2) Rotate the CCT Control Wheel to adjust the color temperature of the light from 2700K-6500K. 3) Lighting FX Mode Press and hold the E ects button for 2 seconds to activate Lighting FX mode, then short press the E ects button to toggle between Paparazzi, Fireworks, Faulty Bulb, Lightning, TV, Pulsing, Strobe, Explosion, Fire, etc.
- Page 13 ai15858101745_LS_300x Product_Manual_EN.pdf 13 2020/4/2 下午2:49 e. TV E ect* f. Pulsing E ect g. Strobe E ect h. Explosion E ect** i. Fire E ect*** * As of writing this the TV e ect worked in CCT range presets and you cannot set a fixed base CCT. ** When controlling the explosion e ect, short press the Trigger button to single trigger the lighting e ect.
- Page 14 ai15858101745_LS_300x Product_Manual_EN.pdf 14 2020/4/2 下午2:49 When in Lighting FX mode, short press the "Frequency" button to enter Frequency Adjustment Mode. Then rotate the Brightness Control Wheel to adjust the frequency of the e ect from 1 to 10 and R (Random) as displayed on the screen. When in Lighting FX mode, rotate the CCT Control Wheel to adjust the base CCT of the lighting e ect from 2700K to 6500K as displayed on the screen.
- Page 15 ai15858101745_LS_300x Product_Manual_EN.pdf 15 2020/4/2 下午2:49 5) Press the MENU button to enter the system menu interface, as shown below. 6) DMX mode Press the MENU button to enter the system menu, rotate the dimming wheel to select DMX mode and press the MENU button again to enter DMX mode. When in DMX mode, rotate the brightness control wheels to set the device's DMX channel.
-
Page 16: Fan Mode
ai15858101745_LS_300x Product_Manual_EN.pdf 16 2020/4/2 下午2:49 8) Fan mode Press the MENU button to enter the system menu, rotate the dimming wheel to select Fan Mode, and press the MENU button again to enter Fan Mode. Use the wheel to select between Force* and Auto, then press the MENU button to confirm your selection. - Page 17 ai15858101745_LS_300x Product_Manual_EN.pdf 17 2020/4/2 下午2:49 11) Language Press the MENU button to enter the system menu, rotate the dimming wheel to select Language, and press the MENU button again to enter the Language menu*. Use the wheel to select from the available languages. Initial languages include "English" and "Chinese".
-
Page 18: Remote Control
ai15858101745_LS_300x Product_Manual_EN.pdf 18 2020/4/2 下午2:49 3. Remote Control You can control the LS 300x from any channel or group configuration. * Light Storm lights have three channels (1/2/3) and four groups (A/B/C/D). * Only groups "C" or "D" can be used to control brightness, CCT and lighting e ects, while groups "A"... -
Page 19: Adjusting Brightness
ai15858101745_LS_300x Product_Manual_EN.pdf 19 2020/4/2 下午2:49 3) Adjusting brightness Press A/B/C/D to toggle the lights on or o , press ( ) to adjust the brightness of the light from 0 to 100% accordingly. * This remote will not work when the light is in DMX mode. ** The remote control will only control the operation of the light when the fixture is in 2.4Ghz Wireless Control Mode. - Page 20 ai15858101745_LS_300x Product_Manual_EN.pdf 20 2020/4/2 下午2:49 5) FX Control Press the ( ) button to enter or exit lighting e ect mode. Press the ) to toggle between di erent e ects. Press the ( ) buttons to adjust the output of the light. Press the ( ) buttons to toggle the e ect frequency.
-
Page 21: Channel Selection
ai15858101745_LS_300x Product_Manual_EN.pdf 21 2020/4/2 下午2:49 * The DMX interface schematic is shown in the pictures below: Data 1+ Data 1+ (Primary Data Link) (Primary Data Link) Data 2- (Optional Data 2- (Optional Secondary Data Link) Data 1- Secondary Data Link) Data 1- (Primary Data Link) (Primary Data Link) -
Page 22: Dmx Chart
ai15858101745_LS_300x Product_Manual_EN.pdf 22 2020/4/2 下午2:49 2) DMX Chart DMX Channel Values / Functions 101-105 4700K (6 DMX Channels) Channel Value Function 106-110 4800K Dimmer 111-115 4900K 0-255 Intensity 0 to 100% 116-120 5000K 121-126 5100K CCT Control 2700K 126-130 5200K 6-10 2800K 131-135... - Page 23 You can download the Sidus Link app from the iOS App Store or Google Play Store for enhance the functionality of the light. Please visit sidus.link/app/help for more details regarding how to use the app to control your Aputure lights. -22-...
-
Page 24: Specifications
ai15858101745_LS_300x Product_Manual_EN.pdf 24 2020/4/2 下午2:49 Specifications Operating Current 3.5A Power Consumption 350W maximum AC 100~240V Power Supply Cooling Mode Active Cooling 50/60Hz TLCI ≥96 ≥95 ≥96 Color Temperature 2700K~6500K Radio Frequency 2.4GHz Channels 1/2/3 Groups A/B/C/D Remote Ability ≤100m 12V-16.8V Battery requirement APP Control Type Bluetooth... - Page 25 ai15858101745_LS_300x Product_Manual_EN.pdf 25 2020/4/2 下午2:49 Photometrics Distance 474 (fc) 54 (fc) 20 (fc) Bare Bulb 5100 (lux) 580 (lux) 220 (lux) 3200K 1505 (fc) 121 (fc) 42 (fc) Hyper-Reflector 16200 (lux) 1300 (lux) 450 (lux) 697 (fc) 74 (fc) 32 (fc) Bare Bulb 7500 (lux) 800 (lux)
- Page 26 ai15858101745_LS_300x Product_Manual_EN.pdf 26 2020/4/2 下午2:49...
Need help?
Do you have a question about the Light Storm LS 300x and is the answer not in the manual?
Questions and answers