Table of Contents
Advertisement
Quick Links
Advertisement
Table of Contents

Related Manuals for Aputure Light Storm LS 600d


Summary of Contents for Aputure Light Storm LS 600d
- Page 1 LS 600d Product Manual English...
-
Page 2: Important Safety Instructions
Thank You! Thank you for purchasing the Aputure Light Storm 600d. The Aputure LS 600d is an incredibly powerful and feature-packed fixture, containing all pre-existing Light Storm features such as Bowens Mount modularity, and wireless remote & app control, DMX 512, a DC battery input. - Page 3 19. The malfunctions caused by unauthorized disassembly are not covered under the warranty. 20. We recommend only using the original Aputure cable accessories. Please note that our warranty for this product does not apply to any repairs required due to any malfunctions of unauthorized Aputure accessories, although you may request such repairs for a fee.
-
Page 4: Fcc Compliance Statement
21. This product is certified by RoHS, CE, KC, PSE, and FCC. Please operate the product in full compliance with the operation standards. Please note that this warranty does not apply to repairs arising from malfunctions, although you may request such repairs on a chargeable basis. 22. -
Page 5: Components List
Increase the separation between the equipment and receiver. Connect the equipment to an outlet on a different circuit than the receiver is connected to. Consult the dealer or an experienced radio/TV technician for help. RF Warning Statement: This device has been evaluated to meet general RF exposure requirements. Components List Please make sure all accessories listed below are completed before using. -
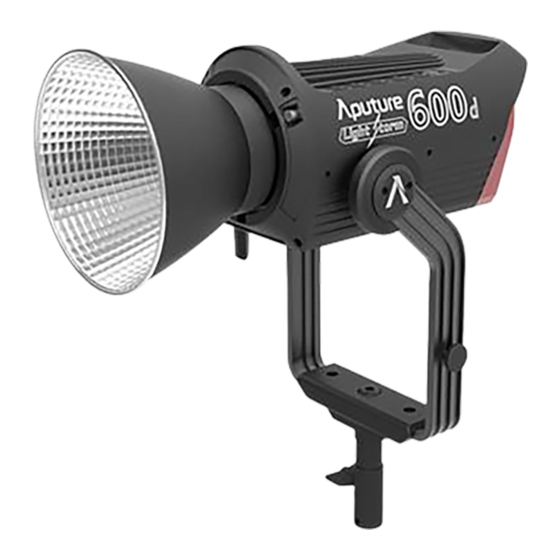
Page 6: Product Details
Product Details 1. Lamp Head Bowens Mount Release Latch Bowens Mount Label LED Light Source Made in China 600 Series Hyper Reflector 5-Pin Male Head Cable Connector Cable Relief Hook T-Handle Ratcheting Disk / Baby Pin Brake Handle Junior/Baby Pin Mount Mounting Screw (1.125in/28mm | 5/8in./16mm) 2. - Page 7 DMX OUT DMX IN Neutrik® 48V DC Input 5-Pin Female Head Cable Connector Port Port powerCON (3-Pin XLR) Power Input Setting Up the Light 1. Attaching/detaching the protection cover Pull back the retaining pin, rotate the cover clockwise, then detach the cover. To reattach the cover, insert it into the Bowens mount and rotate counterclockwise.
- Page 8 3. Setting up the Lamp Head If using a 5/8in / 16mm stand (Baby Pin), then mount the Lamp Head onto the stand, and proceed to fix it in place using the T-Handle/Mounting Screw on the Baby Pin Receiver/Mounting Column. If using a 1.125in / 28mm stand (Junior Pin), then mount the Lamp Head into the Junior Pin receiver, and fix it in place using the T-Handle on the stand.
-
Page 9: Powering Up The Controller
5. Connect the Lamp Head to the control box Connect the Lamp Head to the control box using the LS 600 Series 5-Pin Head Cable. MENU * Hang the cable using the rope to manage and reduce tension on the cable. * Disconnect the Head Cable by pulling up on the collar on the connector. - Page 10 2) Powering by Batteries V-Mount Battery Anton Bauer Battery Customers can choose V-Mount or A-Mount battery plates for their control boxes upon purchase according to their needs. Operations 1. Press the power button to turn the light on and off Battery Level/ Brightness AC Power Symbol...
-
Page 11: Manual Control
2. Manual Control 1) Rotate the Knob to adjust the intensity of the light from 0-100% in 1% increments. The speed with which you turn the knob will change the rate of increase or decrease. 2) Press the MENU button to enter the System Menu interface. In the System Menu you'll find DMX Mode / Dimming Curves / Fan Mode / Studio Mode / Freq.Selection / BT Reset / BT Serial NO / Language / Update Firmware Version / UID / Factory Reset / Exit. - Page 12 * The fade-out time decreases as the percentage of brightness decreases. When the brightness output is 100%, the fade-out time is 60 seconds, which decreases in sequence. * If the signal is reconnected, the DMX console will continue to maintain the signal output as same as before.
- Page 13 2.3) Fan Mode Press the MENU button to enter the system menu, rotate knob to select Fan Mode, and press the MENU button again to enter Fan Mode. Use the wheel to select between Smart, High, Medium, Silent, then press the MENU button to confirm your selection. 2.4) Studio Mode Press the Menu button to enter the System Menu.
- Page 14 2.6) BT Reset Press the MENU button to enter the menu interface, rotate the Knob to select and press to enter BT Reset. Rotate the control wheel to select "YES"and short press the wheel to reset the device's Bluetooth pairing or select "NO" to return to the system menu. After resetting the light's Bluetooth connection, your mobile phone or tablet will be able to connect to and control the light with Sidus Link App.
- Page 15 2.9) Update Press the Menu button to enter the System Menu. Rotate the Knob to select Update Firmware, and short press the knob to enter Update Mode. By selecting Update Firmware, you can update the fixtures existing firmware, by inserting a compatible USB drive, formatted to FAT16/32, with the new firmware files. You can also update the device's firmware using the OTA firmware update function built into Sidus Link.
- Page 16 2.12) Factory Reset Press the MENU button to enter the menu interface,rotate the INT wheel to select and press to enter the Factory Reset interface. The factory settings are: fan is in smart mode, light brightness value is 50%, studio mode off, dimming curve-linear, DMX channel number 001,English, fireworks light effect frequency 5.
- Page 17 e. TV Effect f. Pulsing Effect g. Strobe Effect h. Explosion Effect * In the Explosion Effect, short press the Effects button to trigger the effect. * If the light is powered off, upon turning on again, the light resumes its last saved setting.
- Page 18 4. Connecting to DMX 1) Connect a standard DMX controller Connecting DMX to only one 600d OUTPUT DMX512 OUTPUT DMX512 Daisy chaining multiple lights using DMX * The DMX interface schematic is shown in the pictures below: Data 2+ (Optional Secondary Data 2+ (Optional Secondary Data Link) Data Link)
- Page 19 You can download the Sidus Link app from the iOS App Store or Google Play Store for enhancing the functionality of the light. Please visit sidus.link/app/help for more details regarding how to use the app to control your Aputure lights. Get Sidus Link Sidus.link/app/help...
-
Page 20: Specifications
Specifications 100 V ~ 240 V Operating Current Power Supply 50 Hz / 60 Hz Power Input ≤ 720 W Power Output ≤ 600 W ≥ 96 TLCI ≥ 96 ≥ 94 SSI (D56) Channels 1 / 2 / 3 Groups A / B / C / D 5600±200K...
Need help?
Do you have a question about the Light Storm LS 600d and is the answer not in the manual?
Questions and answers