Table of Contents
Advertisement
Quick Links
Advertisement
Table of Contents

Related Manuals for Aputure STORM 1200x


Summary of Contents for Aputure STORM 1200x
- Page 1 STORM 1200x Product Manual English...
-
Page 2: Table Of Contents
Table of Contents Introduction .............................04 Components List............................05 Product Overview...........................06 1.Lamp Head............................06 2.Control Box.............................06 Setup ................................. 07 1.Attaching/Detaching the Protection Cover................07 2.Attaching/Detaching the Reflector..................07 3.Setting Up the Lamp Head......................07 4.Using the Lightning Clamp ......................08 5.Connecting the Lamp Head to the Control Box ..............09 6.Powering Up the Control Box .....................10 Operating Instructions.......................... - Page 3 2.4.3 White Light Standard..................25 2.4.4 Lead/Follow Mode ....................25 2.4.5 High-Speed Mode ....................25 2.4.6 Fan Mode....................... 26 2.4.7 Studio Mode......................27 2.4.8 Screensaver......................27 2.4.9 Language .......................27 2.4.10 Product Information ...................27 2.4.11 Firmware Update ....................28 2.4.12 Factory Reset ...................... 29 2.5 Presets..........................
-
Page 4: Introduction
DMX512-A, Lumen Radio CRMX, RDM, Art-Net, and sACN, as well as Sidus BT from Aputure. With an IP65 rating and standard Bowens Mount and Spotlight MAX compatibility, the STORM 1200x is a powerful, professional lighting solution... -
Page 5: Components List
Components List Before using this product, please check that all of the following items are included in the package. If any are missing, please contact your dealer. Protection Cover x 1 STORM 1200x Control Box STORM 1200x Neutrik® power CON Lamp Head x 1 7.5m 8-pin Head Cable x 1... -
Page 6: Product Overview
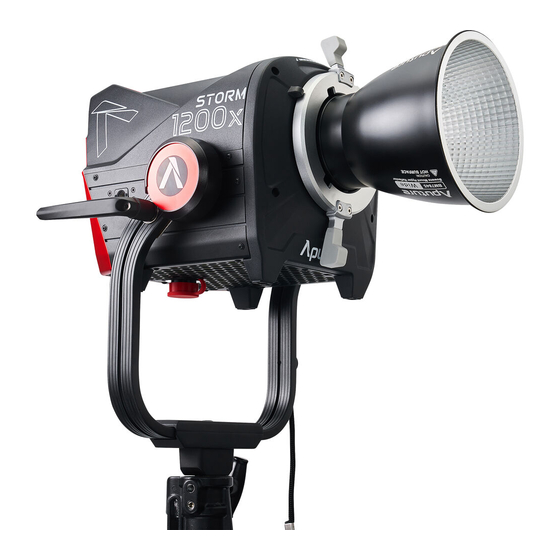
Product Overview 1. Lamp Head Pro-Lock Handle Wide Angle Reflector Ratcheting Disk Brake Handle 8-Pin Weatherproof Head Cable Connector Junior Pin (1.125in/28mm) 2. Control Box Carry Strap Carry Strap Plate 8-Pin Female Head Cable Connector LCD Display Menu Button USB-A Port Light Mode Button DMX OUT Port Select Wheel... -
Page 7: Setup
Setup 1. Attaching/Detaching the Protection Cover To detach the cover, rotate the Pro-Lock Handle to the open position and remove it. To reat- tach the cover, insert it into place and rotate the Pro-Lock Handle clockwise until locked. Open Position * Before use, please make sure to remove the protective cover. -
Page 8: Using The Lightning Clamp
4. Using the Lightning Clamp 1) Attach the Lightning Clamp onto a light stand. 2) To attach the Control Box, rotate the release lever to unlock the quick-release plate. Then mount the Control Box onto the Lightning Clamp (the release lever will spring back) and check that it is secure. -
Page 9: Connecting The Lamp Head To The Control Box
3) To remove the Control Box, grasp it firmly, and unlock the quick-release plate by turning its lever. * The Lightning Clamp can attach to round or square fittings with a diameter of 2-5cm / 0.79-1.97 in. 5. Connecting the Lamp Head to the Control Box Connect the Lamp Head to the Control Box using the 8-pin Weatherproof Head Cable. -
Page 10: Powering Up The Control Box
6. Powering Up the Control Box powerCon IN Plug positioning slot *To disconnect the Neutrik® powerCon cable, pull back on the silver release tab on the cable connector, and rotate the connector counter clockwise. Do not pull directly on the cable. -
Page 11: Operating Instructions
Operating Instructions 1. Powering On/Off Connect the power supply and press the power button on the Control Box to turn on/off. Fan Mode Studio Mode Dimming Curve White Light Standard Mode AC Power Lead/Follow Mode Intensity Intensity : 60.0% Color Temperature Correlated Color :... -
Page 12: Manual Control Of Control Box
2. Manual Control of Control Box Press the button on the Control Box to enter the corresponding modes: MENU, LIGHT MODE, and PRESET. 2. 1 MENU Press the MENU button to enter the System Menu interface. Choose between Light Mode, Control Settings or System Settings. -
Page 13: Cct Mode
2. 2.1 CCT Mode Adjust the Color Temperature (2500K-10000K) and the ±Green level (-1.00 through +1.00). : 60.0% 100% : CCT 10000K 2000K 10000K ±G:-1.0 ±G: +1.0 : ±G -1.0 2.2.2 xy Mode Set the x coordinate value (0.1550-0.6815) and y coordinate value (0.0300-0.5500) and the Intensity. -
Page 14: Sidusfx Mode
Pulsing Strobe 62.5% 62.5% 62.5% Warmer Natural Intensity Frequency Intensity 4600K Frequency Intensity 4600K Frequency Cooler Loop Loop Loop TV Mode Pulse Mode Flash Mode Fireworks Explosion Lightning 62.5% 62.5% 62.5% Random 3200K Intensity 5600K Frequency Intensity 4600K Decay Intensity 4600K Frequency Loop... -
Page 15: Dmx Settings
2.3.1 DMX Settings (1) DMX Status Screen: Displays DMX data status, the DMX address, the DMX Profile being used, the CRMX Signal Strength, Fan Mode, Dimming Curve, Studio Mode in use, Output Mode, Power Status and more. DM X DM X Address Address Output:... -
Page 16: Crmx Settings
DMX Loss Behavior Hold Last Look Black Out Fade Out Hold 2 mins & Fade Out (5) DMX Smoothing:Set the smoothness of DMX dimming. DMX Smoothing Feather Smooth Super Smooth (6) DMX Termination: Turn ON (to help with DMX signal reflection) or OFF. DMX Termination 2. - Page 17 DM X DM X Address Address Output: Constant Linking... P11 - CCT & RGB-8Bit (10 C (2) When in CRMX RX Mode, CRMX to DMX512 "ON" pushes the received DMX data out of the DMX Out Port. If "OFF", then no data is pushed out of the DMX Out Port. CRMX Settings CRMX Mode Unlink...
- Page 18 a. In the Linking Key interface, choose an 8 digit number to be the Linking Key. Three digits cannot be "0". Linking Key Settings Please include at least 3 non-zero numbers. 2 3 5 4 6 8 9 Apply Apply & Save b.
-
Page 19: Sidus Bt Settings
(5) CRMX RX (Receiving) Status a. Signal Strength: When DMX data is provided to the Control Box acting as an RX , the DMX Status Screen will indicate the CRMX signal strength the Control Box is receiving. CRMX DM X DM X Address Address... -
Page 20: Ethernet Settings
Sidus BT Settings Control Settings Sidus BT C R M X Sidus BT Settings Sidus BT UID:110E59 (2) When Sidus BT is "ON': the serial number is displayed here to facilitate connecting with the Sidus Link Pro and Sidus Link Apps. Use Sidus BT Reset to allow your Sidus Link device to connect with a new controller. - Page 21 View IP 192.168.1.1 SubNet Mask 255.255.255.0 Gateway 192.168.1.1 MAC Address: DC:EF:CA:75:D7:6C 2.3.4.2 Protocol Select the Control Protocol for this Control Box to listen to. Choose between Auto, Art-Net, or sACN. Protocol Auto Detect sACN Art-Net (a) Automatic: identifies the Control Protocol automatically. (b) Art-Net: recognizes the Art-Net Protocol only and ignores sACN.
- Page 22 a. In the Presets interface, Select a Preset to edit or apply. Edit IP Edit IP 1 9 2 .1 6 8 .1 . 1 9 2 .1 6 8 .1 .1 1 9 2 .1 6 8 .1 .1 Apply Apply &...
- Page 23 SubNet Mask Presets Set SubNet Mask Preset 1:255.255.255.0 2 5 5 . 2 5 5 . 2 5 5 . 0 Preset 2:255.255.0.0 Preset 3:255.0.0.0 Apply Apply & Save Preset 4:255.255.255.0 In the Presets interface, Select a Preset to edit or apply. Set SubNet Mask SubNet Mask Presets SubNet Mask Preset 1...
-
Page 24: System Settings
2.3.4.5 DMX Address: Set the DMX Address DMX Address DMX: 1 0 1 2.4 System Settings System Settings include: Dimming Curve, Output Settings, White Light Standard, Lead/Fol- low Mode, High-Speed Mode, Fan Mode, Studio Mode, Screensaver Settings, Language, Product Info, Firmware Update, and Factory Reset options. MENU Light Control... -
Page 25: White Light Standard
2.4.3 White Light Standard (1) CIE Daylight: meets the sunlight standard (5000K-10000K, Duv is controlled at 0.0020~0.0040); (2) Blackbody: meets the blackbody luminescence standard (Duv is controlled near the blackbody trajectory line). White Light Standard CIE Daylight Blackbody 2.4.3 Lead/Follow Mode In this interface, set fixtures as either the Leader or the Follower (Leader/"OFF"). -
Page 26: Fan Mode
* If High-Speed Mode is ON: (1) The lowest intensity output is 20% when utilizing High-Speed Mode. (2) FX Modes cannot be utilized in High-Speed Mode. 2.4.6 Fan Mode In the System Settings Fan Mode, rotate the Select Wheel and press to choose between Smart, High, Medium, Silent and DMX Controlled Fan Mode. -
Page 27: Studio Mode
2.4.7 Studio Mode When Studio Mode is enabled (ON), the fixture will power on when connected to live power. When Studio Mode is disabled (OFF), press the power button to power on or power off the fixture. Studio Mode Studio Mode Studio Mode Light turns on with Power Input Light turns on with Power Input... -
Page 28: Firmware Update
4) Hardware Version: display the hardware versions of the Control Box and attached Lamp Head. 5) Operating status: display the Temperature, Control Box and attached Lamp Head Run Time, and any Error Code. Product Info Hardware Version Firmware Version Controller Ver : 1.0 SN:7CXDAG102029 Lamp Head... -
Page 29: Factory Reset
Update Firmware System Settings Firmware: V1.0 V1.2 Please insert USB drive with the. bin file in the root directory. Update Firmware Sidus ID:110E59 Loading 100% Updating Update Complete Firmware update is in progress. Do not turn off the fixture. 2.4.12 Factory Reset Select ''YES"... -
Page 30: Presets
Then press the PRESET button to open the Preset interface. Select the Preset number to open, replace or delete the Preset. 60.0% 10000K ±G -1.0 OPEN 60.0% 10000K HSIC ±G -1.0 Replace Save 3. Control with a DMX Console Connect the Lighting Console to the STORM 1200x Control Box DMX IN Port:... -
Page 31: Controlling Via Dmx
4. Controlling via DMX The STORM 1200x supports several DMX profiles. Please download the DMX Chart on the official website (https://aputure.com) to view detailed configurations. 5. Sidus Link Pro and Sidus Link Download Sidus Link and Sidus Link Pro from the iOS App Store or the Google Play Store. -
Page 32: Product Specifications
* Damage to the Lamp Head or Control Box from moisture is not covered under the warranty. If the STORM 1200x is used in a heavy rain, it is recommended to use the tilt angle range of the lamp head as shown below: +45°... -
Page 33: Photometrics
Photometrics Normal mode Reflectors CF12 Fresnel lens tube Distance Bare light BM7815 BM7830 BM7845 15° 45° 14600lux 162000lux 80000lux 35500lux 145000lux 28000lux 1357fc 15056fc 7435fc 3299fc 13476fc 2602fc 6570lux 74000lux 32200lux 15300lux 64300lux 13000lux 611fc 6877fc 2993fc 1422fc 5976fc 1208fc 2500K 2510lux 25600lux... - Page 34 1757fc 19424fc 9665fc 4275fc 17658fc 3392fc 8490lux 96100lux 41800lux 19800lux 84400lux 16900lux Continued table: 789fc 8931fc 3885fc 1840fc 7844fc 1571fc 5600K 3230lux 33300lux 14100lux 7070lux 29300lux 6230lux Normal mode 300fc 3095fc 1310fc 657fc 2723fc 579fc 1640lux 16600lux Reflectors 7050lux 3580lux 14800lux CF12 Fresnel lens tube 3210lux...
- Page 35 High-speed photography mode Reflectors CF12 Fresnel lens tube Distance Bare light BM7815 BM7830 BM7845 15° 45° 14800lux 165000lux 81500lux 36200lux 148000lux 28500lux 1375fc 15335fc 7574fc 3364fc 13755fc 2649fc 6690lux 75800lux 32900lux 15600lux 65500lux 13200lux 622fc 7045fc 3058fc 1450fc 6087fc 1227fc 2500K 2550lux 26100lux...
- Page 36 1998fc 22119fc 10967fc 4870fc 20074fc 3866fc 9670lux 110000lux 47600lux 22500lux 96100lux 19200lux Continued table: 899fc 10223fc 4424fc 2091fc 8931fc 1784fc 5600K 3690lux 37700lux 16000lux 8010lux 33300lux 7050lux High-speed photography mode 343fc 3504fc 1487fc 744fc 3095fc 655fc Reflectors CF12 Fresnel lens tube 1870lux 18800lux 8020lux...
-
Page 37: Safety Instructions
10. Do not disassemble the fixture to avoid the risk of fire or electric shock. Contact cs@aputure.com or take the lighting fixture to qualified service personnel when service or repair is required. Incorrect reassembly may cause electric shock when the lighting fixture is in use. - Page 38 -such as safety chains- that is certified for the weight of the fixture. We recommend only using the original Aputure cable accessories. Please note that any malfunctions caused by using unauthorized accessories are not covered by the warranty. The user may pay for service and maintenance.
-
Page 39: Fcc Declaration Of Conformity
FCC Declaration of Conformity Changes or modifications to this product that are not expressly approved by the manufacturer are prohibited and voids the user warranty. ATTENTION This equipment has been tested and found to comply with the limits for a Class B digital device, pursuant to Part 15 of the FCC Rules. -
Page 40: Disclaimer
The Company reserves the right for the final explanation of this document and all documents relating to the product on the premise of compliance with laws and regulations. No further notice will be given in the event of any update, revision or termination. Please access the official website of Aputure for the up-to-date product information.
Need help?
Do you have a question about the STORM 1200x and is the answer not in the manual?
Questions and answers