Advertisement
- 1 Box Contents
- 2 Product Description
- 3 Cable Connectors
- 4 Attach 2x7P Connector
- 5 Power Connections
- 6 Terminal Communications
- 7 Privacy Shield or Decorative Plug Installation
- 8 SIM and Micro SD Card Installation
- 9 Reset Button
- 10 Audio Jack
- 11 Terminal Location
- 12 Stand Installation
- 13 Cleaning the Device
- 14 Certifications
- 15 Documents / Resources
Box Contents

- 1 - PAX™ Q30 Payment Terminal
- 1 - Communication Cable (Varies by configuration.)
- 1 - AC Power Adapter (not incl. with PUSB configurations)
- 1 - Privacy Shield
- 1 - Decorative Plug
- 1 - Quick Setup Guide
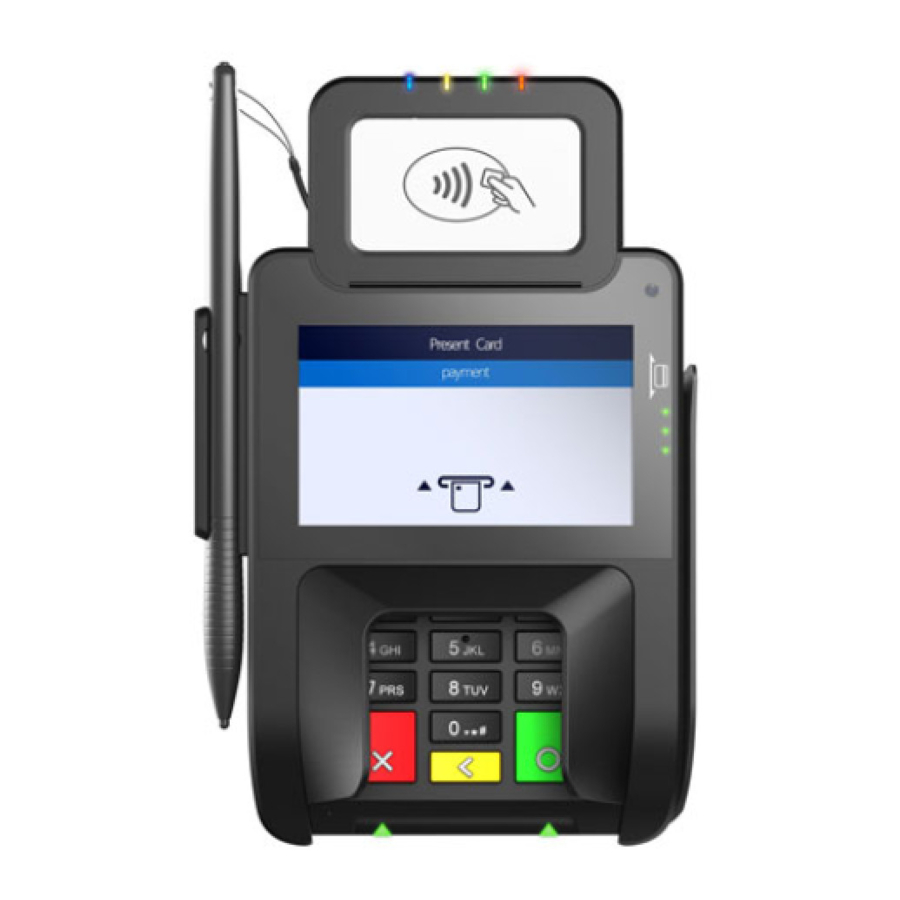
Product Description


Cable Connectors
The 2x7P connector end of the provided communication cable connects to the underside of the Q30.

2x7P connector
Cable connectors at the other end of the cable provide an interface to other systems for communications, to allow local downloading and to provide power. Additionally some cables allow connecting peripherals such as check readers and printers. All of the cable connectors are labeled and color-coded, as follows:
A combination of the following ports are available on the communication cable (depending on the Q30 configuration):
- DC Power - Connects AC power adapter to the Q30
- RS232A (Blue, RJ11 6P4C), RS232B (Yellow, RJ11 6P4C), or RS232 on C302 hub cable (RJ11 6P6C) - Connects an external POS device or check reader
- RS232 (Black, DB9-F) – Used to connect to POS terminal
- USB-Host (Type A) or Micro USB 2.0 - Used for local terminal downloads or external peripherals
- LAN (Red, Ethernet, RJ45-F) - Used for bi-directional Ethernet connections, TMS, and/or payment processing
- Powered USB - to connect to POS/ECR systems
Attach 2x7P Connector
To connect 2x7P end of cable:
- Loosen the screw on the underside ofthe Q30 using a Philips head screwdriver.
![]()
- Open the back cover.
- Place the 2x7P end of the providedcommunication cable over its port, but do not push into place.
- Align rubber sliding pull restraint so thatit seats into its notch on the Q30.
- Firmly press the 2x7P end of the cable into the port.
![]()
- Close the back cover and tighten the screw, ensuring the gasket is properly seated in the opening.


DO NOT connect the other end to the AC power source until all the other cables are connected first. Plugging in the AC power cord to the power source before the other cables are installed may result in damage to the terminal or connected devices.
Power Connections
Power can be supplied to the Q30 by connecting the AC power adapter to the data cable, as in the case of RS232 or USB configurations, or via a powered USB cable (12V Powered USB) where the connected POS terminal provides the power.
Terminal Communications
The Q30 supports the following types of communications:
- RS232
- High Speed Ethernet
- USB 2.0
- Powered USB
- Bluetooth® wireless technology + Wi-Fi (optional)
- GPS (optional)
- 4G (future, optional)
Privacy Shield or Decorative Plug Installation

While the installation of a privacy shield is not required, they do offer additional protection.

*Decorative Plug: If a privacy shield is not installed, a nonremovable decorative plug may be installed in its place. This plug does not provide any PIN entry privacy.

SIM and Micro SD Card Installation
Power down the terminal before installing SIM cards or Micro SD cards. If the terminal is still powered on during an attempted SIM or SD card installation or removal, both the terminal and the card can be damaged irreparably.
To install a SIM and/or Micro SD card:
Power down and remove all power from the Q30. Unscrew and open back cover. Gently press and slide SIM or Micro SD door toward outer edge of terminal and open hinged door. Seat card with gold connectors down into slot, aligning with opening. Gently press and slide door toward center of terminal to lock door closed. Close Q30 back cover and tighten back cover screw.

Reset Button
To reset the terminal, press and hold the reset button for 4-6 seconds using a pen or similar item.

Audio Jack
If required, a headphone can connect to the terminal for audio prompting, if the terminal application supports this, using the 3.5mm output audio jack.

Terminal Location
Locate the terminal on a counter top, desktop, or table top. It is recommended to keep the terminal away from direct sunlight, excessive dust, moisture, and heat. Avoid locating the terminal near electrical devices that might introduce interference such as microwave ovens and blow dryers.
Stand Installation
Insert metal stand prongs into three stand slots on underside of terminal.
Slide terminal firmly into place on stand.

Cleaning the Device
Do not use industrial strength or abrasive cleaner as it may damage or scratch the screen.
- Do not immerse device in water (or liquid).
- Do not spray water or cleaner into EMV Card Reader or ports.
- To clean screen, apply distilled water or mild glass cleaner onto a soft, lint-free cloth and gently wipe terminal screen.
- To clean terminal, apply distilled water or plastic-safe cleaner onto a soft, lint-free cloth and gently wipe terminal.
Changes or modifications not expressly approved by PAX Technology could void the user's authority to operate the equipment. In a domestic environment, this product may cause radio interference in which case the user may be required to take adequate measures.
Certifications
The Q30 passed the following certifications:
- PCI PTS 5.x, SRED
- EMV L1 & L2
- EMV CL L1
- Mastercard PayPass
- American Express Expresspay
- Discover D-PAS
- Visa payWave
- JCB J/Speedy
- Interac Flash
- FCC
- IC
- CE
- UL
- RoHS

Documents / ResourcesDownload manual
Here you can download full pdf version of manual, it may contain additional safety instructions, warranty information, FCC rules, etc.
Advertisement


Need help?
Do you have a question about the Q30 and is the answer not in the manual?
Questions and answers