PAX A920 Reference Manual
Hide thumbs
Also See for A920:
- Quick start manual ,
- Quick setup manual (47 pages) ,
- User manual (30 pages)
Table of Contents
Advertisement
Advertisement
Table of Contents

Related Manuals for PAX A920


Summary of Contents for PAX A920
- Page 1 A920 REFERENCE GUIDE A920 Reference Guide Date: 12-12-2019 Version: 1.0...
-
Page 2: Preface
If unable to resolve the issue, please contact Pax. PAX support operates 24 hours a day, 7 days a week. The level of access to this Service is by the support plan arrangements made between PAX and the Organization. Please consult this support plan for further information about entitlements, including the hours when telephone support is available. -
Page 3: Revision History
A920 REFERENCE GUIDE Revision History Date Version Description 12/12/19 v1.00 Initial Release v1.0 | ii... -
Page 4: Table Of Contents
BATTERY INFORMATION ......................13 BATTERY SPECIFICATIONS ......................13 CHARGING BATTERY ........................13 REMOVE AND INSTALL BATTERY ....................14 INSTALL A920 SIM, SAM, AND MICRO SD CARD ................. 16 SIM, SAM & MICRO SD CARD INSTALLATION ................16 CARD READERS ........................18 10.1 MAGNETIC STRIP READER ...................... - Page 5 L920 DIMENSIONS ........................54 13.9 L920 PRODUCT DESCRIPTION ..................... 54 13.10 L920-BC BOTTOM VIEW ......................54 13.11 L920-BM BOTTOM VIEW ......................54 14. FREQUENTLY ASKED QUESTIONS ....................55 1. WHAT IS THE OPERATING SYSTEM OF A920? ................... 55 v1.0 | v...
- Page 6 4. WHAT’S THE A920 SCREEN BRIGHTNESS? ..................55 5. DOES A920 SUPPORT DUAL BAND WI-FI? ..................55 6. HOW MANY SAM SLOTS DOES A920 HAVE? ..................55 7. HOW MANY SIM SLOT DOES A920 HAVE? ..................55 8. HOW TO TURN ON/OFF THE SCREEN SAVER? .................. 56 9.
-
Page 7: Introduction
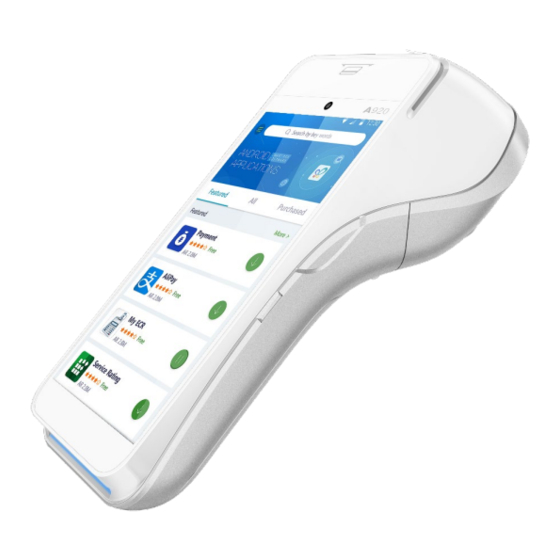
A920 REFERENCE GUIDE 1. Introduction The A920 is an all-in-one Android payment terminal with compact design that has a 5-inch IPS color touchscreen with high anti-glare; the A920 combines the full features of an Android tablet in a powerful payment terminal. The A920 delivers an integrated camera, hi-speed thermal printer and high capacity battery to meet the daily demands across all dynamic Retail or Hospitality environments. -
Page 8: Acronyms And Terms
A920 REFERENCE GUIDE 1.3 Acronyms and Terms Name Description Dynamic Host Configuration Protocol - A network management protocol used on IP networks. The DHCP server dynamically assigns an IP address DHCP and other network configuration parameters to each device on the network. -
Page 9: Packaging
This section covers the A920 packaging information. 2.1 A920 Overpack Carton Twenty (20) A920 terminal boxes are shipped inside an A920 overpack carton. The dimensions of the overpack carton are 16 in. x 14 in. x 11 in. (41cm x 36cm x 28cm). -
Page 10: A920 Protective Cardboard Inserts
A920 REFERENCE GUIDE 2.3 A920 Protective Cardboard Inserts Cardboard inserts inside the terminal box protect the A920 during shipping. In addition, the terminal is enclosed in a plastic wrapper. 2.4 A920 Box Contents The A920 terminal box includes: Thermal USB Charging... -
Page 11: Product Description
| Wi-Fi | LAN | Contactless | Front A920-2AW-RD5-12EA Camera | QR Code Scanning Camera | 2 SAM The A920 part number is detailed below. Each character in the part number has a value and a description. A920 A920 v1.0 | 5... -
Page 12: Serial Number Location On Terminal
A920 REFERENCE GUIDE 3.2 Serial Number Location on Terminal The serial number for the A920 is located on the back of the device, directly above the back camera. Please see the image below for reference. v1.0 | 6... -
Page 13: A920 Functional Information
A920 REFERENCE GUIDE 4.0 A920 Functional Information This section will point out the various features and functions of the terminal from the front, rear, left and right-side angles. 4.1 Technical Details and Specs Feature Description Camera Dual cameras: 5MP front camera; 0.3 MP for 1D/2D code scanning ARM Cortex A7 1.1GHz 4 core processor... -
Page 14: A920 Terminal View From All Sides
A920 REFERENCE GUIDE 4.2 A920 Terminal View from All Sides 4.2.1 A920 Components, Interface, and Ports (Back) Printer Roll Hatch Soft Base 5 Megapixel Auto Focus Rear Soft Base Volume Control Button MAC Address Label Optional Stand POGO Charging Port... -
Page 15: A920 Components, Interface, And Ports (Front)
A920 REFERENCE GUIDE 4.2.2 A920 Components, Interface, and Ports (front) Contactless Card Front Facing Camera Reader and LCD Screen Card Swipe Reader Volume Control Button EMV Card Reader Power Button v1.0 | 9... -
Page 16: Terminal Location
A920 REFERENCE GUIDE Terminal Location Position the terminal on a countertop, desktop or tabletop. Keep the terminal away from direct sunlight, excessive dust, moisture and heat. Avoid locating the terminal near electrical devices that might introduce interference such as microwave ovens or equipment with transmitters. -
Page 17: Ac Power Connection
The A920 can be powered two ways: • By plugging the power supply and power cord into the Micro USB port on the side of the A920. • If the optional Charging Base is included, by plugging the power supply with power cord into the Charging Base power port and seating the A920 on its Charging Base. -
Page 18: Terminal Ports
A920 REFERENCE GUIDE Terminal Ports The following port is available on the terminal: • Type C USB – Used for power and downloads • Microphone – Supports handsfree microphone abilities. v1.0 | 12... -
Page 19: Battery Information
Charging Battery The A920 will charge the battery until 100% full and then it will stop charging. The battery level status can be viewed at the top of the screen in the battery icon and will display the current percent available. -
Page 20: Remove And Install Battery
A920 REFERENCE GUIDE Remove and Install Battery Carefully position the A920 so you have access to the bottom of the unit. Using your finger, slide the tab on the back cover over toward the right of the terminal. Lift and remove the battery cover. Once the cover has been removed, you can push up and pull out the battery. - Page 21 A920 REFERENCE GUIDE 4. Set the battery aside in a safe location. To reinstall the battery, place the battery back in the battery slot and push up to secure it. v1.0 | 15...
-
Page 22: Install A920 Sim, Sam, And Micro Sd Card
SIM, SAM & Micro SD Card Installation The A920 has three SAM card slots on the main body of the device, as illustrated in the figure above, and one SIM card slot. These card slots are under the battery in the back plate. - Page 23 A920 REFERENCE GUIDE 2. After opening the back cover, find the card slots on the bottom side interior of the mount. 3. Insert the SIM card or Micro SD card (with adapter) into the card slot with the contacts facing upwards and the clipped corner of the card facing forward and to the right.
-
Page 24: Card Readers
10.2 EMV Card Reader The A920 includes a smart card reader at the bottom of the device. The smart card reader reads EMV cards. Additionally, the reader has a lifecycle of over 500k insertions, conforms to ISO/IEC 7810:2003, ISO/IEC 7816, and EMVCo L1 &... -
Page 25: Pfc/Contactless Card Reader
10.3 PFC/Contactless Card Reader The A920 has a contactless card reader with an RF antenna located on its front face. The read area for this card reader roughly corresponds to the top half of the touchscreen on the front of the device. The contactless card reader supports ISO14443 Type A/B. -
Page 26: Basic Operation Instructions
A920 REFERENCE GUIDE 11. Basic Operation Instructions This section is intended to demonstrate how to power on and off the A920 11.1 Power ON To turn the device on, plug the micro USB cable into the micro USB port. The device will automatically power on and begin charging the battery. -
Page 27: Adjust The Display Brightness
A920 REFERENCE GUIDE 11.3 Adjust the Display Brightness Use your finger to slide the top navigation panel down. There you’ll find the brightness slider where you can adjust the brightness to your liking. v1.0 | 21... -
Page 28: Adjust The Volume
A920 REFERENCE GUIDE 11.4 Adjust the Volume There are two options for adjusting the volume. The first is to select the volume icon from the home screen. The volume settings will appear. The second is to select the volume settings from the “Settings”... -
Page 29: Take A Screenshot
A920 REFERENCE GUIDE 11.5 Take a Screenshot You can take a screenshot with the A920 by pressing the power and the button on the right-hand side of the device simultaneously. 11.6 Cleaning the Device Do not immerse the device in water or liquid. -
Page 30: Replace Paper Roll
A920 REFERENCE GUIDE 11.7 Replace Paper Roll 1. Locate the Printer Door Hatch on the bottom of the terminal and open the Paper Hatch. 2. Install Paper Roll according to the diagram inside with the paper coming out from the top of the roll. - Page 31 A920 REFERENCE GUIDE 3. Pull 6” Paper from the roll 4. Carefully close the paper hatch until it snaps into place v1.0 | 25...
- Page 32 A920 REFERENCE GUIDE 5. Firmly hold the paper and from an approximate 45-degree upwards angle tear the excess paper. v1.0 | 26...
-
Page 33: Setting Up Communications
(LAN) within a limited area, such as store or office building. Available access types of Wi-Fi on the A920 are DHCP, Static IP, Manual Static IP, and Manual Proxy. The following sections include step-by-step procedures for setting up each of these communication types. -
Page 34: Dhcp Wi-Fi Connection
A920 REFERENCE GUIDE 12.2 DHCP Wi-Fi Connection The A920 supports DHCP setup for network and internet access. DHCP stands for Dynamic Host Configuration Protocol. DHCP is a network management protocol used in IP networks. The DHCP server dynamically assigns an IP address and other network configuration parameters to each device on the network. - Page 35 A920 REFERENCE GUIDE 2. In the “Settings” menu, navigate to the setting option titled “Wi-Fi” nestled under the “Wireless & networks” section. Click on “Wi-Fi” to open the Wi-Fi settings. 3. After selecting the Wi-Fi setting option in the “Settings” menu, the device will show a list of available Wi-Fi networks.
-
Page 36: Static Ip
A920 REFERENCE GUIDE 12.3 Static IP The A920 supports static IP setup for network and internet access. Static IP addresses allow network devices to keep the same IP address all the time, instead of automatically assigning IP addresses such as in a DHCP setup. - Page 37 A920 REFERENCE GUIDE 6. Turn the Wi-Fi on by selecting the on/off switch in the top right-hand corner. After turning on Wi-Fi, a list of available Wi-Fi networks displays. Only local networks that have the SSID broadcast option enabled are listed. Select the desired Wi-Fi network and enter the Wi-Fi case-sensitive password when directed.
- Page 38 A920 REFERENCE GUIDE 8. Scroll to select “IP Settings.” 9. Select “Static” from the IP Settings dropdown menu. v1.0 | 32...
-
Page 39: Manual Static Ip
A920 REFERENCE GUIDE 10. After selecting “Static” from the dropdown menu, scroll the new input options. Enter the IP address, Gateway, Network prefix length, DNS 1, and DNS 2. Once all fields have been entered, select “CONNECT” from the bottom right-hand side of the screen. - Page 40 A920 REFERENCE GUIDE 2. Once in the “Settings” menu, select the Wi-Fi settings option and then turn Wi-Fi on. After Wi-Fi is turned on, a list of available Wi-Fi networks displays. Local networks that have the SSID broadcast option enabled are listed, but if the desired network you need is not listed, you will need to manually configure the network.
- Page 41 A920 REFERENCE GUIDE 4. After selecting “Add network,” enter the case-sensitive network SSID in the input field that pops up. 5. Under “Security,” select the security type from the pull-down menu. Selections include WPA/WPA2 PSK, 802.1 x EAP, FT PSK, FT EAP, WAPI PSK, WAPI CERT.
- Page 42 A920 REFERENCE GUIDE 6. Select “Advanced options.” 7. Under IP settings, select “Static.” 8. Use the touch screen to scroll the pop-up window. Enter the IP address, Gateway, Network prefix length, DNS 1, and DNS 2. Once all fields have been entered, select “SAVE.”...
-
Page 43: Proxy Setup
A920 REFERENCE GUIDE 12.5 Proxy Setup The A920 supports a proxy setup. In this case, another computer, or proxy server, acts as a hub through which the internet requests for the A920 are processed. By connecting through the server, the A920 sends its requests to the server which, in turn, processes the request and then returns the response to the A920. - Page 44 A920 REFERENCE GUIDE 2. Once in the Settings menu, select the option for Wi-Fi and then switch Wi-Fi on with the button in the top right-hand corner. 3. After you turn on Wi-Fi, a list of available Wi-Fi networks displays. Local networks that have the SSID broadcast option enabled are listed, but if the desired network you need is not listed, you will need to manually configure the network.
- Page 45 A920 REFERENCE GUIDE 4. Enter the case-sensitive network SSID. 5. Under Security, select the security type from the pull-down menu. Selections include WPA/WPA2 PSK, 802.1 x EAP, FT PSK, FT EAP, WAPI PSK, WAPI CERT. v1.0 | 39...
- Page 46 A920 REFERENCE GUIDE 6. Select Advanced options and scroll down. 7. In Advanced options, under Proxy, select Manual. v1.0 | 40...
- Page 47 A920 REFERENCE GUIDE 8. After selecting “Manual,” scroll down to enter the Proxy hostname, Proxy port, and Bypass proxy. 9. Next, scroll down to select IP settings and select “Static.” v1.0 | 41...
- Page 48 A920 REFERENCE GUIDE 10. After selecting “Static,” scroll down to enter the IP address, Gateway, Network prefix length, DNS 1, and DNS 2. Once all inputs have been entered, select “SAVE.” v1.0 | 42...
-
Page 49: Cellular 4G Communication
The A920 supports 4G cellular communications. A SIM card is required to support cellular communication. Please see the Install SIM or Micro SD Card section for information about installing a SIM card. Your A920 may come with the SIM card already installed and ready to use when you receive your terminal. Please note, 4G communications will not work if the device is setup for either Wi-Fi or LAN communications at time of 4G communication setup. - Page 50 A920 REFERENCE GUIDE 3. From the “Data usage” menu, click the button to enable cellular data. This will allow the device to search for the network. 4. Return to the main settings menu and select “More.” v1.0 | 44...
- Page 51 A920 REFERENCE GUIDE 5. After selecting “More,” select the option for “Cellular networks.” 6. Next, if the device is not automatically detecting the network, select the + sign in the top right- hand side of the APNs menu to add a new network and then continue to follow steps 7-11. If the device is automatically detecting the network, select the network to connect.
- Page 52 A920 REFERENCE GUIDE 7. After selecting the “Add access point” symbol, the “Edit access point” screen will pop up. Select “Name” to edit the new access point’s name, then type the desired name in the blank name field that pops up and select “OK.”...
- Page 53 A920 REFERENCE GUIDE 9. After selecting “OK” and returning to the “Edit access point” screen, select the three-dot menu in the top right-hand side. A drop-down menu will appear. Select “Save.” 10. After selecting “Save,” the updated APN menu will appear. Select the added network to connect before exiting the settings menu.
-
Page 54: L920 Multi-Functional & Charging A920 Base
A920 REFERENCE GUIDE L920 Multi-Functional & Charging A920 Base This section includes information for the optional L920 base models for the A920 terminal. With the L920 base, you have access to several ports and features that are otherwise unavailable without the base. -
Page 55: Packaging
A920 REFERENCE GUIDE 13.1 Packaging This section is designated to provide more information about the L920 base packaging. 13.1.1 L920 Overpack Cartons Fifty (50) L920-BC charging base boxes are shipped inside an L920 overpack carton. The dimensions of the overpack carton are 18 in. x 14 in. x 10 in. (45.72 cm x 35.56 cm x 25.4 cm). A packaged overpack carton weighs 16 lbs. -
Page 56: Multi-Functional Base Box
Please note there are labels with the part number and serial number of the L920 affixed to the outside of the box. You can retain the original boxes in case the unit needs to be returned to PAX for service. -
Page 57: Box Contents
A920 REFERENCE GUIDE 13.2 Box Contents The L920 multi-functional base box includes: • 1 – L920 base • 1 – User Manual • 1 – Packaging Material NOTE Product images shown may be different than actual product received. v1.0 | 51... -
Page 58: L920 Part Number And Part Number Description
Optional Charging Base L920-BM-2E0 Optional Multi-Functional Base The optional charging base is a countertop base that supports the A920 terminal. The base part number is L920-BC-1E0. This base provides charging capabilities and is a simpler form of its multi-functional counterpart. -
Page 59: L920-Bm Part Number, Hardware, Os And Boot Version
A920 REFERENCE GUIDE 13.5 L920-BM Part Number, Hardware, OS and Boot Version Title Description L920-BM-2E0 Optional Multi-Functional Base Hardware Revision v001 13.6 L920-BM Multiple Port Sticker The multiport supports the following ports. Below is the port sticker identifying each port. -
Page 60: L920 Dimensions
A920 REFERENCE GUIDE 13.8 L920 Dimensions L920 Dimensions: 6.3” (162mm) H x 4.7” (119mm) W x 5.76” (146.3mm) 13.9 L920 Product Description This section is designated to describing the L920 and other important information. 13.10 L920-BC Bottom View 13.11 L920-BM Bottom View... -
Page 61: Frequently Asked Questions
PAXBiz powered by Android 5.1. 2. There’s no physical keypad; how can I meet ADA compliance? You can use IM310 as an external keypad attached to A920. Please talk to PAX Sales team regarding details. 3. Power consumption of A920? -
Page 62: How To Turn On/Off The Screen Saver
A920 REFERENCE GUIDE 8. How to turn on/off the screen saver? Navigate to the Settings menu from the home screen and then select “Display.” In the display settings, select “Screen saver.” Once the screen saver settings have been selected, the wallpaper can be turned off and on. -
Page 63: What Is The Reset Button
A920 REFERENCE GUIDE 10. What is the RESET button? The reset button is used to reboot the device. It is located on the backside of the device. 11. What should I do if the touchscreen is unresponsive or lags? First confirm that the surface of the screen is free from liquids. If there is a protective plastic film over the screen, remove it before attempting to use the device again. -
Page 64: Pax Customer Support
A920 REFERENCE GUIDE Pax Customer Support For questions or help with the terminal installation please contact your service provider or PAX customer support. PAX Technology Inc. 8880 Freedom Crossing Trail Building 400 Floor, Suite 300 Jacksonville, FL 32256 support@pax.us T: (877) 859-0099 www.pax.us...
Need help?
Do you have a question about the A920 and is the answer not in the manual?
Questions and answers
My terminal is brand new it dropped and now the receipts are not printing out.
The PAX A920 terminal may not be printing receipts after being dropped due to potential damage to the printer or internal components. If the terminal was dropped, it could have caused physical damage affecting the receipt printer. You should contact support or your service partner to test the device. Depending on the damage, the terminal might need repair or replacement.
This answer is automatically generated
How do you reprint a previous days transactions?