Table of Contents
Advertisement
Advertisement
Table of Contents

Related Manuals for PAX S900


Summary of Contents for PAX S900
-
Page 2: Table Of Contents
www.firstpaymentmerchantservices.co.uk Contents Initial Setup ........................... 4 Terminal Overview ........................ 5 Screen Overview ........................6 Screen Icons Overview ......................7 Terminal Technical Specifications ..................8 Inserting Battery and Paper Roll .................... 9 Inserting or replacing the SIM card ..................10 Connecting to the Network ....................11 Connecting to Wi-Fi ....................... - Page 3 www.firstpaymentmerchantservices.co.uk Useful Information ........................ 77 13.1 Key Map (Alpha Characters) ....................77 13.2 Glossary ..........................78 Contact Information ..........................81...
- Page 4 Welcome Thank you for choosing your S900 terminal. The S900 is designed to process transactions as quickly as possible whilst providing valuable reporting and other functionality. This user guide is designed to provide users of S900 with everything needed to set-up, register and process transactions.
-
Page 5: Initial Setup
INITIAL SETUP Before starting to use the S900, please take a few moments to check the contents of the box; you should have received the following: S900 Terminal External AC Power Adapter External AC Power Cable Thermal Paper Roll... -
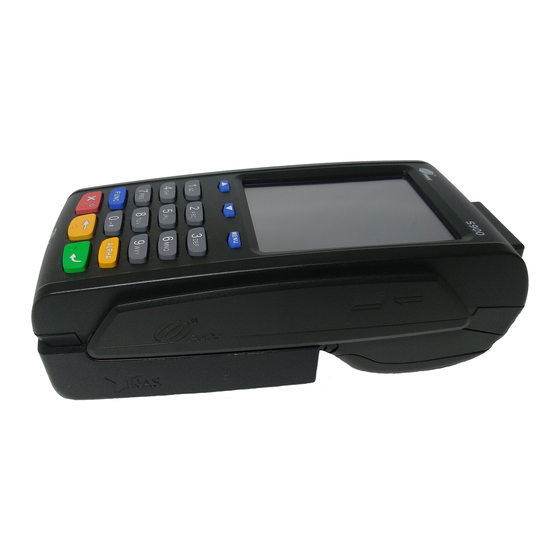
Page 6: Terminal Overview
Terminal Overview An overview of the S900 terminal. -
Page 7: Screen Overview
Screen Overview An overview of the S900 screen. -
Page 8: Screen Icons Overview
Screen Icons Overview Descriptions of the S900 screen icons. Icon Description Battery strength indicator ( indicates battery is charging) Internet connection present No internet connection present GPRS signal indicator Wi-Fi signal indicator Flight mode enabled Transaction data stored on the terminal (not displayed once data uploaded) -
Page 9: Terminal Technical Specifications
Terminal Technical Specifications Technical Specifications of the axept® S900 terminal. Model S900 Processor 32-bit ARM11 CPU, 400MHz Memory 128MB Flash, 64MB DDR Extended storage Micro SD up to 32GB Display 3.5 inch 240 x 320 pixel colour TFT LCD Touch screen... -
Page 10: Inserting Battery And Paper Roll
(as highlighted). Insert paper roll leaving at least 1cm exposed and close the cover. To insert the battery, turn the S900 terminal over so the battery cover latch is visible. Pull the latch down and towards you and carefully remove the battery cover away from the terminal. -
Page 11: Inserting Or Replacing The Sim Card
GPRS functionality. The following steps describe the process of inserting or replacing the SIM card should this be necessary. To insert or replace the SIM card in the terminal, turn the S900 terminal over so the battery cover latch is visible. -
Page 12: Connecting To The Network
Highlight ‘WIFI’ using the keys on the keypad and press the key on the keypad to continue. S900 will ask if manual configuration of Wi-Fi settings is required. Press the key on the keypad to manually configure the settings or the... - Page 13 Automatically Configure Wi-Fi Settings The following steps describes the process for automatically configuring the Wi-Fi Network Settings. If the option to manually configure Wi-Fi was not selected, S900 will start to scan for available Wi-Fi networks. The Wi-Fi networks available are displayed.
- Page 14 First Payments Merchant Services recommends that the Wi-Fi network used is secure and requires authentication as this will adhere to PCI DSS guidelines. • axept® S900 supports WPA2 PSK encryption. WPA2 PSK is a method of securing your network using WPA2 with the use of the Pre-Shared Key (PSK) authentication. •...
- Page 15 www.firstpaymentmerchantservices.co.uk Manually Configuring Wi-Fi Settings The following steps describes the process for manually configuring the Wi-Fi Network Settings. If the option to manually configure the network settings was selected, the SSID for the network will be required. Enter the SSID using the terminal’s keypad.
- Page 16 First Payments Merchant Services recommends that the Wi-Fi network used is secure and requires authentication as this will adhere to PCI DSS guidelines. • axept® S900 supports WPA2 PSK encryption. WPA2 PSK is a method of securing your network using WPA2 with the use of the Pre-Shared Key (PSK) authentication. •...
-
Page 17: Connecting To Gprs
Connecting to GPRS To use a GPRS connection, either as a back-up for Wi-Fi or in place of, configure the S900 using the procedure outlined below. Once the loading process is complete, the Network Configuration menu will appear. Highlight ‘GPRS’ using the keys on the keypad and press the key on the keypad to continue. -
Page 18: Logging On
LOGGING ON Now set-up and activation are complete, S900 is ready for the first logon. Once S900 has completed the start-up process, it will prompt for the entry of the Department ID. Enter the Department ID sent to you using the keypad and press the on the keypad to continue. - Page 19 www.firstpaymentmerchantservices.co.uk Once the log on has been completed, the main menu will be displayed. INFO If a successful sign on has previously been completed, the Department ID will be stored during logon as shown below. If this is still the correct Department ID, press the key on the keypad to continue.
-
Page 20: Processing A Chip And Pin Sale
PROCESSING A CHIP AND PIN SALE Once the logging on process has been completed, S900 is ready to process transactions. The following describes the end-to-end operation of a Chip & PIN sale: From the main menu, select option 1: Sale (Press the key on the keypad). - Page 21 Insert the card (with the Chip of the card on top, facing towards you) into the Chip and PIN card slot at the base of the terminal. Once the card is inserted, S900 will process the card. Please wait and do not remove the card whilst this is in progress.
- Page 22 On the Enter PIN screen, pass the S900 terminal to the cardholder and ask them to enter their PIN. After the PIN has been keyed in, the cardholder will then need to press the key on the keypad to continue.
- Page 23 S900 will attempt to authorise the transaction with your chosen acquirer. S900 will confirm that the payment is complete if authorisation is successful. Once the payment is complete, S900 will prompt for the card to be removed. Once the card is removed, the Merchant Receipt will begin printing.
- Page 24 Tear off the receipt (after printing has completed) from the S900 terminal and press the key on the keypad to continue. The cardholder receipt will then begin printing and can be torn off once printing has completed. The payment processing procedure is now complete and axept® S900...
-
Page 25: Processing A Contactless Sale
PROCESSING A CONTACTLESS SALE axept® S900 supports contactless payments (including technologies such as Android Pay, Apple Pay etc.) and can be used where a cardholder has the contactless feature enabled on their card or device. The following describes the... - Page 26 S900 will prompt for the card or device to be presented. Position the (contactless enabled) card or device around the screen area of the terminal for a few seconds until a ‘beep’ sound confirms the card has been read (the green contactless LEDs will incrementally light up as the card is being read).
- Page 27 S900 will confirm that the payment is complete if authorisation is successful. The Merchant Receipt will begin printing. Tear off the receipt (after printing has completed) from the S900 terminal and press the key on the keypad to continue.
- Page 28 INFO A customer/cardholder copy of the receipt is not automatically printed for contactless transactions as it is not a mandatory requirement. However, axept® S900 provides a facility to print a customer/cardholder copy of the receipt if required. The following steps describe the process for printing a customer/cardholder copy of the receipt for contactless transactions.
-
Page 29: Processing A Chip And Pin Refund
PROCESSING A CHIP AND PIN REFUND Processing a refund using S900 follows a very similar procedure to that of a sale. However, the cardholder is not verified by PIN, but a signature is required instead. The following describes how the refund process works:... - Page 30 S900 will prompt for the card to be presented. Insert the card (with the Chip of the card on top, facing towards you) into the Chip and PIN card slot at the base of the terminal. As the refund is verified by validating the cardholder’s signature, the card needs to be removed from the terminal.
- Page 31 If the signature is confirmed as valid, S900 will begin to print the cardholder’s refund receipt. Tear off the receipt (after printing has completed). The refund procedure is now complete and S900 will return to the main menu.
-
Page 32: Processing A Contactless Refund
(Press the key on the keypad). Enter the amount of the refund using the keypad. (S900 will automatically enter the decimal place for you). Press the key on the keypad to continue. If required, enter the reference for the transaction. If a reference is not needed press the key on the keypad to skip. - Page 33 S900 will prompt for the card or device to be presented. Position the (contactless enabled) card or device around the screen area of the terminal for a few seconds until a ‘beep’ sound confirms the card has been read (the green contactless LEDs will incrementally light up as the card is being read).
- Page 34 Tear off the receipt (after printing has completed) from the S900 terminal and press the key on the keypad to continue. The refund procedure is now complete and axept® S900 will return to the main menu.
-
Page 35: Declined Transactions
DECLINED TRANSACTIONS There may some occasions where the acquirer does not authorise transactions and S900 will report the declined result. There are various reasons for transactions being declined such as lack of funds in the cardholder’s account or that the card may have been reported as stolen. - Page 36 S900 will prompt for the card to be presented again.
-
Page 37: Voiced Referred Transactions
Authorisation Centre. This could be for a number of reasons such as the fact the card issuer wants to speak to the cardholder before approving the transaction. The S900 handles the referral, providing you with all of the information that will be requested. Once the referral result has been received, axept® S900 will request that the card is removed. - Page 38 If authorised, S900 will require the Authorisation Code to be entered. (To use alpha characters, press the numeric key containing the alpha character required multiple times until it is displayed). Press the key on the keypad to continue. axept® S900 will then print both the Merchant’s and Cardholder’s.
-
Page 39: Processing A Cardholder Not Present (Cnp) Sale
S900 supports the processing of transactions when the cardholder is not present and details are supplied over the phone or via the mail. In order to ensure that these transactions are processed as securely as possible, S900 will require the entry of the Card Security Code (CSC), House Number and Post Code (AVS). - Page 40 Enter the card number (no spaces) and press key on the keypad to the continue. S900 will prompt for the card’s expiry date (2-digit Month and Year). The / (slash) is automatically entered by S900. Enter the card’s expiry date and press the...
- Page 41 S900 will prompt for the card’s CSC (Card Security Code), usually a 3-digit number on the signature strip of the card (this is a four-digit number located on the front of the card for AMEX cards). Enter the card’s CSC and press the key on the keypad to continue.
- Page 42 S900 will provide a summary of the results of the checks so that a decision can be made as to whether the transaction should be accepted or rejected. Press the key on the keypad to accept the transaction or the to reject.
-
Page 43: Cardholder Not Present (Cnp) - Results
Cardholder Not Present (CNP) – Results As well as returning the results of the authorisation, the S900 also displays the outcome of the CSC and AVS checks. This allows the accept or reject decision to be made by the user with all the required information. -
Page 44: Processing A Cardholder Not Present (Cnp) Refund
PROCESSING A CARDHOLDER NOT PRESENT (CNP) REFUND S900 has the facility to process refunds without the cardholder being present. The below details the Cardholder Not Present refund procedure: From the main menu, select option 3: Other Transactions (Press the key on the keypad). - Page 45 Enter the card number (no spaces) and press key on the keypad to the continue. S900 will prompt for the card’s expiry date (2-digit Month and Year). The / is automatically entered by axept® S900. Enter the card’s expiry date and press the key on the keypad to continue.
- Page 46 (this is shown on screen as not checked). Press the key on the keypad to continue. S900 will begin to print the Merchant’s Refund Receipt. Tear off the receipt from the terminal and press key on the keypad the to continue.
- Page 47 The Cardholder Not Present (CNP) refund processing procedure is now complete and S900 will return to the main menu.
-
Page 48: Reprinting Receipts
There may be occasions where the customer or merchant may require an additional copy of one of the receipts generated during the transaction. axept® S900 provides functionality for the receipts to be printed again after the transaction. The following demonstrates how to reprint additional receipts. - Page 49 Once printing has completed, please tear off the receipt and press the key on the keypad to continue. S900 will return to the reprint menu. You can reprint another receipt or press key to return to the main the menu.
-
Page 50: The Terminal
THE TERMINAL S900 provides a number of different functions and settings beyond transaction processing. These functions and settings can be accessed from the main menu. The following provides an overview of the functions and settings available. 12.1 Reports A number of default reports are available to allow reconciliation to be performed via the terminal. -
Page 51: Available Reports
Report which provides totals of the transactions processed during the Current totals. End of Day Report Day. Running this report ends the trading day and will clear down the totals. System Information Report currently not available Reprint Last Report Reprints the last report printed by axept® S900... -
Page 52: Supervisor
S900 (e.g. Ethernet configuration). 12.2.1 Network Settings S900 will have been configured to connect to the chosen network(s) during the installation. However, should these details need to be updated (e.g. Network updated) this can be reconfigured within the ‘Network Settings’ menu. - Page 53 S900 will prompt if manual configuration of Wi-Fi settings is required. Press the key on the keypad to automatically configure the settings. Please see section 1.6.1.2 to manually configure Wi-Fi settings.
- Page 54 Press the key on the keypad to continue. axept® S900 supports Dynamic Host Configuration Protocol (DHCP) which automatically obtains all network settings. To use this service, press the key on the keypad to continue.
- Page 55 First Payments Merchant Services recommends that the Wi-Fi network used is secure and requires authentication as this will adhere to PCI DSS guidelines. • axept® S900 supports WPA2 PSK encryption. WPA2 PSK is a method of securing your network using WPA2 with the use of the Pre-Shared Key (PSK) authentication. •...
- Page 56 www.firstpaymentmerchantservices.co.uk 12.2.1.1 Wi-Fi (Fixed IP) The process for the configuration of a Wi-Fi connection using a fixed IP (rather than DHCP) follows the same flow as the previous section (12.2.1.1) until step 6. To use a fixed IP rather than DHCP, press the key.
- Page 57 Enter the IP address for the Preferred DNS server. Enter the IP address for the Alternative DNS server. axept® S900 confirms that the network configuration is successfully completed. axept® S900 will automatically restart to configure the network settings.
- Page 58 First Payments Merchant Services recommends that the Wi-Fi network used is secure and requires authentication as this will adhere to PCI DSS guidelines. • axept® S900 supports WPA2 PSK encryption. WPA2 PSK is a method of securing your network using WPA2 with the use of the Pre-Shared Key (PSK) authentication. •...
- Page 59 S900 will ask for confirmation that you want to reset the network settings. Press the key on the keypad to confirm. The network settings will be cleared and axept® S900 will return to the network settings menu. Once the terminal is restarted, the network settings will need to be configured again.
-
Page 60: Date/Time Settings
www.firstpaymentmerchantservices.co.uk 12.2.2 Date/Time Settings The following describes the process of setting the Date and Time on the terminal. From the main menu, select option 5: Menu (Press the key on the keypad). From the Terminal menu, select option 2: Supervisor (Press the key on the keypad). - Page 61 If setting the Date, enter the (numerical) date using the keypad in the format: YYYY/MM/DD (Year/Month/Day) for example: 2017/07/26 (26 July 2017). (axept® S900 will automatically enter the forward slash (/) for you). Press the key on the keypad to clear the previous value, the to confirm or the key to cancel the changes.
- Page 62 www.firstpaymentmerchantservices.co.uk From the Terminal menu, select option 2: Supervisor (Press the key on the keypad). To set the Screen Brightness on the terminal, select option 3: Power Management (Press the key on the keypad). From the Power Management menu, select option 1: Screen Brightness (Press the key on the keypad).
-
Page 63: Software Rollback
12.2.4 Software Rollback The Software Rollback feature will allow S900 to return to the previous version of software if one is available on the terminal (this feature will only work if a previous software version is stored on the terminal). -
Page 64: Diagnostic Receipts
If continuation of the software rollback was confirmed, S900 will start to perform the backup process. Please be patient as this may take several minutes. -
Page 65: Flight Mode
12.2.6 Flight Mode S900 has a flight mode feature, which when enabled, will de-activate all network connections. The following describes the process to enable/disable Flight Mode. 12.2.6.1 Enable Flight Mode The following describes the process to enable Flight Mode. - Page 66 To enable Flight Mode, select option 1: On (Press the key on the keypad). S900 will ask for confirmation that you want to enable Flight Mode. Press the key on the keypad to confirm or the key to cancel.
- Page 67 12.2.6.3 Disable Flight Mode www.firstpaymentmerchantservices.co.uk The following describes the process to disable Flight Mode. From the main menu, select option 5: Menu (Press the key on the keypad). From the Terminal menu, select option 2: Supervisor (Press the key on the keypad). To enter Flight Mode settings, select option 6: Flight Mode (Press the key on the keypad).
- Page 68 S900 will ask for confirmation that you want to disable Flight Mode. Press key on the keypad to confirm or the key to cancel. S900 will confirm Flight Mode is disabled and the terminal will restart.
-
Page 69: Check For Updates
12.2.7 Check For Updates Updates, when available, can be assigned to axept® S900 using OCC (Please see the OCC User Guide on how this is achieved) allowing axept® S900 will download and install the update. The following describes the process of downloading and installing software updates or terminal configuration updates which have been assigned in OCC. - Page 70 S900 will check for available software updates. If an update is available and has been assigned to the terminal in OCC, axept® S900 will start to download the software update. Please be patient whilst this downloads as it may take several minutes.
- Page 71 Please be patient as this may take several minutes. During the update process, S900 will perform a backup. Please be patient as this make take several minutes. Once the backup is complete, the S900 terminal will restart and the software update process is complete. INFO axept®900 will only download a software update if one is available and has been assigned to the terminal in...
- Page 72 From the Terminal menu, select option 2: Supervisor (Press the key on the keypad). Check for updates, select option 7: Check For Updates (Press the key on the keypad). axept® S900 will check for available software updates.
- Page 73 After the download is complete, the update icon will be displayed and S900 will require you to logout and logon again. axept® S900 will return to the main menu. From the main menu, select option 6: Logout to logout and then logon again.
- Page 74 OCC. S900 will display ‘No updates Currently Available’ if no updates are available or has not been assigned to the terminal.
-
Page 75: Upload Stored Data
12.3 Upload Stored Data As part of the transaction process, aS900 temporarily stores transaction information encrypted on the terminal. This data is uploaded to the axept® platform automatically at the end of a transaction when axept® S900 is connected to the internet. -
Page 76: Upload Log
12.4 Upload Log To enable First Payments Merchant Services to support customers as quickly and efficiently as possible, S900 allows log file data to be uploaded from the terminal directly to the platform. Once the logs have been uploaded, First Payments Merchant Services support team are able to view the information via the support portal. -
Page 77: Network Check
The time required for the upload will depend on your connection speed and the amount of data to be transferred. The Log Upload Complete message will be displayed and axept® S900 will return to the Upload Log menu. 12.5 Network Check This feature is currently not available for use. -
Page 78: Useful Information
USEFUL INFORMATION This section provides various useful information which will assist in the setup and use of S900. 13.1 Key Map (Alpha Characters) The below map represents the available characters when entering free text fields (such as the merchant reference) into S900. -
Page 79: Glossary
www.firstpaymentmerchantservices.co.uk 13.2 Glossary Term Definition Acquirer Your transaction is authorised by your chosen Acquirer. Acronym for Address Verification Service, is a system used to verify the address of the cardholder. The system checks the billing address of the credit/debit card provided by the cardholder with the address on file with the card issuer. - Page 80 www.firstpaymentmerchantservices.co.uk Acronym for Card Security Code also known as Card Validation Code or Value, refers to either: (1) magnetic-stripe data, or (2) printed security features. Data element on a card's magnetic stripe that uses secure cryptographic processes to protect data integrity on the stripe, and reveals any alteration or counterfeiting.
- Page 81 www.firstpaymentmerchantservices.co.uk Merchant Identification – This is a unique number that is assigned to your Organisation by your payment processing provider. Online refers to a direct connection is available to the internet for authorisation or validation before a transaction can be executed. Online/Offline Offline means the connection is not available.
-
Page 82: Contact Information
www.firstpaymentmerchantservices.co.uk CONTACT INFORMATION If you have any questions or require support, please get in touch with us using the details below: First Payments Merchant Services Customer Support 01276 605690 Phone: Customer Support Hours: Days Hours Covered Monday - Saturday 08:00 – 23:00 Sunday and Bank Holidays (excluding Christmas Day) 10:00 –...
Need help?
Do you have a question about the S900 and is the answer not in the manual?
Questions and answers