Advertisement
Quick Links
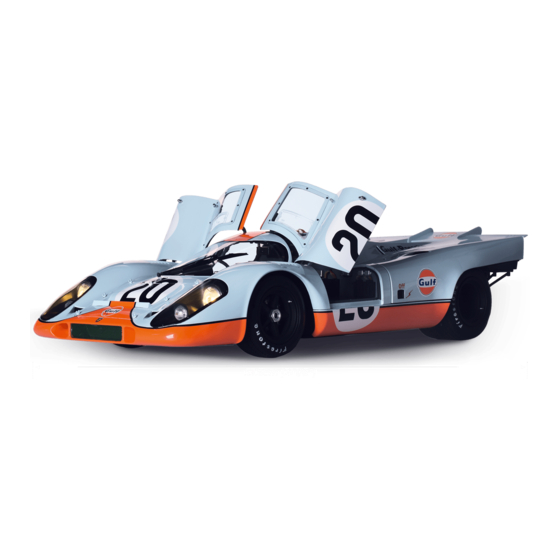
Pack 10
B U I L D
I N S T R U C T I O N S
STAGE 73: MOUNTING THE FUEL PUMP ON
STAGE 77: ASSEMBLING AND INSTALLING
THE RIGHT CHASSIS PLATE
THE SPARE WHEEL
STAGE 74: FITTING THE BATTERY ON THE
STAGE 78: INSTALLING THE FRONT BRAKE
RIGHT CHASSIS PLATE
COOLING JACKETS
STAGE 75: AT TACHING THE FUEL FILLER NECK
STAGE 79: FIT TING THE FRONT WHEEL
AND THE SECOND FUEL PUMP
ARCHES TO THE FRONT FLOOR PANEL
STAGE 76: FIT TING THE RIGHT REAR
STAGE 80: PREPARING THE FRONT BODY
WHEEL ARCH
Porsche, the Porsche shield and the distinctive design of Porsche cars are trademarks and trade dress of Porsche AG. Permission granted.
Personality rights of Steve McQueen are used with permission of Chadwick McQueen and The Terry McQueen Testamentary Trust.
Represented exclusively by Greenlight.
Advertisement

Subscribe to Our Youtube Channel
Related Manuals for Agora Models STEVE MCQUEEN'S ICONIC PORSCHE 917KH Pack 10


Summary of Contents for Agora Models STEVE MCQUEEN'S ICONIC PORSCHE 917KH Pack 10
- Page 1 Pack 10 B U I L D I N S T R U C T I O N S STAGE 73: MOUNTING THE FUEL PUMP ON STAGE 77: ASSEMBLING AND INSTALLING THE RIGHT CHASSIS PLATE THE SPARE WHEEL STAGE 74: FITTING THE BATTERY ON THE STAGE 78: INSTALLING THE FRONT BRAKE RIGHT CHASSIS PLATE COOLING JACKETS...
- Page 2 Advice from the experts Spare screws are included with each part. Occasionally, you may be instructed to keep spare or unused screws for a later stage. Keep these spares in a safe place and label them correctly. Please make sure you don’t mix up the screws. They look quite similar, but the threads do vary slightly. Using the wrong screws may damage the parts.
- Page 3 STAGE 73: MOUNTING THE FUEL PUMP ON THE RIGHT CHASSIS PLATE Right chassis plate Connector Fuel pump Braided fuel line Protective shield Fuel line Pump fitting ASSEMBLY DIAGRAM AGORAMODELS PORSCHE 917KH...
- Page 4 STAGE 73: MOUNTING THE FUEL PUMP ON THE RIGHT CHASSIS PLATE S T E P 1 Take the fuel line (73G) and cut two sections from it: one measuring 50 mm in length (73G-1) and the other measuring 90 mm (73G-2). Take the longer fuel line (73G-2) and fit the ends onto the indicated pins of the right...
- Page 5 STAGE 73: MOUNTING THE FUEL PUMP ON THE RIGHT CHASSIS PLATE Fit the protective shield (73C) onto the right chassis plate (73A) by pressing it into the D-shaped hole, then connect the loose end of the shorter fuel line (73G-1) onto the protruding pin of the plate.
- Page 6 STAGE 73: MOUNTING THE FUEL PUMP ON THE RIGHT CHASSIS PLATE S T E P 4 Fit the pump fitting (73D) onto the pin of the fuel pump (73B) as shown. S T A G E C O M P L E T E AGORAMODELS PORSCHE 917KH...
- Page 7 STAGE 74: FITTING THE BATTERY ON THE RIGHT CHASSIS PLATE Battery Support rod Battery holder Protective shield Battery cover Battery terminal (x2) Screws 1.2 x 3.5 mm (x3) ASSEMBLY DIAGRAM AGORAMODELS PORSCHE 917KH...
- Page 8 STAGE 74: FITTING THE BATTERY ON THE RIGHT CHASSIS PLATE S T E P 1 Position the two battery terminals (74D) onto the top of the battery (74A) and secure them in place with two LP screws. Once the terminals are secure, fit the battery cover (74C) on top by pressing the two pins of the cover into the holes of the battery.
- Page 9 STAGE 74: FITTING THE BATTERY ON THE RIGHT CHASSIS PLATE S T A G E C O M P L E T E AGORAMODELS PORSCHE 917KH...
- Page 10 STAGE 75: ATTACHING THE FUEL FILLER NECK AND THE SECOND FUEL PUMP Fuel filler neck Connector (x3) Fuel filler neck Fuel pump fitting Fuel filler cap Fuel line Handle Braided fuel line Tray Breather pipe Screws 2.0 x 4 mm (x3) Breather pipe Screws 1.7 x 4 mm (x4) Fuel pump...
- Page 11 STAGE 75: ATTACHING THE FUEL FILLER NECK AND THE SECOND FUEL PUMP ASSEMBLY DIAGRAM S T E P 1 Fit the two halves of the fuel filler neck (75A and 75B) together and secure them using two AP screws. Fit them onto the tray (75E) and position onto the right chassis plate (73A) as shown.
- Page 12 STAGE 75: ATTACHING THE FUEL FILLER NECK AND THE SECOND FUEL PUMP S T E P 2 Push the handle (75D) into the fuel filler cap (75C), then press the cap into the top of the fuel filler neck (75A). Fit the fuel pump (75H) into the shaped hole of the protective shield (74F) and position it on...
- Page 13 STAGE 75: ATTACHING THE FUEL FILLER NECK AND THE SECOND FUEL PUMP Turn the assembly back over and locate the two shielded fuel lines (70G) running through from the left chassis plate. Fit the connectors (75I) onto the ends of the two fuel lines as shown.
- Page 14 STAGE 75: ATTACHING THE FUEL FILLER NECK AND THE SECOND FUEL PUMP S T E P 5 Detach the Y branch (39B) from the right side frame (39A) to help with fitting the lines, as shown by the red arrow. Fit the braided fuel line (75L), highlighted in green, into the bottom connection of the branch and bend it into shape as shown, then attach the fuel pump fitting (75J) onto the pin of the fuel pump (75H).
- Page 15 STAGE 75: ATTACHING THE FUEL FILLER NECK AND THE SECOND FUEL PUMP S T A G E C O M P L E T E AGORAMODELS PORSCHE 917KH...
- Page 16 STAGE 76: FITTING THE RIGHT REAR WHEEL ARCH Right rear wheel arch Screws 1.7 x 3.5 mm (x6) Rear brake cooling duct Screws 2.0 x 4 mm (x4) ASSEMBLY DIAGRAM AGORAMODELS PORSCHE 917KH...
- Page 17 STAGE 76: FITTING THE RIGHT REAR WHEEL ARCH S T E P 1 Fit the rear brake cooling duct (76B) into the right rear wheel arch (76A). Position the wheel arch onto the upper frame (47A) while fitting its front section under the right chassis plate (73A).
- Page 18 STAGE 76: FITTING THE RIGHT REAR WHEEL ARCH S T A G E C O M P L E T E AGORAMODELS PORSCHE 917KH...
- Page 19 STAGE 77: ASSEMBLING AND INSTALLING THE SPARE WHEEL Spare wheel tyre Screws 2.0 x 4 mm (x4) Spare wheel outer rim Spare wheel inner rim Spare wheel strap ASSEMBLY DIAGRAM AGORAMODELS PORSCHE 917KH...
- Page 20 STAGE 77: ASSEMBLING AND INSTALLING THE SPARE WHEEL S T E P 1 Take the spare wheel outer rim (77B) and press it into the spare wheel tyre (77A). Position the spare wheel inner rim (77C) into the tyre, aligning the screw holes with the outer rim.
- Page 21 STAGE 77: ASSEMBLING AND INSTALLING THE SPARE WHEEL Lay the spare wheel strap (77D) over the upper frame (47A, highlighted white) with the flat section facing upwards (green arrow). Tie the strap to the upper frame as shown (highlighted red). Do not tie the knot fully for now.
- Page 22 STAGE 77: ASSEMBLING AND INSTALLING THE SPARE WHEEL The spare wheel should look like this once it has been secured with the strap. The quick release lever (red arrow) is now facing upwards. S T A G E C O M P L E T E AGORAMODELS PORSCHE 917KH...
- Page 23 STAGE 78: INSTALLING THE FRONT BRAKE COOLING JACKETS Front left brake cooling jacket Front right brake cooling jacket Model support (x4) The brake cooling jackets are slightly different from each other: the short curved ends (arrow) rise upwards. Check the assembly diagram below to identify the left from the right jacket.
- Page 24 STAGE 78: INSTALLING THE FRONT BRAKE COOLING JACKETS S T E P 1 Locate the intake on the right brake disc cooling air duct (30I), shown here from underneath, of the front right wheel (arrow). With the assembly upright on your work surface, fit the curved end of the front right brake cooling jacket (78B) onto the intake.
- Page 25 STAGE 78: INSTALLING THE FRONT BRAKE COOLING JACKETS Fit the front left brake cooling jacket (78A) onto the intake in the same way as before. S T E P 3 Adjust the right (78B) and left (78A) brake cooling jackets so that they rest in their respective slots (green and red arrows) of the front floor panel (65A).
- Page 26 STAGE 78: INSTALLING THE FRONT BRAKE COOLING JACKETS S T A G E C O M P L E T E AGORAMODELS PORSCHE 917KH...
- Page 27 STAGE 79: FITTING THE FRONT WHEEL ARCHES TO THE FRONT FLOOR PANEL Front left wheel arch Screws 1.7 x 3.5 mm (x8) Front right wheel arch ASSEMBLY DIAGRAM AGORAMODELS PORSCHE 917KH...
- Page 28 STAGE 79: FITTING THE FRONT WHEEL ARCHES TO THE FRONT FLOOR PANEL S T E P 1 Align the front left wheel arch (79A) with the front floor panel (65A) as shown, then fit the screw holes over the raised posts of the panel. Make sure not to trap the wire of the headlights when fitting the arch (arrow).
- Page 29 STAGE 79: FITTING THE FRONT WHEEL ARCHES TO THE FRONT FLOOR PANEL The left and right front wheel arches have been fitted onto the front floor panel. S T A G E C O M P L E T E AGORAMODELS PORSCHE 917KH...
- Page 30 STAGE 80: PREPARING THE FRONT BODY Front body This stage involves removing the cross support from the front body. If you prefer, you can leave the front body safely in its packaging for now and remove the cross support once the front body is needed in a later stage. ASSEMBLY DIAGRAM AGORAMODELS PORSCHE 917KH...
- Page 31 STAGE 80: PREPARING THE FRONT BODY S T E P 1 Take the front body (80A) and place it on your work surface upside down. Remember to use a protective surface to avoid damaging the paint. Remove the screw at each end of the cross support as shown by the red arrows in the two images.
- Page 32 STAGE 80: PREPARING THE FRONT BODY S T A G E C O M P L E T E AGORAMODELS PORSCHE 917KH...
Need help?
Do you have a question about the STEVE MCQUEEN'S ICONIC PORSCHE 917KH Pack 10 and is the answer not in the manual?
Questions and answers