Advertisement
Quick Links
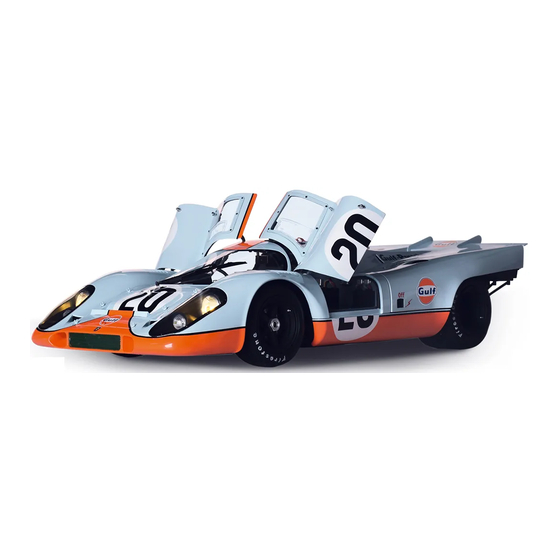
Pack 05
B U I L D
I N S T R U C T I O N S
STAGE 29: INSTALLING THE
STAGE 34: ADDING THE RIGHT COCKPIT
FRONT RIGHT SUSPENSION
TUBULAR FRAME TO THE CHASSIS
STAGE 30: FIT TING THE BRAKES ,
STAGE 35: FIXING THE MUDGUARDS AND
STEERING AND FRONT SUSPENSION
ADDING THE ELECTRICAL CABLES
STAGE 31: ADDING THE LEFT COCKPIT
STAGE 36: ASSEMBLING AND AT TACHING
TUBULAR FRAME TO THE CHASSIS
THE RIGHT FRONT WHEEL
STAGE 32: AT TACHING THE LEFT FUEL TANK
STAGE 37: FIT TING THE COCKPIT PARTITION
WITH THE CIRCUIT BOARD
FRAME AND THE OIL HOSES
STAGE 33: AT TACHING THE RIGHT FUEL TANK
AND CABLES
Porsche, the Porsche shield and the distinctive design of Porsche cars are trademarks and trade dress of Porsche AG. Permission granted.
Personality rights of Steve McQueen are used with permission of Chadwick McQueen and The Terry McQueen Testamentary Trust.
Represented exclusively by Greenlight.
Advertisement

Subscribe to Our Youtube Channel
Related Manuals for Agora Models STEVE MCQUEEN'S ICONIC PORSCHE 917KH Pack 05


Summary of Contents for Agora Models STEVE MCQUEEN'S ICONIC PORSCHE 917KH Pack 05
- Page 1 Pack 05 B U I L D I N S T R U C T I O N S STAGE 29: INSTALLING THE STAGE 34: ADDING THE RIGHT COCKPIT FRONT RIGHT SUSPENSION TUBULAR FRAME TO THE CHASSIS STAGE 30: FIT TING THE BRAKES , STAGE 35: FIXING THE MUDGUARDS AND STEERING AND FRONT SUSPENSION ADDING THE ELECTRICAL CABLES...
- Page 2 Advice from the experts Spare screws are included with each part. Occasionally, you may be instructed to keep spare or unused screws for a later stage. Keep these spares in a safe place and label them correctly. Please make sure you don’t mix up the screws. They look quite similar, but the threads do vary slightly. Using the wrong screws may damage the parts.
- Page 3 STAGE 29: INSTALLING THE FRONT RIGHT SUSPENSION Upper control arm Hub carrier bottom Bracket (x2) Lower control arm Shock absorber upper bracket Lower control arm bracket (x2) Shock absorber piston Hub carrier joint (x2) Shock absorber spring Screw 2.0 x 4 mm (x8) Shock absorber cylinder Screw 2.0 x 3 x 5 mm (x3) Shock absorber lower bracket...
- Page 4 STAGE 29: INSTALLING THE FRONT RIGHT SUSPENSION S T E P 1 Take the hub carrier joint (29L) and fit it into the upper control arm (29A), then secure by driving a DM screw through the larger hole (red arrow). Fit the lug of the hub carrier joint (29L) into the hole at the top of...
- Page 5 STAGE 29: INSTALLING THE FRONT RIGHT SUSPENSION Now take the other hub carrier joint (29L) and fit it into the end of the lower control arm (29J) as shown. Fix the parts together using a DM screw, driving it through the larger hole (red arrow) of the control arm.
- Page 6 STAGE 29: INSTALLING THE FRONT RIGHT SUSPENSION S T E P 3 Fit the hub carrier bottom (29I) onto the top of the lower control arm (29J), then secure together using a CM screw. Note the control arm should be able to rotate freely.
- Page 7 STAGE 29: INSTALLING THE FRONT RIGHT SUSPENSION S T E P 4 Position the shock absorber upper bracket (29C), marked with a ‘1’, onto the top of the shock absorber piston (29D). Drive an EM screw through the larger hole of the bracket (red arrow).
- Page 8 STAGE 29: INSTALLING THE FRONT RIGHT SUSPENSION Secure the brackets firmly in place using two BM screws. The suspension should be able to move, so be sure not to overtighten the screws. S T A G E C O M P L E T E AGORAMODELS PORSCHE 917KH...
- Page 9 STAGE 30: FITTING THE BRAKES, STEERING AND FRONT SUSPENSION Left brake caliper Right brake caliper Brake piston cover (x2) Right brake disc cooling air duct Left brake disc cooling air duct Steering rod Right brake disc inner surface (red Steering bar arrows indicate direction of ventilation holes) Screw 2.0 x 4 mm (x8) Right brake disc outer surface (red...
- Page 10 STAGE 30: FITTING THE BRAKES, STEERING AND FRONT SUSPENSION ASSEMBLY DIAGRAM AGORAMODELS PORSCHE 917KH...
- Page 11 STAGE 30: FITTING THE BRAKES, STEERING AND FRONT SUSPENSION S T E P 1 Take the dashboard frame assembly and position the steering link (30J) in place. Ensure that the pin at the end of the steering wheel column (2B) fits in the slot as shown by the red arrow.
- Page 12 STAGE 30: FITTING THE BRAKES, STEERING AND FRONT SUSPENSION S T E P 2 Position the left brake disc cooling air duct (30C) onto the left hub carrier (3G) in the orientation shown then secure it in place using two IM screws. Retrieve the left brake disc (3O and 3N) from Stage 3 and fit it onto...
- Page 13 STAGE 30: FITTING THE BRAKES, STEERING AND FRONT SUSPENSION S T E P 3 Fit the left brake caliper (30A), marked with an ‘L’, onto the hub carrier (3G) and fix it in place using two IM screws. Attach one of the brake piston covers (30B) to the left brake caliper (30A) by...
- Page 14 STAGE 30: FITTING THE BRAKES, STEERING AND FRONT SUSPENSION In the same manner, peel the backing paper from the right brake disc inner surface (30D) and stick it to the brake disc rotor (inner half) (30F). Fit the two halves of the brake disc (30F and 30G) together as shown and fix them...
- Page 15 STAGE 30: FITTING THE BRAKES, STEERING AND FRONT SUSPENSION S T E P 5 Now fit the left brake disc cooling air duct (30I) onto the hub carrier (29H) and secure in place using two IM screws. Fit the right brake disc (30F and 30G) onto the hub carrier (29H) and left brake disc...
- Page 16 STAGE 30: FITTING THE BRAKES, STEERING AND FRONT SUSPENSION S T E P 6 Fit the right brake caliper (30H) onto the hub carrier (29H) and fix it in place using two IM screws. Push the remaining brake piston cover (30B) into the right brake caliper (30H) in the same manner as...
- Page 17 STAGE 30: FITTING THE BRAKES, STEERING AND FRONT SUSPENSION S T E P 7 Take the chassis assembly. To attach the dashboard frame, start by fitting the two lower control arm brackets (3J) into the chassis (25A) and secure them using two BM screws. For the next two sections of this step, the two shock absorber springs (29E and 3D) are interchangeable.
- Page 18 STAGE 30: FITTING THE BRAKES, STEERING AND FRONT SUSPENSION Fit the other shock absorber spring (3D) over the shock absorber cylinder (3E). Tilt the assembly (green arrow) to fit the shock absorber piston (3C) through the spring and into the cylinder (blue arrow).
- Page 19 STAGE 30: FITTING THE BRAKES, STEERING AND FRONT SUSPENSION S T E P 8 Attach the arms of the dashboard frame (27A) to the chassis (25A) using two BM screws. Check that the two lower control arm brackets (29K) are located properly in the holes of the chassis (25A).
- Page 20 STAGE 30: FITTING THE BRAKES, STEERING AND FRONT SUSPENSION The dashboard frame has now been connected onto the chassis. S T A G E C O M P L E T E AGORAMODELS PORSCHE 917KH...
- Page 21 STAGE 31: ADDING THE LEFT COCKPIT TUBULAR FRAME TO THE CHASSIS Tubular frame Screw 2.0 x 4 mm (x5) Tubular frame Screw 1.7 x 3.5 mm (x5) Wiring board ASSEMBLY DIAGRAM AGORAMODELS PORSCHE 917KH...
- Page 22 STAGE 31: ADDING THE LEFT COCKPIT TUBULAR FRAME TO THE CHASSIS S T E P 1 Fit the wiring board (31C) onto the larger tubular frame (31A) as shown. Attach the board in place using two IM screws. Take the smaller tubular frame (31B) and align it with the assembly as shown.
- Page 23 STAGE 31: ADDING THE LEFT COCKPIT TUBULAR FRAME TO THE CHASSIS S T E P 2 Fit the tubular frame assembly onto the chassis (25A) (blue arrows) and dashboard frame (27A) (red arrow). Using the images opposite, locate the five connection points (red circles) between the two assemblies.
- Page 24 STAGE 31: ADDING THE LEFT COCKPIT TUBULAR FRAME TO THE CHASSIS S T E P 3 Fix the two connection points between the tubular frame (31A) and the dashboard frame (27A) using two BM screws. Press the tubular frame (31A) down onto the chassis (25A) and drive two BM screws into the two...
- Page 25 STAGE 31: ADDING THE LEFT COCKPIT TUBULAR FRAME TO THE CHASSIS S T A G E C O M P L E T E Tip: Check the steering of your model by turning the steering wheel. If any of the parts are not fixed in place fully, loosen the corresponding screw(s), add a drop of oil then tighten the screw.
- Page 26 STAGE 32: ATTACHING THE LEFT FUEL TANK WITH THE CIRCUIT BOARD Left fuel tank top Screw 1.7 x 4 x 5 mm (x5) Left fuel tank bottom Screw 2.0 x 3 x 5 mm (x2) Filling pipe/neck Circuit board with wires Washer (x4) ASSEMBLY DIAGRAM AGORAMODELS...
- Page 27 STAGE 32: ATTACHING THE LEFT FUEL TANK WITH THE CIRCUIT BOARD S T E P 1 Align the circuit board with wires (32D) with the left fuel tank bottom (32B) as shown. Press the board in place by fitting the four holes at the edges over the four columns in the tank bottom.
- Page 28 STAGE 32: ATTACHING THE LEFT FUEL TANK WITH THE CIRCUIT BOARD S T E P 2 Fit the left fuel tank top (32A) onto the left fuel tank bottom (32B), pushing the connections highlighted by the red arrows firmly in place. Push the D-shaped lug of the filling pipe/ neck (32C) into the...
- Page 29 STAGE 32: ATTACHING THE LEFT FUEL TANK WITH THE CIRCUIT BOARD Drive a CM screw into the chassis lug visible at the back of the fuel tank as shown. The wires of the circuit board should run between the chassis (25A) and tubular frame (31B).
- Page 30 STAGE 32: ATTACHING THE LEFT FUEL TANK WITH THE CIRCUIT BOARD S T A G E C O M P L E T E AGORAMODELS PORSCHE 917KH...
- Page 31 STAGE 33: ATTACHING THE RIGHT FUEL TANK AND CABLES Right fuel tank top Screw 1.7 x 3.5 mm (x2) Right fuel tank bottom Filling pipe/neck Switch cable (red-red) The switch cable (33D) can be stored away safely until it is needed for Stage 35. ASSEMBLY DIAGRAM AGORAMODELS PORSCHE 917KH...
- Page 32 STAGE 33: ATTACHING THE RIGHT FUEL TANK AND CABLES S T E P 1 Align the right fuel tank top (33A) with the right fuel tank bottom (33B) as shown and push into place using the three pins (red arrows). Press the filling pipe/ neck (33C) into the D-shaped hole in the...
- Page 33 STAGE 33: ATTACHING THE RIGHT FUEL TANK AND CABLES Secure the right fuel tank to the chassis using an IM screw. Route the red and black cable from the fuel tank through the chassis as shown by the blue arrow. S T E P 3 Pass the red and black cable through...
- Page 34 STAGE 33: ATTACHING THE RIGHT FUEL TANK AND CABLES S T E P 4 Guide the black brake light switch cable (26K) along the footrest (26A) and through the tubular frame as shown. Connect it to the black socket protruding from the left fuel tank. AGORAMODELS PORSCHE 917KH...
- Page 35 STAGE 33: ATTACHING THE RIGHT FUEL TANK AND CABLES S T A G E C O M P L E T E AGORAMODELS PORSCHE 917KH...
- Page 36 STAGE 34: ADDING THE RIGHT COCKPIT TUBULAR FRAME TO THE CHASSIS Tubular frame Screw 2.0 x 4 mm (x5) Tubular frame Screw 1.7 x 3.5 mm (x3) Speaker (with yellow cable) Engine sound switch cable (blue) Horn switch cable (green) The speaker (34C), engine sound switch cable (34D) and horn switch cable (34E) can be stored away safely until they are needed for Stage 35.
- Page 37 STAGE 34: ADDING THE RIGHT COCKPIT TUBULAR FRAME TO THE CHASSIS S T E P 1 Align the tubular frames (34A and 34B) with each other as shown and fit together. Secure using an IM screw. S T E P 2 Align the tubular frame assembly with the chassis assembly as shown.
- Page 38 STAGE 34: ADDING THE RIGHT COCKPIT TUBULAR FRAME TO THE CHASSIS S T E P 3 To attach the tubular frame in place, start by driving two BM screws into the dashboard frame connection points as shown. Turn the assembly over carefully and use two more BM screws to secure the...
- Page 39 STAGE 34: ADDING THE RIGHT COCKPIT TUBULAR FRAME TO THE CHASSIS The tubular frame has been fixed to the chassis and dashboard frame. S T A G E C O M P L E T E AGORAMODELS PORSCHE 917KH...
- Page 40 STAGE 35: FIXING THE MUDGUARDS AND ADDING THE ELECTRICAL CABLES Left mudguard Light switch cable (white) Right mudguard Instrument backlight LED cable Washer (red-white) Left brake hose Adhesive tape strip (x6) Right brake hose Screw 1.7 x 3.5 mm (x5) Headlight LED cable (white-green) Screw 2.0 x 4 x 5 mm (x2) Tail lights LED cable (black-white)
- Page 41 STAGE 35: FIXING THE MUDGUARDS AND ADDING THE ELECTRICAL CABLES ASSEMBLY DIAGRAM AGORAMODELS PORSCHE 917KH...
- Page 42 STAGE 35: FIXING THE MUDGUARDS AND ADDING THE ELECTRICAL CABLES The left (35D) and right (35E) brake hoses will be installed for the first two steps of this stage. This image shows the hoses already installed – you can use this as a reference. S T E P 1 Take the shorter right brake hose (35E) and fit one end of...
- Page 43 STAGE 35: FIXING THE MUDGUARDS AND ADDING THE ELECTRICAL CABLES S T E P 2 Now fit one end of the left brake hose (35D) onto the small pin located under the left brake piston cover (30B). Pass the other end around the shock absorber as shown.
- Page 44 STAGE 35: FIXING THE MUDGUARDS AND ADDING THE ELECTRICAL CABLES Pull the bulb end of each cable towards the rear of the chassis as shown. Identify the longest (blue arrow) and shortest (green arrow) of the two tail light LED cables (black-white) (35G). S T E P 4 Guide the right fuel tank cable (black-red) (33B), the switch cable (red-red) (33D) and the longer (blue arrow) tail light LED cable (black-white) (35G) along the right side of the chassis, then tape...
- Page 45 STAGE 35: FIXING THE MUDGUARDS AND ADDING THE ELECTRICAL CABLES Attach the bundled right fuel tank cable (black-red) (33B), switch cable (red-red) (33D) and longer (blue arrow) tail light LED cable (black-white) (35G) to the right side of the chassis with two more pieces of adhesive tape (35J).
- Page 46 STAGE 35: FIXING THE MUDGUARDS AND ADDING THE ELECTRICAL CABLES S T E P 5 Connect the headlight LED cable (white-green) (35F) into the socket of the same colour from the circuit board (32D). Identify the longest (blue arrow) and shortest (green arrow) of the headlight LED cables (35F).
- Page 47 STAGE 35: FIXING THE MUDGUARDS AND ADDING THE ELECTRICAL CABLES S T E P 6 Connect the horn switch cable (green) (34E), the light switch cable (white) (35H), the engine sound switch cable (blue) (34D), the speaker cable (yellow) (34C) and the instrument backlight LED cable (red-white) (35I) to the same coloured sockets on the...
- Page 48 STAGE 35: FIXING THE MUDGUARDS AND ADDING THE ELECTRICAL CABLES S T E P 5 Reduce the ambient light to make it easier to test the light bulbs. Press the light switch (35H) – the headlights (35F) and instrument panel backlight (35I) should illuminate in white (red circles). The tail lights (35G) should illuminate in red (green circles).
- Page 49 STAGE 35: FIXING THE MUDGUARDS AND ADDING THE ELECTRICAL CABLES S T E P 7 Disconnect the speaker (34C) from the yellow circuit board (32D) cable (red arrows) to avoid damaging it during the rest of the assembly of your model.
- Page 50 STAGE 35: FIXING THE MUDGUARDS AND ADDING THE ELECTRICAL CABLES S T E P 9 Take the front wheel assembled in stage 2 and fit the wheel rim (2E) on the hub carrier (3G). Turn it until the rim engages with the notch on the outer brake disc (3O). Push an MM screw through the washer (35C) then use it to attach the wheel.
- Page 51 STAGE 35: FIXING THE MUDGUARDS AND ADDING THE ELECTRICAL CABLES S T A G E C O M P L E T E AGORAMODELS PORSCHE 917KH...
- Page 52 STAGE 36: ASSEMBLING AND ATTACHING THE RIGHT FRONT WHEEL Front tyre Screw 2.0 x 4 x 5 mm (x2) Front wheel outer rim Screw 2.0 x 4 mm (x4) Front wheel inner rim Hub cap Washer ASSEMBLY DIAGRAM AGORAMODELS PORSCHE 917KH...
- Page 53 STAGE 36: ASSEMBLING AND ATTACHING THE RIGHT FRONT WHEEL S T E P 1 Fit the front wheel outer rim (36B) into the front tyre (36A). Press the front wheel inner rim (36C) into the front tyre (36A), making sure to align the screw holes with the outer rim (36B).
- Page 54 STAGE 36: ASSEMBLING AND ATTACHING THE RIGHT FRONT WHEEL Push an MM screw through the washer (36E) and use it to attach the wheel, then take the hub cap (36D) and position it on the outer rim (36B). Check that the brake disc and wheel spin in unison.
- Page 55 STAGE 37: FITTING THE COCKPIT PARTITION FRAME AND THE OIL HOSES Cockpit partition frame Screw 2.0 x 4 mm (x5) Oil hose (x2) ASSEMBLY DIAGRAM AGORAMODELS PORSCHE 917KH...
- Page 56 STAGE 37: FITTING THE COCKPIT PARTITION FRAME AND THE OIL HOSES S T E P 1 Take the chassis assembly and locate the indicated sockets in the left tubular frame (31A), right tubular frame (34A) and the chassis (25A). Fit the cockpit partition frame (37A) onto the sockets identified in the image above.
- Page 57 STAGE 37: FITTING THE COCKPIT PARTITION FRAME AND THE OIL HOSES S T E P 2 Turn the chassis assembly over and fix the partition frame to it using to BM screws. Remove the batteries from the compartment (blue arrow) until they are needed. The cockpit partition frame has been installed onto the chassis.
- Page 58 STAGE 37: FITTING THE COCKPIT PARTITION FRAME AND THE OIL HOSES S T E P 3 Take the engine assembly and fit the two oil hoses (37B) onto the pins of the water pump housing (8A). S T A G E C O M P L E T E AGORAMODELS PORSCHE 917KH...
- Page 59 STAGE 37: FITTING THE COCKPIT PARTITION FRAME AND THE OIL HOSES S T A G E C O M P L E T E AGORAMODELS PORSCHE 917KH...
Need help?
Do you have a question about the STEVE MCQUEEN'S ICONIC PORSCHE 917KH Pack 05 and is the answer not in the manual?
Questions and answers