Table of Contents
Advertisement
Quick Links
About This Manual
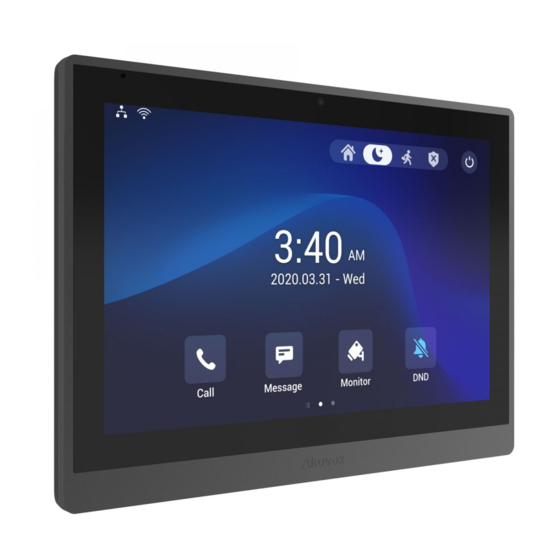
Thank you for choosing the Akuvox IT88 series indoor monitor. This manual
is intended for the administrators who need to properly configure the indoor
monitor. This manual applies to the 88.30.110.302 version, and it provides all
the configurations for the functions and features of the IT88 series door
phone. Please visit the Akuvox forum or consult technical support for any
new information or the latest firmware.
Advertisement
Table of Contents

Related Manuals for Akuvox IT88 Series


Summary of Contents for Akuvox IT88 Series
- Page 1 About This Manual Thank you for choosing the Akuvox IT88 series indoor monitor. This manual is intended for the administrators who need to properly configure the indoor monitor. This manual applies to the 88.30.110.302 version, and it provides all the configurations for the functions and features of the IT88 series door phone.
-
Page 2: Related Documentation
Related Documentation You are advised to refer to the related documents for more technical information via the link below: https://knowledge.akuvox.com... - Page 3 Any Changes or modifications not expressly approved by the party responsible for compliance could void the user's authority to operate the equipment. This device complies with part 15 of the FCC Rules. Operation is subject to the following two conditions: (1) This device may not cause harmful interference, and (2) this device must accept any interference received, including interference that may cause undesired operation.
-
Page 4: Product Overview
IT88 Series Administrator Guide 1.Product Overview IT88 series is an Android SIP-based with a smooth touch-screen indoor monitor. It can be connected with the Akuvox door phone for audio/video communication, unlocking, and monitoring.Residents can communicate with visitors via audio/video call, and it supports unlocking the door remotely. It is more convenient and safer for residents to check the visitor’s identity... - Page 5 Mode selection: Discovery mode: It is a plug and plays configuration mode. Akuvox devices will configure themselves automatically when users power on the devices and connect them to the network. It is super time-saving mode and it will greatly bring users convenience by reducing manual operations.
- Page 6 3. Akuvox PC Manager: distribute all configuration items in batch on a LAN. 4. IP scanner: it is used to search Akuvox device IP addresses on a LAN. 5. FacePro: manage face data in batch for the door phone on a LAN.
-
Page 7: Access The Device
IT88 Series Administrator Guide 4.Access the Device Akuvox indoor monitor system settings can be either accessed on the device directly or on the device web interface. 4.1. Device Start-up Network Selection Akuvox indoor monitor system settings can be either accessed on the device directly or on the device's web interface. - Page 8 IT88 Series Administrator Guide can configure different types of functions as needed. To access the device basic setting by pressing Setting icon. To checking the basic information like MAC, firmware and ect. 4.2.2.Accessing Device Advanced Setting To access the advanced setting, press Setting then press Advanced Settings icon.
- Page 9 IT88 Series Administrator Guide Note You can also obtain the device IP address using the Akuvox IP scanner to log in the device web interface. Please refer to the URL below for the IP scanner application: https://knowledge.akuvox.com/docs/akuvox-ip-scanner Note Google Chrome browser is strongly recommended.
-
Page 10: Language Setting
IT88 Series Administrator Guide 5.Language and Time Setting 5.1. Language Setting When you first set up the device, you might need to set the language to your need or you can do it later if needed. Language setting can be configured on the device that allows you to select or change the language for screen display to your preference. - Page 11 IT88 Series Administrator Guide Automatic Date: automatic Date is switched on by default, which allows the date& time to be automatically set up and synchronized with the default time zone and the NTP server (Network Time Protocol). You can also set it up manually by checking off the square box and then enter the time and date you want and press the Save tab to save the setting.
-
Page 12: Screen Display Configuration
NTP Server: enter the NTP server you obtained in the NTP server field. 6.Screen Display Configuration IT88 series indoor monitor allow you to enjoy a variety of screen displays to enrich your visual and operational experience through the customized setting to your preference. - Page 13 IT88 Series Administrator Guide 6.1. Screen Display setting on the Device You can configure a variety of features of the screen display in terms of brightness, screen saver and font size, etc. To do this configuration on device Setting > Display screen.
- Page 14 IT88 Series Administrator Guide SDMC Pictures Display pictures from SDMC as the screen saver. Display picture uploaded to the indoor monitor as Local Pictures the screen saver. SDMC+Local Display pictures from SDMC and the indoor monitor Pictures in rotation as the screen saver.
- Page 15 IT88 Series Administrator Guide 6.2. Screen Display Setting on the Web Interface IT88 series indoor monitor allows you to enjoy a variety of screen displays to enrich your visual and operational experience through the customized setting to your preference. 6.2.1.Upload Screen Saver You can upload screen saver pictures separately or in batch to the device and to the device web Device >...
- Page 16 The pictures uploaded should be in .png or .zip format. 6.3. Icon Screen Display Configuration IT88 series indoor monitor allows you to customize icon display on the home screen and one more screen for the convenience of your operation on device web Device >...
- Page 17 IT88 Series Administrator Guide Parameter Set-up: Type: click to select among sixteen icon options: “DND”, “Message”,” Contact”, “Call”, “Display”, ”System info”, “Setting”, “Sound”, “Arming”, “SOS”, “Browser”, ”Motion Detection”, “Custom APK”, “Relays”, “Unlock”, “N/A” is selected, the icon display in the corresponding area will disappear.
-
Page 18: Volume Configuration
IT88 Series Administrator Guide 7.Sound and Volume Configuration Akuvox IT88 series indoor monitors provide you with various types of ringtone and volume configuration ranging from Mic volume, Ring volume, Talk volume, Tone volume and Media volume. You can configure them on the device directly or on the web interface. -
Page 19: Phone Book Configuration
IT88 Series Administrator Guide 7.1.1.1. Configure Volume on the Web Interface You can configure the volumes and tones and customize your doorbell sound and alarm ringtone to your preference on device web Device > Audio interface. Note: Doorbell sound files and Alarm Ringtone files to be uploaded must be .WAV or MP3 format. -
Page 20: Add Contact
Number: enter the IP or SIP number to save. CameraUrl: enter the RTSP URL for video preview. Note: Akuvox devices RTSP URL format is rtsp://device IP/live/ch00_0. if you use the third party device, please confirm the URL format with their company. - Page 21 IT88 Series Administrator Guide You can check and edit the exited contacts in the phonebook list. Choose one and click Edit key to modify. 8.1.3.Block List setting on the device Choose which contact on the contact list you want to be added to the blocklist.
-
Page 22: Contact Management
IT88 Series Administrator Guide Parameter set-up: Name: enter the contact name to be saved. Number: enter the contact number (SIP or IP number ) to be saved. Group: select Default or Blocklist group. Dial Account: select Account1 or Account2. - Page 23 IT88 Series Administrator Guide Note: If you want to remove the contact from the blocklist on the web interface, you can change the group to the “Default" when editing the contact. 8.2.4. Contacts Import and Export on the Web Interface...
-
Page 24: Device Network Configuration
IT88 Series Administrator Guide 9.Network Setting & Other Connection 9.1. Device Network Configuration You can check for the door phone’s network connection info and configure the default DHCP mode (Dynamic Host Configuration Protocol) and static IP connection for the device either on the device or on the device web interface. - Page 25 IT88 Series Administrator Guide Static IP: select the static IP mode by checking off the DHCP check box. When static IP mode is selected, then the IP address, subnet mask, default gateway, and DNS servers address have to be manually configured according to your actual network environment.
- Page 26 IT88 Series Administrator Guide To check the network on the web Status > Network information interface. To check and configure network connection on the device web Network > Basic > LAN Port interface. Parameter Set-up: DHCP: select the DHCP mode by checking the DHCP box. DHCP mode is the default network connection.
- Page 27 IT88 Series Administrator Guide Akuvox IT88 series indoor monitors should be deployed before they can be properly configured in the network environment in terms of their location, operation mode, address and extension numbers as opposed to other devices for device control and the convenience of the management. To deploy the device in the network on web Network >...
- Page 28 9.4. Device Bluetooth Setting 9.4.1.Device Bluetooth Pairing After IT88 series indoor monitors turn on the Bluetooth on the device Settings > Bluetooth screen, it can be paired with other device via Bluetooth. 9.4.2.Device Bluetooth Data Transmission To transfer data via Bluetooth by pressing Pair new device.
- Page 29 IT88 Series Administrator Guide 9.5. Device Wi-Fi Setting In addition to wired connection, the device also supports Wi-Fi connection. To set the Wi-Fi on device Settings > Advance Settings > WIFI screen. 10. Intercom Call Configuration AKUVOX SMART INTERCOM www.akuvox.com...
- Page 30 IT88 Series Administrator Guide 10.1.IP call & IP Call Configuration IP calls and SIP calls can be made directly on the intercom device by entering the IP number on the device. And you can also disable the direct IP call if you allow no IP call to be made on the device.
- Page 31 10.3.SIP Account Registration Akuvox IT88 series indoor monitors support two SIP accounts that can all be registered according to your applications. For example, you can switch between the two SIP accounts. The SIP account can be configured on the device and on the device interface.
-
Page 32: Sip Server Configuration
IT88 Series Administrator Guide "5060" by default. The parameter settings for SIP account registration can be configured on the Account setting screen and they can also be configured on the device web Account > Basic > SIP Account interface. Parameter setup: ... - Page 33 IT88 Series Administrator Guide SIP server between intercom devices. To perform the SIP account setting on the Web Account > Basic > SIP Server interface. Parameter Set-up: Server Address: enter the Server’s IP address number or its URL. Sip Server Port: set up SIP server port for data transmission.
- Page 34 IT88 Series Administrator Guide Preferred Outbound Proxy Server: enter the SIP address of the outbound proxy server. Preferred Outbound Proxy Port: enter the Port number for establish call session via the outbound proxy server. Alternate Outbound Proxy Server: set up Backup Server IP for the backup outbound proxy server.
- Page 35 IT88 Series Administrator Guide For the device network data transmission purpose, device needs to be set up with a range of RTP port (Real-time Transport Protocol) for establishing an exclusive range of data transmission in the network. To set up device local RTP on web Network >...
-
Page 36: Call Setting
IT88 Series Administrator Guide TLS: select “TLS” for Secured and Reliable transport layer protocol. DNS-SRV: select “DNS-SRV” to obtain DNS record for specifying the location of services. And SRV not only records the server address but also the server port. Moreover, SRV can also be used to configure the priority and the weight of the server address. - Page 37 IT88 Series Administrator Guide automatically. Answer Mode: set up the video or audio mode you preferred for answering the call automatically. Indoor Auto Answer: turn on the Auto Answer function for call from other indoor monitors by ticking the check box .
- Page 38 IT88 Series Administrator Guide 10.9.3. Live Stream Setting Receive Live Stream on the indoor monitor allows you to see the video image (one way video stream) from the calling device such as a door phone whether or not you answered the call in audio or video mode, while the video image from your indoor monitor will not be sent to the calling devices in order to protect your privacy.
- Page 39 IT88 Series Administrator Guide If you want to see the image at the door station before answering the incoming call, you can enable the intercom preview function on web Device > Intercom > Intercom interface. Parameter Set-up: Intercom Active: tick the check box to enabled or disabled intercom function.
-
Page 40: Multicast Configuration
IT88 Series Administrator Guide Call Number: to setup 3 SOS numbers. Once users press SOS key on the home page (SOS display key shall be set on the web manually), indoor monitors will call out the number in order. - Page 41 IT88 Series Administrator Guide Parameter Set-up: Account: to choose which account shall implement call forwarding feature. Always Forward: to enable always forwarding function; all incoming calls will be automatically forward to a specific number. Busy Forward: to enable busy forwarding function; incoming calls will be forwarded to a specific number if phone is busy.
-
Page 42: Manage Messages
IT88 Series Administrator Guide Busy Transfer: to enable busy forwarding function; incoming calls will be forwarded to a specific number if phone is busy. No Answer Transfer: to enable no answer forwarding function; incoming calls will be forwarded to a specific number if phone is not picked within no answer ring time. - Page 43 IT88 Series Administrator Guide Notification: the message from property manager, this feature is only available when using SDMC or Akuvox SmartPlus. Text MSG: to send or receive or manage the text message here. Owner MSG: if you enable this feature, and no body answer the incoming call within the pre-configure ring time ,the visitor will hear the owner audio message.
-
Page 44: Audio Codec Configuration
SIP Calls 12.1.Audio Codec Configuration Akuvox indoor monitor supports seven types of Codec (iLBC_13_3, iLBC_15_2, L16, PCMU, PCMA, G729, G722 for encoding and decoding the audio data during the call session. Each type of codec varies in terms of sound quality. - Page 45 12.2.Video Codec Configuration IT88 series supports VP8, H263, H264, H265 codec that provides a better video quality at a much lower bit rate with different video quality and payload. To do the configuration on web Account > Advanced > Video Codecs interface.
-
Page 46: Monitor Setting
You can configure the monitor setting on the web Device > Monitor interface. Enter IP/SIP number of door phone in Device number and fill in device name. Then set up the RTSP address. The RTSP format of the Akuvox door phone is rtsp://deviceIP/live/ch00_0. Enable or disable display in the call. If enabled, when there is an incoming call from the monitor, the video will be displayed. - Page 47 13.2.Alarm and Arming Configuration Alarm feature is used to connect some alarm detection devices to protect your home safe. Akuvox indoor monitors support 8 alarm connectors which means you can connect 8 different alarm sensors in different rooms of your house.
- Page 48 IT88 Series Administrator Guide Parameter Set-up: Location: set up the location according to where the alarm sensor is installed. You can select among ten location types: “Bedroom”, “Gate”, “Door” “ Guest room”, “Hall”, “Window”, “Balcony”, “Kitchen”, “Study” and "Bathroom”.
- Page 49 IT88 Series Administrator Guide Zone type: to select which type of detection device is, including Infrared, Drmagnet, Smoke, Gas, and Urgency. Defence delay: it means when users change the arming mode from other modes, there will be 90 seconds delay time to get activated.
- Page 50 IT88 Series Administrator Guide You can upload customized alarm ringtone by choosing the local audio file on web Phone-Audio-Alarm Ringtone Upload interface. Note: The file format of customized ringtone should be .wav. 13.2.7. Alarm Action Configuration The triggering of the alarm sensor can be accompanied by the the actions you configured in forms of HTTP command, SIP Message, Call, Local Relay for different security purposes.
- Page 51 IT88 Series Administrator Guide enabled by using Autop. Call: enable Call if you want you a call to go to a designated SIP or IP number. 13.2.7.2. Configure Alarm Action via HTTP Command To set up the HTTP Command action, you can click “Enable”in the Send HTTP field to enable the actions for the alarm sensor installed in different locations.
-
Page 52: Voice Encryption
IT88 Series Administrator Guide To check alarm log on device Settings > Arming Log screen. 13.3.Screen Unlock Setting You can enable screenlock function directly on the device Settings > Display Setting screen. The device screen will be locked over the sleep time. You are required to wake up the device through the face recognition (Face ID) or password. -
Page 53: Remote Control
IT88 Series Administrator Guide The encryption function provides you with greater security for the intercom call. And, IT88 series support three modes of voice encryption: SRTP(compulsory), SRTP(Optional), ZRTP(Optional) on web Account > Advanced > Encryption interface. Parameter Set-up: Voice Encryption: select encryption mode from four options. If you select to Disable it, the call will not be encrypted. - Page 54 IT88 Series Administrator Guide 14. Door Access Control Configuration 14.1.Relay Switch Setting 14.1.1. Local Relay Setting Local relays in IT88 indoor monitor can be used to trigger relay for the door access and trigger Chime bell as needed in different scenarios. You can do this configuration on web Phone >...
- Page 55 IT88 Series Administrator Guide Remote Control: enable it to trigger local relay by DTMF and vice versa. DTMF: set the DTMF to trigger the local relay when you enable Remote control. 14.1.2. Remote Relay Switch Setting You can use the unlock tab during the call to open the door on web Phone >...
- Page 56 IT88 Series Administrator Guide IP address: enter the web relay IP address. User Name: enter the User name provided by the web relay manufacturer. Password: enter the password provided by the web relay manufacturer.The passwords is authenticated via HTTP and you can define the passwords using “http get”...
- Page 57 IT88 Series Administrator Guide Type: select DTMF type among four options: “Inband”, “RFC2833”, “Info+Inband” and “Info+RFC2833” according to your need. How to Notify DTMF: select among four options: “Disable” “DTMF” “DTMF-Relay” “Telephone-Event” according to your need. DTMF Payload: select the payload 96-127 for data transmission identification.
-
Page 58: Lift Control
IT88 Series Administrator Guide Password: Enter the device password to be used as part of HTTP command to trigger the local relay. Please refer to the following example: http://192.168.35.127/fcgi/do?action=OpenDoor&UserName=admin&Pa ssword=12345&DoorNum=1 Note: DoorNum in the HTTP command above refers to the relay number #1 to be triggered. - Page 59 IT88 Series Administrator Guide Status: click to enable or disable the lift button. Icon: click to select icon for the button. Label: enter the title for the button. HTTP Command: select http:// or https:// for head of http command and enter http command.
-
Page 60: Firmware Upgrade
IT88 Series Administrator Guide 16. Firmware Upgrade 16.1.1. Configure Alarm Action via HTTP Command Firmwares of different versions for indoor monitor can be upgraded on the device web Upgrade > Basic interface. Note: Firmware files should be .zip format for upgrade. - Page 61 IT88 Series Administrator Guide 17. Backup Configuration files can be imported to or exported out of the device to your local PC on the device web Upgrade > Advanced > Others interface if needed. AKUVOX SMART INTERCOM www.akuvox.com...
-
Page 62: Auto Provisioning
Auto-provisioning is a feature used to configure or upgrade the devices in batch via third party servers. DHCP, PNP, TFTP, FTP, HTTPS are the protocols used by the Akuvox intercom devices to access the URL of the address of the third party server which stores configuration files and firmwares, which will then be used to to update the firmware and the corresponding parameters on the door phone. - Page 63 MAC-based configuration files. 18.3.Autop Schedule Akuvox provides you with different Autop methods that enable the indoor monitor to perform provisioning for itself in a specific time according to your schedule. To set up the schedule on device web Upgrade > Advanced >...
- Page 64 IT88 Series Administrator Guide Power On: select “Power on”, if you want the device to perform Autop every time it boots up. Repeatedly: select “Repeatedly”, if you want the device to perform autop according to the schedule you set up.
- Page 65 IT88 Series Administrator Guide Parameter Set-up: Custom Option: enter the DHCP code that matched with corresponding URL so that device will find the configuration file server for the configuration or upgrading. DHCP Option 66: If none of the above is set, the device will automatically use DHCP Option 66 for getting the upgrade server URL.
- Page 66 IT88 Series Administrator Guide interface. If an autop schedule is set up, the indoor monitor will perform the auto provisioning on a specific timing according to autop schedule you set up. In addition,TFTP, FTP, HTTP, and HTTPS are the protocols that can be used for upgrading the device firmware and configuration.
-
Page 67: Voice Assistant
(use other ports, such as 8080) HTTPS: https://192.168.0.19/ (use the default port 443) Note: Akuvox do not provide user specified server. Please prepare TFTP/FTP/HTTP/HTTPS server by yourself. 19. Voice Assistant You can configure voice assistant named "Albert" to perform a variety of functions related to intercom call, open-door, arming modes etc. - Page 68 IT88 Series Administrator Guide without your needing to call “Albert" again to wake up the voice assistant., while if you disable it, the voice assistant will be wake up again for each voice command. Not Disturb At Night: move the toggle switch to the left to enable the function.
- Page 69 IT88 Series Administrator Guide dream Made it, good night Started sweet dreams! away mode Use it when you want to Sure, away mode is on change the arming mode OK, start away mode to away mode Alright, away mode is ...
- Page 70 IT88 Series Administrator Guide closed, mingle with the world Sure, DND is off 10 enable Use it when you want to OK, DND is on enable the DND mode Done, enjoy yourself DND is on, feel your ...
- Page 71 IT88 Series Administrator Guide some contents to send Message is ready for already opened it for 17 open use it when you want to Got it ,please check monitor check monitor 18 homepage use it when you want to go Home page is already ...
- Page 72 IT88 Series Administrator Guide will also appear when you call " Tom", and you are required to select the right contact manually. To enable the voice assistant and set the voice assistant-controlled relay on the web Setting > Voice Assistant > Voice Assistant Setting interface, you can tick the check box to enable the voice assistant function.
- Page 73 IT88 Series Administrator Guide If you want to check on the calls inclusive of the dial-out calls, received calls, and missed calls in a certain period of time, you can check and search the call log on the device web Contacts > Call Logs interface and export the call log from the device if needed.
- Page 74 21.2. PCAP for Debugging PCAP in Akuvox indoor monitor is used to capture the data package going in and out of the devices for debugging and troubleshooting purpose. You can set up the PCAP on the device web Upgrade > Advanced > PCAP interface properly before using it.
-
Page 75: User Agent
IT88 Series Administrator Guide Parameter set-up: Specific Port: select the specific ports from 1-65535 so that only the dat a packet from the specific port can be captured. You can leave the field bl ank by default. PCAP: click ”Start” tab and ”Stop” tab to capture the a certain range of d ata packets before clicking Export tab to export the data packets to you L ocal PC. - Page 76 IT88 Series Administrator Guide 22. Device Integration with Third Party 22.1.Enter Applications Screen The content of this part mainly teaches you how to enter the APK interface through hidden operations. To do the configuration on device Settings > System Info interface. you can press on User Mode for 10 times and press “Admin Mode”...
- Page 77 IT88 Series Administrator Guide To configure the installed the third-party app, you can click App Name field to select the specific name of the installed APK files for configuration. Then tick the check boxes of the each field for specific configuration you need.
- Page 78 IT88 Series Administrator Guide IT88 Android indoor monitor has built in the PBX server which makes the indoor station not only used as a intercom monitor also a SIP PBX, users do not bother to prepare an extra SIP PBX again. The PBX supports call, forward, transfer, conference, ring group feature and so on.
- Page 79 IT88 Series Administrator Guide Status: to show whether the account is registered or not. Username: T=to enter the extension number registered onto SIP server. Display Name: to enter the display name of this account, which will show on other devices when making calls.
-
Page 80: Password Modification
IT88 Series Administrator Guide Group Name: the name of a ring group. Quick Dial: a number of this ring group. 23.2.PBX Configuration on The Web Interface You can do the same configuration on web PBX > Basic and PBX > Ring Group interface. - Page 81 IT88 Series Administrator Guide To do the configuration on device Settings > Advanced Settings > Protected Code screen to choose System Code to change a new password. The default password is 123456. 24.2.Modify Device Advanced Setting Password This password is used to enter the advanced settings of the device, including password settings, account numbers, SOS numbers, network settings, etc.
- Page 82 IT88 Series Administrator Guide 24.4.Modify Browser Password This password is used to lock the browser on the device in case someone abuses the browser for any unwanted application. You can do this configuration on device Settings > Advanced Settings > Protected Code >...
- Page 83 IT88 Series Administrator Guide To restart to the system setting on device Settings > Advance Settings > Reset&Reboot screen. 25.1.2. Reboot on the Web Interface If you want to restart the device system, you can operate it on the device web Upgrade >...
- Page 84 IT88 Series Administrator Guide If you only want to reset the configuration file to the factory setting instead of the whole device system, you can press Reset Config To Factory Setting tab. 25.2.2. Reset on the Web Interface Device system can also be reset on device web Upgrade > Basic interface without approaching the device.
- Page 85 IT88 Series Administrator Guide ACS: Auto Configuration Server Auto: Automatically AEC: Configurable Acoustic and Line Echo Cancelers ACD: Automatic Call Distribution Autop: Automatical Provisioning AES: Advanced Encryption Standard BLF: Busy Lamp Field COM: Common CPE: Customer Premise Equipment CWMP: CPE WAN Management Protocol...
- Page 86 IT88 Series Administrator Guide PNP: Plug and Play RFID: Radio Frequency Identification RTP: Real-time Transport Protocol RTSP: Real Time Streaming Protocol MPEG: Moving Picture Experts Group MWI: Message Waiting Indicator NO: Normal Opened NC: Normal Connected NTP: Network Time Protocol...
- Page 87 A1: You can use the display screen to get the IP information, just check the IP address at setting, basic info. You can also use Akuvox IP Scanner to search Akuvox devices in the same LAN network. Q2: Do Akuvox devices support Opus codec? A2: For now, only Akuvox Android video IP phone R48G can support Opus audio codec.
- Page 88 Q7:Can I communicate other indoor monitor with indoor monitor? A7:Akuvox device can communicate with each other, no matter it is indoor monitor,door phone or ip phone. Of course indoor monitor can call to other indoor monitor, also if you want, you can set other indoor monitor as auto answer mode.
- Page 89 IT88 Series Administrator Guide 28. Contact Us For more information about the product, please visit us atwww.akuvox.com or feel free to contact us by Sales email: sales@akuvox.com Technical support email: support@akuvox.com Telephone: +86-592-2133061 ext.7694/8162 We highly appreciate your feedback about our products.
Need help?
Do you have a question about the IT88 Series and is the answer not in the manual?
Questions and answers