Table of Contents
Advertisement
Quick Links
Advertisement
Table of Contents

Related Manuals for Akuvox IT82


Summary of Contents for Akuvox IT82
- Page 1 IT82 Indoor Monitor User Manual...
-
Page 2: Table Of Contents
Content 1 Production Overview................4 1.1 Production Description......................4 1.2 Technical Specification......................4 1.3 Button Instruction......................... 5 1.4 Dimension..........................6 1.5 Equipment Appearance And Interface Description.............. 7 1.6 Installation..........................8 1.7 Installation Considerations....................9 1.8 Equipment Packaging......................9 2 Setting.....................10 2.1 Main interface instruction....................10 2.2 Network..........................10 2.2.1 DHCP.........................10 2.2.2 Static IP........................11... - Page 3 3.3 Answer a call........................26 3.4 Reject a call..........................27 3.5 Contacts..........................27 3.5.1 New contacts......................27 3.5.2 Modify the contact....................28 3.5.3 Delete the contact....................29 3.6 Call log..........................29 3.6.1 Modify the call log....................29 3.6.2 Delete the log......................30 3.7 Capture..........................30 3.8 Message..........................30 3.9 Live View..........................31 3.10 Unlock..........................31 3.11 SOS.............................32 3.12 Security..........................33...
-
Page 4: Production Overview
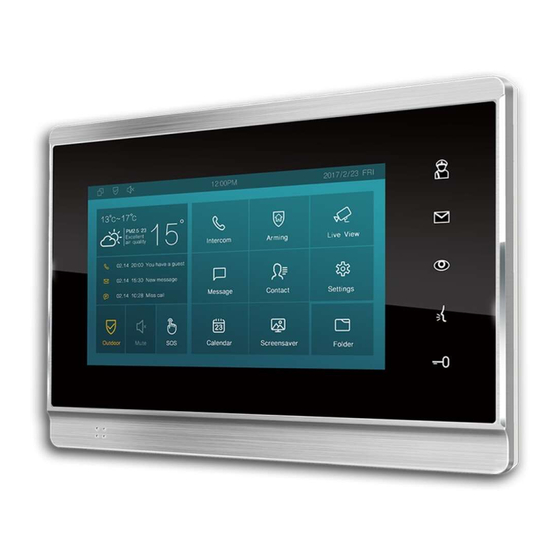
It is more convenient and safe for residents to check the visitor identity through its video preview function. IT82 is often applicable in villas , apartments, building and so on 1.2 Technical Specification... -
Page 5: Button Instruction
Memory RAM:2GB, Flash:4GB Management LCD Menu Configuration, WebUI Dimension 232x160x21mm Album Storage External SD device 1.3 Button Instruction Interface Description Manage center button. Click to make a call with manage center. Message button. Click to direct access to message interface. Monitor button. -
Page 6: Dimension
1.4 Dimension... -
Page 7: Equipment Appearance And Interface Description
1.5 Equipment Appearance And Interface Description Interface Description 8 PIN connector For power supply and 485 connector 10PINconnect For 8 security connector Ethernet 1 Network interface can be connected to a hub, switch or other network access devices. Ethernet 2 Share the network access from ethernet 1 port, and for PC and other equipment connection. -
Page 8: Installation
1.6 Installation Use a 5mm hand Use the pencil to drill to make the 4 mark 4 fixation holes fixation holes on through wall bracket the wall on the wall Once the fixation Use 4 ST4X20 screws holes are made, wall insert the four bracket in the wall... -
Page 9: Installation Considerations
Place the device away from traffic areas to prevent collisions. Please use the equipment with the matching power adapter or POE. 1.8 Equipment Packaging Name Quantity IT82 Wall bracket Quick Start Guide 10 Pin cable 8 Pin cable... -
Page 10: Setting
2 Setting 2.1 Main interface instruction It82 supports two pages of main interface. Click the corresponding area to operate. 2.2 Network 2.2.1 DHCP IT82 use DHCP mode to get IP address by default. Please go to Setting-Advanced(password:123456)-Network Choose DHCP,press CONFIRM, the phone will get IP address automatically. -
Page 11: Static Ip
2.2.2 Static IP Select Static IP in LAN Type. Enter the IP address parameters in the corresponding area. Parameter Specification IP address set the IP address of the device... -
Page 12: Register Account
Subnet Mask set the subnet mask of the device Gateway set the default gateway DNS 1 set the DNS address DNS 2 set the backup DNS address 2.3 Register Account SIP account is provided by SIP server. Go to Setting-Advanced-Sip Account . Please consult administrator about sip server information. -
Page 13: Display
Fill the parameters in the corresponding area. Click CONFIRM to save. Parameter Specification Register Name SIP Account ID provided by ISP User Name SIP User Name provided by ISP Password SIP Password provided by ISP Display Name SIP Display name SIP Register Server, format: domain/IP, for example: Reg Server IP 194.168.1.2... -
Page 14: Sleep
2.4.2 Sleep Choose the sleep time from 15 seconds to Never. IT82 setup 1minute by default. After the sleep time without any operation, the phone will black screen. Touch it to wake up. -
Page 15: Screen Saver
2.4.3 Screen Saver 2.4.4 Screen Clean This function is used to protect the device from being pressed any keys when users clean the screen. -
Page 16: Sound
2.5 Sound 2.5.1 Volume Slide the point right or left to adjust the Ring / Talk/Tone Volume. 2.5.2 Ring tones To setup the Phone Ringtone, click OK to confirm 2.5.3 Notification Sound Select the suitable notification sound, click OK to confirm. 2.6 Time Setup the date and time in the corresponding area. -
Page 17: System Info
manually. Users can also select the suitable Time Zone and use 24-Hour format. 2.7 System Info Enter System Info interface to check Account, Network and Version information. To check the SIP account status... -
Page 18: Language
To check the Network Access Mode And parameters. To check the Software version, Firmware version, Firmware Model and Hardware version. 2.8 Language Choose the suitable phone language. IT82 use English by default. -
Page 19: Reboot
2.9 Reboot To reboot the device, click CONFIRM when you see the prompt. The phone will reboot. -
Page 20: Reset
2.10 Reset Go to Advance-Reset. Choose the Reset mode,click CONFIRM when you see the prompt. The phone will reset to factory setting automatically. 2.11 Folder Click Folder to check the local and SD card files. IT82 supports external SD card. -
Page 22: Function
3 Function 3.1 Make a call User can directly dial from the soft keypad, select from the contact list or from call log to call out the number. User can choose one of the following steps to enter the dialing interface. Mode 1: Click Call icon on the main screen. -
Page 23: Call Resident
3.1.2 Call resident If you want to call room number, you can select Call Resident label. For example, if you want to call community 1, Building 1, Unit 1, Floor 1, Room1, you can input digits “001001010101”. 3.1.3 Call from Call Log User can enter the call log page to make a call. - Page 24 Directly click Contact icon If you want to make an audio call, click Audio Call icon . If you want to make a video call, click Video Call Contact is shown as below: If the contact has multiple numbers, after clicking the calling mode, user need to choose the number you want to call.
-
Page 25: Call Center
Incoming calls include audio and video calls. If the caller has been stored in the contacts, it will show the contact name, otherwise the caller number will be displayed. When IT82 received the video call, it can automatically get a screenshot and save it in the Album. -
Page 26: Answer A Call
3.3 Answer a call 1) Answer a audio Click Answer Key to answer the call, As shown below: 2) Answer a video call When receiving an video call, the phone will automatically open the video preview so... -
Page 27: Reject A Call
that resident can view the visitors identity. Press Answer key to answer the call. As shown below: 3.4 Reject a call If user want to reject a call, click Cancel label in incoming interface. 3.5 Contacts 3.5.1 New contacts 1.Click Add button. 2.Enter the name. -
Page 28: Modify The Contact
3.5.2 Modify the contact 1. Choose the existed contact, click to edit. 2. Then modify the contact you need. 3. Click CONFIRM to save. -
Page 29: Delete The Contact
3.5.3 Delete the contact Choose the the existed contact you need to delete. Click to delete. 3.6 Call log Click Intercom, slide up and down to check the all call log in the marked box as shown below. 3.6.1 Modify the call log Choose one call log, click to modify the log. -
Page 30: Delete The Log
3.6.2 Delete the log Click in the corresponding log, choose Delete to remove the call log number. 3.7 Capture IT82 supports capture the visitor photo when incoming preview. IT82 can auto capture if ringing for 3 seconds without answer. 3.8 Message... -
Page 31: Live View
Unlock touch key to open the door during the call. Setup Unlock IT82 support unlock local door lock or remote unlock. And there are two unlock keys- softkey during the talking, physical unlock key. If you want to unlock the local door lock, choose the type as Relay. -
Page 32: Sos
IT82. Configuration DTMF code, please consult your administrator. 3.11 SOS SOS key is used to call out the emergency number in case of emergency. IT82 will call out for three predefined numbers in a loop, each number will be called for 60s (by default). -
Page 33: Security
Different alarm sensor is suitable for different type. For example , if you use the smoke detector in your bedroom(zoon1) , connect the sensor in IO1 and GND contact in IT82, then you can setup the type as Smoke. Trigger Mode depends on connecting mode . - Page 34 Return to the main interface, click Arming. Setup alarm delay, the alarm will ringing after the alarm has been triggered. Open or close Alarm Status to enable or disable this function. Enter Zone Status to check 8 alarm zones working mode.
- Page 35 When the alarm is triggered, click Cancel and input “0000” to disable it.
-
Page 36: Website
4 Website 4.1Web login The Akuvox IT82 uses DHCP IP address by default, go to the path: Settings-System Info-Network to check the IP address. Open a Web Browser, enter the corresponding IP address. Then, type the default user name and password to log in. The default User Name and Password are as... -
Page 37: Status
4.2 Status 4.2.1Basic Sections Description Product Information To display the device’s information such as Model name, MAC address (IP device’s physical address), Firmware version and Hardware firmware. Network Information To display the device’s Networking status(LAN Port),such as Port Type(which could be DHCP/Static/PPPoE), Link Status, IP Address, Subnet Mask, Gateway, Primary DNS server, Secondary DNS server, Primary NTP server and Secondary NTP server(NTP server is used to synchronize... -
Page 38: Account
4.3 Account 4.3.1 Basic Sections Description SIP Account To display and configure the specific Account settings. Status: To display register result. Display Label: Which is displayed on the phone’s LCD screen. Display Name: Which is sent to the other call party for ... - Page 39 automatically within registration period. Sections Description SIP Server 2 To display and configure Secondary SIP server settings. This is for redundancy, if registering to Primary SIP server fails,the IP phone will go to Secondary SIP server for registering. Note: Secondary SIP server is used for redundancy, it can be left blank if there is not redundancy SIP server in user’s environment.
-
Page 40: Advance
TCP: Reliable but less-efficient transport layer protocol. TLS: Secured and Reliable transport layer protocol. DNS-SRV: A DNS RR for specifying the location of services. To display and configure NAT(Net Address Translator) settings. STUN: Short for Simple Traversal of UDP over NATS, a ... - Page 41 Sections Description SIP Account To display current Account settings or to select which account to display. Audio Codecs To display and configure available/unavailable codecs list. Codec means coder-decoder which is used to transfer analog signal to digital signal or vice versa. Familiar codecs are PCMU(G711U), PCMA(G711A), G722 (wide-bandth codecs), G729 and so on.
- Page 42 Sections Description DTMF To display and configure DTMF settings. Type: Support Inband,Info, RFC2833 their combination. How To Notify DTMF: Only available when DTMF Type is Info. DTMF Payload: To configure payload type for DTMF. Note: By default, DTMF type is RFC2833 which is the standard.
- Page 43 provisional messages, this means it will send ACK every time the IP phone receives a provisional SIP message from SIP server. User=phone: If enabled, IP phone will send user=phone within SIP message. PTime: Interval time between two consecutive RTP ...
- Page 44 Sections Description Session Timer To display or configure session timer settings. Active: To enable or disable this feature, If enable, the ongoing call will be disconnected automatically once the session expired unless it’s been refreshed by UAC or UAS. Session Expire: Configure session expire time.
-
Page 45: Network
4.4 Network 4.4.1 Basic Sections Description LAN Port To display and configure LAN Port settings. DHCP: If selected, IP phone will get IP address, Subnet Mask, Default Gateway and DNS server address from DHCP server automatically. Static IP: If selected, you have to set IP address, Subnet ... -
Page 46: Phone
stream can use. 4.5 Phone 4.5.1 Time/Language Sections Description Web Language Choose the suitable web language you need. English by default. To configure NTP server related settings. Time Zone: To select local Time Zone for NTP server. Primary Server: To configure primary NTP server ... -
Page 47: Call Feature
4.5.2 Call Feature Sections Description Mode To enable or disable feature key sync. Feature Key Sync: To enable or disable feature key sync. Mode: Select the desired mode. Forward Transfer To display and configure Forward setting. Note: There are three types of forward: Always Forward, Busy Forward and No answer Forward. - Page 48 phone is busy. No answer Forward: Any incoming call will be forwarded if it’s no answer after a specific time. DND (Do Not Disturb) allows IP phones to ignore any incoming calls. DND Emergency: the phone from the Authorized ...
- Page 49 Sections Description Intercom Intercom allows user to establish a call directly with the callee. Active: To enable or disable Intercom feature. Intercom Mute: If enabled, once the call established, the callee will be muted. Remote Control Remote Control allows specific host to interact with IP phone by sending HTTP or HTTPS requests.
- Page 50 DTMF code. Door Phone When there is an incoming call from doorphone, setup the delay auto answer time, IT82 will auto answer the call after the timeout. Note: if you enable Auto Answer function, this feature will be not available.
-
Page 51: Audio
4.5.3 Audio Sections Description Echo Canceller Echo Canceller: To remove acoustic echo from a voice communication in order to improve the voice quality . VAD(Voice Activity Detection): Allow IP phone to detect the presence or absence of human speech during a call. -
Page 52: Video
background sound is consistent throughout the call and the listener does not think the line has released. Automatical Generation R48G will auto adjust amplification circuit gain via signal. Control Automatic Gain Control(Sending-side): Disabled by default Automatic Gain Control(Receiving-side): Disabled by ... -
Page 53: Phonebook
Enabled by default. Image Quality: User can select Low, Middle or High mode. Camera Priority: IT82 can connect extra camera. If R48G has 2 cameras , please setup the priority for external camera or internal one. Video Call Status ... - Page 54 Sections Description Contact To display and select local contact type. All Contacts: To display or edit all local contacts. Black List: To display black list contacts. Search To search designated contacts from local phonebook. Dial To dial out a call or hangup an ongoing call from Web UI. Note: For this feature, you need to have the remote control privilege to control IP phone via Web UI.
-
Page 55: Call Log
4.6.2 Call Log Sections Description Call History To display call history records. Available call history types are All calls, Dialed calls, Received calls, Missed calls, Forwarded calls. HangUp: To click to hangup ongoing call on the IP phone. Note: For “HangUp” feature, you need to have the remote control privilege to control IP phone via Web UI. -
Page 56: Upgrade
4.7 Upgrade 4.7.1 Basic Sections Description Firmware version To display firmware version, firmware version starts with MODEL name. Hardware Version To display Hardware version. Upgrade To select upgrading zip file from local or a remote server automatically. Note: Please make sure it’s right file format for right model. Reset to Factory Setting To enable you to reset IP phone’s setting to factory settings. -
Page 57: Advance
4.7.2 Advance Sections Description PNP Option To display and configure PNP setting for Auto Provisioning. PNP: Plug and Play, once PNP is enabled, the phone will send SIP subscription message to PNP server automatically to get Auto Provisioning server’s address. By default, this SIP message is sent to multicast address 224.0.1.75(PNP server address by standard). - Page 58 Sections Description Manual Auto To display and configure manual update server’s settings. URL: Auto provisioning server address. User name: Configure if server needs an username to access, otherwise left blank. Password: Configure if server needs a password to ...
- Page 59 Sections Description System Log To display syslog level and export syslog file. Syslog level:From level 0~7.The higher level means the more specific syslog is saved to a temporary file. By default, it’s level 3. Export Log: Click to export temporary syslog file to ...
-
Page 60: Security
Config file: To export or import configure file for IP phone. 4.8 Security 4.8.1 Basic Sections Description Web Password Modify To modify user’s password. Current Password: The current password you used. New Password: Input new password you intend to use. ... -
Page 61: Advance
4.8.2 Advance Sections Description Web Server Certificate To display or delete Certificate which is used when IP phone is connected from any incoming HTTPs request. Note: The default certificate could not be deleted. - Page 62 Sections Description Web Server Certificate To upload a certificate file which will be used as server Upload certificate. Client Certificate To display or delete Certificates which is used when IP phone is connecting to any HTTPs server. Client Certificate Upload To upload certificate files, this is used as client certificate.
Need help?
Do you have a question about the IT82 and is the answer not in the manual?
Questions and answers