Akuvox C315 Series Admin Manual
Indoor
Hide thumbs
Also See for C315 Series:
- Admin manual (144 pages) ,
- Manual (11 pages) ,
- Admin manual (112 pages)
Table of Contents
Advertisement
Advertisement
Table of Contents

Related Manuals for Akuvox C315 Series


Summary of Contents for Akuvox C315 Series
- Page 2 This manual applies to the 115.30.3.217 version, and it provides all the configurations for the functions and features of the C315 series indoor monitor. Please visit the Akuvox forum or consult technical support for any new information or the latest firmware.
- Page 3 Introduction of Icons and Symbols Note • Informative information and advice from the efficient use of the device. Useful information for the quick and efficient use of the device. ...
- Page 4 Related Documentation You are advised to refer to the related documents for more technical information via the link below: https://knowledge.akuvox.com...
-
Page 5: Table Of Contents
Content 1 Product Overview ........................9 2 Change Log..........................10 3 Model Difference ........................11 4 Introduction to Configuration Menu ................... 13 5 Access the Device ........................15 5.1 Device Start-up Network Selection ....................15 5.2 Device Home Screen Type Selection .................... 15 5.3 Accessing the Device Setting on the Device .................16 5.3.1 Accessing Device Basic Setting ....................16 5.3.2 Accessing Device Advanced Setting .................. - Page 6 9.1.3 Blocklist Settings on the Device ....................35 9.2 Phone Book Configuration on the Web Interface ................. 36 9.2.1 Contact Configuration .......................36 9.2.2 Contact Management ....................... 37 9.2.3 Block List Setting on the Web Interface ................... 37 9.2.4 Contact Display ......................... 38 9.2.5 Contacts Import and Export on the Web Interface ..............
- Page 7 12.10.2 Call Forwarding Configuration on the Web Interface ............62 13 Intercom Message Setting .......................63 13.1 Manage Messages ........................63 14 Audio& Video Codec Configuration for SIP Calls ............... 64 14.1 Audio Codec Configuration ......................64 14.2 Video Codec Configuration ......................65 15 Security..
- Page 8 18 Auto-provisioning via Configuration File .................. 93 18.1 Provisioning Principle......................... 93 18.2 Introduction to the Configuration Files for Auto-Provisioning ...........93 18.3 Autop Schedule ........................... 94 18.4 DHCP Provisioning Configuration ....................95 18.5 Static Provisioning Configuration ....................97 19 Device Integration with Third Party ..................99 19.1 Enter Applications Screen ......................
-
Page 9: Product Overview
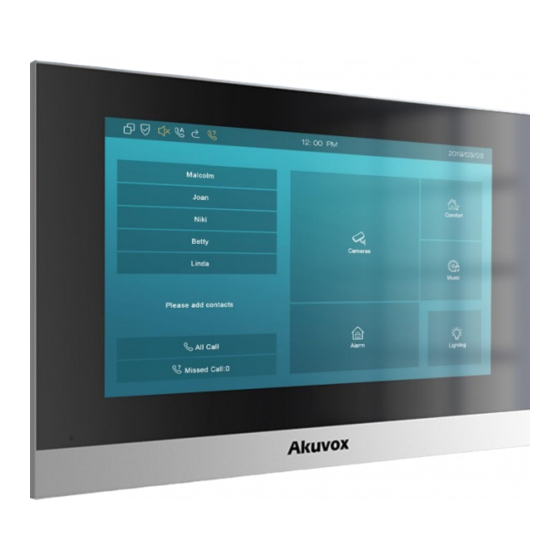
C315 Indoor Monitor Administraor Guide 1 Product Overview C315 series is an Android SIP-based with a smooth touch-screen indoor monitor. It can be connected with the Akuvox door phone for audio/video communication, unlocking, and monitoring. Residents can communicate with visitors via audio/video call, and it supports unlocking the door remotely. -
Page 10: Change Log
C315 Indoor Monitor Administraor Guide 2 Change Log The change log will be updated here along with the changes in the new software version. www.akuvox.com... -
Page 11: Model Difference
3 Model Difference Model C315X Feature Housing Material Plastics Android 6 Display 7 inch (176 mm) diagonal Resolution 1024*600 IEEE802.11b/g/n, @2.4GHz Wi-Fi Optional Bluetooth Ethernet 2xRJ45, 10/100Mbps adaptive Power Supply 12V DC connector 802.3af Power-over-Ethernet Alarm Input Relay Output www.akuvox.com... - Page 12 C315 Indoor Monitor Administraor Guide Installation Flush/Wall/Desk mounting Operation -10°C ~ +45°C Temperature Operation 10~90% Humidity Dimensions 200 x 132 x 17.5 mm (W x H x D) www.akuvox.com...
-
Page 13: Introduction To Configuration Menu
Mode selection: • Discovery mode: It is a plug and play configuration mode. Akuvox devices will configure themselves automatically when users power on the devices and connect them to the network. It is a super time-saving mode and it will greatly bring users convenience by reducing manual operations. - Page 14 It is a convenient tool for property managers to manage, operate, and maintain the community. Tool selection: Akuvox has many configuration tools for you to set up devices more conveniently. Here we list some common tools, please contact your administrator to get the tool if you need them.
-
Page 15: Access The Device
5 Access the Device 5.1 Device Start-up Network Selection Akuvox indoor monitor system settings can be either accessed on the device directly or on the device's web interface. After the device boots up initially, you are required to select the network connection for the device. -
Page 16: Accessing The Device Setting On The Device
5.3 Accessing the Device Setting on the Device 5.3.1 Accessing Device Basic Setting You can access the device's basic setting and advance setting where you can configure different types of functions as needed. To access the device's basic setting by pressing More > Settings. www.akuvox.com... -
Page 17: Accessing Device Advanced Setting
5.4 Access the Device Setting on the Web Interface You can also enter the device IP address on the web browser to log in to the device web interface by username and password admin/admin where you can configure and adjust www.akuvox.com... - Page 18 C315 Indoor Monitor Administraor Guide parameters, etc. www.akuvox.com...
- Page 19 C315 Indoor Monitor Administraor Guide • You can also obtain the device IP address using the Akuvox IP scanner to log in to the device web interface. Please refer to the URL below for the IP scanner application: https://knowledge.akuvox.com/docs/how-to-obtain-ip- address-via-ip-scanner-1?highlight=ip%20scanner Note •...
-
Page 20: Language And Time Setting
To configure the language display on the device Setting > Language screen. 6.1.2 Language Setting on the Web Interface To configure the language display on the device web Setting > Time/Lang interface. www.akuvox.com... -
Page 21: Time Setting
To set up time setting on the device Setting > Time screen. Parameter Set-up: • Automatic Date Time: NTP-based automatic date time is switched on by default, which allows the date& time to be automatically set up and synchronized with the www.akuvox.com... -
Page 22: Time Setting On The Device Web Interface
And when your time zone is selected, the device will automatically notify the NTP server of its time zone so that the NTP server can synchronize the time zone setting in your device. www.akuvox.com... - Page 23 C315 Indoor Monitor Administraor Guide Parameter Set-up: • NTP Server: enter the NTP server you obtained in the NTP server field. www.akuvox.com...
-
Page 24: Screen Display Setting
1 min, then the screen will be turned off automatically when the device has no operation for 1 min. • Screen Saver: tick the square box to enable the screen saver function. www.akuvox.com... - Page 25 SDMC Videos saver. Display videos from the indoor monitor as Local Videos the screen saver Display videos from SDMC and the door SDMC+Local Videos phone in rotation as the screen saver. Clock Display the clock as the screen saver. www.akuvox.com...
-
Page 26: Screen Display Setting On The Web Interface
C315 Indoor Monitor Administraor Guide 7.2 Screen Display Setting on the Web Interface C315 series indoor monitor allows you to enjoy a variety of screen displays to enrich your visual and operational experience through the customized setting to your preference. -
Page 27: Upload Screensaver
To upload screen saver on device web interface Phone >Display Setting > Screen Saver Setting. Parameter Set-up: • Screen Saver Pictures: select the existing screen saver pictures. • Screen Saver video: select the existing screen saver video. www.akuvox.com... -
Page 28: Upload Wall Paper
The pictures uploaded should be in JPG format with 2M maximum. 7.4 Upload Wall Paper You can customize your screen background picture on the device web Phone > Display Setting > Wallpaper interface to achieve the visual effect and experience you need for your personalized screen background display. www.akuvox.com... -
Page 29: Status Bar
The pictures uploaded should be in .png or .zip format. Upload Device Web Logo You can customize the web Logo on the upper left corner of the web interface if needed. To upload the web logo, go to Phone > Logo > Web Logo. www.akuvox.com... -
Page 30: Icon Screen Display Configuration
The pictures uploaded should be in .png format with 50K maximum. 7.8 Icon Screen Display Configuration C315 series indoor monitor allows you to customize icon display on the Home screen and More screen for the convenience of your operation on device web Phone > Key/Display interface. - Page 31 • Icons: click to select the picture to be uploaded as the icon to be displayed. Note • You can configure 4 icons in areas 1,2,3, and 4 on the home screen. • You can configure 6 icons on the More screen. www.akuvox.com...
-
Page 32: Sound And Volume Configuration
C315 Indoor Monitor Administraor Guide 8 Sound and Volume Configuration Akuvox C315 series indoor monitor provides you with various types of ringtones and volume configurations. You can configure them on the device directly or on the web interface. 8.1 Configure Volume on the Device To set up the volumes on the device Setting >... -
Page 33: Configure Volume On The Web Interface
• Doorbell Sound: select and upload your doorbell sound. • Doorbell Timeout: select and upload doorbell duration. (From 10sec.-5 min.) • Alarm Ringtone: select and upload the alarm ringtone. Note • Doorbell sound files and Alarm ringtone files to be uploaded must be .WAV or MP3 format. www.akuvox.com... -
Page 34: Phone Book Configuration
• Camera URL enter the RTSP URL for video preview. • Auto Ringtone: select the phone ringtone for incoming calls. • Account1: select which account to use to dial out, Account 1 or Account2. Note • The RTSP URL format is rtsp://device IP/live/ch00_0. www.akuvox.com... -
Page 35: Edit Contacts
9.1.3 Blocklist Settings on the Device You can choose from the contact list the contact you want to add to the block list Note • You can delete contacts regardless of whether it is on the All Contacts screen or the Blocklist screen. www.akuvox.com... -
Page 36: Phone Book Configuration On The Web Interface
Parameter Set-up: • Name: enter the contact name to be saved. • Number: enter the contact number ( SIP or IP number ) to be saved. • Group: select Default or Blocklist group. • Account: select Account1 or Account2. www.akuvox.com... -
Page 37: Contact Management
Contacts interface. 9.2.3 Block List Setting on the Web Interface You can set the blocklist directly in the contact list on the web Contacts > Local Contacts > Contacts List Setting interface or set it when editing a contact. www.akuvox.com... -
Page 38: Contact Display
• Contacts Sort By: there are three modes Default, ASCII code, and Created time mode for showing the contact list. • Show Local Contacts Only: if you enable the function, the contact on the device will only show the local phonebook, and the contact for discovery mode will be hidden. www.akuvox.com... -
Page 39: Contacts Import And Export On The Web Interface
When the contact becomes so many that you can not afford to manage each contact one by one manually, you can import and export the contacts in batch on the device web Contacts > Local Contacts interface. Note • The contact file can only be imported or exported in .xml or .csv format. www.akuvox.com... -
Page 40: Network Setting & Other Connection
• DHCP: select the DHCP mode by moving the toggle switch to the right. DHCP mode is the default network connection. If the DHCP mode is turned on, then the door phone will be assigned by the DHCP server with IP address, subnet mask, default gateway, and DNS server address automatically. www.akuvox.com... -
Page 41: Configuring Device Network Connection On The Web Interface
• You can press the System Info icon and then press the Network tab on the Settings screen to check the device network status. • The default system code is 123456. 10.1.2 Configuring Device Network Connection on the Web Interface To check the network on the web Status > Network information interface. www.akuvox.com... - Page 42 • LAN DNS1/2 Server: set up DNS (Domain Name Server) according to your actual network environment. Preferred DNS Server is the primary DNS server address while the Alternate DNS Server is the secondary server address and the door phone connects to the alternate DNS server when the preferred DNS server is unavailable. www.akuvox.com...
-
Page 43: Device Deployment In Network
C315 Indoor Monitor Administraor Guide 10.2 Device Deployment in Network Akuvox C315 series indoor monitor should be deployed before it can be properly configured in the network environment in terms of their location, operation mode, address and extension numbers as opposed to other devices for device control and the convenience of the management. -
Page 44: Device Bluetooth Setting
After indoor monitors turn on the Bluetooth on the devices More > Setting > Bluetooth screen, it can be paired with other device via Bluetooth. 10.4.2 Device Bluetooth Data Transmission To transfer data via Bluetooth by pressing Pair new device. www.akuvox.com... - Page 45 C315 Indoor Monitor Administraor Guide Note • After successful Bluetooth pairing, data transmission can be carried out. www.akuvox.com...
-
Page 46: Device Wi-Fi Setting
C315 Indoor Monitor Administraor Guide 10.5 Device Wi-Fi Setting In addition to a wired connection, the device also supports Wi-Fi connection. You can set the Wi-Fi on the device at More > Setting > Advance Settings >WLAN screen. www.akuvox.com... -
Page 47: Intercom Call Configuration
1-65535. If you enter any values within the range other than 5060, you are required to check if the value entered is consistent with the corresponding value on the device you wish to establish a data transmission with. www.akuvox.com... -
Page 48: Sip Call &Sip Call Configuration
11.3 SIP Account Registration C315 series indoor monitors support two SIP accounts that can all be registered according to your applications. For example, you can switch between the two SIP accounts. The SIP account can be configured on the device and on the device interface. -
Page 49: Sip Server Configuration
11.4 SIP Server Configuration SIP server can be set up for devices to achieve call sessions through an SIP server between intercom devices. To perform the SIP account setting on the Web Account > Basic > SIP Account Interface. Parameter Set-up: www.akuvox.com... -
Page 50: Outbound Proxy Server Configuration
• Alternate Outbound Proxy Server: set up backup server IP for the backup outbound proxy server. • Alternate Outbound Proxy Port: enter the port number for establishing call sessions via the backup outbound proxy server. www.akuvox.com... -
Page 51: Sip Call Dnd & Return Code Configuration
For the device network data transmission purpose, device needs to be set up with a range of RTP ports (Real-time Transport Protocol) for establishing an exclusive range of data transmission in the network. To set up device local RTP on web Network > Advanced > Local RTP interface. www.akuvox.com... -
Page 52: Data Transmission Type Configuration
• DNS-SRV: select DNS-SRV to obtain DNS record for specifying the location of services. And SRV not only records the server address but also the server port. Moreover, SRV can also be used to configure the priority and the weight of the server address. www.akuvox.com... -
Page 53: Call Setting
To enable or disable on web Account > Advanced > Call > Auto Answer interface. And set up the corresponding auto answer parameters on the web Phone > Call Feature > Others interface. Parameter Set-up: • Auto Answer: turn on the Auto Answer function by ticking the square box. www.akuvox.com... -
Page 54: Auto-Answer Allow List Setting
Therefore, you are required to configure or edit the numbers in the allow list on the web Security > Allowlist. SIP/IP numbers can be imported to or exported out of the indoor monitor in batch on web www.akuvox.com... -
Page 55: Live Stream Setting
• Receive the incoming calls in audio call so that you can see the caller in the one-way video conversation while the call can not see you. Note • Only devices with camera module will have this feature. www.akuvox.com... -
Page 56: Intercom Call Configuration
SDP in the 200 OK, and finally sends the media package time, that is, the Ptime value. To set it up, go to Account > Advanced >Call. Parameter Set-up: • PTime: you can disable the PTime feature. Or set up it from 10 to 60seconds. www.akuvox.com... -
Page 57: Sip Hacking Protection
Especially for the elders and children. Press the SOS key, the phone will automatically initiate the target SOS numbers. 12.7.1 SOS Number Display To display SOS softkey on web Phone > Key/Display > Home Page Display interface. The icon will be shown in the main interface or more interface after configuring. www.akuvox.com... -
Page 58: Sos Number Settings
• Loop Time: set up the call loop times. For example, if you set it as 3 times, then the call will be canceled automatically if the call is not answered before reaching the timeout three times. www.akuvox.com... -
Page 59: Rf Setting (Optional)
• Long Press: if you choose Unlock1/2/3 for long pressing which means when you press the pendant about 3s, it will send out an unlocking signal to the door phone during a call. 12.9 Multicast Configuration C315 allows you to conduct one-to-many broadcasting via multicast function on web Phone > Multicast interface. www.akuvox.com... - Page 60 • Listen List: to fill in the parameters of listen group. Indoor monitor will receive multicast calls if some indoor monitors call the listeninggroup. • Label: to show the label name on the calling interface if users establish all call. www.akuvox.com...
-
Page 61: Call Forwarding Setting
• No Answer Forwarding: To enable the no answer forwarding function; incoming calls will be forwarded to a specific number if the phone is not picked up within the no answer ring time. • Capture Path: select the storage location for all the captured pictures. www.akuvox.com... -
Page 62: Call Forwarding Configuration On The Web Interface
• Target Number: to enter the specific forwarding number if C315 enables always forwarding / busy forward / no answer forward. • No Answer Ring Time: set the no answer time interval from 0-120 seconds before the call is transferred to a designated number. www.akuvox.com... -
Page 63: Intercom Message Setting
Click New to create a new text message and Delete icon to delete the existing messages. Parameter Set-up: • New: press this icon to create a new message • Clear: press this icon to clear the messages that have been selected. www.akuvox.com... -
Page 64: Audio& Video Codec Configuration For Sip Calls
14 Audio& Video Codec Configuration for SIP Calls 14.1 Audio Codec Configuration Akuvox indoor monitor supports seven types of Codec (iLBC_13_3, iLBC_15_2, L16, PCMU, PCMA, G729, G722) for encoding and decoding the audio data during the call session. Each type of Codec varies in terms of sound quality. You can select the specific codec with different bandwidths and sample rates flexibly according to the actual network environment. -
Page 65: Video Codec Configuration
14.2 Video Codec Configuration C315 series supports VP8, H263, H264, H265 codec that provides a better video quality at a much lower bit rate with different video quality and payload. To do the configuration on web Account > Advanced > Video Codecs interface. Choose an available video codec and set up the codec parameters. - Page 66 While the default code bitrate is 2048. • Payload: select the payload type (ranging from 90-118) to configure audio/video configuration file. The default payload is 104. www.akuvox.com...
-
Page 67: Security
SIP number of the door phone in the device number and fill in the device name. Then set up the RTSP address. The RTSP format of the Akuvox door phone is rtsp://deviceIP/live/ ch00_0. You can enable or disable the display in the call. If enabled, when there is an incoming call from the monitor, the video will be displayed. - Page 68 • Destination URL: to set RTSP URL for the door phone. The RTSP format of the Akuvox door phone is rtsp://device IP/live/ch00_0 • User Name: to enter the username if required. • Password: to enter the password if required.
-
Page 69: Video Image Capturing
C315 Indoor Monitor Administraor Guide 15.1.2 Video Image Capturing To capture video image by pressing Capture during monitor or a video call. www.akuvox.com... -
Page 70: Rtsp Authentication
The alarm feature is used to connect some alarm detection devices to protect your home's safety. Akuvox indoor monitors support 8 alarm connectors which means you can connect 8 different alarm sensors in different rooms of your house. For example, by connecting a smoker sensor in your kitchen to detect if the gas is leaking, the indoor monitor will ring and send the alarm message to the target, like community property. -
Page 71: Configure Alarm And Arming On The Device
15.3.1 Configure Alarm and Arming on the Device To configure the arming and disarm code on device Advance Settings > Arming/Disarm Code screen. Change the current password and save it. To check the zone status on Arming > Zone Status screen. www.akuvox.com... -
Page 72: Configure Alarm And Arming On The Web Interface
Bedroom, Gate, Door, Guest room, Hall, Window, Balcony, Kitchen, Study, and Bathroom. • Zone Type: set up the alarm sensor types (Infrared, Drmagnet, Smoke, Gas, and Urgency). • Trigger Mode: set sensor trigger mode between NC and NO according to yourneed. www.akuvox.com... -
Page 73: Configure Location-Based Alarm
• Zone type: to select the type of detection device, including Infrared, Drmagnet, Smoke, Gas, and Urgency. • Defence delay: it means when users enable the arming mode, there will be90 seconds delay time for the alarm mode to be activated. www.akuvox.com... -
Page 74: Configure Alarm Text
Enter the alarm text for the alarm at each location according to your need. 15.3.5 Configure Arming mode To switch arming mode, disarm the alarm on the Arming screen by pressing their respective icons. Press Disarm icon if you want to clear the Arming Mode. www.akuvox.com... -
Page 75: Configure Alarm Ringtone
• The file format of the customized ringtone should be .wav. 15.3.7 Alarm Action Configuration The triggering of the alarm sensor can be accompanied by the actions you configured in the forms of HTTP command, SIP Message, Call, and Local Relay for different security purposes. www.akuvox.com... - Page 76 C315 Indoor Monitor Administraor Guide 15.3.7.1 Select Alarm Action Types Select and set up actions on web Arming > Alarm Action interface. www.akuvox.com...
- Page 77 Then enter the HTTP command provided by the manufacturer of the device on which the action is to be carried out. To set it up go to Arming > Alarm Action > HTTP Command Setting. www.akuvox.com...
- Page 78 To set up the SIP message action receiver on the same web interface. Enter the SIP account to which you want to send the configured SIP message as an action when the alarm is triggered. To set it up go to Arming > Alarm Action > Receiver Of SIP Message. www.akuvox.com...
- Page 79 15.3.7.4 Configure Alarm Action via SIP Call To set up the call action, you can enter the SIP or IP number of the device to be called as an action, then enable Alarm Siren for the arming zone as needed. www.akuvox.com...
-
Page 80: Check Alarm Log
Screen Unlock Setting You can enable the screen lock function directly on the device More > Setting > Display screen. The device screen will be locked over sleep time. You are required to wake up the device through a PIN code. www.akuvox.com... -
Page 81: Screen Unlock By Pin Code
C315 Indoor Monitor Administraor Guide 15.4.1 Screen Unlock by PIN Code You can unlock the device screen by entering the pre-configured PIN code when the screen is locked. Note • The default unlocks PIN is 123456. www.akuvox.com... -
Page 82: Voice Encryption
15.5 Voice Encryption The encryption function provides you with greater security for the intercom call. And Akuvox indoor monitors support three modes of voice encryption: SRTP(Compulsory), SRTP(Optional), ZRTP(Optional) on web Account > Advanced > Encryption interface. Parameter Set-up: • Voice Encryption: select encryption mode from four options. If you select disable it, the call will not be encrypted. -
Page 83: Location
• Disabled: select Disabled if you do not allow any app to find your device location. • Only Device: the device location can be determined using GPS • High Accuracy: the device location can be determined via WAN, Bluetooth, or cellular networks. www.akuvox.com... -
Page 84: Client Certificate Setting
• Client Certificate: when Akuvox IP Phone required an SSL connection with a server, the phone must verify the server to make sure it can be trusted. And the server will send its certificate to the Akuvox IP Phone. Then the phone will verify this certificate according to the client certificate list. -
Page 85: Web Server Certificate
C315 Indoor Monitor Administraor Guide 15.8.1 Web Server Certificate To upload Web Server certificate on the device web interface Security > Advanced > Web Server Certificate. 15.8.2 Client Certificate To upload and configure client certificates on the same page. Parameter Set-up: www.akuvox.com... -
Page 86: Power Output Setting
15.9 Power Output Setting The indoor monitor can serve as a power supply to the Akuvox E10 door phone. You can enable the power output, then connect the E10 to the RJ45 port on the indoor monitor. To enable it, go to Device Setting > Basic > Power Output Setting. -
Page 87: Door Access Control Configuration
16.1 Relay Switch Setting 16.1.1 Local Relay Setting Local relays in Akuvox indoor monitor can be used to trigger the relay for the door access and trigger the chime bell as needed in different scenarios. You can do this configuration on web Phone >... -
Page 88: Remote Relay Switch Setting
16.2 Web Relay Setting In addition to the relay that is connected to indoor monitor, you can also control the door access using the network-based web relay. To do this configuration on web Phone > Relay > Web Relay interface. www.akuvox.com... -
Page 89: Door Unlock Configuration
DTMF code on the soft keypad or press DTMF code attached unlock tab on the screen to unlock the door for visitors etc., during acall. Parameter Set-up: • Type: select DTMF type among four options: Inband, RFC2833, Info+Inband and Info+RFC2833 according to your need. www.akuvox.com... -
Page 90: Door Unlock Via Http Command
• Password: enter the device password to be used as part of the HTTP command to trigger the local relay. Please refer to the following example: http://192.168.35.127/ fcgi/do?action=OpenDoor&UserName=admin&Password=12345&DoorNum=1 Note • DoorNum in the HTTP command above refers to the relay number #1 to be triggered. www.akuvox.com... -
Page 91: Lift Control
When the lift controller receives the HTTP command, it will give feedback on the current lift status with a prompt. To do this configuration on web Phone > Lift> Hints interface. Edit the HTTP Status Code, which is the feedback code from the Lift controlboard. www.akuvox.com... - Page 92 C315 Indoor Monitor Administraor Guide If there are huge amounts of prompts that need to be added, you can click Export tab to export a template, after editing to import/export. www.akuvox.com...
-
Page 93: Auto-Provisioning Via Configuration File
Auto-provisioning is a feature used to configure or upgrade devices in batch via third-party servers. DHCP, PNP, TFTP, FTP, and HTTPS are the protocols used by the Akuvox intercom devices to access the URL of the address of the third-party server which stores configuration files and firmware, which will then be used to update the firmware and the corresponding parameters on the door phone. -
Page 94: Autop Schedule
18.3 Autop Schedule Akuvox provides you with different Autop methods that enable the indoor monitor to perform provisioning for itself in a specific time according to your schedule. To set up the schedule on the device web Upgrade > Advanced > Automatic Autop interface. -
Page 95: Dhcp Provisioning Configuration
DHCP server for a specific DHCP option code. If you want to use Custom Option as defined by users with option code (range from 128-255), you are required to configure DHCP Custom Option on the web Upgrade > Advanced > Automatic Autop interface. www.akuvox.com... - Page 96 Option 66 for getting the upgraded server URL. This is done within the software and the user does not need to specify this. To make it work, you need to configure the DHCP server for option 66 with the updated server URL in it. www.akuvox.com...
-
Page 97: Static Provisioning Configuration
In addition, TFTP, FTP, HTTP, and HTTPS are the protocols that can be used for upgrading the device firmware and configuration. Parameter Set-up: www.akuvox.com... - Page 98 • HTTP: http://192.168.0.19/ (use the default port 80) • http://192.168.0.19:8080/ (use other ports, such as 8080) • HTTPS: https://192.168.0.19/ (use the default port 443) • Akuvox does not provide user specified server. • Please prepare TFTP/FTP/HTTP/HTTPS server by yourself. www.akuvox.com...
-
Page 99: Device Integration With Third Party
The content of this part mainly teaches you how to enter the APK interface through hidden operations. To do the configuration on device Settings > System Info interface. You can press on User Mode 10 times and press Admin Mode and press Confirm for confirmation. www.akuvox.com... -
Page 100: Install Third-Party App
To configure the installed third-party app on web Phone > Key/Display > Third Party APK Control, you can click App Name field to select the specific name of the installed APK files for configuration. Then tick the check boxes of each field for the specific configuration you need. www.akuvox.com... -
Page 101: Smart Living Setting
• Show App Icon: tick the box if you want the app icon to be displayed on the screen. 19.3 Smart Living Setting You can control the home sensor through an HTTP command on the device web interface Phone > Smart Living. www.akuvox.com... -
Page 102: Display Third-Party Webpage After Booting Up
Third-party Integration via API To allow the third-party devices to integrate with the indoor monitor, you need to set up API authentication by setting up a username and password. You also need to select the authentication code for the API-based integration. www.akuvox.com... - Page 103 Before the API integration, you need to enable the API permission and create allow list by entering the location and IP address of the device to be integrated with the indoor monitor. To set it up, go to Security > Allowlist. www.akuvox.com...
- Page 104 C315 Indoor Monitor Administraor Guide www.akuvox.com...
-
Page 105: Firmware Upgrade
Firmwares of different versions for the indoor monitors can be upgraded on the device web Upgrade > Basic interface. 20.1 Backup Configuration files can be imported to or exported out of the device to your local PC on the device web Upgrade > Advanced > Others interface if needed. www.akuvox.com... -
Page 106: Password Modification
This password is used to enter the advance settings of the device, including password settings, account numbers, SOS numbers, network settings, etc. To modify the advanced setting password on the device Advanced Settings > Setting Code screen. The default password is 123456. www.akuvox.com... -
Page 107: Modify Device Web Interface Password
This password is used to lock the browser on the device in case someone abuses the browser for any unwanted application. You can do this configuration on device Advance Settings > App Protected Code screen. The default password is 123456. www.akuvox.com... -
Page 108: System Reboot&Reset
22.1.2 Reboot on the Web Interface If you want to reboot the device system, you can operate it on the device web Upgrade > Basic interface as well. Moreover, you can set up a schedule for the device to be restarted. www.akuvox.com... -
Page 109: Reset
If you want to reset the whole device system to the factory setting, you can operate it directly on the device Advance Settings > Reset screen. If you only want to reset the configuration file to the factory setting instead of the whole device system, you can press Reset Config To Factory Setting tab. www.akuvox.com... -
Page 110: Reset On The Web Interface
The device system can also be reset on device web Upgrade > Basic interface without approaching the device. If you only want to reset the configuration file to the factory setting, you can click Reset Config on the same page. www.akuvox.com... -
Page 111: Logs
> Call Log interface and export the call log from the device if needed. Parameter Set-up: • Capture Delay: set the image capturing starting time when the device goes into video preview. • Upper Limit: set the maximum screenshot storage capacity, when the capacity is reached the previous screenshots would be overwritten. www.akuvox.com... - Page 112 C315 Indoor Monitor Administraor Guide • Call History: select call history among four options: All, Dialed, Received, and Missed for the specific type of call log to be displayed. www.akuvox.com...
-
Page 113: Debug
Upgrade > Advanced > System Log interface. Parameter Set-up: • LogLevel: select log levels from 1 to 7 levels. You will be instructed by Akuvox technical staff about the specific log level to be entered for debugging purpose. The default log level is 3, the higher the level is, the more complete the log is. -
Page 114: Pcap For Debugging
C315 Indoor Monitor Administraor Guide 24.2 PCAP for Debugging PCAP in Akuvox indoor monitor is used to capture the data package going in and out of the devices for debugging and troubleshooting purpose. You can set up the PCAP on the device web Upgrade >... -
Page 115: Screenshots
C315 Indoor Monitor Administraor Guide 24.4 Screenshots You can take a screenshot of the specific device screen to help with the troubleshooting and so on if needed. To take screenshots, go to Upgrade > Diagnosis > Screenshots, then click Screenshots. www.akuvox.com... -
Page 116: Abbreviations
LCD: Liquid Crystal Display LED: Light Emitting Diode MAX: Maximum POE: Power Over Ethernet PCMA: Pulse Code Modulation A-Law PCMU: Pulse Code Modulation µ-Law PCAP: Packet Capture PNP: Plug and Play RFID: Radio Frequency Identification RTP: Real-time Transport Protocol www.akuvox.com... - Page 117 SNMP: Simple Mail Transfer Protocol SDMC: SIP Devices Management Center TR069: Technical Report069 TCP: Transmission ControlProtocol TLS: Transport Layer Security TFTP: Trivial File Transfer Protocol UDP: User Datagram Protocol URL: Uniform Resource Locator VLAN: Virtual Local Area Network WG: Wiegand www.akuvox.com...
-
Page 118: Faq
A1: You can use the display screen to get the IP information, just check the IP address at setting, basic info. You can also use Akuvox IP Scanner to search Akuvox devices in the same LAN network. Q2: Do Akuvox devices support opus codec? A2: For now, only Akuvox Android video IP phone R48G can support Opus audio codec. -
Page 119: Contact Us
C315 Indoor Monitor Administraor Guide Contact US For more information about the product, please visit us atwww.akuvox.com or feel free to contact us by Sales email: sales@akuvox.com Technical support email: support@akuvox.com Telephone: +86-592-2133061 ext.7694/8162 We highly appreciate your feedback about our products.
Need help?
Do you have a question about the C315 Series and is the answer not in the manual?
Questions and answers
my akuvox monitor is no longer connected to the network.Model C315S
To reconnect your Akuvox C315S monitor to the network, go to the Configuration Menu and select the "Network" section. There, you can configure DHCP or Static IP settings and adjust RTP port settings as needed. Ensure proper connection to either Ethernet (RJ45) or Wi-Fi, depending on your setup.
This answer is automatically generated