Table of Contents
Advertisement
Quick Links
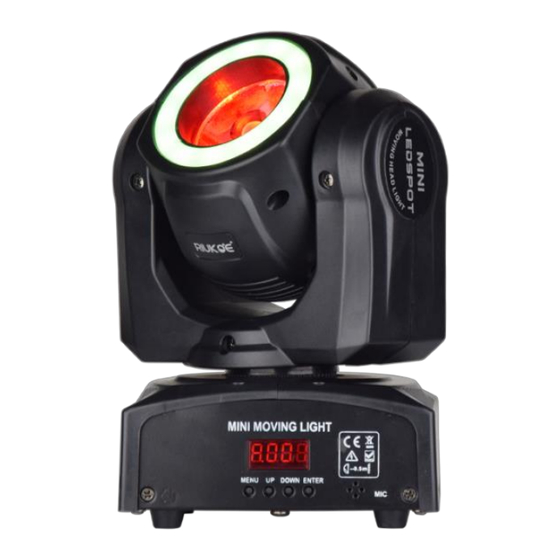
60W LED Beam With Ring Effect
This product manual contains important information about the safe installation and
use of this projector. Please read and follow these instructions carefully and keep
this manual in a safe place for future reference.
User manual
Please read the instructions carefully before use
(ML-BR60)
Advertisement
Table of Contents

Subscribe to Our Youtube Channel
Related Manuals for RIUKOE ML-BR60


Summary of Contents for RIUKOE ML-BR60
- Page 1 60W LED Beam With Ring Effect (ML-BR60) This product manual contains important information about the safe installation and use of this projector. Please read and follow these instructions carefully and keep this manual in a safe place for future reference.
-
Page 2: Table Of Contents
INDEX 1.STATEMENT ..................... 2 2.ACCESSORIES ..................2 3.SAFETY INSTRUCTION................2 4.INSTALLATION ..................4 5.DMX CONNECTION ................. 5 6.TECHNICAL SPECIFICATION..............6 7.CONTROL SYSTEM ................. 7 8.TROUBELSHOOTING ................9 9.CLEANING AND MAINTENANCE ............11... -
Page 3: Statement
1.STATEMENT Thank you for choosing RIUKOE. The product has well capability and intact packing when leave factory. All of the user should comply with warning item and manual, any misuse cause of the damages are not included guarantee, also cannot responsible malfunction &... - Page 4 Review the following safety precautions carefully before installing or operating the fixture. This fixture must be installed in accordance with the applicable installation code by a person familiar with the construction and operation of the fixture and the hazards involved. Preventing electric shock WARNING! Risk of electric shock.
-
Page 5: Installation
Avoid personal injury WARNING! Take measure to prevent personal injury. Do not look directly at the light source from close range. ⚫ Take precautions to prevent injury due to falls when working at height. ⚫ For permanent installation, ensure that the fixture is securely fastened to ⚫... -
Page 6: Dmx Connection
5.DMX CONNECTION DMX-512 control connection: Connect the provided XLR cable to the female 3-pin XLR output of your controller and the other side to the male 3-pin XLR input of the moving head. You can chain multiple Moving head together through serial linking. The cable needed should be two core, screened cable with XLR input and output connectors. -
Page 7: Technical Specification
6.TECHNICAL SPECIFICATION Power Supply - Voltage:AC90-240V,50/60Hz - Power:90W Light Source - Lamp source:60W RGBW 4in1 LED + 12pcs RGB 3IN1 SMD 5050 LED - Beam Angle:4° Protocols - Control Mode:DMX512/Maser/Auto/Sound - DMX Channel:15/13 DMX Channels Movement - X-axis: 540° (16-bit) motor correction - Y-axis: 270°... -
Page 8: Control System
7.CONTROL SYSTEM 7.1 Display Main Function Turn on the unit, press the MENU button into menu mode, and press the UP/DOWN button until the required function is shown on the monitor. Select the function by the ENTER button. Use the UP/DOWN button to choose the submenu, press the ENTER button to store and automatically return to the last menu. - Page 9 adjustment X motor forward rotation rPAN X motor reverse rotation Y motor forward rotation rTiL Y motor reverse rotation After 5 seconds led display close Display keep ON REST System reset 7.2 CHANNEL DESCRIPTION: 15 CH 13 CH Function Description 0-255 Pan Low 0-255...
-
Page 10: Troubelshooting
Reset 250-255 ( 5 seconds ) no function Light belt effect 5-109 choose color 110-255 auto run 8.TROUBELSHOOTING Following are a few common problems that may occur during operation. Here are some suggestions for easy troubleshooting: A. The unit does not work, no light and the fan does not work 1. - Page 11 2. The motor’s drive IC on the PCB might be out of condition. D. The lamp is cutting out intermittently 1. The lamp is not working well. Check the mains voltage either too high or too low. 2. Internal temperature may be too high. Check if replacement of fan is needed on the head.
-
Page 12: Cleaning And Maintenance
9.CLEANING AND MAINTENANCE Following are a few common problems that may occur during operation. Here are some suggestions for easy troubleshooting: CLEANING Frequent cleaning is recommended to insure proper function, optimized light output, and an extended life. The frequency of cleaning depends on the environment in which the fixture operates: damp, smoky or particularly dirty environments can cause greater accumulation of dirt on the fixture’s optics. - Page 13 A detailed electric check by an approved electrical engineer every • three months, to make sure the circuit contacts are in good condition and prevent overheating. Be sure all screws and fasteners are securely tightened at all times. • Lose screws may fall out during normal operation resulting in damage or injury as larger parts could fall.
- Page 14 Add: No.619 Building C Jiahua Square Yingbin Avenue Guangzhou China +86-20-2904 6476 info@ricostagelight.com YouTube www.riukoe.com Facebook...
Need help?
Do you have a question about the ML-BR60 and is the answer not in the manual?
Questions and answers