
Related Manuals for Schiller FRED easyport plus


Summary of Contents for Schiller FRED easyport plus
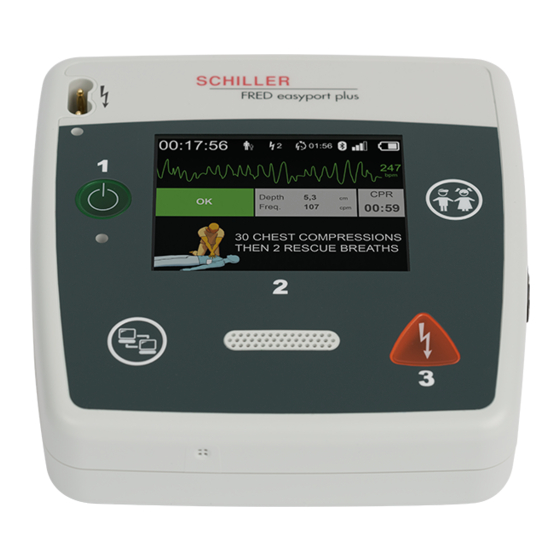
- Page 1 ® ® FRED easyport plus Automated external defibrillator (AED) Depth CPR OK 00:59 Rate /min User Guide...
- Page 2 Sales and service information The SCHILLER sales and service centre network is world-wide. For the address of your local distributor, contact your nearest SCHILLER subsidiary. In case of difficulty, a complete list of all distributors and subsidiaries is provided on our internet site: http://www.schiller.ch...
-
Page 3: Table Of Contents
2.2.1 Available versions ................18 2.2.2 Overview of the configurable settings ..........18 Operating and Display Elements ........19 2.3.1 Overview FRED easyport plus ............19 2.3.2 FRED easyport plus with bag............20 Display................. 21 Functions ................22 2.5.1 Automatic Self-test ................22 2.5.2... - Page 4 ® ® FRED easyport plus Initial operation ........24 Batteries ................24 3.1.1 General information and safety notes ..........24 3.1.2 Battery replacement................. 25 3.1.3 Switching device On and Off............25 Battery monitoring.............. 26 3.2.1 Sufficient battery capacity indication while the device is switched off ..................
- Page 5 ® ® User Guide FRED easyport plus Maintenance ..........51 Maintenance Intervals ............51 7.1.1 Service/Shelf life ................52 7.1.2 Visual inspection of the device and accessories......53 7.1.3 Functional check ................54 7.1.4 Maintenance of the rechargeable Li-Ion battery....... 54 7.1.5 Maintenance of the non rechargeable Lithium/MnO2 battery ..
- Page 6 ® ® FRED easyport plus Index ............82 Appendix - Symbols .......83 Page 6...
-
Page 7: Safety Notes
FRED easyport plus with manual override or in monitoring mode. Intended Use The FRED easyport plus is a defibrillator with the possibility to deliver a shock either in semi-automatic, fully-automatic or manual mode. FRED easyport plus® is intended to be used to terminate cardiac arrhythmia such as Ventricular Fibrillation or Ventricular Tachycardia with a defibrillation shock. -
Page 8: Contraindication For Use
Properly dispose of the packaging material and make sure it is out of children's reach. The FRED easyport plus is an emergency device and must be ready for operation at any time and in all situations. Make sure that: –... -
Page 9: Organisational Measures
(see section 8.7). Avoid using such devices or keep a sufficient distance from them. FRED easyport plus is not intended to be operated while using high-frequency surgical devices. Interference with other devices - The charging of energy and the release of the defibrillation impulse can disturb other devices. -
Page 10: Maintenance And Cleaning
Do not, under any circumstances, immerse the device or cable assemblies in liquid. To ensure patient safety, only use original SCHILLER accessories. The user is responsible for the use of third-party accessories. The warranty does not cover damage resulting from the use of accessories or consumables other than those marketed by SCHILLER. -
Page 11: Additional Terms
1.13.2 Terms of Warranty Your SCHILLER FRED easyport plus is warranted against defects in material and manufacture according the general terms of condition. Excluded from this warranty is damage caused by an accident or as a result of improper handling. The warranty entitles to free replacement of the defective part. -
Page 12: Symbols/Indicators
Safety Notes ® ® 1.14 Symbols/Indicators FRED easyport plus 1.14 Symbols/Indicators 1.14.1 Symbols used in this user guide The safety levels are classified according to ANSI Z535.6. The following overview shows the safety symbols and pictograms used in this user guide. The terms Danger, Warning, and Caution are used in this User Guide to point out potential dangers and to indicate risk levels. -
Page 13: Symbols Used On The Device
ECG data. The user can take the following measures to prevent electromagnetic interferences: • Increase the distance between the disturbed device and the FRED easyport plus. A minimum distance of 20 cm must be kept between the device and a pacemaker. -
Page 14: Symbols Used On The Batteries
Safety Notes ® ® 1.14 Symbols/Indicators FRED easyport plus 1.14.3 Symbols used on the batteries For general used symbols see 10 Appendix - Symbols Caution: Consult the warning and safety information in the instructions for use! Do not incinerate Do not crush Do not saw Rechargeable Li-Ion battery 60°C... -
Page 15: Symbols Used On The Electrode Packaging
Safety Notes ® ® User Guide Symbols/Indicators 1.14 FRED easyport plus 1.14.5 Symbols used on the electrode packaging General used symbols see 10 Appendix - Symbols. Reading the instruction for use is mandatory before using the electrodes! Do not bend packing Don’t use if the packaging is damaged Disposable item;... -
Page 16: Components And Operation
AEDs to an Emergency Medical Technician or First Responders after they have undergone special training. Professional use For the professional use, the FRED easyport plus offers an AED with ECG display, an optional data transfer and a manual override. Biocompatibility... -
Page 17: Design
During the intervention, data can therefore be saved, including the analysed ECG data. In addition, technical data (logs) will be stored. Data transmission • The FRED easyport plus has a USB host connection in order to – retrieve data via USB memory stick – perform software and configuration updates –... -
Page 18: Available Versions
Modification in the password-protected menus is only allowed by authorised users. Any unauthorized modification may endanger the patient. SCHILLER's service centre can configure the following password-protected parameters: Configurable device parameters Detail see Password required •... -
Page 19: Operating And Display Elements
(12) Ambient light sensor To ensure patient safety – only use original SCHILLER electrodes (3) – connect only the LifePoint sensor to the USB port (6) – connect only USB memory stick to USB port (6), when device is not in use. -
Page 20: Fred Easyport Plus With Bag
Operating and Display Elements FRED easyport plus 2.3.2 FRED easyport plus with bag (1) RTU LED (Ready -to-use LED) transparent window (2) Defibrillation electrode compartment (3) Scissor and razor compartment (4) Connection ARGUS LifePoint CPR feedback sensor (USB Port) (5) ARGUS LifePoint compartment... -
Page 21: Display
Components and Operation ® ® User Guide Display FRED easyport plus Display The following information is displayed on the LCD: Depth CPR OK 00:59 Rate /min 30 CHEST COMPRESSIONS THEN 2 RESCUE BREATHS (1) Time passed since the device has been switched on (2) Selected patient type: = Adult = Child... -
Page 22: Functions
3. Test in progress is displayed on the top of the display. Self-Test passed 4. If a connection via network to the Schiller data Management server (SDM) exist, select "Upload Selftest" to upload result of the test to the SDM server. -
Page 23: Defibrillation Procedure
The analysis takes approximately 16 seconds. If a shock is advised, a countdown accompanies the last 3 seconds before the shock is automatically delivered. The FRED easyport plus runs in man- The basic functions are the same as for the semi-automatic mode. In addition, the ual mode: manual mode can be activated. -
Page 24: Initial Operation
The protective cover must only be removed when the battery is used. Do not expose the FRED easyport plus to direct sunlight or to extreme hot or cold. An ambient temperature higher than 25°C has an adverse effect on the battery life. -
Page 25: Battery Replacement
Initial operation ® ® User Guide Batteries FRED easyport plus 3.1.2 Battery replacement Always keep a new spare battery on hand (observe the expiration date). Always check that the rechargeable Li-Ion battery is fully charged before inserting. If only one LED is flashing twice every second (quick flashing) the capacity is below 10%. -
Page 26: Battery Monitoring
– use self-test interval daily or weekly and – always keep a new spare full battery on hand The RTU LED on the FRED easyport plus is blinking green when the battery capacity is sufficient to perform the resuscitation protocol with approx. 5 shocks at max energy. -
Page 27: Battery Depleted During Use, Limited Mode (Cpr)
Initial operation ® ® User Guide Battery monitoring FRED easyport plus 3.2.3 Battery depleted during use, limited mode (CPR) Patient hazard — Defibrillation is no longer possible if a depleted battery is detected. The battery needs to be replaced immediately. If a depleted battery is detected while the device is in use, the device will show after Battery Low the “Low battery”... -
Page 28: Ensuring Operational Readiness
Initial operation ® ® Battery monitoring FRED easyport plus 3.2.5 Ensuring Operational Readiness • Do not expose the device to direct sunlight, or extremely high or low temperatures. The ambient temperature should be in the range of -5°C to 50 °C. Lower or higher ambient temperatures will have a negative impact on the battery's life or on the electrodes. -
Page 29: Defibrillation
Instructions and Safety Notes 4.1.1 Instructions • The FRED easyport plus is a high-voltage electrotherapy device. Only personnel au- thorised by local law are permitted to use these devices. Improper use can endanger life. • Non medical personnel is only permitted to use an AED such as the FRED easyport plus if local law approves of this practice. - Page 30 Defibrillation ® ® Instructions and Safety Notes FRED easyport plus Shock hazard — for user and assistants Position the patient flat on a firm, electrically insulated surface. Make sure that there are no conductive connections between the patient and other persons during ECG analysis and defibrillation.
-
Page 31: Defibrillating Children
Defibrillation ® ® User Guide Instructions and Safety Notes FRED easyport plus 4.1.3 Defibrillating children For the defibrillation of children, the paediatric pads should be used. If no paediatric pads are available adult electrodes can be used when patient type “Child”... -
Page 32: Applying The Adhesive Electrodes
Defibrillation ® ® Applying the adhesive electrodes FRED easyport plus Applying the adhesive electrodes Do not reuse the pads . If reused, the electrical properties may be insufficient, which could lead to patient injury. Only use the pads up to their expiration date. Please note that the indicated expiration date only applies if the vacuum pack is intact. -
Page 33: Unpacking And Applying Electrodes
Defibrillation ® ® User Guide Applying the adhesive electrodes FRED easyport plus 4.2.2 Unpacking and applying electrodes Risks for the user and the patient — The packaging of pre-connected electrodes is welded to the electrode cable. Do not remove the packaging from the electrode cable (risk of damaging the cable). -
Page 34: Applying The Electrodes To The Patient's Chest
Defibrillation ® ® Applying the adhesive electrodes FRED easyport plus 4.2.3 Applying the electrodes to the patient’s chest Skin covered with sea water, sand, sunscreen, or skin or body care products may impair electrode contact or cause the electrodes to become disconnected. Adult and paediatric electrodes Adult electrodes 80 cm The adult electrodes with the blue connector are used for adults and children... -
Page 35: Checking The Electrodes
Defibrillation ® ® User Guide Applying the adhesive electrodes FRED easyport plus 4.2.4 Checking the electrodes If the resistance (impedance) reaches an unacceptable value, the device interrupts and prompts the user to check the electrode application; in addition, the orange indicator is on. -
Page 36: Semi-Automatic Defibrillation
Defibrillation ® ® Semi-automatic defibrillation FRED easyport plus Semi-automatic defibrillation Patient hazard — The guidelines given in 4.1 Instructions and Safety Notes must be observed. Always follow the written instructions and the picture on the monitor, as the spoken instructions may not be understood in a noisy environment. - Page 37 Defibrillation ® ® User Guide Semi-automatic defibrillation FRED easyport plus Step 3 Shock delivery When the energy is charged, the user is prompted to trigger the shock by pressing the illuminated orange button. Shock hazard! Do not, under any circumstances, touch the patient during shock delivery. ...
-
Page 38: Automatic Defibrillation
• ECG curve (when configured) • CPR feedback when using LifePoint sensor If a shock is advised, the energy is automatically charged. A countdown accompanies the last 3 seconds before the shock is delivered. FRED easyport plus Fig. 4.6 Auto- matic 4.4.2... -
Page 39: Automatic Defibrillation Procedure
Defibrillation ® ® User Guide Automatic defibrillation FRED easyport plus 4.4.3 Automatic defibrillation procedure Depending on the configuration of the device, the instruction provided by the device in step 4 can follow directly after step 1 if the "Start with Analysis” parameter is set to “No”. - Page 40 Defibrillation ® ® Automatic defibrillation FRED easyport plus Step 3 Automatic shock delivery As soon as the energy charge is completed, the device automatically delivers the shock, without user intervention. SHOCK ADVISED!” and “WARNING! SHOCK!” is displayed on the screen, the flash symbol lights up and a voice countdown 3..2..1 is issued before the shock is delivered.
-
Page 41: Defibrillation In Manual Mode
• The device cannot be switched over to the manual mode during the defibrillation process (analysis, charging, shock release). • To operate the FRED easyport plus in semi-automatic mode again, it must be shut off and on again. Switch the device on by pressing the green button Simultaneously press the Data transfer (COM) button and the shock button. -
Page 42: Shock Delivery In Manual Mode
Defibrillation ® ® Defibrillation in manual mode FRED easyport plus 4.5.2 Shock delivery in manual mode Danger to the patient! Before you release the shock, check the displayed ECG curve to make sure that a shockable rhythm is present. ... -
Page 43: Monitoring Mode
During analysing phase, it is not possible to select this mode. Note: Programming “Auto switch” off is disabled in this mode. Procedure The procedure is valid for all FRED easyport plus versions; therefore, buttons can have different colours. 1. Normal procedure for applying Defibrillation pads as described in this manual. -
Page 44: Finishing The Therapy
Defibrillation ® ® Finishing the therapy FRED easyport plus Finishing the therapy Switch the device off as soon as the therapy is finished by pressing the button for 3 seconds. Disconnect the electrode cable. Adhesive electrodes and adhesive – Carefully remove the electrodes or adhesive pad (LifePoint) from the patient's skin. -
Page 45: Argus Lifepoint
Defibrillation ® ® User Guide ARGUS LifePoint FRED easyport plus ARGUS LifePoint 4.8.1 ARGUS LifePoint The ARGUS LifePoint measures the compression depth and rate and recoil* after each compression (*except in France, Germany, UK and USA.) The LifePoint is not suitable for use on children younger than 8 years or less than 25 kg. -
Page 46: Setup Of The Sensor
Defibrillation ® ® ARGUS LifePoint FRED easyport plus 4.8.2 Setup of the sensor Only use the securing pads up to their expiration date. Do not reuse the pads. 1. Connect the LifePoint USB cable to the USB connector. 2. -
Page 47: Communication
Transmission menu FRED easyport plus 5 Communication • To read the intervention data, use the appropriate SCHILLER software. Contact your SCHILLER representative. • The following transmission possibilities are available to retrieve the intervention data: – directly to USB memory stick –... -
Page 48: Retrieving Intervention Data Via Usb
Communication ® ® Transmission menu FRED easyport plus 5.1.1 Retrieving intervention data via USB • If setup “Auto Start” in the transmision menu is set to “Yes”, the device starts the transmission automatically, when point 2 has been executed. The Point 3 till 4 are then not needed. -
Page 49: Charging Unit Cs-2
This battery charger is not intended for domestic private use and has to be stored in a place inaccessible to children. The batteries supplied are rechargeable Lithium-Ion 11.1 V, 12.9 Wh. Only use rechargeable batteries supplied by SCHILLER. We recommend that the batteries are replaced every 500 charge / discharge cycles. -
Page 50: Led Status Display Of The Charger
Charging Unit CS-2 ® ® Overview battery charger FRED easyport plus 6.1.1 LED Status display of the charger Status LED 1 LED 2 LED 3 LED 4 Charging Status Start up, charger supplied and switch on without battery Quick flash 0-25% Quick flash 25-50%... -
Page 51: Fred Easyport Plus User Guide
(see 8.9 Inspection report) • If used in optimal conditions the FRED easyport plus does not need any particular maintenance tests since the device is able to test itself automatically on a regular basis, and it issues a notification if any action either from the user or from a tech- nician is required. -
Page 52: Service/Shelf Life
Maintenance ® ® Maintenance Intervals FRED easyport plus 7.1.1 Service/Shelf life Device The device has defined Service Life of 8 years if maintenance intervals have been observed according to section 7.1 Maintenance Intervals and the directive IEC/EN 62353. Battery Rechargeable Lithium Ion battery (approx.4 years), Li-MnO2 6 years, see manufacturing date on the battery and internal battery cell (approx. -
Page 53: Visual Inspection Of The Device And Accessories
Maintenance ® ® User Guide Maintenance Intervals FRED easyport plus 7.1.2 Visual inspection of the device and accessories Regularly (in between the set RTU test interval) and after each use, inspect visually the device and the cables in order to detect possible mechanical damages. If you observe damages or dysfunctions which can endanger the safety of the patient or user, only use the device once it has been serviced. -
Page 54: Functional Check
“RTU” LED is OFF with an acoustic signal, the battery is depleted or the device is defective and must be repaired. In case of intensive use of the device, SCHILLER recommends that these inspections be performed at shorter interval. -
Page 55: Maintenance Of The Non Rechargeable Lithium/Mno2 Battery
Maintenance ® ® User Guide Maintenance Intervals FRED easyport plus 7.1.5 Maintenance of the non rechargeable Lithium/MnO2 battery Important • The battery's performance and life largely depend on how and under which ambient conditions the battery is used. • The non-rechargeable battery is maintenance-free during its life. •... -
Page 56: Cleaning
Maintenance ® ® Cleaning FRED easyport plus Cleaning Cleaning removes dust, dirt and stains; however, this does not constitute a disinfection. Use commercially available detergents intended for clinics, hospitals and practices. 7.2.1 Detergents Please refer to the manufacturer's information regarding the detergents. Admissible detergents •... -
Page 57: Disinfection
Maintenance ® ® User Guide Disinfection FRED easyport plus Disinfection Use commercially available disinfectants intended for clinics, hospitals and practices to disinfect the device. Wipe disinfection removes certain bacteria and viruses. Please refer to the manufacturer's information. 7.3.1 Disinfectant Admissible disinfectants •... -
Page 58: Cleaning And Disinfecting The Device, Cable And Sensor
Maintenance ® ® Disinfection FRED easyport plus 7.3.2 Cleaning and disinfecting the device, cable and sensor Shock hazard — Remove the battery before cleaning the device. This ensures that the device will not be turned on inadvertently while you are cleaning it. Risk of death! Disconnect the defibrillation pads before cleaning the device. -
Page 59: Accessories And Disposables
Your local representative stocks all the consumables and accessories for the FRED easyport plus. A full list of all SCHILLER representatives can be found on the SCHILLER website (www.schiller.ch). In case of difficulty, contact SCHILLER. Our staff will be pleased to help process your order or to provide details for all SCHILLER products. -
Page 60: Disposal Information
In accordance with national law, the battery must be disposed of at an appropriate waste disposal station or returned to SCHILLER. According to European legislation, this device is considered as electronic waste equipment. -
Page 61: Troubleshooting
Maintenance ® ® User Guide Troubleshooting FRED easyport plus Troubleshooting • If it is not possible to get the device back into operating condition within a reason- able period of time, continue cardiopulmonary resuscitation until the rescue service arrives. Forced shutdown procedure •... -
Page 62: Technical Notification
Maintenance ® ® Troubleshooting FRED easyport plus Problem Possible causes Remedy The notification tone does • Selftest failed Switch the device on, read error message, remedy the not stop. cause and run a new selftest. • Battery defect. Replace the battery. •... -
Page 63: Preventing Electromagnetic Interferences
The user can help avoid electromagnetic disturbances by keeping the minimum distance between portable and mobile HF telecommunication devices (transmitters) and the FRED easyport plus. The minimum distance of 0.3 m has been tested according to IEC 60601-1-2 for a wide range of telecommunication equipment, as shown in the following table: “Non ionising electromagnetic radiation"... -
Page 64: Measures To Prevent Electromagnetic Interferences
• Observe the maintenance intervals as stated in 7.1 Maintenance Intervals, page However, there is no guarantee that no interference can occur in certain installations. If the FRED easyport plus causes interferences, these can be prevented by switching off the device. Page 64... -
Page 65: Technical Data
Unless otherwise stated, all specifications are valid at a temperature of 25 °C. System Specifications Manufactured by SCHILLER Device name FRED easyport plus Dimensions 46 x 150 x 143 mm (h x l x w) With bag: 110 x 190 x 170 mm (h x l x w) Weight Approx. - Page 66 • 30 minutes; Time for warming up/cooling Time required for the FRED easyport plus to warm or cool from the minimum/ down maximum storage temperature between uses until the FRED easyport plus is ready for its intended use when the ambient temperature is 20 °C.
-
Page 67: Classification And Safety Standards
• FRED easyport plus is a class IIb device. Patient Protection BF type, resistant to defibrillation shocks. Explosions protection FRED easyport plus is not designed to be used in the presence of flammable mixtures of anaesthetic agents with air or oxygen. Page 67... -
Page 68: Defibrillation Pulse
Technical Data ® ® Defibrillation pulse FRED easyport plus Defibrillation pulse Defibrillation Waveform • Pulsed BTE (Biphasic Truncated Exponsential) Multipulse Biowave® with fixed physiological optimum phase durations • Maintains the energy delivered to the patient at an approximately constant level with regard to patient resistance (up to 175 Ohms) Printout: Current –... - Page 69 Default energy for 1, 2, 3 and following shocks is: for adults: 150/200/200 Joule for children: 50/50/50 Joule SCHILLER's customer service department can change the default energy levels to other values. (automatic adaptation when paediatric pads are connected or when the paediatric...
- Page 70 Technical Data ® ® Defibrillation pulse FRED easyport plus Patient impedance at which 25 to 250 Ω shock delivery is possible Indication when ready to shock The orange button is lit and warning tone is issued Shock delivery • With the orange button (in semi-automatic) •...
-
Page 71: Shock Advisory System
- 125] Hz. The bandwidth of the devices that recorded the signals is larger than that of the FRED easyport plus. However, when the analogue signals of the database are run on the FRED easyport plus via electrode connector, the FRED easyport plus's rhythm detector signal-processing characteristics are applied. -
Page 72: Bluetooth Standard
Technical Data ® ® Bluetooth standard FRED easyport plus Bluetooth standard Modules PAN1026 FCC ID T7VPAN10 IC ID 216Q-PAN10 Transmission standards Bluetooth BT version 4.0 BR/LE Frequency range 2.402 ..-2480 MHz Max. power output +4 dBm Charging unit Device name CS-2 Charger Dimensions 42 x 140 x 130mm (h x l x w) -
Page 73: Argus Lifepoint Sensor
Technical Data ® ® User Guide ARGUS LifePoint sensor FRED easyport plus ARGUS LifePoint sensor Sensor name Argus LifePoint Dimensions 80 x 25 mm (diameter/ depth) Weight 152 g Cable length Power supply 5 VDC via USB from the medical device Environmental conditions Note: The environmental conditions for the LifePoint depend on the device and are determined by it) -
Page 74: Literature
Technical Data ® ® Literature FRED easyport plus Literature European Resuscitation Council Guidelines for Cardiopulmonary Resuscitation and Emergency Cardiovascular Care American Heart Association Guidelines for Cardiopulmonary Resuscitation and Emergency Cardiovascular Care Glossary ABCD The primary ABCD A = Airways (check if airways are free) B = Breathing (artificial respiration) C = Circulation (circulatory signs or cardiac massage) D = Defibrillation... -
Page 75: Inspection Report
Date: Performed by: In case of problems, please notify your Biomedical Department , your local SCHILLER distributor , or the authorized Customer Service for your area Name: ..............Tel.: ..............Page 75... -
Page 76: Overview Menus
Technical Data ® ® 8.10 Overview menus FRED easyport plus 8.10 Overview menus Menu/parameters Sub menu/Parameter Sub menu/Parmeter Sub menu/Parmeter/details Selftest >>> all tests (2.5.2 Performing manual self-test Bluetooth pairing Start see service manual Device information >>> (S/N; RefNr; Device Name; SW and HW versions; Pads Expired date; Maintenance date; Guidelines; Battery >>>;... -
Page 77: Device Settings
User Guide Device Settings 8.11 FRED easyport plus 8.11 Device Settings The following settings can be configured by the SCHILLER after-sales service and are password protected. The default settings are printed bold. 8.11.1 Shock setting Parameter Values Description • 2, 4, 8, 15, 30, 50, 70, 90,... -
Page 78: Cpr Feedback
• Hostename of the SDM server – (semadev.schiller.ch) SDM server >>> • Port host SDM >>> – (8080) Schiller Device Manager • SLL (Certificate validation) – No/Yes Allows to update Settings via SDM server Auto Update Settings – On/Off Allows to upload intervention data to SDM server Upload interventions –... -
Page 79: Transmission Mode
FRED easyport plus Parameter Parameter Description/Selection Setup of the following SEMA server parameters: • Hostename of the SDM server – (semadev.schiller.ch) • Hostename • Port host • Port host – (8080) • User Name • User name SEMA >>> – Default •... -
Page 80: System Settings
Technical Data ® ® 8.12 System Settings FRED easyport plus 8.12 System Settings You will find the following setting at the bottom of the display. Parameter Values Description Sets the volume of audio prompts and notifications. • Low (>50) Caution: Volume •... -
Page 81: Base Settings
Technical Data ® ® User Guide System Settings 8.12 FRED easyport plus 8.12.2 Base Settings Parameter Values Description • Year Entering date for the next maintenance reminder. If expired notification “Maintenance required” appears. • Month Warning: Maintenance >>> Do not enter date longer than 3 years see 7.1 Maintenance Intervals! ... - Page 82 Index ® ® FRED easyport plus 9 Index Internal backup battery ......56 Maintenance Intervals......51 Accessories..........59 Test............54 Appendix Visual inspection ........53 Glossary ..........74 Inspection Report ........75 Literature ..........74 Required accessories......59 Safety Notes ..........7 Battery Technical Data Battery Disposal ........
- Page 83 Appendix - Symbols 10 Appendix - Symbols This appendix lists all general symbols that may be present on the device, label and accessories. Not all of those symbols are necessarily present on your device. This appendix has its own article number, which is independent of the user guide's article number.
- Page 84 Appendix - Symbols CE marking, affirms its conformity with European standards Regulatory Compliance Mark for the Australian standards The device is recyclable Symbol for the recognition of electrical and electronic equipment. Device must not be disposed of in the household waste. Symbol for the recognition of a battery.
- Page 85 Appendix - Symbols Keep dry (store in a dry location) Keep away from sunlight (protect from direct sunlight) Fragile, handle with care Transport upwards (this way up) Do not use hooks EIP = electronic information product (dos not contain any toxic and hazardous substances or elements above the maximum concentra- tion values (product can be recycled and re-used).
- Page 86 Appendix - Symbols Blank page...
Need help?
Do you have a question about the FRED easyport plus and is the answer not in the manual?
Questions and answers