Table of Contents
Advertisement
Quick Links
Advertisement
Table of Contents

Subscribe to Our Youtube Channel
Related Manuals for Schiller CARDIOVIT AT-1 G2


Summary of Contents for Schiller CARDIOVIT AT-1 G2
- Page 1 CARDIOVIT AT-1 G2 User guide...
- Page 2 The SCHILLER sales and service centre network is world-wide. Contact your nearest SCHILLER subsidiary to obtain the address of your local distributor. In case of difficulty, a complete list of all distributors and subsidiaries is provided on our internet site: www.schiller.ch...
-
Page 3: Table Of Contents
1.11 Symbols and Pictograms........... 11 1.11.1 Symbols used in this document ............11 1.11.2 Symbols used on the device ............12 Overview ..........13 Main Components of the CARDIOVIT AT-1 G2 ....13 2.1.1 Standard................... 13 2.1.2 Options..................... 13 Keyboard ................14 2.2.1... - Page 4 CARDIOVIT AT-1 G2 Contents Electrode placement .......21 Basics .................. 21 Electrode Identification and Colour Code ......22 Resting ECG with 10-lead patient cable ......23 4.3.1 Electrode placement for standard leads .......... 23 Standard with C4r for CCAA recordings ......24 Skin/Electrode Resistance..........
- Page 5 CARDIOVIT AT-1 G2 User guide Contents Maintenance ..........44 10.1 Visual inspection ..............44 10.2 Cleaning the casing and cables ........45 10.2.1 Cleaning the patient cable..............46 10.2.2 Admissible detergents..............46 10.2.3 Non-admissible detergents .............. 46 10.3 Disinfection ................. 47 10.3.1 Admissible disinfectants..............
- Page 6 CARDIOVIT AT-1 G2 Contents Page 6...
-
Page 7: Safety Notes
Intended Use 1 Safety notes Intended Use The CARDIOVIT AT-1 G2 is a 12-lead ECG device intended to be used by trained medical professionals in healthcare facilities for cardiological diagnosis in adult and paediatric patients. ECG analysis is complemented with algorithms that provide measurement results, data, graphic presentation and interpretation for review by the user. -
Page 8: Organisational Measures
The device is CF classified. It is defibrillation protected only when the SCHILLER original patient cable is used. However, as a safety precaution and if possible, remove the electrodes before defibrillation. Do not touch the unit during defibrillation. -
Page 9: Operation With Other Devices
CARDIOVIT AT-1 G2. Special care must be exercised when the unit is used with high-frequency equipment. Use the special high frequency SCHILLER patient cable to avoid possible signal interference during ECG acquisition. However, the stimulation units should only be used at a sufficient distance from the electrodes and both devices must be connected to the same potential equalisation. -
Page 10: Terms Of Warranty
The warranty is void if unauthorised or unqualified persons attempt to make repairs. In case the device is defective, send it to your local SCHILLER representative or directly to the manufacturer. The manufacturer can only be held responsible for the safety, reliability and performance of the apparatus if: •... -
Page 11: Symbols And Pictograms
Safety notes CARDIOVIT AT-1 G2 User guide Symbols and Pictograms 1.11 1.11 Symbols and Pictograms 1.11.1 Symbols used in this document The safety level is classified according to ISO 3864-2. The following overview shows the safety symbols and pictograms used in this user guide. -
Page 12: Symbols Used On The Device
Potential equalisation. CF symbol. The device is classified safe for internal and external use. However, it is only defibrillation protected when used with the original SCHILLER patient cable. Manufacturer symbol, manufacturing date. The device is IP20-classified and is not protected against the ingress of liquids. Keep dry. -
Page 13: Overview
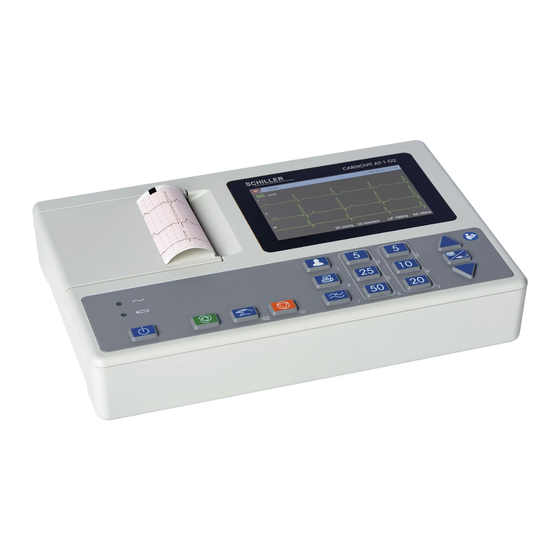
Main Components of the CARDIOVIT AT-1 G2 2 Overview The SCHILLER CARDIOVIT AT-1 G2 is a 12-channel ECG unit designed to record, display and measure resting ECGs. The display and keyboard enable easy and intuitive operation to efficiently enter patient data, record ECGs and adjust device settings. -
Page 14: Keyboard
Overview Keyboard CARDIOVIT AT-1 G2 Keyboard Delete numerical Numerical input input 2.2.1 Description of keys Switching the device on/off Starting an automatic resting ECG Starting a manual resting ECG For numerical input: delete (backspace • Stopping printout of an automatic/manual ECG •... -
Page 15: Display
Overview CARDIOVIT AT-1 G2 User guide Display Display The display will vary according to the task being carried out. In all screens, however, the top and bottom areas always display the same category of information. Example for a typical ECG view:... -
Page 16: Operation
• Do not allow the unit to come into contact with acidic vapours or liquids. • The CARDIOVIT AT-1 G2 should not be placed in the vicinity of X-ray or diathermy units, large transformers or electric motors. -
Page 17: Right-Hand Side Panel
Connect the mains cable to the mains. 2. Connect the mains cable at the rear of the unit. The mains indicator LED is lit. 3. Leave the CARDIOVIT AT-1 G2 connected to the mains for 3 hours to fully charge the battery. -
Page 18: Switching On / Off
Operation Switching on / off CARDIOVIT AT-1 G2 Switching on / off The unit is switched on and off with the On / Off key. To switch the device off, confirm the dialogue by pressing the Enter key. Turn off device... -
Page 19: Changing The Printing Paper
• Certain glues can react with the paper. Therefore, do not use glue to attach the printout onto a mounting sheet. SCHILLER can only guarantee perfect printouts when original SCHILLER chart paper or chart paper of the same quality is used. -
Page 20: System And Ecg Settings
Operation System and ECG settings CARDIOVIT AT-1 G2 System and ECG settings • The system settings (time, date, device ID etc.) and other general settings are de- scribed on page • The ECG settings are described on page Page 20... -
Page 21: Electrode Placement
A minimal resistance between skin and electrode is required to obtain the best ECG signal and ensure the highest quality ECG recording. Therefore, please note the following points: Only use electrodes that are recommended by Schiller AG (see accessories) Before using disposable electrodes, check that the expiration date has not yet passed. -
Page 22: Electrode Identification And Colour Code
Electrode placement Electrode Identification and Colour Code CARDIOVIT AT-1 G2 Electrode Identification and Colour Code The electrode colour codes in the following sections correspond to Code 1 (IEC) for the graphics and to Code 2 (AHA) in the tables IEC label... -
Page 23: Resting Ecg With 10-Lead Patient Cable
Electrode placement CARDIOVIT AT-1 G2 User guide Resting ECG with 10-lead patient cable Resting ECG with 10-lead patient cable C1 red C2 yellow C3 green C4 brown C5 black C6 purple R red L yellow N black F green Fig. IEC labelling 4.3.1... -
Page 24: Standard With C4R For Ccaa Recordings
Electrode placement Standard with C4r for CCAA recordings CARDIOVIT AT-1 G2 Standard with C4r for CCAA recordings ACC/AHA guidelines recommend examining patients suffering from a myocardial infarction with inferior ST elevation for possible RV ischaemia or RV infarction; this examination should be performed with a right precordial C4r lead. (See section 7.1.2... -
Page 25: Skin/Electrode Resistance
Electrode placement CARDIOVIT AT-1 G2 User guide Skin/Electrode Resistance Skin/Electrode Resistance 4.5.1 Electrode and patient cable check The electrode check is performed before the start of an ECG recording. The following is checked and displayed: • Excessive nose (signal noise too high, the electrode is highlighted in colour) –... -
Page 26: Lead Sequence/Lead View
Electrode placement Lead sequence/lead view CARDIOVIT AT-1 G2 Lead sequence/lead view 4.6.1 Setting Standard or Cabrera lead sequence The lead sequence is defined in the ECG menu. (Key Menu > ECG > Leads & cable). In the Lead menu, select between Standard and Cabrera. -
Page 27: Patient Data
Patient data CARDIOVIT AT-1 G2 User guide Lead sequence/lead view 5 Patient data If no date of birth and gender is entered, the interpretation is performed as if for a 50- year old male patient. In the patient data screen, new patients can be entered. - Page 28 Patient data Lead sequence/lead view CARDIOVIT AT-1 G2 Patient ID Enter the patient's identification number (max. 16 characters) Date of Birth Enter the patient‘s date of birth in the format dd.mm.yyyy, yyyy-mm-dd or mm/dd/ yyyy. Gender Enter the patient‘s gender - Male or Female or Undefined Pacemaker Select if the patient has a pacemaker (Yes/No/Unknown).
-
Page 29: Resting Ecg
Do not operate the unit if the earth connection is suspect or if the mains lead is damaged or suspected of being damaged. If the CARDIOVIT AT-1 G2 is used together with other electronic devices, use the potential equalisation stud for earth protection. -
Page 30: Resting Ecg - Procedural Flow Diagram
Resting ECG Resting ECG - Procedural Flow Diagram CARDIOVIT AT-1 G2 Resting ECG - Procedural Flow Diagram • Lead configuration, ECG cable Basic settings Prepare the patient, connect the electrodes and switch on the device Enter the patient data •... -
Page 31: Automatic Resting Ecg Recording
Resting ECG CARDIOVIT AT-1 G2 User guide Automatic resting ECG recording Automatic resting ECG recording To take an automatic ECG recording, press the Auto key. After approx. 10 seconds, the recording is analysed and the result displayed. The recording can be checked and printed. -
Page 32: Printout
Resting ECG Automatic resting ECG recording CARDIOVIT AT-1 G2 6.2.1 Printout The printout gives the following: • Date and time • Name (needs to be written by hand) • Patient ID • Date of Birth • Gender • Pacemaker Yes/No •... -
Page 33: Manual Rhythm Printout
Resting ECG CARDIOVIT AT-1 G2 User guide Manual Rhythm Printout Manual Rhythm Printout Use this function to print a real-time ECG. The print parameters such as lead sequence, print speed and sensitivity can be changed by the user during the printout. -
Page 34: Changing The Ecg Display
Resting ECG Changing the ECG display CARDIOVIT AT-1 G2 Changing the ECG display The ECG display is optimised for one column of 3 channels and cannot be changed. The amplitude and speed can be changed at any time with the direct keys. The standard values for the display and thermal printer are 25 mm/s and 10 mm/mV. -
Page 35: Culprit Coronary Artery Algorithm
Culprit Coronary Artery Algorithm CARDIOVIT AT-1 G2 User guide Introduction 7 Culprit Coronary Artery Algorithm Introduction The Culprit Coronary Artery Algorithm developed by Professor Hein Wellens is designed to determine the size of the cardiac area at risk by localising the occlusion... -
Page 36: Culprit Artery Algorithm Decision Overview
Culprit Coronary Artery Algorithm Introduction CARDIOVIT AT-1 G2 7.1.1 Culprit Artery Algorithm Decision Overview Prior Bypass/ PCI centre Stent? PCI = Percutaneous Coronary Intervention QRS width limit? PCI centre ST Score < lower Transport to nearest hospital limit? ST Score >= lower limit... -
Page 37: Starting The Ccaa Analysis
Culprit Coronary Artery Algorithm CARDIOVIT AT-1 G2 User guide Introduction 7.1.2 Starting the CCAA analysis When the CCAA analysis option is activated, make sure that the C4 electrode is attached in position C4r (precordial), see section 4.4 Standard with C4r for CCAA recordings, page 24. -
Page 38: Ccaa Information On Print Preview/Printout
Culprit Coronary Artery Algorithm Introduction CARDIOVIT AT-1 G2 7.1.3 CCAA information on print preview/printout Information on LAD (left anterior descending) For men under the age of 40 showing early repolarisation in the anterior leads, false LAD diagnoses may occur. -
Page 39: Pdf Export
PDF export CARDIOVIT AT-1 G2 User guide Data integrity 8 PDF export Data integrity When exporting patient data to a USB stick, the operator needs to take appropriate security measures to protect the data: – Make sure that only authorised persons have access to the USB stick. -
Page 40: General And System Settings
General and System Settings System settings CARDIOVIT AT-1 G2 9 General and System Settings System settings The system settings are saved when the main menu is closed. When the Menu key is pressed, the main menu is displayed. The following illustration gives an overview of all available settings. -
Page 41: Ecg
General and System Settings CARDIOVIT AT-1 G2 User guide The default settings are printed bold 9.2.1 Leads & cable Menu Parameter Description / selection Patient cable IEC or AHA Simultaneous or Sequential. If Sequential is selected, consecutive time segments are used for the individual lead groups (this applies for Leads &... -
Page 42: Print Formats
General and System Settings CARDIOVIT AT-1 G2 9.2.4 Print formats The stored recordings can be printed in different formats. Menu Display Description 4 pages (25 mm/s), 8 pages (25 mm/s) 8 pages (50 mm/s) ECG printout 4x3 (25 (mm/s) Print formats... -
Page 43: System
General and System Settings CARDIOVIT AT-1 G2 User guide System System 9.3.1 Settings Menu Parameter Select a language Language dd.mm.yyyy, yyyy-mm-dd or mm/dd/ Date format yyyy. Settings Enter the date Date Enter the time Set Time (24h) Displaying the parameter “Simulation ECG” to activate simulated ECGs is described in the service manual and only serves demonstration purposes. -
Page 44: Maintenance
No kinks, abrasion or wear in any cable assembly. Input/output connectors (undamaged). In addition to the visual inspection, switch on the CARDIOVIT AT-1 G2, scroll through the menu and test some sample functions. In this way, you can check that: •... -
Page 45: Cleaning The Casing And Cables
• Confirm that all connectors engage securely. The casing of the CARDIOVIT AT-1 G2 and the cable assemblies can be cleaned with a cloth slightly moistened (not wet) on the surface only. If necessary, a domestic non- caustic cleaner or a 50 % alcohol solution can be used to remove grease stains and finger prints. -
Page 46: Cleaning The Patient Cable
Maintenance 10.2 Cleaning the casing and cables CARDIOVIT AT-1 G2 10.2.1 Cleaning the patient cable 1. Before cleaning, inspect the cable for damage. Gently bend and flex all parts of the cable. Inspect for splits in the sheathing, damage or extreme wear, exposed wires or bent connectors. -
Page 47: Disinfection
Maintenance CARDIOVIT AT-1 G2 User guide Disinfection 10.3 10.3 Disinfection Disinfection removes certain bacteria and viruses. Please refer to the manufacturer's information. Use commercially available disinfectants intended for clinics, hospitals and medical practices. Disinfect the device in the same way as described for cleaning the device (previous page). -
Page 48: Battery
Maintenance 10.5 Battery CARDIOVIT AT-1 G2 10.5 Battery • The lead gel battery does not require any maintenance. • Replace the battery approx. every 4 years (depending on the application) when the battery running time falls substantially under one hour. -
Page 49: Inspection Report
Maintenance CARDIOVIT AT-1 G2 User guide Inspection Report 10.6 10.6 Inspection Report The user guide, especially chapter 10, must be read before the inspection. Recommended inspection interval: Every 6 months Serial no.: ________________ Test Results Date Visual inspection 10.1... -
Page 50: Lifed-Item Replacement Every 3 - 5 Years
CARDIOVIT AT-1 G2 10.6.1 Lifed-item replacement every 3 - 5 years Inspection Results Replacement Internal battery Replace Internal Accumulator if • Unit sent to SCHILLER service operation falls substantially under centre for accumulator replace- one hour. -
Page 51: Accessories And Disposables
SCHILLER. Failure to do so may endanger life and/or invalidate the warranty. Your local representative stocks all the disposables and accessories available for the CARDIOVIT AT-1 G2. A comprehensive list of all SCHILLER representatives can be found on the SCHILLER website (www.schiller.ch). In case of difficulty, contact our head office. -
Page 52: Trouble Shooting
• Old paper inserted Ensure that new SCHILLER paper is inserted. Note that the CARDIOVIT AT-1 G2 thermal paper is heat- and light- sensitive. If it is not stored in its original seal, stored in high temper- Printout fades, is not atures or is simply old, print quality can deteriorate. - Page 53 Switch off and on again after a few seconds. Press and hold the On/Off button for 10 seconds to force the device Keyboard blocked to switch off. Reconnect mains and switch on. If the problem persists, call your local SCHILLER representative. Page 53...
-
Page 54: Preventing Electromagnetic Interferences
Portable HF telecommunication devices must not be used within a radius of 0.3 m from the CARDIOVIT AT-1 G2 and its cables. Do not place the CARDIOVIT AT-1 G2 on top of other electric/electronic devices - i.e. maintain a sufficient distance to other devices (this includes the patient cables). -
Page 55: Measures To Prevent Electromagnetic Interferences
Trouble Shooting CARDIOVIT AT-1 G2 User guide Preventing electromagnetic interferences 11.2 11.2.1 Measures to prevent electromagnetic interferences The user can take the following measures to prevent electromagnetic interferences: • Increase distance to the source of interference. • Turn the device to change the angle of radiation. -
Page 56: Technical Data
Technical Data 12.1 Device CARDIOVIT AT-1 G2 12 Technical Data 12.1 Device Dimensions 285 x 189 x 61 mm, approx. 1.94 kg incl. thermal paper Display • Colour LCD • Resolution: 800 x 480 dots, 5 “ Power supply 100 - 240 VAC, max. 0.75 A (115 V) - 0.4 A (230 V), 50/60Hz... -
Page 57: Ecg
• IEC/EN 60601-1-2 • CISPR 11/32 Group 1, class B The CARDIOVIT AT-1 G2 can be exposed to the following interferences without any impairment of the essential performance features: • static discharge up to ±8 kV contact, ±15 kV air •... -
Page 58: Safety Standards
Technical Data 12.3 Safety Standards CARDIOVIT AT-1 G2 12.3 Safety Standards Safety standard IEC/EN 60601-1 IEC/EN 60601-2-25 IEC/EN 60601-1-2 Protection class Device as a system: Class I in accordance with IEC/EN 60601-1 Conformity/classification CE/IIa in accordance with directive 93/42/EEC Protection... -
Page 59: Index
Index CARDIOVIT AT-1 G2 User guide 13 Index Accessories and disposables ....Resting ECG .......... Address Headquarters ......Automatic mode recording ....AT-1 G2 elements ........Automatic printout ......Lead group ......... Manual printout ......Resting ECG - Procedural Flow Diagram .. - Page 60 Index CARDIOVIT AT-1 G2 Page 60...
Need help?
Do you have a question about the CARDIOVIT AT-1 G2 and is the answer not in the manual?
Questions and answers