Schiller FRED easyport User Manual
Automated external defibrillator
Hide thumbs
Also See for FRED easyport:
- Short operating instructions (4 pages) ,
- User manual (51 pages)

Related Manuals for Schiller FRED easyport


Summary of Contents for Schiller FRED easyport
- Page 1 FRED easyport ® ® Automated External Defibrillator (AED) ® ® FRED easyport User Guide...
- Page 2 Sales and Service Information The SCHILLER sales and service centre network is world-wide. For the address of your local distributor, contact your nearest SCHILLER subsidiary. In case of difficulty a complete list of all distributors and subsidiaries is provided on our internet site: http://www.schiller.ch...
-
Page 3: Table Of Contents
FRED easyport User Guide Table of Contents Safety Notes ..........3 Responsibility of the User ..........3 Intended Use ................ 3 Organisational Measures............. 4 Safety-Conscious Operation ..........4 Operation with other Devices ..........4 Maintenance................5 General Safety Notes ............5 General Notes Regarding the Unit ........ - Page 4 FRED easyport Defibrillation in Manual Mode..........23 4.5.1 Finishing the Therapy ..............25 Documentation of an Intervention ..26 Inserting the Memory Card ..........26 Maintenance ..........27 Maintenance Intervals ............27 6.1.1 Visual Unit Check................27 6.1.2 Functional Test ................27 6.1.3...
-
Page 5: Safety Notes
– is breathing – has pulse The FRED easyport is an emergency device and must be ready for operation at any time and in all situations. Ensure that the device is always equipped with a sufficiently charged battery, and keep a spare battery on hand. -
Page 6: Organisational Measures
Before switching on, check if the unit's casing and electrode connection are un- damaged. Operation with other Devices Only use accessories and other parts recommended or supplied by SCHILLER AG. Use of other than recommended or supplied parts may result in injury, inac- curate information and/or damage to the unit. -
Page 7: Maintenance
• assembly operations, extensions, readjustments, modifications, or repairs are car- ried out by persons authorised by him, and • the FRED easyport and approved attached equipment is used in accordance with the manufacturer's instructions. There are no express or implied warranties which extend beyond the warranties hereinabove set forth. -
Page 8: Display Symbols/Indicators
Safety Notes FRED easyport 1.10 Display Symbols/Indicators 1.10 Display Symbols/Indicators 1.10.1 Symbols Used in this User Guide The safety level is classified according ANSI Z535.4. The following overview shows the safety symbols and pictograms used in this user guide. For a possibly dangerous situation, which could lead to serious bodily injury or to death. -
Page 9: Symbols Used On The Device
Safety Notes FRED easyport User Guide Display Symbols/Indicators 1.10 1.10.2 Symbols Used on the Device BF symbol. The device's signal input is defibrillation protected. Notified body of the CE certification (G-MED). Note accompanying documents! Defibrillation electrode connector. Symbol for the recognition of electrical and electronic equipment. -
Page 10: Symbols Used On The Electrode Package
Safety Notes FRED easyport 1.10 Display Symbols/Indicators 1.10.4 Symbols Used on the Electrode Package Open the electrode package Peel off the protective foil Disposable item; do not reuse Do not bend packing Storage temperature for the electrodes Expiration date Page 8... -
Page 11: Components And Operation
Design 2 Components and Operation Its small size and light weight make the FRED easyport the ideal companion of phy- sicians, paramedics, public service staff and other persons trained in early defibrilla- tion. Risk patients carry their own rescue device after they and their families have been instructed by their doctor. -
Page 12: Operating Elements
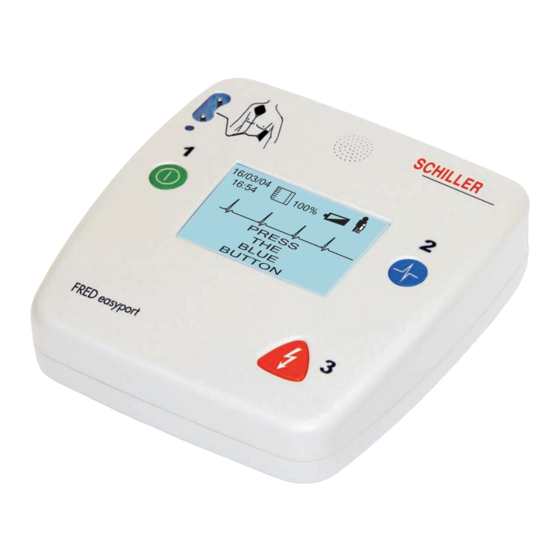
Components and Operation FRED easyport Operating Elements Operating Elements Fig. 2.1 Operating elements (1) Green button to switch the device on/off (2) Rubber seal for DS minicard (3) Yellow indicator lamp; lit as long as no electrodes are connected (4) Electrode connector... -
Page 13: Display
Components and Operation FRED easyport User Guide Display Display The following information is displayed on the LCD: (1) Time and triggered shocks since switch-on (2) Memory card inserted and memory allocation in % – Flashing = memory card almost full (from 98%) –... -
Page 14: Function
Defibrillation Procedure The user is guided through all operation steps by spoken and displayed instructions. The FRED easyport runs in semi-automatic mode. This means that the shock must be released by the user. When the device is switched on, the user is prompted to apply the electrodes to the patient. -
Page 15: Device Detects No Shockable Rhythm
(2). 2.4.4 Device Detects no Shockable Rhythm If the analysis program does not identify a shockable rhythm, the FRED easyport informs the user: • that no shock is required • that he or she should alternately carry out 30 chest compressions and 2 breaths for 2 minutes •... -
Page 16: Voice Support
Components and Operation FRED easyport Voice Support Voice Support When the device is switched on, it carries out a self-test and indicates the software and hardware version. The following instructions will be spoken by the device: Language Display Note PLACE ON... -
Page 17: Procedure In Case Of Cardiac Arrest
Components and Operation FRED easyport User Guide Procedure in Case of Cardiac Arrest Procedure in Case of Cardiac Arrest This procedure applies to adults and children. • Breakdown • Possible circulatory arrest • Responsive? No response Start of primary ABCD (BLS-algorithm) -
Page 18: Operation
(gasoline) or anaesthetics. Oxygenation in the vicinity of the defibrillation elec- trodes must be strictly avoided. Danger of electric shock! The FRED easyport is a high-voltage electric therapy device. Improper use of the device can endanger life. Always follow the instruc- tions given in this user guide. -
Page 19: Ensuring Operational Readiness
Inspection Report on page If you only carry out the self-tests, the battery will last for approx. 30 switch-ons. SCHILLER recommends always to keep a spare battery on hand. 3.1.3 Switching on and off • When the device is switched off for less than 5 min. (e.g. for battery replacement or by mistake), the data remains stored and the operation is continued after the self-test as if the device had not been switched off. -
Page 20: Defibrillating
Defibrillating FRED easyport General Application Guidelines 4 Defibrillating General Application Guidelines Observe the following guidelines to ensure successful and safe defibrillation. Other- wise the lives of the patient, the user and bystanders are in danger. The patient must: – not come into contact with other persons during defibrillation. -
Page 21: Applying The Pads
Defibrillating FRED easyport User Guide Applying the Pads Applying the Pads Use the defibrillation electrode pads only up to the indicated expiration date. Please note that the indicated expiration date only applies if the vacuum pack is intact. The pads are pre-gelled, so there is no need to use extra contact agent. -
Page 22: Checking The Electrodes
Defibrillating FRED easyport Applying the Pads 4.3.3 Checking the Electrodes If the resistance between the skin and an electrode should be too high, a message is displayed and the yellow electrode LED (A) (fig. 4.2) remains lit. Proceed as follows: 1. -
Page 23: Defibrillation Procedure
Defibrillating FRED easyport User Guide Defibrillation Procedure Defibrillation Procedure When the device is switched on, it gives spoken and displayed instructions up to the defibrillation. Exactly follow the instructions. Step 1 Switching on and preparing the device Switch the device on by pressing the green button (1). - Page 24 Defibrillating FRED easyport Defibrillation Procedure Step 3 Shock delivery As soon as the energy for a shock is charged, the device prompts the user to deliver the shock by pressing button 3. Danger of electric shock! • Do not, under any circumstances, touch the patient during shock delivery.
-
Page 25: Defibrillation In Manual Mode
• The device cannot be switched over to the manual mode during the defibrillation process (analysis, charging, shock release). • To operate the FRED easyport in semi-automatic mode again, it must be shut off and remain off for at least 5 minutes. - Page 26 Defibrillating FRED easyport Defibrillation in Manual Mode Shock Delivery in Manual Mode Danger to the patient! Before you release the shock, check the displayed ECG curve to make sure that a shockable rhythm is present. Danger of electric shock! – Do not, under any circumstances, touch the patient during shock delivery.
-
Page 27: Finishing The Therapy
Defibrillating FRED easyport User Guide Defibrillation in Manual Mode 4.5.1 Finishing the Therapy 1. Switch the device off as soon as the therapy is finished (keep the button pressed for approx. 3 seconds ). 2. Disconnect the plug of the electrode line. -
Page 28: Documentation Of An Intervention
After inserting the card, close the plastic cover again. If the flashing symbol is displayed even though the card is inserted, check if the card is intended by SCHILLER for this device. Incorrect or defective cards can impair the unit's operation! (See section Error Detection 6.3.) -
Page 29: Maintenance
Maintenance FRED easyport User Guide Maintenance Intervals 6 Maintenance Maintenance Intervals Note The unit must be serviced on a regular basis. The test results must be recorded and compared to the values in the accompanying documents. The following table indicates the intervals and responsibilities of the maintenance work required. -
Page 30: Maintenance Interval For The Battery
Maintenance FRED easyport Maintenance Intervals 6.1.3 Maintenance Interval for the Battery Important • The battery is maintenance free during its normal life. • The battery must be replaced after 5 years, regardless of whether or not the unit has been used. -
Page 31: Cleaning
Your local representative stocks all the disposables and accessories available for the FRED easyport. A full list of all SCHILLER representatives can be found on the SCHILLER website (www.schiller.ch). In case of difficulty, contact our head office in Switzerland. Our staff will be pleased to help process your order or to provide any details for all SCHILLER products. -
Page 32: Error Detection
Replace device Battery capacity indicator is • Battery almost empty Replace battery flashing is not displayed • SCHILLER memory card not/not Switch off device and properly insert memory card Symbol correctly inserted Replace card by a new SCHILLER card • The card is defective •... -
Page 33: Measures To Prevent Electromagnetic Interferences
Maintenance FRED easyport User Guide Error Detection 6.3.1 Measures to Prevent Electromagnetic Interferences The device is designed for use in an electromagnetic environment in accordance with IEC/EN 60601-1-2, tables 201, 202 and 204. If the device should nevertheless be dis- turbed, especially in the vicinity of equipment labelled with the symbol “Non-ionic elec-... -
Page 34: Technical Data
Where nothing else is indicated, the data refers to a temperature of 25 °C. System Data Manufacturer SCHILLER MEDICAL Device name FRED easyport (First Responder External Defibrillator) Dimensions 35 x 133 x 126 mm (h x l x w) Weight 490 g... -
Page 35: Defibrillation Impulse
Technical Data FRED easyport User Guide Defibrillation Impulse Defibrillation Impulse Form • Biphasic pulsed defibrillation impulse with fixed physiological optimum phase du- rations • Near stabilisation of the emitted energy in function with the patient resistance us- ing pulse-pause modulation depending on the measured patient resistance. -
Page 36: Storage Of An Intervention (Option)
Technical Data FRED easyport Defibrillation Impulse Safety discharge when: • the battery voltage is insufficient • the device is defective • the device is turned off Shock delivery Via disposable adhesive electrode pads applied in the anterior-anterior lateral posi- tion... -
Page 37: Appendix
Appendix FRED easyport User Guide Accessories 8 Appendix Accessories Article no. Article description 2.155056 Single-use defibrillation pads for adults 2.155057 Single-use defibrillation pad for children 3.940002 Battery 2.156038 Carrying pouch 4.150169 Mini SD memory card 16 MB Literature European Resuscitation Council... -
Page 38: Inspection Report
• User guide • SCHILLER memory card ❒ ❒ ❒ ❒ ❒ Only use a SCHILLER memory card! Incorrect cards can impair the unit's operation! • The standard screen is displayed. Self-test (automatic when the unit is switched on) ❒... -
Page 39: Index
Index FRED easyport User Guide 9 Index Accessories and disposables ..........Operating elements ............. Operational readiness ............Options .................. Battery ................Battery life ..............Battery disposal ..............Recharging time ..............Battery type ................ Respiration missing ............. Biocompatibility ..............Rhythm, not shockable ............ - Page 40 Index FRED easyport Page 38...
Need help?
Do you have a question about the FRED easyport and is the answer not in the manual?
Questions and answers