Melitta Avanza 600 Series Operating Instructions Manual
Hide thumbs
Also See for Avanza 600 Series:
- Operating instructions manual (502 pages) ,
- Operating instructions manual (468 pages)
Table of Contents
Advertisement
Advertisement
Table of Contents

Related Manuals for Melitta Avanza 600 Series


Summary of Contents for Melitta Avanza 600 Series
- Page 1 Bedienungsanleitung / Operating Instructions / Mode d'emploi Gebruiksaanwijzing / Istruzioni per l’uso / Manual de instrucciones Betjeningsvejledning / Bruksanvisning / Bruksanvisning Руководство по эксплуатации / Instrukcja obsługi / Naudojimo instrukcija...
-
Page 2: Table Of Contents
Table of contents Table of contents Overview of the appliance ....................33 Appliance at a glance ...................33 Overview of the control panel ................34 The Cappuccinatore at a glance ...............35 For your safety ........................35 Proper use .........................35 Danger from electric current................35 Risk of burns and scalds ..................36 Other dangers ......................36 First steps ..........................37 Unpacking the appliance ..................37... - Page 3 Table of contents Resetting the appliance to the factory settings ..........47 Setting the grinding fineness ................47 Care and maintenance ....................47 General cleaning.....................48 Cleaning the Cappuccinatore ................48 Cleaning the brewing unit ..................48 Running the cleaning programme ..............49 Running the descaling programme ..............50 Using a water filter ....................52 Transport, storage and disposal .................54 Venting the appliance ..................54...
-
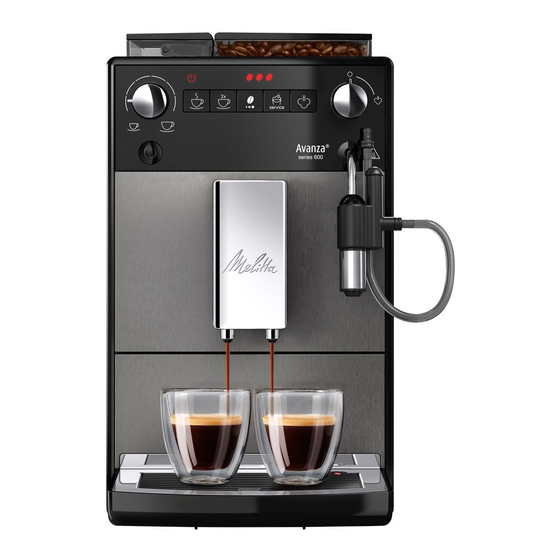
Page 4: Overview Of The Appliance
Overview of the appliance Overview of the appliance 1.1 Appliance at a glance 1 Water tank 2 Water tank lid 3 Lid of the bean container 4 Bean container 5 Cup rest 6 Control panel 7 Outlet with 2 coffee nozzles for coffee beverages 8 Coffee grounds container (inner) 9 Drip tray... -
Page 5: Overview Of The Control Panel
Overview of the appliance 1.2 Overview of the control panel Fig. 3: Control panel 16 Indications 17 "Valve" 18 Buttons 19 "Coffee quantity" rotary regulator 20 ON/OFF button Display Designation Control Designation Ready display "Coffee" direct key 2 cups display "2 cups"... -
Page 6: The Cappuccinatore At A Glance
For your safety 1.3 The Cappuccinatore at a Melitta or visit our website at: www.international.melitta.de/ glance We hope you enjoy using your appliance. For your safety The appliance conforms to the relevant European directives and has been built using the latest technology. Nev- ertheless, some residual dangers remain. -
Page 7: Risk Of Burns And Scalds
For your safety 2.4 Other dangers ū Do not use a damaged power cable. Observe the following safety ū A damaged power cable may instructions to avoid personal only be replaced by the manu- injury and material damage: facturer or its customer service ū... -
Page 8: First Steps
First steps First steps 3.4 Connecting the appliance This chapter describes how to prepare Observe the following instructions: your appliance for use. ū Check that the supply voltage matches the operating voltage specified in the technical data (see table Technical data 3.1 Unpacking the appliance on page 55). -
Page 9: Basic Operation
Basic operation CAUTION Hot water and hot steam flowing out of Open the "valve". the pipe » Hot water first flows out of the Cap- Do not reach into the outflowing hot ƒ puccinatore. water. Do not touch the steam pipe during ƒ... -
Page 10: Filling Coffee Beans Into The Bean Container
Basic operation are still remains of the old type of bean in Information the grinder. For this reason, the first two If the appliance was only switched off coffees dispensed can contain remains of briefly, there is no automatic rinsing after the old type of bean. -
Page 11: Filling With Water
Basic operation 4.3 Filling with water Only use fresh, cold water without carbon dioxide for optimum coffee enjoyment. Change the water daily. Information The quality of the water largely deter- mines the flavour of the coffee. Therefore, use a water filter (see section 6.3 Setting the water hardness on page 45 and sec- tion 7.6 Using a water filter on page 52). -
Page 12: Emptying The Drip Tray And Coffee Grounds Container
Preparing beverages To ensure that sufficient milk can be Information drawn in, the end of the hose must not If you empty the drip tray and the coffee touch the bottom of the vessel. grounds container while the appliance is switched off, the appliance does not 4.6 Emptying the drip tray register this process. -
Page 13: Setting The Coffee Quantity
Preparing beverages 5.4 Stopping coffee You can adjust the coffee strength by preparation pressing the "Coffee strength" button one or more times. If you want to stop the preparation of a coffee beverage prematurely, press the You can adjust the coffee strength before direct key again. -
Page 14: Preparing Milk Foam
Cappuccinatore on page 48). » Beverage dispensing stops. ū Rinsing the Cappuccinatore each week 5. Remove the vessel. with the Melitta® PERFECT CLEAN 6. Prepare further beverages or rinse the milk system cleaning agent for fully Cappuccinatore: automatic coffee makers. Use the milk... -
Page 15: Preparing Hot Water
Changing basic settings 5.7 Preparing hot water Service mode 1 Display function You prepare hot water on the Cappucci- natore. Descaling programme Brewing temperature CAUTION Hot water and hot steam flowing out of To call up Service mode 1, proceed as the pipe follows: Do not reach into the hot water that is... -
Page 16: Setting The Water Hardness
Changing basic settings The following settings are possible: Display Energy save Switch off after: mode after: Display Water hardness 30 minutes 8 hours soft, descale after 150 litres flash medium, descale after 100 litres Information hard, descale after 70 litres ... -
Page 17: Setting The Brewing Temperature
Changing basic settings The following settings are possible: Press the "Service" button repeatedly until the display for the Display Switch-off rinsing Brewing temperature function appears. activated no coffee beans deactivated Press the "Coffee strength" button repeatedly until the desired brewing temperature is set. -
Page 18: Resetting The Appliance To The Factory Settings
Care and maintenance Press the "Coffee" direct key to exit the approx. 1 month, depending on coffee service mode without saving the settings. consumption). Do not set the grinding fineness too ƒ fine. The grinding fineness is optimally Information set when the coffee flows evenly out If no further input is made within 1 min- of the outlet and a fine, dense crema ute, the appliance returns to Ready mode. -
Page 19: General Cleaning
Care and maintenance 7.1 General cleaning 1. Detach the Cappuccinatore from the steam pipe (21). Clean the appliance regularly. Immediately 2. Detach the following individual parts remove external soiling caused by milk from the Cappuccinatore: and coffee. ū Milk hose (25) ū Air intake nozzle (22), ATTENTION ū... -
Page 20: Running The Cleaning Programme
Only use Melitta® PERFECT CLEAN ƒ 5. Allow the brewing unit to drip dry. cleaning tablets for fully automatic 6. Use a soft, dry cloth to remove coffee coffee machines. -
Page 21: Running The Descaling Programme
Care and maintenance 4. Empty the drip tray and the coffee The fourth stage of the cleaning grounds container. programme starts. The three coffee beans 5. Insert the drip tray without the coffee flash. grounds container. 12. Place the coffee grounds container 6. - Page 22 The first stage of the descaling Use of unsuitable descaling agents and programme starts. One coffee bean lights failure to observe the processing instruc- tions may damage the appliance. Only use Melitta® ANTI CALC liquid des- ƒ The Drip tray display lights » ...
-
Page 23: Using A Water Filter
14. Remove the water tank. Only use Melitta® Pro Aqua filter cartridges 15. Thoroughly rinse out the water tank for fully automatic coffee machines. and fill it with fresh water. - Page 24 Care and maintenance Press the "Coffee strength" button until one bean lights up. 4. Follow the instructions from step 3 in section Changing the water filter. Changing the water filter In order to maintain a constant effect of the water filter, we recommend changing the water filter every 2 months –...
-
Page 25: Transport, Storage And Disposal
Transport, storage and disposal 5. Insert the drip tray without the coffee Press the "Service" button for grounds container. more than 2 seconds to call up Service 6. Place the coffee grounds container mode 1. beneath the Cappuccinatore. The Water display lights up and Press the "Service"... -
Page 26: Transporting The Appliance
Technical data Requirement: The appliance is ready for Before transporting the appliance, carry operation. out the following activities: 1. Vent the appliance (see section 8.1 Press the "Service" button as Venting the appliance on page 54). well as the "Coffee" direct key for more 2. -
Page 27: Trouble Shooting
Trouble shooting 10 Trouble shooting Technical data Capacity If the actions listed below fail to rectify Bean container 250 g the problems or other problems not listed Water tank 1.5 l here occur, contact our hotline (local rate). Weight (empty) 8.1 kg You will find the hotline number in the lid Ambient conditions of the water tank or in the Service section Temperature... - Page 28 Trouble shooting Problem Cause Action Coffee only emerges from Grinding fineness is too fine. Set a coarser grinding fineness (see ƒ the outlet in drips. section 6.8 on page 47). Appliance is soiled. Clean the brewing unit (see sec- ƒ tion 7.3 on page 48). Run the cleaning programme (see ƒ...
Need help?
Do you have a question about the Avanza 600 Series and is the answer not in the manual?
Questions and answers