
Related Manuals for Planet GT-915A


Summary of Contents for Planet GT-915A
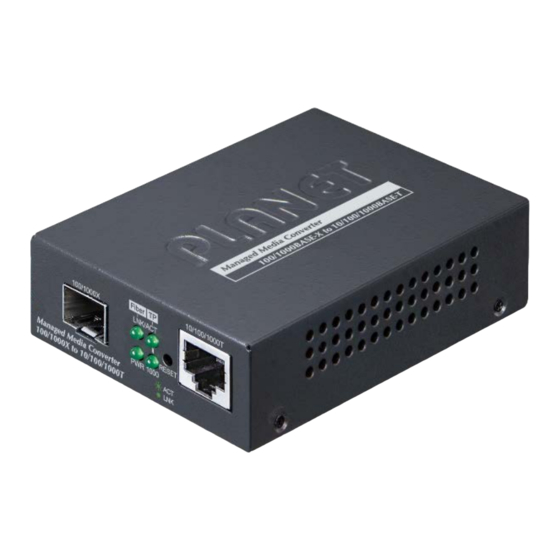
- Page 1 User’s Manual of GT-915A 10/100/1000BASE-T to 100/1000BASE-X SFP Managed Media Converter GT-915A...
- Page 2 PLANET is a registered trademark of PLANET Technology Corp. All other trademarks belong to their respective owners. Disclaimer PLANET Technology does not warrant that the hardware will work properly in all environments and applications, and makes no warranty and representation, either implied or expressed, with respect to the quality, performance, merchantability, or fitness for a particular purpose.
-
Page 3: Table Of Contents
3.1 Requirements ............................. 24 3.2 Management Access Overview ......................... 24 3.3 Web Management ............................25 3.4 SNMP-Based Network Management ......................26 3.5 PLANET Smart Discovery Utility ......................27 4. WEB CONFIGURATION ...................... 29 4.1 Main Web Page ............................32 4.2 System ................................. 35 4.2.1 Management ................................ - Page 4 User’s Manual of GT-915A 4.2.1.4 Users Configuration ........................... 38 4.2.1.5 CPU Resource Utilization .......................... 39 4.2.1.6 Syslog Settings ............................40 4.2.1.7 System Log ............................... 41 4.2.2 IP Configuration ..............................42 4.2.2.1 IPv4 ................................42 4.2.2.2 IPv6 ................................42 4.2.3 SNMP Settings ..............................43 4.2.3.1 SNMP Configuration ..........................
- Page 5 User’s Manual of GT-915A 4.3.6 Link Fault Passthrough ............................82 4.4 QoS ................................83 4.4.1 Understanding QoS ............................. 83 4.4.2 General ................................84 4.4.2.1 QoS Mode Set ............................84 4.4.2.2 Class of Service............................85 4.4.2.3 802.1p-based QoS ............................ 86 4.4.2.4 DSCP-based Priority ..........................87 4.4.2.5 IP Addr Base..............................
-
Page 6: Introduction
User’s Manual of GT-915A 1. INTRODUCTION Thank you for purchasing PLANET Managed Media Converter. In the following sections, unless specified, the term “Managed Media Converter” mentioned in this manual refers to the GT-915A. Open the box of the Managed Media Converter and carefully unpack it. The box should contain the following items:... -
Page 7: Product Description
PLANET GT-915A 10/100/1000BASE-T to 100/1000BASE-X Managed Media Converter is developed to meet the advanced demand of network applications but it comes with the easy Plug and Play feature. The GT-915A provides all kinds of 10/100/1000Mbps Ethernet Media on RJ45 port and offers highly-stable Gigabit SFP fiber performance. It supports conversion between 10/100/1000BASE-T and 100/1000BASE-X Ethernet, which includes SFP slot with single-mode or multi-mode media as required. - Page 8 GT-915A operation statuses. Thus, they're designed for both the enterprises and industries where deployments of the GT-915A can be as remote as possible, without having to go to the actual location once a bug or faulty condition is found.
- Page 9 Easy Chassis Installation The GT-915A Media Converter can be used as a stand-alone unit or as a slide-in module to the PLANET Media Converter Chassis (MC-700, MC-1500 and MC-1500R series). The media chassis can assist in providing DC power to the GT-915A Media Converter to maintain the fiber-optic network at one centralized location.
-
Page 10: How To Use This Manual
User’s Manual of GT-915A 1.3 How to Use This Manual This User’s Manual is structured as follows: Section 2, INSTALLATION The section explains the functions of the Managed Media Converter and how to physically install the Managed Media Converter. Section 3, SWITCH MANAGEMENT The section contains the information about the software function of the Managed Media Converter. -
Page 11: Product Features
User’s Manual of GT-915A 1.4 Product Features Physical Port One 1G/100/10BASE-T RJ45 interface with auto MDI/MDI-X function One 1G/100BASE-X SFP interface Layer 2 Features Supports VLAN − IEEE 802.1Q tagged VLAN − Supports provider bridging (VLAN Q-in-Q, IEEE 802.1ad) −... - Page 12 − SFP-DDM (Digital Diagnostic Monitor) Syslog remote alarm Local system Log PLANET Smart Discovery Utility for deploy management PLANET Remote Management − PLANET NMS Controller and CloudViewer for deployment management Case and Installation External 5V DC, 2A power supply ...
-
Page 13: Product Specifications
User’s Manual of GT-915A 1.5 Product Specifications Model GT-915A Hardware Specifications Copper Interface 1 x 10/100/1000BASE-T RJ45 port (Auto-MDI/MDI-X) twisted pair Fiber Interface 1 x 100/1000BASE-X SFP Slot < 10 sec.: System reboot Reset Button > 10 sec.: Factory default... - Page 14 User’s Manual of GT-915A IEEE 802.1Q tag-based VLAN IEEE 802.1ad Q-in-Q tunneling VLAN Up to 16 VLAN groups, out of 4094 VLAN IDs Management VLAN Per port bandwidth control Bandwidth Control Ingress: 1~1000,000Kbps Egress: 1~1000,000Kbps Traffic classification based, strict priority and WRR...
- Page 15 User’s Manual of GT-915A RFC 792 ICMP RFC 2068 HTTP Environment Temperature: 0 ~ 50 degrees C Operating Relative Humidity: 5 ~ 95% (non-condensing) Temperature: -10 ~ 70 degrees C Storage Relative Humidity: 5 ~ 95% (non-condensing)
-
Page 16: Installation
User’s Manual of GT-915A 2. INSTALLATION This section describes the hardware features and installation of the Managed Media Converter on the desktop or rack mount. For easier management and control of the Managed Media Converter, familiarize yourself with its display indicators, and ports. -
Page 17: Converter Led Indicators
User’s Manual of GT-915A Reset the Managed Media Converter to Factory Default configuration. The Managed Media Converter will then reboot and load the default settings as below: 。 Default Username: admin > 5 sec: Factory Default 。 Default Password: admin 。... -
Page 18: Rear Panel
The central pole of the Managed Media Convertere’s power jacks measures 2.5mm wide that require +5VDC power input. It conforms to the bundled AC-DC adapter and PLANET’s media chassis. Should you have the issue of power connection, please contact your local sales representative. -
Page 19: Media Converter Installation
Step 1: Unpack the Media Converter. Step 2: Connect the 5V DC power adapter to the GT-915A and verify that the Power LED lights up. (Please refer to the 2.1.4 Power Information section for power input.) Step 3: 3-1: Prepare a twisted-pair, straight-through Category 5e/6/7 UTP cable for Ethernet connection. -
Page 20: Media Chassis Installation
User’s Manual of GT-915A Step 3: Hang the Managed Media Converter on the screws from the wall. Step 4: Refer to Chapter 2.1.4 Power Information on power supply to the Managed Media Converter. Before mounting the device to the wall, please check the location of the electrical outlet and the length of the Ethernet cable. -
Page 21: Installing The Sfp Transceiver
Figure 2-3: Plug-in the SFP Transceiver Approved PLANET SFP Transceivers PLANET Managed Media Converter supports both Single mode and Multi-mode SFP transceiver. The following list of approved PLANET SFP transceivers is correct at the time of publication: Gigabit SFP Transceiver Modules... - Page 22 MFB-TF20 SFP-Port 100BASE-FX Transceiver (1310nm) - 20km (-40~75 degrees C) It is recommended to use PLANET SFP on the Managed Media Converter. If you insert an SFP transceiver that is not supported, the Managed Media Converter will not recognize it.
- Page 23 User’s Manual of GT-915A Figure 2-4: How to Pull Out the SFP Transceiver Never pull out the module without lifting up the lever of the module and turning it to a horizontal position. Directly pulling out the module could damage the module and the SFP module slot of the Managed...
-
Page 24: Media Converter Management
User’s Manual of GT-915A 3. MEDIA CONVERTER MANAGEMENT This chapter explains the methods that you can use to configure management access to the Managed Media Converter. It describes the types of management applications and the communication and management protocols that deliver data between your management device (workstation or personal computer) and the system. -
Page 25: Web Management
User’s Manual of GT-915A Method Advantages Disadvantages • Text-based Command Line • Telnet and SSH protocols functionality • Security can be compromised (hackers • Ideal for configuring the switch remotely need only know the IP address and • Compatible with all popular browsers... -
Page 26: Snmp-Based Network Management
User’s Manual of GT-915A Figure 3-4: Web Main Screen of Managed Media Converter 3.4 SNMP-Based Network Management You can use an external SNMP-based application to configure and manage the Managed Media Converter, such as SNMP Network Manager, HP Openview Network Node Management (NNM) or What’s Up Gold. This management method requires the SNMP agent on the Managed Media Converter and the SNMP Network Management Station to use the same community string. -
Page 27: Planet Smart Discovery Utility
3.5 PLANET Smart Discovery Utility For easily listing the Managed Media Converter in your Ethernet environment, the PLANET Smart Discovery Utility is an ideal solution. The following installation instructions are to guide you to running the PLANET Smart Discovery Utility. - Page 28 To click the “Control Packet Force Broadcast” function, it can allow assign new setting value to the Web Smart Switch under a different IP subnet address. Press “Connect to Device” button and the Web login screen appears in Figure 3-4. Press “Exit” button to shut down the Planet Smart Discovery Utility.
-
Page 29: Web Configuration
User’s Manual of GT-915A 4. WEB CONFIGURATION This section introduces the configuration and functions of the Web-based management from Managed Media Converter. About Web-based Management The Managed Media Converter offers management features that allow users to manage the Managed Media Converter from anywhere on the network through a standard browser such as Microsoft Internet Explorer or Google Chrome. - Page 30 User’s Manual of GT-915A Figure 4-2: Login Screen Default User name: admin Default Password: admin After entering the username and password, the main screen appears as shown in Figure 4-1-3. Figure 4-3: Web Main Page Now, you can use the Web management interface to continue the switch management or manage the Managed Media Converter by Web interface.
- Page 31 User’s Manual of GT-915A It is recommended to use Chrome 98.0.xxx or above to access the Managed Media Converter. The changed IP address take effect immediately after clicking the Save icon on the top Switch Menu bar. You need to use the new IP address to access the Web interface.
-
Page 32: Main Web Page
User’s Manual of GT-915A 4.1 Main Web Page The Managed Media Converter provides a Web-based browser interface for configuring and managing it. This interface allows you to access the Managed Media Converter using the Web browser of your choice. This chapter describes how to use the Managed Media Converter’s Web browser interface to configure and manage it. - Page 33 User’s Manual of GT-915A Main Menu Using the onboard web agent, you can define system parameters, manage and control the Managed Media Converter, and all its ports, or monitor network conditions. Via the Web-Management, the administrator can set up the Managed Media Converter by selecting the functions those listed in the Main Function.
- Page 34 User’s Manual of GT-915A • The current (GMT) system time and date. The system time is obtained through the System Date configured NTP Server, if any. • System Uptime The period of time the device has been operational. • Software Version The software version of the Managed Media Converter.
-
Page 35: System
User’s Manual of GT-915A 4.2 System Use the system menu items to display and configure basic administrative details of the Managed Media Converter. Under the system the following topics are provided to configure and view the system information. This section has the following items:... -
Page 36: Management
User’s Manual of GT-915A page. SNMP Settings Configure the Managed Media Converter-SNMP functions on this web page. NTP Configuration Configure the Managed Media Converter-NTP function on this web page. Remote Management Configure the Planet NMS Configuration Table 4-2-1: Item Desciptions of System Web Page 4.2.1 Management... -
Page 37: System Configuration
User’s Manual of GT-915A • The current (GMT) system time and date. The system time is obtained through the System Date configured NTP Server, if any. • System Uptime The period of time the device has been operational. • Software Version The software version of the Managed Media Converter. -
Page 38: Device Information
User’s Manual of GT-915A 4.2.1.3 Device Information Access Device Information web page, you can view device informations of the Managed Media Converter, the screen in Figure 4-10. Figure 4-10: Device Information Page Screenshot The page includes the following fields: Object Description •... -
Page 39: Cpu Resource Utilization
User’s Manual of GT-915A The page includes the following fields: Object Description • User Name The name identifying the user. This is also a link to Add/Edit User. Enter the user’s new password here. • Password (Range: 0-32 characters plain text, case sensitive) •... -
Page 40: Syslog Settings
User’s Manual of GT-915A 4.2.1.6 Syslog Settings The Syslog settings provide to set system log settings, the configured column is used to select the related settings of Syslog settings as the screen in Figure 4-13 appears. Figure 4-13: Syslog Settings Configuration Page Screenshot... -
Page 41: System Log
User’s Manual of GT-915A 4.2.1.7 System Log The Managed Media Converter system log information is provided here. The System Log screen in Figure 4-14 appears. Figure 4-14: System Log Page Screenshot The page includes the following fields: Object Description •... -
Page 42: Ip Configuration
User’s Manual of GT-915A 4.2.2 IP Configuration The IP configuration includes the IPv4 subnet address setting and IPv6 subnet address setting, the configured column is used to view or change the IP configuration. 4.2.2.1 IPv4 The IPv4 configuration includes the IPv4 Address, Subnet Mask, Default Gateway and DNS Server, also the DHCPv4 Client Enable function. -
Page 43: Snmp Settings
User’s Manual of GT-915A 4.2.3 SNMP Settings The Simple Network Management Protocol (SNMP) is an application layer protocol that facilitates the exchange of management information between network devices. It is part of the Transmission Control Protocol/Internet Protocol (TCP/IP) protocol suite. -
Page 44: Snmp Configuration
User’s Manual of GT-915A 4.2.3.1 SNMP Configuration The SNMP Host Table provides to set SNMP settings; the configured column is used to input the selected operation modes of SNMP State, SNMP Trap and SNMP Link Change Traps as the screen in Figure 4-17 appears. - Page 45 User’s Manual of GT-915A Figure 4-18: SNMP View Table Configuration Page Screenshot\ The Current column is used to show the SNMP View Table configuration. Object Description Configure the Managed Media Converter view name information on this web page, the •...
-
Page 46: Snmp Group Table
User’s Manual of GT-915A 4.2.3.3 SNMP Group Table The SNMP View Table provide to set SNMP Group settings, the configured column is used to input the group name, change the Read, Write, Notify view type and Security Model /Level. The screen in Figure 4-19 appears. -
Page 47: Snmp User Table
User’s Manual of GT-915A Buttons : press this button to take affect. : press this button to delete. The SNMP group needs to create the view before group create. 4.2.3.4 SNMP User Table The SNMP User Table provide to set SNMP user settings, the configured column is used to input the user name, select the group name and input the password for Auth-Protocol MD5 /Priv-Protocol DES. -
Page 48: Snmp Community Table
User’s Manual of GT-915A Create SNMP views and groups are required to use, the security level of the user needs to be the same as the security level of the group. 4.2.3.5 SNMP Community Table The SNMP User Table provides to set SNMP community settings; the configured column is used to input the community name,... -
Page 49: Snmp Host Table
User’s Manual of GT-915A 4.2.3.6 SNMP Host Table The SNMP Host Table provides to set SNMP host settings. The configured column is used to input the host IP address, and select the security model, security level and community string for SNMPv3 user as the screen in Figure 4-22 appears. -
Page 50: Ntp Configuration
User’s Manual of GT-915A 4.2.4 NTP Configuration On this page. NTP, an acronym for Network Time Protocol, is for synchronizing the clocks of computer systems. NTP uses UDP (data grams) as transport layer. You can specify NTP Servers and set GMT time zone. The NTP configuration screen in Figure 4-23 appears. -
Page 51: Remote Management
APs, VoIP phones, IP cameras, etc., compliant with the SNMP Protocol, ONVIF Protocol and PLANET Smart Discovery utility. The CloudViewer is a free networking service just for PLANET Products. This service provides simplified network monitoring and real-time network status. Working with PLANET CloudViewer app, user can easily check network status, device information, Port and PoE status from Internet. - Page 52 User’s Manual of GT-915A The CloudViewer Server – Internet screens in Figure 4-26 appear. Figure 4-26 CloudViewer Server – Internet Configuration Page Screenshot Object Description • Remote NMS Enable Enable NMS management • Subscriber email The email registered on CloudViewer Server •...
-
Page 53: Switching
User’s Manual of GT-915A 4.3 Switching On the Access Basic configuration web page, you can view Port management function informations of the Managed Media Converter as the screen in Figure 4-27 appears. Figure 4-27: Managed Media Converter Basic Configuration Web Page... -
Page 54: Port Management
User’s Manual of GT-915A 4.3.1 Port Management 4.3.1.1 Port Configuration This page displays current port configurations and each port can also be configured here as the Port configuration screen in Figure 4-29 appears. Figure 4-29 : Port Configuration Page Screenshot... -
Page 55: Sfp Module Information
User’s Manual of GT-915A 4.3.1.2 SFP Module Information This page shows the operational status, such as the transceiver type, speed, wavelength, optical output power, optical input power, temperature, laser bias current and transceiver supply voltage in real time. The SFP Module Information page is shown Figure 4-30. -
Page 56: Oam Ts-1000
User’s Manual of GT-915A 4.3.2 OAM TS-1000 4.3.2.1 Local OAM TS-1000 Configuration This function provides Local TS-1000 OAM Setup of Managed Media Converter. Press the “Apply” button to save the current configuration of Managed Media Converter. The screen in Figure 4-35... -
Page 57: Remote Oam Ts-1000 Configuration
This function provides Remote TS-1000 OAM Setup of Managed Media Converter. Press the “Apply” button to save the current configuration of Managed Media Converter. The screen in Figure 4-33 appears. Figure 4-33 GT-915A Remote TS-1000 OAM Setup Web Page screen Please use the PLANET GST-80x and GT-91x as the Remote device. Notice:... -
Page 58: Oam Ts-1000 Loop Back
User’s Manual of GT-915A 4.3.2.3 OAM TS-1000 Loop Back The TS-1000 Loop Back Test allows manual run this loop back test to check the interconnection between two Media Converter devices. To assure the Remote TS-1000 OAM function can work correctly. - Page 59 Display the TS-1000 Loop Back Test Result. Fail or Pass. Result counter Display the value of Counter Result. Table 4-35 Descriptions of the TS-1000 Loop Back Test Web Page Screen Objects Please use the PLANET GST-80x and GT-91x as the Remote device. Notice:...
-
Page 60: Oam 802.3Ah
User’s Manual of GT-915A 4.3.3 OAM 802.3ah 4.3.3.1 Common OAM 802.3ah Configuration When enable 802.3ah OAM function, all 802.3ah OAMPDU packets will trap to embedded CPU. Software will implement auto discovery procedure. With hardware support, software controls the 802.3ah remote loop back procedure. -
Page 61: Remote Oam 802.3Ah Configuration
Table 4-37 Descriptions of the 802.3ah Setup Web Page Screen Objects 1. The 802.3ah function must work with manageable device that supports 802.3ah function. Notice: 2. Please use the PLANET GT-90x as the Remote device. 4.3.3.2 Remote OAM 802.3ah Configuration Figure 4-37 802.3ah Setup Web Page screen... -
Page 62: Oam 802.3Ah Loop Back
User’s Manual of GT-915A 4.3.3.3 OAM 802.3ah Loop Back The 802.3ah Loop Back Test allows manual run this loop back test to check the interconnection between two Media Converter devices. To assure the Remote 802.3ah function can work correctly. This function provides 802.3ah Loop Back Test of Managed Media Converter. Press the “Apply” button to run 802.3ah Loop Back Test and see the 802.3ah Loop Back Test Result of Managed Media Converter, also press the “Refresh”... - Page 63 Display the 802.3ah Loop Back Test Result. Fail or Pass. Table 4-39 Descriptions of the 802.3ah Loop Back Test Web Page Screen Objects 1. The 802.3ah function must work with manageable device that supports 802.3ah function. Notice: 2. Please use the PLANET GT-90x as the Remote device.
-
Page 64: Vlan Configuration
User’s Manual of GT-915A 4.3.4 VLAN Configuration 4.3.4.1 VLAN Overview A Virtual Local Area Network (VLAN) is a network topology configured according to a logical scheme rather than the physical layout. VLAN can be used to combine any collection of LAN segments into an autonomous user group that appears as a single LAN. -
Page 65: Ieee 802.1Q Vlan
User’s Manual of GT-915A QinQ Port Config Display and configure QinQ Port Config function on this web page. QinQ Index Config Display and configure QinQ Index Config function on this web page. Table 4-41: Descriptions of VLAN Configuration 4.3.4.2 IEEE 802.1Q VLAN In large networks, routers are used to isolate broadcast traffic for each subnet into separate domains. - Page 66 User’s Manual of GT-915A Some relevant terms: Tagging - The act of putting 802.1Q VLAN information into the header of a packet. Untagging - The act of stripping 802.1Q VLAN information out of the packet header. ■ 802.1Q VLAN Tags The figure below shows the 802.1Q VLAN tag.
- Page 67 User’s Manual of GT-915A ■ Port VLAN ID Packets that are tagged (are carrying the 802.1Q VID information) can be transmitted from one 802.1Q compliant network device to another with the VLAN information intact. This allows 802.1Q VLAN to span network devices (and indeed, the entire network –...
-
Page 68: Vlan Mode
User’s Manual of GT-915A ■ VLAN Classification When the switch receives a frame, it classifies the frame in one of two ways. If the frame is untagged, the switch assigns the frame to an associated VLAN (based on the default VLAN ID of the receiving port). But if the frame is tagged, the switch uses the tagged VLAN ID to identify the port broadcast domain of the frame. -
Page 69: Vlan Tag-Based Entry Config
User’s Manual of GT-915A Button : press this button to take effect. 4.3.4.4 VLAN Tag-based Entry Config Use the VLAN Tag-based entry config to configure port members function for the selected VLAN index. The VLAN Tag-based Entry config configuration can be monitored and modified here. Up to 26 VLANs are supported. This page allows for adding and... - Page 70 User’s Manual of GT-915A : press this button to delete specific VLAN group. Press the button to edit per member port state and the screen in Figure 4-44 appears. Figure 4-44: Edit VLAN Tag-based Entry Config Configuration Page Screenshot The page includes the following fields:...
-
Page 71: Vlan Port Config
User’s Manual of GT-915A GVRP (GARP VLAN Registration Protocol) maintains VLAN dynamic registration information for GVRP devices based on the working mechanism of GARP to maintain VLAN dynamic registration information that supports GVRP devices. And propagate this information to other devices in order to achieve agreement on VLAN information for all devices supporting GVRP in the same LAN. - Page 72 User’s Manual of GT-915A The VLAN Port configuration screen in Figure 4-46 is shown below. Figure 4-46 : VLAN Port Config Configuration Page Screenshot The page includes the following fields: Object Description • Port Selection Select specific port for VLAN settings.
- Page 73 User’s Manual of GT-915A • Exclusive Display per port Exclusive information. • Egress Display per port Egress information. • Ingress Check Display per port Ingress Check information. • Ingress-Frame Display per port Ingress Frame information. The port must be a member of the same VLAN as the Port VLAN ID.
-
Page 74: Q-In-Q Port Config
User’s Manual of GT-915A 4.3.4.6 Q-in-Q Port Config This page is used for configuring the Managed Media Converter Q-in-Q port VLAN function; the Q-in-Q port VLAN function configuration page contains fields for managing ports that are part of Q-in-Q VLAN. - Page 75 User’s Manual of GT-915A Q-in-Q Port Configuration The Q-in-Q Port configuration screen in Figure 4-47 is shown below. Figure 4-47 : Q-in-Q Port Configuration Page Screenshot The page includes the following fields: Object Description • Port Selection/Port Select specific port for Q-in-Q Port configuration./ List per port numbers.
-
Page 76: Q-In-Q Index Config
User’s Manual of GT-915A 4.3.4.7 Q-in-Q Index Config This page is used for configuring the Managed Media Converter Q-in-Q port VLAN function; the Q-in-Q port VLAN function configuration page contains fields for managing ports that are part of Q-in-Q VLAN. - Page 77 User’s Manual of GT-915A Q-in-Q Index Configuration The Q-in-Q Index configuration screen in Figure 4-48 appears. Figure 4-48 : Q-in-Q Index Configuration Page Screenshot The page includes the following fields: Object Description • Type Set the type value of service Tag.
-
Page 78: Lldp
User’s Manual of GT-915A 4.3.5 LLDP On this page, Link Layer Discovery Protocol (LLDP) is used to discover basic information about neighboring devices on the local broadcast domain. LLDP is a Layer 2 protocol that uses periodic broadcasts to advertise information about the sending device. -
Page 79: Lldp Port Setting
User’s Manual of GT-915A Interval >= (4 * Delay Interval) • Tx Hold Multiplier (2-10) This column provides configuring the value for Tx Hold Multiplier; the default value is 4 minute and the available range is 2 to 10. Each LLDP frame contains information about how long the information in the LLDP frame will be considered valid. - Page 80 User’s Manual of GT-915A The page includes the following fields: Object Description • Port Selection This column provides selecting specific port for LLDP Port Settings function. • Admin Status This column provides displaying and selecting the Admin status of LLDP and...
-
Page 81: Lldp Remote Mib
User’s Manual of GT-915A 4.3.5.3 LLDP Remote MIB This page allows you to configure the LLDP Remote MIB settings for Managed Media Converter as the screen in Figure 4-52 appears. Figure 4-52: LLDP Remote MIB Page Screenshot The page includes the following fields:... -
Page 82: Link Fault Passthrough
User’s Manual of GT-915A 4.3.6 Link Fault Passthrough GT-915A provides auto MDI/MDI-X on its TP port and built-in Link Fault Pass-through function (LFP). The LFP function includes Link Loss Carry Forward (LLCF) and Link Loss Return (LLR), both of which can immediately alarm administrators the problem of the link media and provide efficient solution to monitoring the net. -
Page 83: Qos
User’s Manual of GT-915A 4.4 QoS 4.4.1 Understanding QoS Quality of Service (QoS) is an advanced traffic prioritization feature that allows you to establish control over network traffic. QoS enables you to assign various grades of network service to different types of traffic, such as multi-media, video, protocol-specific, time critical, and file-backup traffic. -
Page 84: General
User’s Manual of GT-915A On the Access QoS configuration web page, you can view QoS management function informations of the Managed Media Converter as the screen in Figure 4-53 appears. Figure 4-53: Managed Media Converter QoS Configuration Web Page QoS Configuration... -
Page 85: Class Of Service
User’s Manual of GT-915A The page includes the following fields: Object Description • Queue Mode Select the Queue Mode for QoS and the available options are shown below: First-In-First-Out WRR/WFQ/Bwassure/Bwlimit/TWRR SPx1 WRR/WFQ/Bwassure/Bwlimit/TWRRx7 SPx2 WRR/WFQ/Bwassure/Bwlimit/TWRRx6 SPx4 WRR/WFQ/Bwassure/Bwlimit/TWRRx4 SPx8 • Queue Method... -
Page 86: P-Based Qos
User’s Manual of GT-915A Object Description • Port Selection Select specific port for QoS Class of Service settings. • Port No. Display per port list. • IP Addr Enable or disable the IP Address function for specific port. Also display per port IP Address status. -
Page 87: Dscp-Based Priority
User’s Manual of GT-915A 4.4.2.4 DSCP-based Priority This page allows you to configure the DSCP-based Priority settings for Managed Media Converter as the DSCP-based Priority screen in Figure 4-57 appears. Figure 4-57: DSCP-based Priority Configuration Page Screenshot The page includes the following fields:... -
Page 88: Ip Addr Base
User’s Manual of GT-915A 4.4.2.5 IP Addr Base This page allows you to configure the IP Addr Base settings for Managed Media Converter as the IP Addr Base screen in Figure 4-58 appears. Figure 4-58: IP Addr Base Configuration Page Screenshot... -
Page 89: Bandwidth Control
User’s Manual of GT-915A 4.4.3 Bandwidth Control This page allows you to configure the incoming and outgoing bandwidth control settings for all switch ports as the bandwidth control screen in Figure 4-59 appears. Figure 4-59: Bandwidth Control Configuration Page Screenshot... -
Page 90: Storm Control
User’s Manual of GT-915A 4.4.4 Storm Control Storm control for the switch is configured on this page. There are a broadcast storm rate control, multicast storm rate control, and unicast storm rate control. These only affect flooded frames, i.e. frames with a (VLAN ID, DMAC) pair not present on the MAC Address table. - Page 91 User’s Manual of GT-915A • Enable or disable the multicast storm control function. Multicast • DLF Enable or disable the unknown destination MAC packets control function. • ARP Enable or disable the ARP packets control function. • ICMP Enable or disable the ICMP packets control function.
-
Page 92: Security
User’s Manual of GT-915A 4.5 Security On the Access Security configuration web page, you can view and configure Security functions of the Managed Media Converter as the screen in Figure 4-61 appears: Figure 4-61: Managed Media Converter Security Configuration Web Page... -
Page 93: Https
User’s Manual of GT-915A Button : press this button to take effect. 4.5.1.2 HTTPS Configure HTTPS on this page. The HTTPS Configuration screen in Figure 4-64 appears. Figure 4-64: HTTPS Configuration Page Screenshot The page includes the following fields: Object Description •... -
Page 94: Maintenance
User’s Manual of GT-915A 4.6 Maintenance 4.6.1 Configuration The configuration includes backup and reload the current configuration of the Managed Media Converter to/from the local management station. 4.6.1.1 Backup The backup configuration provides downloading the Managed Media Converter configuration file (Current.tar.gz) to local... -
Page 95: Firmware Update
User’s Manual of GT-915A Figure 4-67: Restoring Configuration Page Screenshot Button : press this button to take effect 4.6.2 Firmware Update This page facilitates an update on the firmware controlling the switch as the Web Firmware Upgrade screen in Figure 4-68 appears. -
Page 96: System Reboot
User’s Manual of GT-915A Button : Click to reset the configuration to Factory Defaults. To reset the Managed Media Converter to the Factory default setting, you can also press the hardware-based reset button at the front panel about 5 seconds. -
Page 97: Troubleshooting
User’s Manual of GT-915A 5. TROUBLESHOOTING This chapter contains information to help you solve issues. If the Managed Media Converter is not functioning properly, make sure the Managed Media Converter was set up according to instructions in this manual. ■ The Link LED is not lit... - Page 98 To reset the IP address to the default IP address “192.168.0.100” or reset the login password to default value, press the hardware-based reset button on the front panel for about 5 seconds. After the device is rebooted, you can log in to the management Web interface within the same subnet of 192.168.0.xx. Figure 9-1: GT-915A Reset Button...
-
Page 99: Appendix A Networking Connection
User’s Manual of GT-915A Appendix A Networking Connection A.1 Device‘s RJ-45 Pin Assignments ■ 1000Mbps, 1000Base T RJ-45 Connector pin assignment Contact MDI-X BI_DA+ BI_DB+ BI_DA- BI_DB- BI_DB+ BI_DA+ BI_DC+ BI_DD+ BI_DC- BI_DD- BI_DB- BI_DA- BI_DD+ BI_DC+ BI_DD- BI_DC- 10/100Mbps, 10/100Base-TX... -
Page 100: Cable Pin Assignment
User’s Manual of GT-915A A.2 RJ-45 cable pin assignment The standard RJ-45 receptacle/connector There are 8 wires on a standard UTP/STP cable and each wire is color-coded. The following shows the pin allocation and color of straight cable and crossover cable connection:...
Need help?
Do you have a question about the GT-915A and is the answer not in the manual?
Questions and answers