Advertisement
Quick Links
Advertisement

Subscribe to Our Youtube Channel
Related Manuals for Spectra Stack


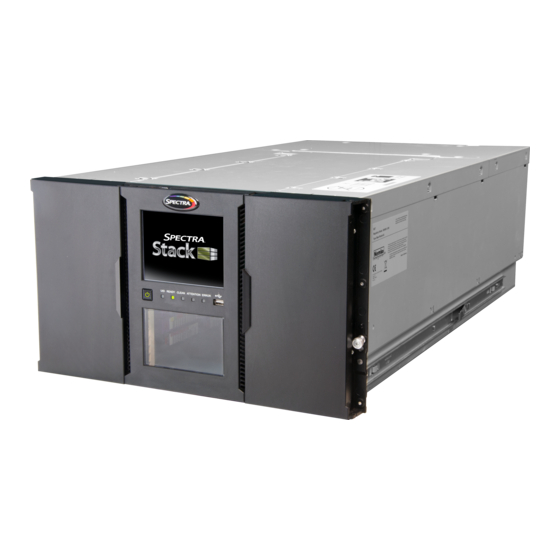
Summary of Contents for Spectra Stack
- Page 1 Spectra Stack Shipping Bracket Installation and Removal Guide SpectraLogic.com...
- Page 2 KIND, EITHER EXPRESSED OR IMPLIED, INCLUDING BUT NOT LIMITED TO THE IMPLIED WARRANTIES OF MERCHANTABILITY OR FITNESS FOR A PARTICULAR PURPOSE, BOTH OF WHICH ARE EXPRESSLY DISCLAIMED. In no event shall Spectra Logic be liable for any loss of profits, loss of business, loss of use or data, interruption of business, or for indirect, special, incidental or consequential damages of any kind, even if Spectra Logic has been advised of the possibility of such damages arising from any defect or error. Information furnished in this manual is believed to be accurate and reliable. However, no responsibility is assumed by Spectra Logic for its use. Due to continuing research and development, Spectra Logic may revise this publication from time to time without notice, and reserves the right to change any product specification at any time without notice. Trademarks BlackPearl, BlueScale, CC, RioBroker, Spectra, SpectraGuard, Spectra Logic, StorCycle, TeraPack, TFinity, TranScale, and Vail are registered trademarks of Spectra Logic Corporation. Attack Hardened, Eon Protect, and PreCal are trademarks of Spectra Logic Corporation. MigrationPass is a service mark of Spectra Logic Corporation. All rights reserved worldwide. All other trademarks and registered trademarks are the property of their respective owners. Part Number 90970045 Revision A Revision History Revision Date Description December 2022 Initial release. December 2022 Shipping Bracket Installation & Removal — Spectra Stack Library...
-
Page 3: Contacting Spectra Logic
Spectra Logic Sales Website: shop.spectralogic.com United States and Canada Europe Phone: 1.800.833.1132 or 1.303.449.6400 Phone: 44 (0) 870.112.2150 Fax: 1.303.939.8844 Fax: 44 (0) 870.112.2175 Email: sales@spectralogic.com Email: eurosales@spectralogic.com To Obtain Documentation Spectra Logic Website: support.spectralogic.com/documentation December 2022 Shipping Bracket Installation & Removal — Spectra Stack Library... -
Page 4: Before You Begin
OBOTICS HIPPING RACKET & R NSTALLATION EMOVAL This document describes installing and removing the robotics shipping bracket in a Spectra Stack library. The bracket is only required when a Stack library is installed in a data center rack prior to shipping. Estimated Time = 5 - 10 minutes EFORE YOU EGIN Before installing or removing the shipping bracket, make sure that you have addressed the following requirements. Gather Materials and Tools Required A #1 Phillips screwdriver A small screwdriver Recommended An anti‐static mat A static protection wristband or grounding footstrap Ensure ESD Protection The installation environment must be free of conditions that could cause ... -
Page 5: Shipping Bracket
Note: Keep all electronic components in anti‐static bags when not in use. NSTALL THE HIPPING RACKET Use the instructions in this section to install the robotics shipping bracket in the Spectra Stack tape library prior to shipping. 1. Remove the top cover. a. Using a small screwdriver, press down on the release latch on the top of the chassis at the front. Figure 1 Release the cover latch. b. Slide the top cover towards the front of the chassis until it contacts the screwdriver. c. Remove the screwdriver and slide the cover forward to release it from the chassis. d. Lift the cover off and set it aside. December 2022 Shipping Bracket Installation & Removal — Spectra Stack Library... - Page 6 Install the Shipping Bracket Ensure ESD Protection 2. Using a #1 Phillips screwdriver, remove the two screws that secure the slot 5 drive bay cover. Figure 2 The rear of the Spectra Stack chassis. 3. Move the drive bay cover to the slot 1 position at the bottom of the library. 4. Using a #1 Phillips screwdriver, install the two screws you removed in Step 2 to secure the cover to the chassis. 5. Locate the shipping lock inside the library at the front of the chassis. Figure 3 The shipping lock. December 2022 Shipping Bracket Installation & Removal — Spectra Stack Library...
- Page 7 Install the Shipping Bracket Ensure ESD Protection 6. To unlock the shipping lock, from the front of the chassis, slide the latch to the left (1), pull the latch toward the front of the chassis (2), then slide the latch to the right (3). Figure 4 The shipping lock. 7. Grasp the robotic module gently by the sides and pull up to raise the robotic elevator approximately one inch. Figure 5 Grasp the robot as shown. December 2022 Shipping Bracket Installation & Removal — Spectra Stack Library...
- Page 8 Figure 6 Use the cutout holes to raise the robotic elevator. 9. While holding the robotic elevator at the top of the chassis, install the robotic shipping bracket in the slot 5 drive bay (see Figure 2 on page 6). Note: It may be helpful to have a second person install the bracket while you hold the elevator in place. 10. Using a #1 Phillips screwdriver, remove the two screws under the handle of the robotic shipping bracket (1) and install the two screws at the ends of the shipping bracket to secure it to the chassis (2). Figure 7 The robotics shipping bracket rear panel. 11. Once the bracket is in place, release the elevator and allow it to rest on the robotic shipping bracket. December 2022 Shipping Bracket Installation & Removal — Spectra Stack Library...
- Page 9 Install the Shipping Bracket Ensure ESD Protection 12. Locate the shipping lock inside the library at the front of the chassis. Figure 8 The shipping lock. 13. To engage the shipping lock, from the front of the chassis, slide the latch to the left (1), pull the latch toward the rear of the chassis (2), then slide the latch to the right (3). Figure 9 The shipping lock. December 2022 Shipping Bracket Installation & Removal — Spectra Stack Library...
- Page 10 Install the Shipping Bracket Ensure ESD Protection 14. Position the cover over the opening in the chassis so that the tabs on the sides of the cover align with the slots in the chassis, and slide the cover towards the rear of the chassis until it locks in place. Figure 10 The top cover. December 2022 Shipping Bracket Installation & Removal — Spectra Stack Library...
- Page 11 You must remove the bracket prior to powering on the library to avoid an Important initialization failure. 1. Remove the top cover. a. Using a small screwdriver, press down on the release latch on the top of the chassis at the front. Figure 11 Release the cover latch. b. Slide the top cover towards the front of the chassis until it contacts the screwdriver. c. Remove the screwdriver and slide the cover forward to release it from the chassis. d. Lift the cover off and set it aside. December 2022 Shipping Bracket Installation & Removal — Spectra Stack Library...
- Page 12 Remove the Shipping Bracket Ensure ESD Protection 2. Locate the shipping lock inside the library at the front of the chassis. Figure 12 The shipping lock. 3. To unlock the shipping lock, from the front of the chassis, slide the latch to the left (1), pull the latch toward the front of the chassis (2), then slide the latch to the right (3). Figure 13 The shipping lock. December 2022 Shipping Bracket Installation & Removal — Spectra Stack Library...
- Page 13 Figure 14 The robotics shipping bracket rear panel. Using your finger, hold the robotic elevator in place (see Figure 6 on page 8) while you pull the shipping bracket out of the chassis. 6. Release the elevator and allow it to slowly descend to the bottom of the chassis. 7. Store the bracket and screws for use if you need to move the library after installation. 8. Using a #1 Phillips screwdriver, remove the two screws that secure the slot 1 drive bay cover. Figure 15 The rear of the Spectra Stack chassis. 9. Move the drive bay cover to the slot 5 position in the library. 10. Using a #1 Phillips screwdriver, install the two screws you removed in Step 8 to secure the cover to the chassis. December 2022 Shipping Bracket Installation & Removal — Spectra Stack Library...
- Page 14 Remove the Shipping Bracket Ensure ESD Protection 11. Replace the top cover. Note: Replacing the top cover is only necessary if the Stack base module is the top‐most chassis in the rack. a. Position the cover over the opening in the chassis so that the tabs on the sides of the cover align with the slots in the chassis. Figure 16 The top cover. b. Slide the cover towards the rear of the chassis until it locks in place. December 2022 Shipping Bracket Installation & Removal — Spectra Stack Library...
Need help?
Do you have a question about the Stack and is the answer not in the manual?
Questions and answers