
Related Manuals for Spectra T200


Summary of Contents for Spectra T200
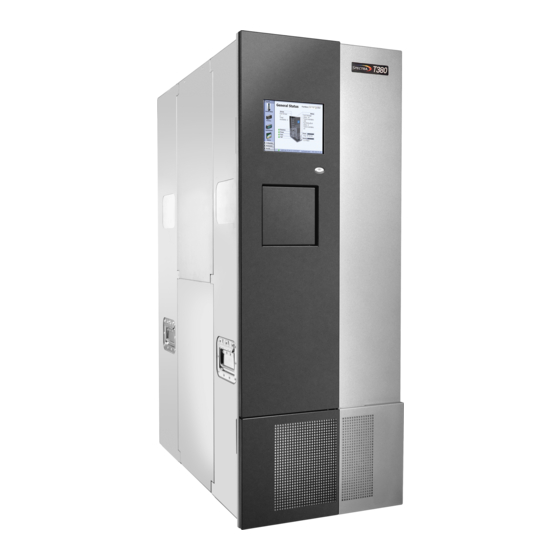
- Page 1 Spectra T200, T380, T680, T950, and T-Finity Libraries Fan Replacement Instructions SpectraLogic.com...
- Page 2 KIND, EITHER EXPRESSED OR IMPLIED, INCLUDING BUT NOT LIMITED TO THE IMPLIED WARRANTIES OF MERCHANTABILITY OR FITNESS FOR A PARTICULAR PURPOSE, BOTH OF WHICH ARE EXPRESSLY DISCLAIMED. In no event shall Spectra Logic be liable for any loss of profits, loss of business, loss of use or data, interruption of business, or for indirect, special, incidental or consequential damages of any kind, even if Spectra Logic has been advised of the possibility of such damages arising from any defect or error. Information furnished in this manual is believed to be accurate and reliable. However, no responsibility is assumed by Spectra Logic for its use. Due to continuing research and development, Spectra Logic may revise this publication from time to time without notice, and reserves the right to change any product specification at any time without notice. Trademarks BlueScale, Spectra, SpectraGuard, Spectra Logic, TeraPack, T‐Finity, and TranScale are registered trademarks of Spectra Logic Corporation. ArchiveGrade and nTier Verde are trademarks of Spectra Logic Corporation. All rights reserved worldwide. All other trademarks and registered trademarks are the property of their respective owners. Part Number 91010019 Revision C Revision History Revision Date Description Initial release April 2010 Updated to add T‐Finity library November 2013 Modified instructions for Boa & T‐Finity libraries November 2013 Spectra T200, T380, T680, T950 and T-Finity libraries...
-
Page 3: Contacting Spectra Logic
Email: Spectra Logic Sales Website: www.spectralogic.com/shop United States and Canada Europe Phone: 1.800.833.1132 or 1.303.449.6400 Phone: 44 (0) 870.112.2150 Fax: 1.303.939.8844 Fax: 44 (0) 870.112.2175 Email: sales@spectralogic.com Email: eurosales@spectralogic.com To Obtain Documentation Spectra Logic Website: www.spectralogic.com/documents November 2013 Spectra T200, T380, T680, T950 and T-Finity libraries... -
Page 4: Replacing The Fan Assembly
Replacing the Fan Assembly This guide provides instructions for replacing the fan assembly in a Spectra T200, T380, T680, T950, or T‐Finity library, referred to in this document as “the library”. REPARE FOR AINTENANCE Before you begin the replacement procedure, make sure you fulfill the prerequisites described in this section. Discontinuing Backups T200, T380, T680 libraries Backups cannot run during fan replacement since the library must be powered down. Use your backup software to stop any backups running to the library. T950 and T-Finity libraries Backups can continue to run while you replace the fan assembly. Ensuring ESD Protection The repair environment for the library must be free of conditions that could cause electrostatic discharge (ESD). To protect the library from ESD, follow these procedures when repairing or testing the library: Place a static protection mat on the work surface used while removing and installing library components. Use a 1‐megohm resistor to ground the static protection mat. Wear a static protection wristband or grounding footstrap whenever you handle library components when they are removed from their anti‐static bags. Connect the wristband to the static protection mat or to ... - Page 5 T-Finity T-Finity Fan Assembly Main and Drive Used in the Main frame and frames: the Drive-expansion frames PN 90948283 T-Finity Service Bay T-Finity Service Fan Assembly frames: PN 90948284 Connector Spectra T200, T380, T680, T950 and T-Finity libraries November 2013...
- Page 6 Service panel. T‐Finity and T950B Media Expansion Frames do not have fans. Front panel power button Fan assembly location Fan assembly location (behind filter cover panel) (behind filter cover panel) Filter cover panel Spectra T200, T380, T680, T950 and T-Finity libraries November 2013...
-
Page 7: Fan Assembly
Replacing the Fan Assembly Replacing a T200, T380, or T680 Fan Assembly EPLACE THE SSEMBLY Risk of electrical shock. Hazardous moving parts. Turn off the power to the library Warning and disconnect the power cords before accessing the fan. Replacing a T200, T380, or T680 Fan Assembly This section describes how to replace the fan assembly in a T200, T380, or ... -
Page 8: Remove The Front Panel
Replacing the Fan Assembly Replacing a T200, T380, or T680 Fan Assembly 3. Back Panel—Disconnect the AC power cords from the library. Note: If cable locks are installed on the power cords, it may be easier to disconnect the cords from the AC outlets at the wall. If you have redundant power supplies installed, make sure you disconnect both power cords. Remove the Front Panel Follow these steps to remove the front panel: 1. From the front of the library, pull firmly outward on the top edge of the filter cover panel to release the magnetic latches and tip the cover out from the front panel. Library Front 1. Pull outward 2. Lift upward Figure 2 Filter cover panel removal. - Page 9 Replacing the Fan Assembly Replacing a T200, T380, or T680 Fan Assembly 3. Using your fingers or a #2 Phillips screwdriver, loosen the two knurled screws securing the bottom of the library front panel to the chassis. Library Front Knurled screws Figure 3 Front panel screws. 4. Lift the front panel upward and away from the chassis to disengage the two nuts on the back of the front panel from the holes on either side of the chassis. Set the cover aside. Lift up and away Library Front Alignment nut on front panel Figure 4 Front panel removal.
- Page 10 Replacing the Fan Assembly Replacing a T200, T380, or T680 Fan Assembly Replace the Fan Assembly Follow these steps to replace the fan assembly: 1. Using your fingers or a #2 Phillips screwdriver, fully loosen the knurled captive screw securing the fan assembly to the chassis. Library Front 1. Loosen knurled screw Gasket material 2. Pivot the assembly out. Figure 5 Fan assembly removal. 2. Pivot the left side of the fan assembly away from the library to remove ...
-
Page 11: Replace The Front Panel
Replacing the Fan Assembly Replacing a T200, T380, or T680 Fan Assembly 5. Angle the right edge of the assembly behind the front right edge of the chassis so that the notches in the edge of the assembly fit over the PEM nuts on the chassis. Library Front Front edge of chassis PEM nuts Gasket material Knurled screw Figure 6 Fan assembly installation. 6. Pivot the left side of the fan assembly in toward the library. 7. Using your fingers or a #2 Phillips screwdriver, tighten the knurled screw on the left side of the fan assembly to secure the assembly to the chassis. Replace the Front Panel 1. - Page 12 Replacing the Fan Assembly Replacing a T200, T380, or T680 Fan Assembly c. Fit the alignment pin on the top edge of the panel and the two nuts extending from the back of the front panel into the corresponding holes on the edges of the chassis. Note: Make sure that the power button fits into the cutout in the front panel and that the front panel is flush against the front of the chassis. Library Front Chassis Alignment nut on front panel Figure 7 Front panel attachment. 2. Using your fingers or a #2 Phillips screwdriver, tighten the two knurled screws on the bottom of the library front cover to secure it to the chassis. Library Front Slots for...
-
Page 13: Powering On The Library
Replacing the Fan Assembly Replacing a T200, T380, or T680 Fan Assembly 3. Position the tabs on the back of the filter cover over the slots in the front cover. 4. Insert the tabs into the slots in the front of the library, then slide the cover downward. Push the upper edge of the cover inward toward the front panel until the magnets secure it to the front panel. Library Front Push inward Slide downward Figure 9 Install the filter cover. Powering On the Library Press and hold the front panel power button (see Locating the Fans on page 6) for two to three seconds or until the button’s LED illuminates. 2. Wait while the library completes its power‐on sequence, which takes ... - Page 14 Replacing a T950 or T-Finity Fan Assembly Replacing a T950 or T-Finity Fan Assembly This section describes how to replace a fan assembly in a Spectra T950 or T‐Finity library. The steps are the same for both library types and similar for both types of fan assemblies in a T‐Finity library. Follow these steps to replace the fan assembly: 1. Remove the filter cover. T950 library: Remove the filter cover by pulling outward on the handle at the top left of the panel and the bottom right corner of the panel. T‐Finity library: Remove the filter cover by pulling outward on the bottom center of the panel, then pulling outward on the handle at the top center of the panel. Library Front View Filter cover 2. Set the cover aside. Spectra T200, T380, T680, T950 and T-Finity libraries November 2013...
- Page 15 Figure 10 The fan assembly screws (T-Finity frame shown). T‐Finity Service Frame: Use a a #2 Phillips screwdriver to remove the four recessed screws securing the fan assembly. Library Front Figure 11 The T-Finity service frame fan assembly screws. 4. Pull the old fan assembly straight out of the library. If you are installing a T‐Finity service frame module, continue to Step 5 on page For all other fan modules, skip to Step 6 on page Spectra T200, T380, T680, T950 and T-Finity libraries November 2013...
- Page 16 Figure 12 Side panels on a T-Finity service frame fan Figure 13 The long and short captive module. screw tabs on the side brackets of the service frame fan module. b. The longer length captive screw tab points toward the center of the library when the module is installed. If the long tab is on the right side of the service frame fan module, the module can be installed in the left‐side service frame. If the long tab is on the left side of the service frame fan module, the module can be installed in the right‐side service frame. Spectra T200, T380, T680, T950 and T-Finity libraries November 2013...
- Page 17 Replacing a T950 or T-Finity Fan Assembly c. If the fan module is configured to fit in the opposite side service frame than the service frame needing a replacement, use a #2 Phillips screwdriver to remove the three screws securing each side bracket. Screws Figure 14 The screws securing the side bracket to the service frame fan module. Position the long captive screw tab bracket (see Figure 13 on page 16) so that it is on the side of the service frame fan module that is closest to the center of the library. Use a number #2 Phillips screwdriver to secure the bracket to the fan module. e. Install the short‐tab bracket on the other side of the fan module. Spectra T200, T380, T680, T950 and T-Finity libraries November 2013...
- Page 18 Figure 15 The fan assembly internal connector (T-Finity frame shown). 7. Ensure that the tab on the top of the fan assembly depresses the safety switch on the chassis. Library Front Switch Screws Figure 16 The safety switch (T950 shown). 8. Use a #2 Phillips screwdriver to replace the four fan assembly screws (see Figure 10 and Figure 11 on page 15). Replace the filter cover. Refer to Step 1 on page Spectra T200, T380, T680, T950 and T-Finity libraries November 2013...
- Page 19 Severe damage can occur if the component is not packaged correctly, and you may Caution be invoiced if it is received with damage due to improper or insufficient packaging. Use the return label and instructions that were included with the replacement component when preparing to ship the replacement part. If you cannot locate these, contact Spectra Logic for another copy (see Contacting Spectra Logic on page 3). The return label and RMA printed on it are used to associate the returned part with your account. To avoid being invoiced for failure to return the part, do not ship the part back without the RMA return label. Spectra T200, T380, T680, T950 and T-Finity libraries November 2013...
Need help?
Do you have a question about the T200 and is the answer not in the manual?
Questions and answers