Table of Contents
Advertisement
Quick Links
Advertisement
Chapters
Table of Contents

Subscribe to Our Youtube Channel
Related Manuals for SMART Room System SRS-LYNC-XS


Summary of Contents for SMART Room System SRS-LYNC-XS
- Page 1 Help us make this document better smarttech.com/docfeedback/170819 SMART Room System™ for Microsoft® Lync® ADMINISTRATOR’S GUIDE FOR MODELS SRS-LYNC-XS, SRS-LYNC-S, SRS-LYNC-M, SRS-LYNC-M-DUAL, SRS-LYNC-L AND SRS-LYNC-XL FEATURING SMART BOARD® 8055i-G5, 8070i-G4 AND 8084i-G4 INTERACTIVE FLAT PANELS...
- Page 2 © 2015 SMART Technologies ULC. All rights reserved. No part of this publication may be reproduced, transmitted, transcribed, stored in a retrieval system or translated into any language in any form by any means without the prior written consent of SMART Technologies ULC. Information in this manual is subject to change without notice and does not represent a commitment on the part of SMART.
-
Page 3: Important Information
Do not open or disassemble the SMART product. You risk electrical shock from the high voltage inside the casing. Opening the casing also voids your warranty. Do not stand (or allow children to stand) on a chair to touch the surface of your SMART product. Rather, mount the product at the appropriate height. - Page 4 Because the interactive flat panel is heavy, rope, wire or handle failure could lead to personal injury. Use SMART supplied mounting hardware or hardware that is designed to properly support the weight of your product. Disconnect all power cables for your interactive flat panel from the wall outlet and seek...
-
Page 5: Table Of Contents
Contents Important information Chapter 1: Welcome About this guide About your room system Resources for administrators Resources for others Chapter 2: Maintaining your room system Recommended tools Turning off your room system Maintaining the interactive flat panels Maintaining the console Maintaining the camera Maintaining the microphones Maintaining the speakers... - Page 6 SMART Settings controls Appendix B: Using the interactive flat panel on-screen display menus Using the SMART Board 8055i-G5 interactive flat panel on-screen display menu Using the SMART Board 8070i-G4 interactive flat panel on-screen display menu Using the SMART Board 8084i-G4 interactive flat panel on-screen display menu...
- Page 7 Wall stand kit Comparing room sizes Resources for administrators Setup guide Support center and knowledge base Resources for others Resources for decision makers Resources for installers Resources for users This chapter introduces you to this guide and your SMART Room System™ for Microsoft® Lync®. smarttech.com/kb/170819...
-
Page 8: Chapter 1 Welcome
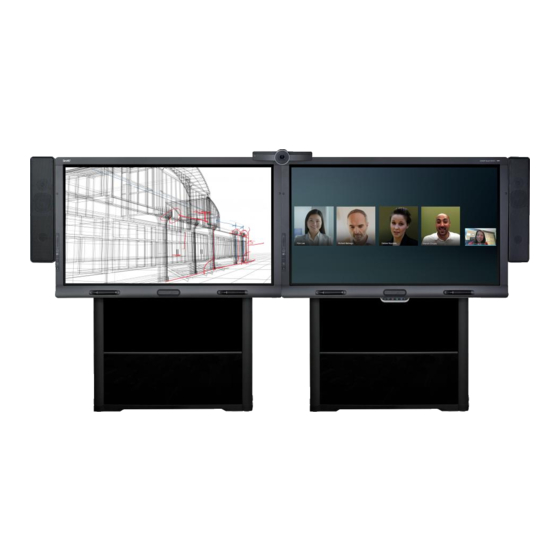
About your room system Your room system features one or two SMART Board® interactive flat panels, a Lync appliance, a tabletop console, a high-definition camera, microphones, speakers and cables for use with an optional computer. -
Page 9: Automatic Sharing Of Video And Audio
Components Your room system consists of the following major components: Part no. Description Room sizes SBID 8055i-G5 SMART Board 8055i-G5 interactive flat panel Extra small Medium with dual panels (×2) SBID 8070i-G4 SMART Board 8070i-G4 interactive flat panel Small Large (×2) SBID 8084i-G4 SMART Board 8084i-G4 interactive flat panel... -
Page 10: Smart Board Interactive Flat Panels
In room systems with SMART Board 8055i-G5 interactive flat panels, the Lync appliance is installed in an enclosure mounted to the wall behind the left interactive flat panel. -
Page 11: Console
CHAPTER 1 WELCOME Console The console is the room system’s primary display. It enables users to access and control the features of Lync Room System software during meetings. The console is typically located on the meeting room table. Like the interactive flat panels, the console features a 16:9 LCD screen with touch technology, enabling users to interact with buttons and other controls by pressing them. -
Page 12: Smart Room System Usb Bridge
When combined with the video connection harness, the SMART Room System USB Bridge enables users to connect their laptops or a room computer to the room system. When users connect the SMART Room System USB Bridge to a computer, they can interact with the computer by touching the interactive flat panel’s surface. -
Page 13: Comparing Room Sizes
CHAPTER 1 WELCOME Comparing room sizes The SMART Room System comes in six sizes. This section presents the key differences between these sizes. Extra small room (SRS-LYNC-XS) Intended use: Extra small meeting rooms (approximately four people) 75 sq. ft. (7 m²) Display type: One SMART Board 8055i-G5... -
Page 14: Resources For Administrators
In addition to this guide, there are other resources for SMART Room System administrators. Setup guide Refer to the SMART Room System for Lync setup guide included with your room system to prepare for the room system prior to installation and then set it up after installation. If you misplaced this guide, you can download a PDF version from smarttech.com/kb/170820. -
Page 15: Resources For Others
CHAPTER 1 WELCOME Resources for others SMART provides resources for SMART Room System decision makers, installers and users as well as administrators. Resources for decision makers Decision makers can refer to the SMART Room System website (smarttech.com/smartroom) for general information on room systems and to the specifications for detailed information on specific products. -
Page 16: Resources For Users
The table top guide includes basic information on using the room system. In addition, users can refer to the SMART Room System for Lync user’s guide (smarttech.com/kb/170818) for more detailed information. smarttech.com/kb/170819... -
Page 17: Chapter 2: Maintaining Your Room System
Chapter 2 Maintaining your room system Recommended tools Turning off your room system Maintaining the interactive flat panels Calibrating the interactive flat panels Orienting the interactive flat panels Cleaning the screens Cleaning the presence detection sensors Cleaning the camera windows and reflective tape Maintaining ventilation Preventing condensation Maintaining pens... -
Page 18: Recommended Tools
Functional spare microphone and audio processor kit, including cables Functional spare speaker kit, including cables Functional spare power supplies for the camera, audio processor and speakers for room systems with SMART Board 8055i-G5 interactive flat panels IT access IT administrator with knowledge of your organization’s Lync infrastructure SMART Board interactive flat panel remote control... -
Page 19: Turning Off Your Room System
To turn off your room system 1. On the console, press Options, and then press Restart. 2. When the screens are blank or when the SMART logo appears, do the following: a. If the room system includes SMART Board 8055i-G5 interactive flat panels, press the power button on the Lync appliance enclosure. -
Page 20: Calibrating The Interactive Flat Panels
Digital cameras in the corners of the interactive flat panels track the position of the pens, eraser and your finger on the screens, and then send the information to SMART Product Drivers, which interprets this information as mouse clicks, digital ink or ink removal in the appropriate location. -
Page 21: Orienting The Interactive Flat Panels
You’re unable to orient the interactive flat panels in meeting mode. If your room system includes SMART Board 8055i-G5 interactive flat panels, ensure version 15.12.02 or later of Lync Room System software is installed before attempting to orient the interactive flat panels (see Updating software and firmware on page 23). - Page 22 The room system restarts. 3. Type the room system administrator account’s password, and then press ENTER. The Lync Admin Console appears. 4. Press OEM Settings, and then press SMART Settings. SMART Settings appears. 5. Press SMART Hardware Settings. 6. Press the icon of the interactive flat panel you want to orient.
-
Page 23: Cleaning The Screens
2. Wipe the screens with a lint-free, non-abrasive cloth. Cleaning the presence detection sensors Each SMART Board 8055i-G5 interactive flat panel has one presence detection sensor, and each SMART Board 8070i-G4 and 8084i-G4 interactive flat panel has two presence detection sensors. The sensors should be inspected regularly for dust and should be cleaned if any obvious dust buildup has occurred. -
Page 24: Cleaning The Camera Windows And Reflective Tape
CHAPTER 2 MAINTAINING YOUR ROOM SYSTEM Cleaning the camera windows and reflective tape The DViT technology in the interactive flat panels uses four cameras in the corners of the frames and the reflective material between the screens and the bezels. Excessive dust buildup on the camera windows or reflective tape can impair touch performance. -
Page 25: Preventing Condensation
(see smarttech.com/Support/PartsStore). NOTE For room systems with SMART Board 8070i-G4 or 8084i-G4 interactive flat panels, you can replace the pen nib instead of the entire pen. These room systems come with replacement nibs. For instructions on removing a worn nib with a replacement nib, see the Pen nib replacement installation instructions (smarttech.com/kb/156689). -
Page 26: Maintaining The Console
CHAPTER 2 MAINTAINING YOUR ROOM SYSTEM Maintaining the console Follow these instructions to clean the console’s screen without damaging its anti-glare coating or other product components. CAUTION Do not rub the screen with a dense or rough material. Do not apply excessive pressure to the screen. Do not use cleaning solution or glass cleaner on the screen, because they can deteriorate or discolor the screen. -
Page 27: Maintaining The Microphones
CHAPTER 2 MAINTAINING YOUR ROOM SYSTEM Maintaining the microphones Follow these instructions to clean the microphones. To clean the microphones 1. Turn off your room system (see Turning off your room system on page 13). 2. Wipe the microphones with a lint-free, non-abrasive cloth. Maintaining the speakers Follow these instructions to clean the speakers. -
Page 28: Removing And Transporting Your Room System
This packaging was designed with optimal shock and vibration protection. If your original packaging isn’t available, you can purchase the same packaging directly from your authorized SMART reseller (smarttech.com/where). Transporting your room system without correct packaging voids your warranty and could lead to product damage. -
Page 29: Chapter 3: Maintaining Software And Firmware
You can also manually check for updates. For alternative methods of updating Lync Room System software, see Summary of SMART Room System for Lync software updates (kb.smarttech.com/?q=14458). To manually check for updates 1. On the console, press Options, and then press Settings. -
Page 30: Enabling The Room Pc View Feature
CHAPTER 3 MAINTAINING SOFTWARE AND FIRMWARE 5. Press Check Updates and Install. Lync Room System software checks for and installs any updates. 6. Press Apply & Restart. Enabling the Room PC View feature If you want to connect a room computer to your room system, you must enable the Room PC View feature. -
Page 31: Chapter 4: Remotely Monitoring Your Room System
Installing the Lync Room System Administrative Web Portal Using the Lync Room System Administrative Web Portal Using the Lync Room System Administrative Web Portal, you can remotely collect diagnostic information to monitor the health of your SMART Room System. Installing the Lync Room System Administrative Web Portal To install the Lync Room System Administrative Web Portal 1. - Page 32 CHAPTER 4 REMOTELY MONITORING YOUR ROOM SYSTEM To log on to the Lync Room System Administrative Web Portal 1. Open your Internet browser. 2. Go to the following address: https:// [Computer] /lrs Where [Computer] is the address of the computer you installed the Lync Room System Administrative Web Portal on.
- Page 33 CHAPTER 4 REMOTELY MONITORING YOUR ROOM SYSTEM 4. Set the following controls: Control Procedure Credentials Password Type the room system’s password, and then click Set. Show password Select the check box to show the password. Room Tag Type the room system’s tag, and then click Update. Audio Default Speaker Move the slider to the right to increase the default speaker volume...
- Page 34 CHAPTER 4 REMOTELY MONITORING YOUR ROOM SYSTEM To save a room system’s diagnostic logs 1. Log on to the Lync Room System Administrative Web Portal (see To log on to the Lync Room System Administrative Web Portal on page 26). 2. Click the room system’s Room Name link. 3.
-
Page 35: Chapter 5: Remotely Managing Your Room System
Ports Intel MEBx controls References Intel® AMT is part of Intel vPro® technology, which is used in your SMART Room System’s Lync appliance. You can use Intel AMT to remotely manage your room system. Before you can use Intel AMT, you must first enable and configure it on the Lync appliance. You can then connect to the room system... -
Page 36: Configuring Your Room System
1. Turn off your room system (see Turning off your room system on page 13). 2. Connect a USB keyboard to the Lync appliance. 3. If the room system includes SMART Board 8055i-G5 interactive flat panels, press the power button on the Lync appliance enclosure. -
Page 37: Remotely Managing Your Room System
CHAPTER 5 REMOTELY MANAGING YOUR ROOM SYSTEM To configure Intel AMT 1. Enter the default Intel AMT password (admin) when prompted, and then change the Intel AMT password following the on-screen instructions. IMPORTANT New passwords must be between eight and 32 characters in length and must contain at least one of each of the following character types: Uppercase letters (A–Z) Lowercase letters (a–z) -
Page 38: Using Management Software
After you connect to your room system, you can perform all of the administrative tasks described in this guide, including restarting the room system in administrator mode and making configuration changes in Lync Admin Console and SMART Settings. NOTE When you connect to a room system using remote access software, an orange and yellow border appears around the room system’s screens and an icon flashes in the top-right corner to... -
Page 39: Security
CHAPTER 5 REMOTELY MANAGING YOUR ROOM SYSTEM To connect to your room system using DameWare 1. Start DameWare. 2. Click Connect. The Remote Connect window opens. 3. Type the IP address for the room system in the Host box. 4. Type admin in the User ID box. 5. -
Page 40: Ports
CHAPTER 5 REMOTELY MANAGING YOUR ROOM SYSTEM Ports Ensure the following ports are open for use by Intel AMT: Port Description 16992 Intel AMT HTTP WS-Management messages to and from Intel AMT NOTE This port is open over the network only when Intel AMT is configured or during the configuration process. -
Page 41: Intel Mebx Controls
Lowercase letters (a–z) Digits (0–9) Non-alphanumeric characters Local FW Update Select Enabled to enable local firmware SMART recommends not changing this updates. control from its default setting. Select Disabled to disable local firmware updates. Select Password Protected to protect local firmware updates using the Intel AMT... - Page 42 CHAPTER 5 REMOTELY MANAGING YOUR ROOM SYSTEM Control Procedure Notes (if any) Legacy Redirection Select Enabled to leave the port open at all times when redirection is enabled in Intel MEBx. Mode User Consent Select KVM to require local user consent for This control doesn’t affect your room User Opt-in Intel KVM remote control.
- Page 43 CHAPTER 5 REMOTELY MANAGING YOUR ROOM SYSTEM Control Procedure Notes (if any) Type how long (in seconds) the record should This control is only available if you enable not be scavenged in DNS server. Dynamic DNS Update. TCP/IP Settings Wired LAN IPV4 Configuration DHCP Mode Select Enabled to configure TCP/IP settings by a Dynamic Host Configuration Protocol (DHCP)
-
Page 44: References
CHAPTER 5 REMOTELY MANAGING YOUR ROOM SYSTEM Control Procedure Notes (if any) RCFG Start Configuration Select Y to activate remote configuration. Select N to not activate remote configuration. TLS PSK Set PID and PPS Type the provisioning ID (PID) and provisioning pre-shared key (PPS) in the dash format. -
Page 45: Chapter 6: Troubleshooting
NOTES If you come across an issue not in this chapter, refer to the SMART Room System for Lync troubleshooting decision tree and other troubleshooting information in the SMART knowledge base (see Support center and knowledge base on page 8). -
Page 46: Resolving Hardware Issues
Speakers Back of each speaker It’s good practice to record these serial numbers in a safe place. You can use the SMART Room System for Lync setup guide provided with your room system for this purpose (see Setup guide on page 8). smarttech.com/kb/170819... -
Page 47: Locating Power And Status Lights
Your room system’s components have power and status lights, which you can use when resolving common issues with the room system. No. Component Light Interactive flat panel Standby (SMART Board 8055i-G5 interactive flat panels) Power/Standby (SMART Board 8070i-G4 and 8084i-G4 interactive flat panels) Console Power and status... -
Page 48: Resolving Issues With Smart Board 8055I-G5 Interactive Flat Panels
NOTE The following power and status lights aren’t shown in the above diagram: Touch system light on the interactive flat panels (room systems with SMART Board 8070i-G4 and 8084i-G4 interactive flat panels only) Power, hard drive activity and network connection lights on the Lync appliance Power light on the Lync appliance enclosure (room systems with SMART Board 8055i-G5... - Page 49 CHAPTER 6 TROUBLESHOOTING Standby light Interactive flat panel Issues Solutions status Solid amber Standby mode The interactive flat panels Enable presence detection (see don’t turn on when page 62). Reduce the room temperature to participants enter the room. increase the difference between the ambient temperature and human body temperature.
- Page 50 Solid white On with no touch There’s no touch control. Use SMART Board Diagnostics, control which is available from SMART Settings (see page 55), to troubleshoot the issue. Ensure that the USB cables are connected as shown in the installation instructions (see page 9).
-
Page 51: Resolving Issues With Smart Board 8070I-G4 And 8084I-G4 Interactive Flat Panels
Resolving issues with SMART Board 8070i-G4 and 8084i-G4 interactive flat panels Use the following table to resolve issues with your room system’s SMART Board 8070i-G4 and 8084i-G4 interactive flat panels. Lights Interactive flat panel Issues... - Page 52 On with no touch There’s no touch control. Use SMART Board Diagnostics, Solid green control which is available from SMART Settings (see page 55), to Touch system: troubleshoot the issue. Flashing or solid green Ensure that the USB cable is connected as shown in the installation instructions (see page 9).
- Page 53 CHAPTER 6 TROUBLESHOOTING Lights Interactive flat panel Issues Solutions status Power: On with touch control The displays are blank. Press the Input Select buttons Solid green on the front control panels Touch system: until you select HDMI3/PC. Solid green Ensure that the HDMI cables are connected as shown in the installation instructions (see page 9).
-
Page 54: Resolving Issues With The Console
HDMI1 receptacle on the Lync appliance is connected to the console. There’s no touch control. Use SMART Board Diagnostics, which is available from SMART Settings (see page 55), to troubleshoot the issue. Ensure that the USB cable is connected as shown in the installation instructions (see page 9). -
Page 55: Resolving Issues With The Microphones
CHAPTER 6 TROUBLESHOOTING Lights Camera status Issues Solutions Video capture: Hardware error The camera’s video output Temporarily disconnect the power doesn’t appear. cable from the camera and then connect it again after a few Service light: seconds. Flashing red Video capture: Hardware error (the The camera’s video output Ensure the USB cable from the... -
Page 56: Resolving Software Issues
If you find the room system takes a long time to restart when you are modifying settings, you can remove unused Microsoft language packs to improve the restart time. For more information, see Improving the start-up and restart time on a SMART Room System for Microsoft Lync (kb.smarttech.com/?q=14391). -
Page 57: Adding Trusted Domains To Your Room System
CHAPTER 6 TROUBLESHOOTING Adding trusted domains to your room system If the domain name used in the Lync account’s SIP URI is different from the domain name on the Lync Web Service certificate, your room system might not connect to the Lync Server. When this occurs, a dialog box might appear asking if you want to trust the certificate, but this dialog box disappears quickly thereafter. -
Page 58: Testing Your Room System
CHAPTER 6 TROUBLESHOOTING 11. Type the domain name specified in the Subject Name and Common Name fields of the Lync Web Service certificate in the Value data box, and then press OK. 12. Close the Registry Editor window. 13. Disconnect the mouse and keyboard. 14. - Page 59 CHAPTER 6 TROUBLESHOOTING 7. Press Apply & Restart. The room system restarts. smarttech.com/kb/170819...
-
Page 61: Appendix A: Using The Lync Admin Console And Smart Settings
The Lync Admin Console appears. 4. Make changes (see Lync Admin Console controls on the next page). 5. If you want to make changes to SMART Settings, press OEM Settings, press SMART Settings, make changes (see SMART Settings controls on page 61), and then press OK. -
Page 62: Lync Admin Console Controls
APPENDIX A USING THE LYNC ADMIN CONSOLE AND SMART SETTINGS 6. If you want to apply your changes, press Apply & Restart. If you don’t want to apply your changes, press Undo & Restart. The Lync appliance restarts in meeting mode. - Page 63 APPENDIX A USING THE LYNC ADMIN CONSOLE AND SMART SETTINGS Control Procedure Notes (if any) Manual Select if your organization’s autodiscover DNS records aren’t set to automatically link to the Lync 2013 server pool, such as when your organization maintains a mixed environment of Lync 2010 and Lync 2013 server pools.
- Page 64 APPENDIX A USING THE LYNC ADMIN CONSOLE AND SMART SETTINGS Control Procedure Notes (if any) Logging Help our support team Select Off to disable logging. SMART recommends that you enable full logging. help you Review the Privacy supplement for Select Light to enable recording of summary Microsoft Lync...
- Page 65 APPENDIX A USING THE LYNC ADMIN CONSOLE AND SMART SETTINGS Control Procedure Notes (if any) Press to open the User Accounts dialog box. In the User Accounts dialog box, you can User Settings view and manage the user and administrator accounts you created during the initial configuration of your room system’s software.
- Page 66 APPENDIX A USING THE LYNC ADMIN CONSOLE AND SMART SETTINGS Control Procedure Notes (if any) Download from WSUS Select to download Microsoft updates from your organization’s Windows Server Update Services server (WSUS) server. Type the URL of the WSUS server in the text box.
-
Page 67: Smart Settings Controls
APPENDIX A USING THE LYNC ADMIN CONSOLE AND SMART SETTINGS Control Procedure Notes (if any) SRS Licensing Tool Press to check the status of your room system’s This control is available only for version product key and provide a MAK key if your Lync 15.05 or earlier of Lync Room System... - Page 68 APPENDIX A USING THE LYNC ADMIN CONSOLE AND SMART SETTINGS Control Procedure Notes (if any) Defaults Press to return orientation settings to their defaults. Advanced Settings Calibrate Select to calibrate the interactive flat panel. See Calibrating the interactive flat panels on page 14.
- Page 69 APPENDIX A USING THE LYNC ADMIN CONSOLE AND SMART SETTINGS Control Procedure Notes (if any) Hardware Info & Select to view information about the console, including its serial number. Settings Audio Conferencing System Select to view information about the audio Hardware Info &...
-
Page 71: Appendix B: Using The Interactive Flat Panel On-Screen Display Menus
On-screen display menu options Using the SMART Board 8055i-G5 interactive flat panel on-screen display menu You can access the SMART Board 8055i-G5 interactive flat panel on-screen display menu using the menu control panel located on the side of the interactive flat panel. Name... - Page 72 APPENDIX B USING THE INTERACTIVE FLAT PANEL ON-SCREEN DISPLAY MENUS IMPORTANT For room systems with one interactive flat panel, temporarily remove the left speaker to access the menu control panel. For room systems with two interactive flat panels, temporarily remove both speakers and the camera, and then move the right interactive flat panel to access the menu control panels.
- Page 73 Sound Sound Mode Treble L50–R50 Sets the high frequency sound This option isn’t applicable to the SMART Room System. Don’t change it from its default value. Bass L50–R50 Sets the low frequency sound This option isn’t applicable to the SMART Room System. Don’t change it from its default value.
- Page 74 Notes (if any) 7.5 kHz 0–100 Sets the sound equalization at This option isn’t applicable to the 5 kHz SMART Room System. Don’t change it from its default value. 12 kHz 0–100 Sets the sound equalization at This option isn’t applicable to the 10 kHz...
- Page 75 Notes (if any) Proximity Enables or disables presence If you change this option in detection SMART Settings (see page 61), the change appears in the on-screen display menu. However, if you change this option in the on-screen display menu, the change doesn’t appear in SMART Settings.
-
Page 76: Using The Smart Board 8070I-G4 Interactive Flat Panel On-Screen Display Menu
APPENDIX B USING THE INTERACTIVE FLAT PANEL ON-SCREEN DISPLAY MENUS Using the SMART Board 8070i-G4 interactive flat panel on-screen display menu Using the menu control panel The menu control panel is located on the bottom of the interactive flat panel. Name... - Page 77 APPENDIX B USING THE INTERACTIVE FLAT PANEL ON-SCREEN DISPLAY MENUS To replace batteries in the remote control 1. Press the tab on the underside of the remote control, and then open the cover. 2. Remove the existing batteries. 3. Insert two new 1.5V AAA batteries in the remote control. 4.
- Page 78 APPENDIX B USING THE INTERACTIVE FLAT PANEL ON-SCREEN DISPLAY MENUS Option Values Function Notes (if any) BRIGHTNESS 0–100 Sets the overall brightness of the You can modify this option only if image and background you select USER in PICTURE MODE . 0–100 Sets the brightness of the image in You can modify this option only if...
- Page 79 PICTURE RESET [N/A] Resets all options in the PICTURE menu to their default values ADJUST The options in this menu aren’t applicable to the SMART Room System. AUDIO L50–R50 Balances the left and right volume This option isn’t applicable to the BALANCE SMART Room System.
- Page 80 AUDIO INPUT DPORT Sets the audio input source Alternatively, you can press the AUDIO INPUT button on the remote control. This option should be set to IN2 for the SMART Room System. HDMI3/PC ANALOG HDMI3/PC DIGITAL LEFT SPEAKER Enables or disables the left Don’t change this option from its...
- Page 81 STANDBY in DISABLE STANDBY MODE . If you change this option in SMART Settings (see page 61), the change appears in the on-screen display menu. However, if you change this option in the on-screen display menu, the change doesn’t appear in SMART Settings.
- Page 82 (in degrees Celsius) USB SETTING USB1 VGA1 Sets the video input for the USB1 This option isn’t applicable to the receptacle or disables the SMART Room System. Don’t VGA2 receptacle change it from its default value. HDMI1 HDMI2 HDMI3/PC DISABLE...
-
Page 83: Using The Smart Board 8084I-G4 Interactive Flat Panel On-Screen Display Menu
Using the SMART Board 8084i-G4 interactive flat panel on-screen display menu You can access the SMART Board 8084i-G4 interactive flat panel on-screen display menu using the menu control panel or the remote control. Using the menu control panel The menu control panel is located on the bottom of the interactive flat panel. - Page 84 APPENDIX B USING THE INTERACTIVE FLAT PANEL ON-SCREEN DISPLAY MENUS Using the remote control The remote control requires two 1.5V AAA batteries. WARNING To reduce the risk associated with leaking batteries: use only AAA type batteries do not mix used and new batteries orient the battery’s plus (+) and minus (-) terminals according to the markings found on the remote control do not leave the batteries in the remote control for an extended period...
- Page 85 Function Notes (if any) PICTURE Picture Mode Picture Mode Vivid Sets the picture mode SMART recommends that this option be set to Standard. Standard The other options in the Picture Ambient Mode menu change depending on Expert1 which value you select for this Expert2 option.
- Page 86 (in lux) information. You’re unable to modify it. Backlight 0–100 Sets the backlight level of the SMART recommends that this image option be set to 100. Contrast 0–100 Sets the brightness of the image in SMART recommends that this relation to the background option be set to 84.
- Page 87 Option Values Function Notes (if any) Super Resolution Enables or disables super resolution Sets the gamma SMART recommends that this Gamma option be set to Low. Medium Hight Picture Option Sets image noise reduction SMART recommends that this Noise Reduction option be disabled.
- Page 88 SOUND Sound Mode Standard Sets the sound mode This option isn’t applicable to the SMART Room System. Don’t User Setting change it from its default value. Virtual Surround Enables or disables virtual This option isn’t applicable to the surround sound SMART Room System.
- Page 89 HDMI2 DPORT DVI-D Component Composite Disable HDMI3/PC Analog Specifies whether the HDMI3/PC This option should be set to Analog audio input is analog or digital for the SMART Room System. Digital TIME Clock Date 1–31 Specifies the current date smarttech.com/kb/170819...
- Page 90 Off Time [N/A] Enables you to schedule times This option isn’t applicable to the when the interactive flat panel SMART Room System. Don’t turns off automatically change it from its default value. [N/A] Enables you to schedule times This option isn’t applicable to the...
- Page 91 Proximity Control Proximity Control Enables or disables presence If you change this option in detection SMART Settings (see page 61), the change appears in the on-screen display menu. However, if you change this option in the on-screen display menu, the change doesn’t appear in SMART Settings.
- Page 92 Values Function Notes (if any) USB 3 HDMI1 Sets the video input for the USB3 This option isn’t applicable to the receptacle, or disables the SMART Room System. Don’t HDMI2 receptacle change it from its default value. HDMI3/PC DVI-D DPORT Disable Lync® Room Reset...
-
Page 93: Appendix C: Resetting The Room System To Factory Defaults
5. Press Reset the Device to Factory Image. The room system restarts, and the software is reset to factory defaults. 6. Complete the procedure in the SMART Room System for Lync setup guide (see Setup guide on page 8). To reset the room system from the BIOS 1. - Page 94 10. Browse to the Save & Exit tab. 11. Select Save Changes and Exit, and then select Yes. The room system restarts, and the software is reset to factory defaults. 12. Complete the procedure in the SMART Room System for Lync setup guide (see Setup guide on page 8). smarttech.com/kb/170819...
-
Page 95: Appendix D: Hardware Environmental Compliance
Batteries The remote controls for SMART Board 8070i-G4 and 8084i-G4 interactive flat panels contain 1.5V AAA batteries. Recycle or dispose of batteries properly. More information smarttech.com/compliance for more information. -
Page 97: Index
Index cameras about 5 cleaning 20 accessories 6 optimizing 62 Administrative Web Portal See Lync Room troubleshooting 48 System Administrative Web Portal certificates 59 air conditioning 19 chemicals 18 ambient lighting 72 cleaning AMT See Intel AMT cameras 20 audio interactive flat panel cameras and configuring 63, 67, 73, 82 reflective tape channels 18 maintaining 21... - Page 98 INDEX interactive flat panels See interactive configuring 31 enabling 30 flat panels managing your room system with 31 documentation 8 security 33 domains 51 Intel MEBx 31 dry-erase markers 17 interactive flat panels dust 18, 20 about 4 DViT technology 4 configuring 61 maintaining 13 troubleshooting 42, 45...
- Page 99 INDEX cleaning 21 proxy authentication 56 connecting additional 6 setting default volume for 27, 57 troubleshooting 49 Microsoft Exchange 58 quality control 57 Microsoft Lync appliances See Lync appliances Microsoft Lync infrastructure See Lync infrastructure recovery 87 Microsoft Lync Room System regions 59 software See Lync Room System remote control 70, 78 software...
- Page 100 INDEX small rooms 7 USB Bridge SMART Board interactive flat user names 56 panels See interactive flat panels SMART Room System USB Bridge 6 SMART Room Systems See room systems SMART Settings 61 vacuum cleaners 18 SMART updates 60 ventilation 18 smoke 18...
- Page 102 SMART TECHNOLOGIES smarttech.com/support smarttech.com/support/entsupport smarttech.com/kb/170819...
Need help?
Do you have a question about the Room System SRS-LYNC-XS and is the answer not in the manual?
Questions and answers