SMART Board 600 Series Installation And User Manual
Board 600, d600 series
Hide thumbs
Also See for Board 600 Series:
- Quick manual (2 pages) ,
- Basic functionality (3 pages) ,
- Troubleshooting manual (15 pages)

Related Manuals for SMART Board 600 Series


Summary of Contents for SMART Board 600 Series
-
Page 1: Interactive Whiteboard
SMART Board™ 600 and D600 Series Interactive Whiteboard Installation and User’s Guide... - Page 2 SMART Technologies ULC in the U.S. and/or other countries. The Bluetooth word mark is a registered trademark and is owned by the Bluetooth SIG, Inc. and any use of such marks by SMART Technologies ULC is under license. Windows, Microsoft, Excel and PowerPoint are either registered trademarks or trademarks of Microsoft Corporation in the U.S.
-
Page 3: Safety Warnings And Cautions
Important Information Before you install and use your SMART Board™ 600 or D600 series interactive whiteboard, read and understand the safety warnings and precautions in this installation and user’s guide. These safety warnings and precautions describe the safe and correct operation of your SMART Board interactive whiteboard and its accessories, helping you to prevent injuries and equipment damage. - Page 4 IM P O RT A NT I NF O R M A TI O N • To reduce the risk of fire or electric shock, do not expose your SMART Board interactive whiteboard to rain or moisture. • Use two wall-mounting brackets to install your SMART Board 685/D685 or 690/D695 interactive whiteboard.
- Page 5 Other Precautions If you own a SMART product other than a SMART Board 600 or D600 series interactive whiteboard, refer to the installation manual for your product for relevant warnings and maintenance instructions.
- Page 6 IM P O RT A NT I NF O R M A TI O N...
-
Page 7: Table Of Contents
About Your SMART Board 600 or D600 Series Interactive Whiteboard ..................1 In This Chapter ....................1 Features......................2 Understanding How Your SMART Board Interactive Whiteboard Works ..4 Included Accessories..................5 Optional Accessories ..................6 Installing and Securing Your SMART Board Interactive Whiteboard ............7 In This Chapter .................... - Page 8 CON T EN TS Connecting a Guest Laptop ................29 Connecting Multiple Interactive Products ............. 29 Using and Maintaining Your SMART Board Interactive Whiteboard ....31 In This Chapter ..................... 31 Tips for Trouble-Free Performance .............. 32 Keeping the Writing Surface Clean............... 33 Transporting Your Interactive Whiteboard ............
- Page 9 vi i | – Registration....................54 Index ........................55...
- Page 10 vi ii | –...
-
Page 11: About Your Smart Board 600 Or D600 Series Interactive Whiteboard
600 or D600 Series Interactive Whiteboard In This Chapter Refer to these topics to learn more about your SMART Board 600 or D600 series interactive whiteboard and for information about product parts and accessories. Features......................2 Understanding How Your SMART Board Interactive Whiteboard Works ..4 Included Accessories.................. -
Page 12: Features
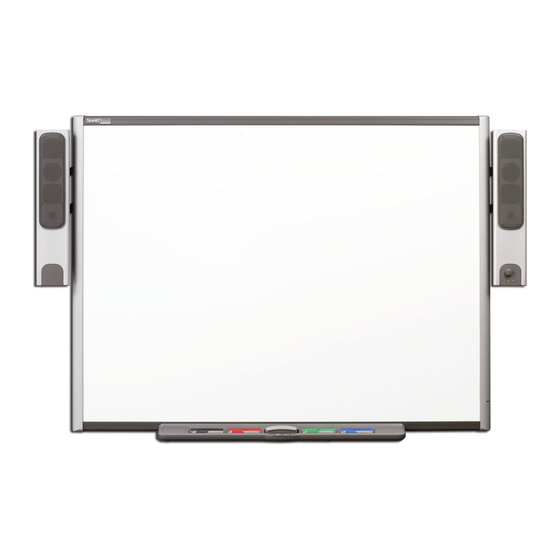
CH A P T E R 1 – A BO U T Y O U R S M A R T B O A R D 6 0 0 O R D 6 0 0 S ER I E S IN T ERA CT IVE WH IT EBOA RD Your SMART Board 600 or D600 series product is a touch sensitive, front projection interactive whiteboard. It enables you to do everything that you can do at your computer—open and close applications, scroll through files, conference with... -
Page 13: Feature Highlights
Lock your interactive whiteboard with a security cable to help safeguard it from theft. Expansion Slot Add optional accessories, such as a SystemOn expansion module. Optional Accessories To view a variety of accessories for your SMART Board interactive whiteboard, go to smarttech.com/accessories (education) or smarttech.com/business accessories... -
Page 14: Understanding How Your Smart Board Interactive Whiteboard Works
SMART Software To use the features of the interactive whiteboard, you must install SMART software on your computer. SMART software includes: • SMART Product Drivers •... -
Page 15: Included Accessories
CH A P T E R 1 – A BO U T Y O U R S M A R T B O A R D 6 0 0 O R D 6 0 0 S ER I E S IN T ERA CT IVE WH IT EBOA RD With SMART Notebook software, you can save your notes to a .notebook file or directly into any Ink Aware application, such as Microsoft® Word, Excel® or PowerPoint®. -
Page 16: Optional Accessories
SMART Board Interactive Whiteboard Wall-Mounting Kit The 32" (81.3 cm) wall-mounting bracket comes with five screws and drywall anchors, enabling you to wall-mount your interactive whiteboard simply and securely. -
Page 17: Installing And Securing Your Smart Board Interactive Whiteboard
Your SMART Board Interactive Whiteboard In This Chapter Refer to these topics for information about mounting your SMART Board 600 or D600 series interactive whiteboard on a floor stand or on a wall. Environmental Requirements ................. 8 Wall-Mounting Your SMART Board Interactive Whiteboard ......9 Securing the Pen Tray and Interactive Whiteboard ........ -
Page 18: Environmental Requirements
CH A P T E R 2 – I NSTAL LI NG AND S ECU R I N G Y O U R S MA R T B O A R D IN T ERA CT IVE WH IT EBOA RD Environmental Requirements Before installing your interactive whiteboard, review the following environmental requirements. -
Page 19: Wall-Mounting Your Smart Board Interactive Whiteboard
WARNING Two people are required to safely mount your interactive whiteboard on a wall. IMPORTANT For information on installing your SMART Board interactive whiteboard on a floor or table stand, go to the SMART Board 600 and D600 series Support page. - Page 20 For Children and Short Adults, and for Clearing Obstructions to the Projected Image If SMART Board 640 interactive whiteboard users are of shorter stature, you might want to mount your interactive whiteboard lower on the wall, while keeping it high enough that furniture or other objects don’t obstruct the projected image.
- Page 21 11 | CH A P T E R 2 – I NSTAL LI NG AND S ECU R I N G Y O U R S MA R T B O A R D IN T ERA CT IVE WH IT EBOA RD Tools Required to Wall-Mount Your Interactive Whiteboard To wall-mount your interactive whiteboard you’ll need the following tools, which aren’t included:...
- Page 22 IN T ERA CT IVE WH IT EBOA RD NOTES • To take full advantage of all the interactive features of your SMART product, you must connect a digital projector (not included). • Some steps in the following procedure look different than illustrated if you have a SMART Board 685/D685 or 690/D690 interactive whiteboard.
- Page 23 CH A P T E R 2 – I NSTAL LI NG AND S ECU R I N G Y O U R S MA R T B O A R D IN T ERA CT IVE WH IT EBOA RD If you’re installing a SMART Board 685/D685 or 690/D690 interactive whiteboard, 685/D685: 4"...
-
Page 24: Completing Your Installation
IMPORTANT For SMART Board D600 series interactive whiteboards, it is important to align your interactive whiteboard and projector correctly so that the projected image divider in dual-user mode in SMART Notebook software aligns with the physical center of your interactive whiteboard. - Page 25 15 | CH A P T E R 2 – I NSTAL LI NG AND S ECU R I N G Y O U R S MA R T B O A R D IN T ERA CT IVE WH IT EBOA RD 2.
-
Page 26: Securing The Pen Tray And Interactive Whiteboard
7. Place the four pens and the eraser into their respective slots in the pen tray. Securing the Pen Tray and Interactive Whiteboard Because your SMART Board interactive whiteboard’s pen tray is detachable, you might want to safeguard it—and your interactive whiteboard—by anchoring it with a security cable. NOTE... -
Page 27: Securing The Pen Tray To The Pen Tray Brackets
17 | CH A P T E R 2 – I NSTAL LI NG AND S ECU R I N G Y O U R S MA R T B O A R D IN T ERA CT IVE WH IT EBOA RD IMPORTANT Be aware that security cable locks are not designed to be a solid protection measure because the lock can be torn out. -
Page 28: Removing The Pen Tray
18 | CH A P T E R 2 – I NSTAL LI NG AND S ECU R I N G Y O U R S MA R T B O A R D IN T ERA CT IVE WH IT EBOA RD Removing the Pen Tray You might need to remove the pen tray when you transport or repair your interactive whiteboard. -
Page 29: Connecting Your Interactive Whiteboard To Your Computer
Connecting Your Interactive Whiteboard to Your Computer In This Chapter Refer to these topics for information about connecting your SMART Board 600 or D600 series interactive whiteboard to your computer. Overview....................... 20 Power Safety ....................20 Connecting with a USB Cable ..............20 Installing SMART Software................ -
Page 30: Overview
Because this cable provides both a digital signal and power from your computer to your interactive whiteboard, you don’t need an additional power supply. Your interactive whiteboard will be touch sensitive after you install SMART Product Drivers on your connected computer. After connecting your interactive whiteboard to your computer, you must perform a brief orientation procedure. - Page 31 USB driver installed on your Windows® computer, the Ready light on the lower-right frame immediately turns red, and then flashes green. If this happens, see Installing SMART Software on page 22. If the appropriate driver isn’t installed on your Windows computer, a Found New Hardware wizard helps you locate the driver for the newly connected USB Human Interface Device (HID), that is, your interactive whiteboard.
-
Page 32: Installing Smart Software
USB connection and is operating in HID mouse mode. Installing SMART Software You must install SMART software on the computer connected to your interactive whiteboard system to access all of its features. Download SMART software from smarttech.com/software. These pages list the minimum hardware requirements for each software version. -
Page 33: Usb Extender Cables And Hubs
23 | CH A P T E R 3 – C O NN E C TI NG Y O U R INT E R AC T I V E W H I T E B O A R D T O Y O U R COM PU TE R USB Extender Cables and Hubs The 16' 5"... -
Page 34: Configuring Your Computer Settings
See Getting the Best Image Quality on Your SMART Board Interactive Whiteboard (smarttech.com/kb/127199) for more information. Determine your projector’s native resolution, indicated in your projector’s user’s guide, and then set your computer’s resolution to match. -
Page 35: Orienting Your Interactive Whiteboard
SMART Product Drivers. After you install SMART Product Drivers on your computer, orient your interactive whiteboard. An orientation performed with SMART Product Drivers is called a User Orientation. -
Page 36: Orienting Your Interactive Whiteboard
1. Press and hold the two large pen tray buttons at the same time. interactive whiteboard Press the Help button on the pen tray, and then select Orient/Align the SMART Product. NOTE For more information on the pen tray buttons, see Pen Tray Buttons on page 35. - Page 37 27 | CH A P T E R 3 – C O NN E C TI NG Y O U R INT E R AC T I V E W H I T E B O A R D T O Y O U R COM PU TE R –...
- Page 38 The orientation screen closes. The orientation procedure can be 4, 9, 12 or 20 touches, depending on the precision setting you specify in your SMART Board Settings in the SMART control panel. The following procedure shows you how to change the precision setting.
-
Page 39: Connecting A Guest Laptop
COM PU TE R Connecting a Guest Laptop If you want to connect a guest laptop without installing SMART Product Drivers on it, disconnect the USB cable from your resident computer, and then connect it to the laptop. You’ll immediately have touch control of your interactive whiteboard. However, you’ll need to connect a video cable between the laptop and your projector. - Page 40 You must each interactive product separately so that the pointer is properly aligned when you touch the product. To do this, open the SMART control panel and select Orient/Align the SMART Product. Refer to the Help Center for the specific procedure to orient each display.
-
Page 41: Using And Maintaining Your Smart Board Interactive Whiteboard
Using and Maintaining Your SMART Board Interactive Whiteboard In This Chapter Refer to these topics for information about using and maintaining your SMART Board 600 or D600 series interactive whiteboard. Tips for Trouble-Free Performance .............. 32 Keeping the Writing Surface Clean............... 33 Transporting Your Interactive Whiteboard ............ -
Page 42: Tips For Trouble-Free Performance
• Instruct your students not to run in the vicinity of a SMART Board interactive whiteboard floor stand because they might trip over the floor stand’s feet. Preventing Damage to Your Interactive Whiteboard Although your SMART Board interactive whiteboard’s surface is very durable,... -
Page 43: Keeping The Writing Surface Clean
• To view dirt or streaks more easily, set your projector to standby (lamp off) mode. With proper care, your SMART Board interactive whiteboard will provide years of trouble-free service. Follow these tips to keep the screen surface clean: •... -
Page 44: Transporting Your Interactive Whiteboard
SMART Technologies. With its foam-lined interior, aluminum edges and valances, and steel-reinforced corners, this shipping case protects your SMART Board interactive whiteboard and has dual-tilt wheels for ease of transport. To order a hard shipping case, contact your authorized SMART reseller. -
Page 45: Indicators And Controls
Help Button Keyboard Button Right-Click Button You can customize the buttons using SMART Product Drivers to provide several other functions, including printing, changing pages and capturing the screen. Pressing both buttons simultaneously starts the orientation process. The third small, round button launches the online Help, where you’ll also find an... -
Page 46: Pen Tray Leds And Sensors
NOTE The pen tray tools must reflect infrared light. Old-style black SMART Board interactive whiteboard pens might not reflect infrared light reliably. Cleaning the Pen Tray’s Sensors If the infrared sensors in the bottom of your pen tray’s recesses become obstructed by... -
Page 47: The Ready Light
Solid green Your interactive whiteboard is receiving power and is communicating successfully with SMART Product Drivers. Flashing green Your interactive whiteboard is receiving power and is communicating successfully with the USB HID driver of your computer’s operating system. - Page 48 38 | CH A P T E R 4 – U S I NG A N D MA IN TA INI NG Y O U R S MA R T B O A RD INT E R A C T IV E W H I T E B O A R D...
-
Page 49: Troubleshooting Your Smart Board Interactive Whiteboard
Troubleshooting Your SMART Board Interactive Whiteboard In This Chapter Refer to these topics for information about troubleshooting your SMART Board 600 or D600 series interactive whiteboard. Adjusting the Projected Image..............40 Resetting Your Interactive Whiteboard ............41 Troubleshooting Using the Ready Light............41 Troubleshooting Tips .................. -
Page 50: Adjusting The Projected Image
40 | CH A P T E R 5 – T R O U B L E S H O O T I N G Y O U R S M A R T B O A RD I N T E R A C T I V E W H I T E B O A R D Adjusting the Projected Image If your projector isn’t installed in a fixed location, you can correct many image... -
Page 51: Resetting Your Interactive Whiteboard
41 | CH A P T E R 5 – T R O U B L E S H O O T I N G Y O U R S M A R T B O A RD I N T E R A C T I V E W H I T E B O A R D Resetting Your Interactive Whiteboard If your interactive whiteboard behaves erratically or becomes unresponsive, possibly... - Page 52 Go to touch-only operation of your interactive whiteboard. light flashing Flowchart If you want to use the SMART Board tools or the pen tray green? pens, go to Flowchart 4. A solid green Ready light indicates normal operation. To diagnose issues that can occur in other components of...
- Page 53 If possible, replace the computer with one that Replace the you previously used successfully with your computer SMART Board interactive whiteboard. Refer to product specifications for minimum computer hardware and software requirements. Is the Ready light on...
- Page 54 44 | CH A P T E R 5 – T R O U B L E S H O O T I N G Y O U R S M A R T B O A RD I N T E R A C T I V E W H I T E B O A R D Flowchart 3: Ready Light Red A red Ready light indicates that your interactive whiteboard is receiving power but isn’t...
- Page 55 W H I T E B O A R D Flowchart 4: Ready Light Flashing Green NOTES • This is the normal mouse mode state when SMART Product Drivers aren’t installed on your computer. • This mode can be useful for occasional or guest users who don’t require the use of SMART Board tools or pen tray functions.
- Page 56 Replace controller Contact your next Done level of support now? NOTE If another user has reassigned the pen, eraser or pen tray button functions, you can return them to normal operation using the SMART control panel.
-
Page 57: Troubleshooting Tips
47 | CH A P T E R 5 – T R O U B L E S H O O T I N G Y O U R S M A R T B O A RD I N T E R A C T I V E W H I T E B O A R D Troubleshooting Tips Try the troubleshooting tips in this table if the Ready light indicates that your... - Page 58 CH A P T E R 5 – T R O U B L E S H O O T I N G Y O U R S M A R T B O A RD I N T E R A C T I V E W H I T E B O A R D Symptom/Observation Cause Solution The SMART software icon SMART Board Tools Start SMART Board Tools. doesn’t appear in the isn’t running.
-
Page 59: Finding More Information
SMART contact information. For more information on the pen tray buttons, see Pen Tray Buttons on page 35. Alternatively, access the Help Center from the SMART software icon in the Windows notification area or Mac Dock. -
Page 60: Contacting Smart Technical Support
(if you printed it). To determine your You can find the serial number in two places: on the back of your SMART Board interactive whiteboard, and on the bottom, right-hand edge of your interactive interactive whiteboard’s whiteboard's frame (the side) or on the bottom of the right-hand end of the frame. -
Page 61: Hardware Environmental Compliance
Appendix A Hardware Environmental Compliance SMART Technologies supports global efforts to ensure that electronic equipment is manufactured, sold and disposed of in a safe and environmentally friendly manner. Waste Electrical and Electronic Equipment Regulations (WEEE Directive) Waste Electrical and Electronic Equipment regulations apply to all electrical and electronic equipment sold within the European Union. -
Page 62: China's Electronic Information Products Regulations
China’s EIP regulations. U.S. Consumer Product Safety Improvement Act The United States has enacted the Consumer Product Safety Improvement Act which limits the lead (Pb) content in products used by children. SMART Technologies is committed to complying with this initiative. -
Page 63: Customer Support
Technical Support If you experience difficulty with your SMART product, please contact your local reseller before contacting SMART Technical Support. Your local reseller can resolve most issues without delay. NOTE To locate your local reseller, visit www.smarttech.com/where. -
Page 64: General Inquiries
Toll Free 1.866.518.6791 (U.S./Canada) +1.403.228.2500 E-mail info@smarttech.com Warranty Product warranty is governed by the terms and conditions of SMART’s “Limited Equipment Warranty” that shipped with the SMART product at the time of purchase. Registration To help us serve you, register online at www.smarttech.com/registration. - Page 65 33 computer floor stand matching resolution to projector, 24, 40 safety, 32 recommended settings, 24 refresh rate, 40 concrete installation, 12, 13, 15 connecting a laptop computer, 29 general inquiries, 54 connecting multiple SMART Board interactive whiteboards, 29...
- Page 66 32 removing permanent marker ink stains, online support, 53 shipping box, ordering, 34 orientation and alignment SMART Meeting Pro Premium software, 20-point, 25 4- and 9-point, 25 SMART Meeting Pro software, 4 factory (manufacturing) default, 25 SMART Notebook software, 4 SMART technical support, 53 support, 53–54...
- Page 67 57 | IN DE X troubleshooting flowcharts, 41 cables, 20 resetting your interactive whiteboard, connector, 20 extender cables and hubs, 23 using the Ready light, 41 USB audio system troubleshooting articles, 53 components, 7 user’s guides, 53 U.S. regulations, 52 wall-mounting, recommended heights, 9 warranty, 54 WEEE directive, 51...
- Page 68 58 | IN DE X...
- Page 70 Toll Free 1.866.518.6791 (U.S./Canada) or +1.403.228.5940 www.smarttech.com...
Need help?
Do you have a question about the Board 600 Series and is the answer not in the manual?
Questions and answers