Advertisement
Quick Links
Advertisement

Summary of Contents for Arrow Dixie 3401 White
- Page 1 ASSEMBLY INSTRUCTIONS Dixie ITEM NO.: 3401 White...
-
Page 2: General A Ssembly Guidelines
General A ssembly Guidelines Read the instructions carefully before beginning the assembly process to ensure proper assembly of this product. Please open and inspect the contents of box(es) to see that all parts and hardware are included. 2. Tools Required Phillips Screwdriver Hammer Electric Screwdriver... - Page 3 Par ts List: Panels ITEM DESCRIPTION QTY. PACK. Top panel 2 of 2 Top leaf 2 of 2 Shelf 2 of 2 Frame leg support 1 of 2 Side leg supports 1 of 2 Adjustable leg with casters 1 of 2 Rail 1 of 2 Dixie...
- Page 4 Par t 1: Base 4mm Allen wrench x1 6x12 Bolt x12 Slide Adjustable Legs (Part L) into Support (Part F1). Adjust to the same height on both legs for stability and secure with b1 Fix Bolts. Tighten with r1 4mm Allen Wrench. Repeat with remaining L and F1 parts (2 assem- blies total).
- Page 5 Par t 1: Base 5mm Allen wrench x1 8x25 Bolt x6 Connect the two Frame Leg Supports (Part F1) with three Rails (Part R) using b2 Bolts. TIP: Only partially tighten bolts with r2 5mm Allen Wrench. This will make the next step easier. Dixie Assembly Instructions...
- Page 6 Par t 1: Base 6x35 Bolt x12 8x25 Bolt x4 5mm Allen wrench x1 4mm Allen wrench x1 Connect the two Side Leg Supports (Part S) with Leg Frame Assembly (Part F1) using b2 Bolts. Tighten with r2 5mm Allen Wrench. Place Fixed Shelves (Panel F) on the Leg Frame Assembly (F1) and attach using b4 Bolts.
- Page 7 Par t 2: Top 3.5x14 Screw x36 Hinge x6 Attach Panels A1 to Panel A with h1 Hinges as shown. Position h1 Hinges in indentations on Panels A1 and A and attach with s1 Screws. Dixie Assembly Instructions...
- Page 8 Par t 2: Top 4mm Allen wrench x1 6x35 Bolt x6 This step may require two people. Flip and align entire Leg Assembly with holes on Panel A and attach using b4 Bolts. Tigthen with r1 4mm Allen Wrench. Dixie Assembly Instructions...
- Page 9 Par t 2: Top 4x8 Bolt x2 Bracket x2 Plastic Support Tube x2 Attach p Plastic Support Tube to b Connector using b3 Bolt as shown. Repeat with remaining Plastic Support Tube and Connector, two Click b/p Plastic Support Tube Assembly onto S Side Leg Assembly, as shown.
- Page 10 Par t 2: Top 3.5x14 Screw x4 Slide S Support Leg with b/p Plastic Align one hole with pre-drilled hole Support Tube Assembly to pre-drilled hole Attach with s1 Screw. Align the support leg the way you want it, and install a second s1 Screw. There is no pre-drilled hole, so you may have to apply extra pressure.
- Page 11 Par t 2: Top Two people may be required to flip the cutting table up onto its wheels. Make sure all legs contact the ground and side leg supports are properly snapped into connectors on both sides before use. Dixie Assembly Instructions...
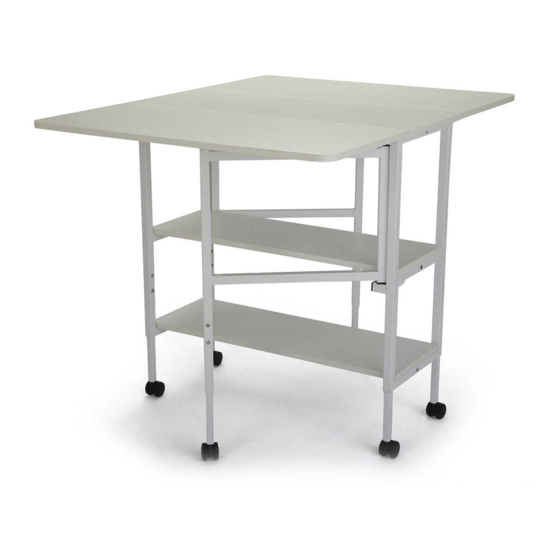
- Page 12 Completed Di xie Cutting Table Dixie Assembly Instructions...
-
Page 13: Limited Warranty
(detailed receipt), and photos of the product. Arrow will replace any defective part (at its sole option), excluding labor. Replacement parts will be warranted for only the remaining period of the original Warranty. - Page 14 COMPLETE YOUR SEWING STUDIO! Elevate your sewing experience with Arrow’s Best-Selling Accessories! Custom Sewing Inserts Sewing Chairs Enhance your sewing experience with a custom acrylic Arrow’s #1 Rated Height Adjustable Sewing Chair is sewing insert! Custom acrylic sewing inserts are...


Need help?
Do you have a question about the Dixie 3401 White and is the answer not in the manual?
Questions and answers