
Related Manuals for Moxa Technologies UPort 400A Series


Summary of Contents for Moxa Technologies UPort 400A Series
- Page 1 UPort™ 400A Series Quick Installation Guide Version 1.0, November 2022 Technical Support Contact Information www.moxa.com/support 2022 Moxa Inc. All rights reserved. P/N: 1802004002001 *1802004002001*...
-
Page 2: Package Checklist
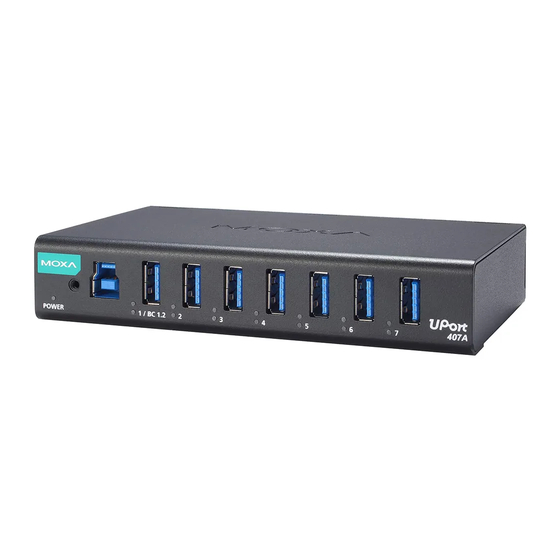
Overview The UPort™ 400A Series Industrial-grade USB 3.2 Gen 1 hubs expand 1 USB port to 4 or 7 ports. The hubs are designed to provide true USB 3.2 SuperSpeed 5 Gbps data transmission through each port, even for heavy-load applications. As USB-IF certified products, the UPort™ 400A Series has passed SuperSpeed compliance testing and is eligible to bear the USB logo. - Page 3 Optional Accessories (can be purchased separately) • Standard USB cable (without latch): CBL-USB3-BA-BK-120, 1.2 m • USB cable with latch: CBL-USB3-BA-G-120, 1.2 m • WK-UP400A-BAK-BK: Wall-mounting kit for the back side of the UPort 400A with 2 plates (60 x 27 x 2 mm/2.36 x 1.06 x 0.08 in) and 6 screws (M3x5mm) •...
- Page 4 How to have Moxa’s USB cable plugged into the hub and computer securely The Moxa new latch USB cable comes with a latch on each side of the Type-A connector and a screw on the Type-B connector. Every time you plug in and plug out the cable from the host computer, always press both latches and then plug the connector into the USB sockets on your computer or vice versa.
-
Page 5: Led Indicators
NOTE The latch is designed to lock to most of the computer USB sockets; however, some sockets may be designed with a slight margin difference, which may cause the latch not to lock to properly to those USB sockets. Plugging in the USB cable to the UPort 400A hub: The bolt on the side of Type-B connector is for fixing the cable firmly to the UPort 400A USB hub. -
Page 6: Wall Mounting
Wall Mounting The UPort™ 400A Series comes with two options of wall mounting, and both have metal attachment plates to allow installation on a wall. Option 1 – Bottom-mounting with WK-UP400A-BOT-BK UPort 407A Unit: mm (inches) UPort 404A The mounting kit is 2 mm in height, and the two centers of the mounting kit on each plate is 163 mm (UPort 407A) and 123 mm (UPort 404A) - Page 7 The wall screws should use the M3 type, and the length should no less than 7 mm. Option 2 – Rear-mounting With WK-UP400A-BAK-BK UPort 407A Unit: mm (inches) UPort 404A First, attach the brackets at the rear of the UPort™ 400A with the screws, as the circles indicate.
-
Page 8: Din-Rail Mounting
UPort 407A Unit: mm (inches) UPort 404A DIN-Rail Mounting The UPort™ 400A Series has a DIN-rail kit option (DK-UP-42A) to allow installation on a DIN Rail. DIN-rail attachments can be purchased separately to attach the product to a DIN Rail. The DIN-rail attachments should be oriented with the metal springs on top. - Page 9 To remove the UPort™ 400A from the DIN Rail, do the following: STEP 1: Pull down the latch on the DIN-rail kit with a screwdriver. STEP 2 & 3: Slightly pull the UPort™ 400A forward and lift it up to remove it from the mounting rail.
-
Page 10: Specification
UPort 404A Specification USB Interface Compliance USB 3.2/2.0/1.1, BC 1.2 compliant Upstream 1 USB Type-B port Downstream UPort™ 404A: 4 USB Type-A ports UPort™ 407A: 7 USB Type-A ports Speed 5 Gbps (SuperSpeed USB), 480 Mbps (Hi-speed USB) and 12 Mbps (Full-speed USB) Physical Characteristics Housing Aluminum... -
Page 11: Compliance Notice
Power Requirements Input Voltage 12 to 48 VDC (external power) DC Power/Polarity Power UPort™ 404A: 2800 mA @ 12 VDC, 1400 mA @ 24 Consumption VDC, 700 mA @ 48 VDC UPort™ 407A: 4750 mA @ 12 VDC, 2375 mA @ 24 VDC, 1187 mA @ 48 VDC Warranty Warranty Period... -
Page 12: Connector Description
Connector Description Power Connector • The wiring of input terminal block must be installed by a skilled person. • Wire type: Cu • Only use 12-28 AWG wire size, torque value 0.18 N-m. • One individual conductor in a clamping point. If you are using a Class I adapter, the power cord must be connected to an outlet with an earthing connection. - Page 13 Q: My device is USB 2.0 compatible. Will the UPort 400A work with my device? A: The UPort 400A is a USB 3.2 Gen 1 certified product; therefore, it is downward compatible to USB 2.0 and 1.1. Q: How many USB devise cascade can the UPort 400A support? A: Five layers.
Need help?
Do you have a question about the UPort 400A Series and is the answer not in the manual?
Questions and answers