Moxa Technologies UPORT 1200 series User Manual
Advanced usb-to-serial hubs
Hide thumbs
Also See for UPORT 1200 series:
- Quick installation manual (7 pages) ,
- Quick installation manual (6 pages) ,
- Quick installation manual (2 pages)

Subscribe to Our Youtube Channel
Related Manuals for Moxa Technologies UPORT 1200 series


Summary of Contents for Moxa Technologies UPORT 1200 series
- Page 1 UPort 1200/1400/1600 Series User’s Manual Second Edition, November 2006 www.moxa.com/product Moxa Technologies Co., Ltd. Tel: +886-2-8919-1230 Fax: +886-2-8919-1231 Web: www.moxa.com MOXA Technical Support Worldwide: support@moxa.com...
-
Page 2: Copyright Notice
The software described in this manual is furnished under a license agreement and may be used only in accordance with the terms of that agreement. Copyright Notice Copyright © 2006 Moxa Technologies Co., Ltd. All rights reserved. Reproduction without permission is prohibited. -
Page 3: Table Of Contents
Table of Contents Chapter 1 Introduction ..................1-1 Overview ........................1-2 Package Checklist......................1-2 Product Features ......................1-2 Product Specifications ....................1-3 Panel Layout......................1-4 Dimensions........................1-5 Chapter 2 Driver Installation ................2-1 USB Usage Limitations for UPort................2-2 Installing the Driver....................2-2 Connecting the Hardware ..................2-4 Connecting to the External Power Adaptor ............2-4 Connecting to a Serial Device ................2-5 LED Indicators ....................2-5 Adjustable Pull High/low Resistors for the RS-485 Port........2-5... -
Page 4: Chapter 1 Introduction
Introduction Chapter 1 The MOXA UPort 1200/1400/1600 are advanced USB-to-serial hubs that connect to 2, 4, 8, or 16 RS-232 or RS-232/422/485 serial devices. The UPort 1200/1400/1600 Series adds 2, 4, 8, or 16 Windows serial COM ports via its USB connection, and is compatible with new and legacy RS-232 or RS-422/485 devices. -
Page 5: Overview
UPort 1200/1400/1600 Series User’s Manual Introduction Overview UPort 1200/1400/1600 Series products are easy to use. Simply install the drivers, connect the UPort to your computer, plug in your serial devices, and you’re ready to go. Programming is NOT required, and you do not need to worry about IRQs, configuring a board, power requirements, or connection schemes. -
Page 6: Product Specifications
UPort 1200/1400/1600 Series User’s Manual Introduction Product Specifications Models Names UPort 1250/1250I, UPort 1410/1450/1450I, UPort 1610-8/1650-8, UPort 1610-16/1650-16 Compliant with USB 2.0, 1.1 Connector USB type B Speed High speed 480 Mbps Serial No. of Ports 2 (UPort 1250/1250I) 4 (UPort 1410/1450/1450I) 8 (UPort 1610-8/1650-8) 16 (UPort 1610-16/1650-16) Interface... -
Page 7: Panel Layout
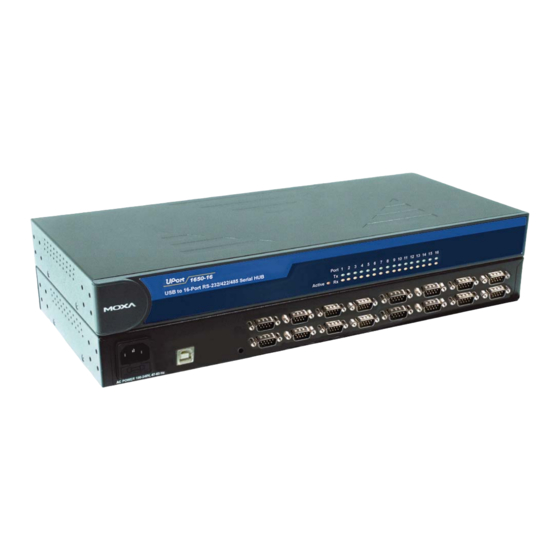
UPort 1200/1400/1600 Series User’s Manual Introduction Panel Layout UPort 1250 UPort 1250I UPort 1410/1450/1450I UPort 1610-8/1650-8 UPort 1610-16/1650-16... -
Page 8: Dimensions
UPort 1200/1400/1600 Series User’s Manual Introduction Dimensions UPort 1250 UPort 1250I 12-48 26 mm (1.02 in) 77 mm (3.03 in) 77 mm (3.03 in) 100 mm (4.18 in) 100 mm (4.18 in) UPort 1410/1450/1450I... - Page 9 UPort 1200/1400/1600 Series User’s Manual Introduction UPort 1610-8/1650-8 UPort 1610-16/1650-16...
-
Page 10: Chapter 2 Driver Installation
Driver Installation Chapter 2 This chapter includes information about installing the UPort 1200/1400/1600 USB-to-Serial Hub. We present the installation procedure for Windows 2000. The procedures for Windows XP/2003 (32 bit) and Windows XP/2003 (64 bit) are essentially the same as that for Windows 2000. We recommend installing the UPort 1200/1400/1600 driver first, before connecting the UPort 1400/1600 USB-to-Serial Hub to your computer’s USB port. -
Page 11: Usb Usage Limitations For Uport
UPort 1200/1400/1600 Series User’s Manual Driver Installation USB Usage Limitations for UPort 1. A maximum of 4 UPorts can be connected to each host. Connecting more than 4 UPorts will cause system resources to become low and unstable. 2. We recommend connecting the UPort directly to the host USB port. If you need to use an external USB hub, only the first level is recommended. - Page 12 UPort 1200/1400/1600 Series User’s Manual Driver Installation 2. Click Next to install the driver in the indicated folder. 3. Click Install to proceed with the installation.
-
Page 13: Connecting The Hardware
UPort 1200/1400/1600 Series User’s Manual Driver Installation 4. The next window that opens cautions you that although this software has not passed Windows logo testing, the driver has already been tested and shown that it can support Windows OS. Click Continue Anyway to proceed. 5. -
Page 14: Connecting To A Serial Device
UPort 1200/1400/1600 Series User’s Manual Driver Installation If the power is properly supplied, the Active LED will glow a solid green. Buzzer (UPort 1400 and 1600 only) UPort will sound the buzzer twice when the power is turned on. You will also hear the buzzer when using the Locate function on the driver property page. - Page 15 UPort 1200/1400/1600 Series User’s Manual Driver Installation UPort 1200 DIP Switches Port1, Port 2 UPort 1400 DIP Switches Port1, Port 2, Port 3, Port 4 UPort 1600-8 DIP Switches Port1, Port 2, Port 3, Port 4, Port 5, Port 6, Port 7, Port 8...
-
Page 16: Installing The Setup Program
UPort 1200/1400/1600 Series User’s Manual Driver Installation UPort 1600-16 DIP Switches Port1, Port 2, Port 3, Port 4, Port 5, Port 6, Port 7, Port 8, Port 9, Port 10, Port 11, Port 12, Port 13, Port 14, Port 15, Port 16 Installing the Setup Program 1. -
Page 17: Installing The Driver For The Server
UPort 1200/1400/1600 Series User’s Manual Driver Installation 3. Click Install to proceed with the installation. 4. The next window that opens cautions you that although this software has not passed Windows logo testing, this driver has already been tested and shown that it can support the Windows OS. Click Continue Anyway to proceed. - Page 18 UPort 1200/1400/1600 Series User’s Manual Driver Installation 2. Select No, not at this time. Click Next to start the installation. 3. Select Install the software automatically (Recommended), and then click Next to continue.
- Page 19 UPort 1200/1400/1600 Series User’s Manual Driver Installation 4. Wait while the installation wizard searches for the correct drivers. The next window that opens cautions you that although this software has not passed Windows logo testing, this driver has already been tested and shown that it can support Windows OS. Click Continue Anyway to proceed.
-
Page 20: Installing The Driver For The Ports
UPort 1200/1400/1600 Series User’s Manual Driver Installation 6. The next window shows the model name of the board, and indicates that Windows has completed the driver installation. Click Finish to proceed with the rest of the installation procedure. Installing the Driver for the Ports 1. - Page 21 UPort 1200/1400/1600 Series User’s Manual Driver Installation 2. Select Install the software automatically (Recommended), and then click Next to continue. 3. Wait while the installation wizard searches for the correct drivers. The next window that opens cautions you that although this software has not passed Windows logo testing, this driver has already been tested and shown that it can support Windows OS.
- Page 22 UPort 1200/1400/1600 Series User’s Manual Driver Installation 4. Wait while the driver software is installed. 5. After all files have been copied to the system, the Completing the Found New Hardware Wizard window will open to indicate that it has finished installing Port 0. Click Finish to proceed with the rest of the installation.
-
Page 23: Configuring The Ports
UPort 1200/1400/1600 Series User’s Manual Driver Installation Configuring the Ports After the driver has been installed, use Device Manager to configure the UPort serial ports. 1. With the System Properties window open, click on the Hardware tab, and then click on Device Manager. - Page 24 UPort 1200/1400/1600 Series User’s Manual Driver Installation The Ports Configuration page settings are described below. Auto Enumerating COM Number If the “Auto Enumerating COM Number” checkbox is checked, COM numbers will be assigned automatically and in sequence to the ports. E.g., COM3 to Port 1, COM4 to Port 2, etc.
- Page 25 UPort 1200/1400/1600 Series User’s Manual Driver Installation Tx Mode Setting Factory Default Necessity Hi-Performance, Hi-Performance Required Classical To improve write performance, you can select the Hi-Performance mode. Under classical mode, the driver will not notify the user’s program that Tx is completed until all Tx data has been sent out from the UPort;...
-
Page 26: Other Settings
UPort 1200/1400/1600 Series User’s Manual Driver Installation Other Settings Reset default If you click the Rest default button, all the settings will return to Factory default settings: COM Number: <Assign available COM number automatically> Tx Mode: Hi-Performance UART FIFO: Enable Fast Flush: Enable Interface:... - Page 27 UPort 1200/1400/1600 Series User’s Manual Driver Installation Restore Read all settings from UPort as new settings. You still need to press the OK button to activate it. Clear Clear the UPort setting which is stored in UPort Device. This operation is simliar to resettng all the settings to ther factory defaults.
-
Page 28: Uninstalling Uport
UPort 1200/1400/1600 Series User’s Manual Driver Installation Locate This function can help to identify the UPort location, especially when two or more UPorts are installed. This function will ask the UPort to flash the ready LED and turn on the Buzzer until you stop it. -
Page 29: Uninstalling The Driver
UPort 1200/1400/1600 Series User’s Manual Driver Installation 2. Expand the Multi-port serial adapters tab, right click MOXA UPort 1450 Series, and then click Remove to uninstall this UPort device. A window will pop up to confirm if you want to remove this UPort. - Page 30 UPort 1200/1400/1600 Series User’s Manual Driver Installation 2. Select Moxa UPort Windows Driver Ver1.0. Click the Remove button. 2-21...
- Page 31 UPort 1200/1400/1600 Series User’s Manual Driver Installation 3. Wait while the driver software is uninstalled. 4. Click OK to proceed with the un-installation procedure. 2-22...
-
Page 32: Chapter 3 Pin Assignment
Pin Assignment Chapter 3 UPort 1250/1250I has 2 RS-232/422/485 ports, UPort 1410 has 4 RS-232 ports, UPort 1450/1450I has 4 RS-232/422/485 ports, UPort 1610-8/1610-16 has 8/16 RS-232 ports, and UPort 1650-8/1650-16 has 8/16 RS-232/422/485 ports. Serial Port Pinouts DB9 Male RS-232 Port for UPort 1410/1610-8/1610-16 RS-232 DB9 Male RS-232/422/485 Port for UPort 1250/1250I/1450/1450I/1650-8/1650-16 RS-422/... -
Page 33: Appendix A Service Information
Service Information Appendix A This appendix shows you how to contact Moxa for information about this and other products, and how to report problems. In this appendix, we cover the following topics. MOXA Internet Services Problem Report Form Product Return Procedure... -
Page 34: Moxa Internet Services
UPort 1200/1400/1600 User’s Manual Service Information MOXA Internet Services Customer satisfaction is our primary concern. To ensure that customers receive the full benefit of our products, Moxa Internet Services has been set up to provide technical support, driver updates, product information, and user’s manual updates. The following services are provided E-mail for technical support........support@moxa.com... -
Page 35: Problem Report Form
UPort 1200/1400/1600 User’s Manual Service Information Problem Report Form MOXA UPort 1200/1400/1600 Customer name: Company: Tel: Fax: Email: Date: Moxa Product: UPort 1250 UPort 1250I UPort 1410 UPort 1450 UPort 1450I UPort 1610-8 UPort 1650-8 UPort 1610-16 UPort 1650-16 Serial Number: _________________ Problem Description: Please describe the symptoms of the problem as clearly as possible, including any error messages you see. -
Page 36: Product Return Procedure
UPort 1200/1400/1600 User’s Manual Service Information Product Return Procedure For product repair, exchange, or refund, the customer must: Provide evidence of original purchase. Obtain a Product Return Agreement (PRA) from the sales representative or dealer. Fill out the Problem Report Form (PRF). Include as much detail as possible for a shorter product repair time.
Need help?
Do you have a question about the UPORT 1200 series and is the answer not in the manual?
Questions and answers