Table of Contents
Advertisement
Available languages
Available languages
Quick Links
Assembly Instructions
GET STARTED
Assemble Your
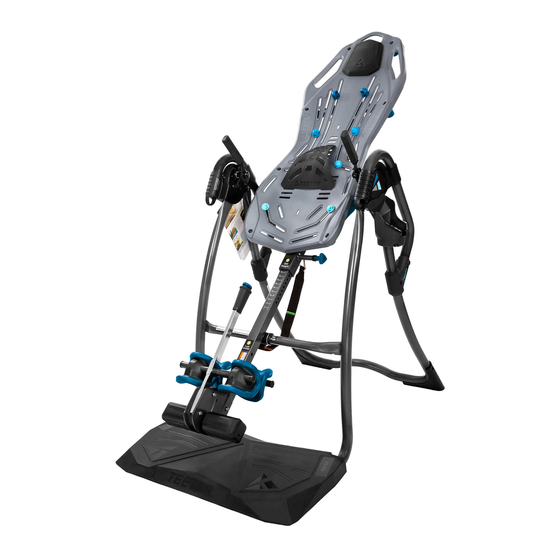
FitSpine LX
Inversion Table
™
For gravity-assisted stretching and decompression
Follow along with these instructions
OR
Scan to download the free BILT app
and search 'Teeter' in app.
* Specifications may vary from this image and are subject to change without notice.
EN
Advertisement
Chapters
Table of Contents

Related Manuals for Teeter FitSpine LX Inversion Table


Summary of Contents for Teeter FitSpine LX Inversion Table
- Page 1 FitSpine LX Inversion Table ™ For gravity-assisted stretching and decompression Follow along with these instructions Scan to download the free BILT app and search ‘Teeter’ in app. * Specifications may vary from this image and are subject to change without notice.
-
Page 2: Table Of Contents
If you have any questions concerning assembly or if any parts are missing, DO NOT RETURN THE ITEM TO THE STORE OR CONTACT THE RETAILER. Our dedicated product service experts can help! Contact Teeter Customer Service at 800-847-0143, or via online forms or Live Chat at teeter.com. -
Page 3: Important Safety Instructions
• DO NOT store the inversion table upright if children are present. Fold and lay the table on the floor. DO NOT store outdoors. • DO NOT use aggressive movements, or use weights, elastic bands, any other exercise or stretching device or non-Teeter ®... -
Page 4: Items For Assembly
I T E M S FO R A S S EM B LY Parts are not shown to scale. Hardware drawings located on the insert inside each Hardware Kit. ITEM NO. ITEM NAME ITEM NO. ITEM NAME A-Frame Base Assembly FitSpine Table Bed Assembly ™... -
Page 5: Understanding Your Inversion Table
A GU I D E TO YO U R I NVE R SI ON TA B L E Before reading further, study the drawing below to familiarize yourself with the important components of your Teeter Inversion Table. Located on back of table bed. -
Page 6: Safety Warning Labels & Product Specifications
This drawing indicates the locations of the warning labels found on your product. If a label is missing, illegible or is removed, contact Teeter Customer Service to request a complimentary replacement label. Note: Image and labels below not shown at actual size. -
Page 7: Assembly Steps
L E T ’ S GE T STA RTE D Unpack and Prepare Your Workspace • If possible, assemble the equipment at or near the space in which you intend to use it to avoid moving it later. • Unpack all parts and support materials. Set aside packing materials and clear your work area. •... - Page 8 Figure 3: Fully tighten all Boarding Platform Bolts using the 5mm Allen Wrench. Figure 3 Figure 4: Position the assembled A-Frame upright and open it on a level surface, ensuring the Boarding Platform and Rubber Feet are secure and rest evenly on the ground.
- Page 9 FOR LX9 MOD E LS: AS SE M B LE STORAGE CA D DY Figure A NOTE: The Storage Caddy is included with LX9 Models and must be attached BEFORE the Handles. If your inversion table does not include a Storage Caddy, proceed to the next step.
- Page 10 S T E P 2 A S S E M B LE H A N D L E S & B R AC KE TS FIGURE 4 FIGURE 4 Figure 5-6 IMPORTANT: Do not fully tighten the bolts until all the bolts have been screwed into the Handles AND the Handle Brackets.
- Page 11 A S S E M B LE RO L L E R H I NG E S S T E P 3 FIGURE 4 FIGURE 4 TO TA BL E B E D Figure 10: Familiarize yourself with the 3-Hole Roller Figure 10 Hinge and Cam Lock terms.
- Page 12 Figure 12: For ease of assembly, rest the Table Bed against the Crossbar at the front of the A-Frame. Figure 12a: On one side of the Table Bed, lift and hold the Cam Lock up all the way to unlock. In your other hand, hold one Roller Hinge near the Pivot Pin.
- Page 13 S T E P 4 A S S E M B LE TA B L E B ED TO A- F R A ME FIGURE 4 FIGURE 4 Figure 15: Face the front of the A-Frame where the Crossbar is located. Grasp both Roller Hinges, right above the Cam Lock, and lift the Table Bed.
- Page 14 S T E P 5 ASSEMBLE MAIN SHAFT TO TABLE BED FIGURE 4 FIGURE 4 Figure 19: Stand on the LEFT side of the A-Frame, holding the Main Shaft with the height markings facing up. Begin to slide the end of the Main Shaft into the Main Shaft Housing at the base of the Table Bed.
- Page 15 MISASSEMBLY CHECK WARNING If your Teeter Inversion Table looks like Image A or B, your inversion table has been misassembled and is unfit for use. Improper assembly could result in serious injury or death! Image B Image C Image A...
- Page 16 AT TAC H A NG LE T E TH ER S T E P 6 FIGURE 4 & H E A D PI L LOW Attach Angle Tether The tether will come pre-assembled to the A-Frame. Figure 22: Unfold the adjustable tether and clip it to the U-Bar on the underside of the Table Bed.
- Page 17 Stabilize the inversion table to prevent rotation during assembly. Position the bridge with the Teeter logo at the base and facing towards you. Figure 24: First, insert the bottom two notches of the bridge into the desired horizontal slots on the lower portion of the Table Bed.
- Page 18 S T E P 8 ATTACH ACUPRESSURE NODES FIGURE 4 (OPTIONAL) Personalize the intensity and target zone of the Acupressure Nodes by positioning the varying sizes along the FitSpine bed tracks as desired. Figure 27: Determine your desired node position along the table bed.
-
Page 19: Before Inverting
NEXT STEP Locate User Guide and Get Started with Inversion Refer to the User Guide attached to your FitSpine LX Inversion Table. This is your step-by-step guide to customizing your user settings for a smooth and effortless inversion experience. Ensure User Guide Remains on Product Figure 30 &... -
Page 20: Warranty Terms & Registration
Under no circumstances shall Teeter, or any other party involved in the sale of this product, have any liability for incidental or consequential damage arising from breach of an express or implied warranty on any Teeter product. - Page 21 This page intentionally left blank.
-
Page 22: Terms & Conditions
Teeter also offers a 30-Day Price Match Guarantee. If at any time within 30 days of placing your order, you find the same, new-condition model advertised in print or online by a Teeter authorized dealer for a lower price, send Teeter customer service a copy of the ad (dated and published within 30 days of placing your order) and they will either adjust your future payments for the new price or refund you the difference. - Page 23 Sites or these materials, whether or not the circumstances giving rise to such cause may have been within the control of Teeter or of any vendor providing software or services. In no event will Teeter or any such parties be liable to you, whether in contract or tort, for any direct, special, indirect, punitive, consequential or incidental damages, attorney fees, or any other damages of any kind even if Teeter or any other such party has been advised of the possibility thereof.
- Page 24 Tel. +49 511 62628630 Teeter Decompression Devices are multiple user, reusable devices for home use, intended to provide traction to the spine while stretching the para-spinal muscles and soft tissues. The devices provide non-powered traction and are meant for use by adults.
- Page 25 LX4, LX5, LX6, LX7, LX8, LX9 Appareil d’étirement et de décompression par gravité GARANTIE Pour télécharger et imprimer le J’ai créé Teeter pour que les manuel de la série FitSpine LX Teeter, visitez la page d’assistance gens puissent mener une vie des produits au teeter.com...
- Page 26 Avant de commencer le montage ....5 Tirez le maximum de votre Teeter ....6 Étapes du montage .
-
Page 27: Instructions De Sécurité Importantes
• NE FAITES PAS de mouvements brusques, n’utilisez pas d’haltères, de bandes élastiques, tout autre appareil d’exercice ou d’étirement ou d’accessoires non-Teeter® sur la table d’inversion. • NE LAISSEZ PAS tomber ou n’introduisez pas d’objet dans aucune des ouvertures. Gardez les parties du corps, les cheveux, les vêtements flottants et les bijoux à... -
Page 28: Éléments De Montage
Éléments de montage Les éléments ne sont pas représentés à l’échelle. Les schémas correspondants au matériel sont situés sur l’encart à l’intérieur de chaque ensemble de matériel. NUMÉRO DE NUMÉRO DE NOM DE L’ARTICLE NOM DE L’ARTICLE L’ARTICLE L’ARTICLE Ensemble du cadre en A Montage du dossier FitSpine EX1100 Cadre en A... -
Page 29: Comprendre Sa Table D'inversion
Comprendre sa table d’inversion Avant de continuer la lecture de ce document, examinez le schéma ci-dessous afin de vous familiariser avec les éléments importants de votre table d’inversion Teeter. Situé à l’arrière du dossier de la table. Le produit présenté ici est le LX4. -
Page 30: Étiquettes D'avertissement De Sécurité Et
Ce dessin signale la position des étiquettes d’avertissement situées sur votre produit. S’il manque une étiquette, si elle est illisible ou a été retirée, veuillez contacter le service à la clientèle Teeter par téléphone ou via le site internet indiqué au bas de cette page pour solliciter une étiquette de remplacement gratuite. -
Page 31: Avant De Commencer Le Montage
• Descendre – Apprenez à descendre correctement de votre Teeter, selon le modèle. • Rangement et entretien – Voyez comment votre Teeter se range facilement et de manière compacte. • Descendre – Apprenez à descendre correctement de votre Teeter, selon le modèle. - Page 32 Pour tous les modèles ÉTAPE 1 Montage de la plateforme surélevée IMPORTANT : Ne pas serrer complètement les vis avant FIGURE 1 qu’elles soient toutes en place et que la plateforme soit installée correctement. • Retirer le cadre en A de la boîte et le mettre dos au sol, de manière à...
- Page 33 Montage des poignées et de leurs supports FIGURE 5 N.B. : Si votre Teeter vient avec un panier de rangement (optionnel, compris avec le modèle LX9), sortir le panier de son emballage et suivre les instructions pour le fixer à la poignée gauche avant de fixer les poignées au cadre en A.
- Page 34 Pour tous les modèles ÉTAPE 3 Installez les charnières pivotantes sur le dossier de la table REMARQUE : Certains modèles comprennent des poignées FIGURE 10 de traction pré-assemblées aux charnières pivotantes. Toutefois, les instructions de montage détaillées ci-dessous VERROUILLÉ s’appliquent toujours. DÉVERROUILLÉ...
- Page 35 Pour tous les modèles ÉTAPE 4 Montez le dossier de la table et le cadre en A • Positionnez-vous en face du cadre en A, là où se situe la barre FIGURE 15 transversale (Figure 15). • Saisissez les deux charnières pivotantes, juste au-dessus du dispositif de blocage à...
- Page 36 Pour tous les modèles ÉTAPE 5 Montez l’axe principal sur le dossier de la table • L’axe principal de votre modèle peut différer des figures présentées, FIGURE 20 cependant les instructions de montage restent les mêmes. • En vous tenant face au cadre en A, tenez l’axe principal dans votre main gauche, les indications de hauteur tournées vers le haut.
- Page 37 Pour tous les modèles ÉTAPE 6 Attachez la courroie d’attache angulaire et le repose-tête Attachez la courroie d’attache angulaire FIGURE 24 • La courroie d’attache angulaire est prémontée sur le cadre en A. • Dépliez la courroie réglable et fixez-la à la barre en U sous le dossier de la table (Figure 24).
-
Page 38: Vérification D'un Mauvais Montage
Vérification d’un mauvais montage AVERTISSEMENT Si votre table d’inversion Teeter ressemble à l’un de ces schémas, votre table est montée de façon incorrecte et elle n’est pas prête à être utilisée. Un montage incorrect peut entraîner des blessures graves ou la mort! -
Page 39: Avant L'inversion
Le manuel d’utilisation contient des informations importantes concernant la façon d’utiliser votre table d’inversion Teeter, y compris la façon de personnaliser les réglages de l’utilisateur, de verrouiller et de déverrouiller correctement le système de fixation des chevilles et de tester et d’ajuster le contrôle de la rotation. - Page 41 à cette garantie, son interprétation, ou de toute violation alléguée de celle-ci, qui ne peut être réglé à l’amiable entre Teeter et le propriétaire dans les soixante (60) jours après notification écrite par la partie lésée à...
-
Page 44: Inversion
Tel. +49 511 62628630 Les appareils de décompression de Teeter, accrédités 510(k) par la FDA, sont conçus pour une utilisation domestique et peuvent être utilisés par plusieurs adultes. Ils permettent d’exercer une traction non assistée sur la colonne vertébrale et ainsi d’étirer les muscles et les tissus mous paravertébraux.
Need help?
Do you have a question about the FitSpine LX Inversion Table and is the answer not in the manual?
Questions and answers