Table of Contents
Advertisement
Quick Links
Advertisement
Table of Contents

Related Manuals for Dejero EnGo 3x


Summary of Contents for Dejero EnGo 3x
- Page 1 User Guide June 2022 D-UG145-DRAFT...
- Page 2 Copyright © 2022 Dejero Labs Inc. Dejero is a trademark of Dejero Labs Inc. QuickTime is a trademark of Apple Inc. Wi-Fi is a trademark of the Wi-Fi Alliance. Linux is the registered trademark of Linus Torvalds in the U.S.
-
Page 3: Table Of Contents
Transferring files About warning and error states Using Control for remote management Setting the display orientation Viewing connection information About stream indicators Using the Wired Remote Troubleshooting Warning and error messages Technical specifications 3 | Dejero EnGo 3x User Guide... - Page 4 Additional help 4 | Dejero EnGo 3x User Guide...
-
Page 5: Safety Warnings And Hazards
Dejero platform. Warranty on the Dejero EnGo 3x is voided if the device is opened or the endcaps are removed. For details, see Handling and Operating Conditions below. - Page 6 The EnGo 3x has an internal lithium-ion battery rated less than 100 watt-hours (Wh). The battery, if left inside the EnGo, is rated by the TSA and FAA as safe for travel on aircraft as checked luggage or as a carry-on.
-
Page 7: Handling And Operating Conditions
In order to safely install and use Dejero products full consideration of vehicle occupants, vehicle systems (i.e., the location of fuel lines, brakes lines, electrical, drive train or other systems), airbags and other safety equipment is recommended. -
Page 8: About The Dejero Engo 3X
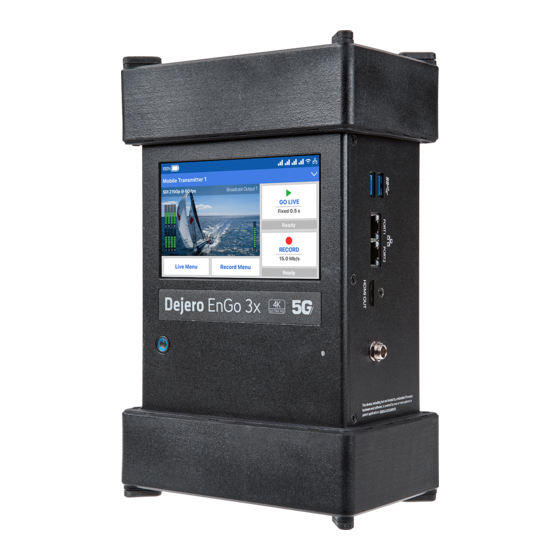
Dejero is not recommended and will void the warranty. About the Dejero EnGo 3x The Dejero EnGo 3x is reliable, simple to use, and built tough for field use. It is designed for mobile video professionals who demand high performance. - Page 9 Featuring Dejero's renowned Smart Blending Technology, the dependable EnGo 3x reliably performs in the most challenging network conditions. Worn in a backpack or mounted in a vehicle for use with roof-top antennas, EnGo 3x is ideal for newsgathering, sports coverage, live event production, and transmitting real-time video from drones.
-
Page 10: What's Included
● UAS interoperability: Works seamlessly with unmanned aerial systems to capture real-time video from unique vantage points. Note: EnGo 3x can transmit and receive encrypted live transmissions (including IFB). What’s included The EnGo includes the following items: ●... -
Page 11: About Dejero Control
About Dejero Control When you manage the EnGo with Dejero Control, you can: ● Assign live and recorded video, as well as file transfers, from the EnGo to a Dejero receiver. ● Geolocate the EnGo mobile transmitter. ● Preview and route feeds from the EnGo. - Page 12 113° F, or if it has encountered a problem that caused the battery to fail. Charge the EnGo using a power outlet Note: Use only the power adapter that is included with the EnGo 3x. You cannot use the power adapter from an EnGo hardware version 1.3 or earlier to charge the EnGo 3x.
-
Page 13: Starting The Engo
● Live: Transmit live video over network blending of cellular, Wi-Fi, Ethernet, or satellite connections to the Dejero receivers. ● Recording: Record video for later transmission. Use this mode when a live feed is not required, or when bandwidth is limited or not available. 13 | Dejero EnGo 3x User Guide... -
Page 14: Connecting To The Engo
Ethernet, IFB, or Intercom. You can also use the USB ports on the EnGo. Note: By default, Ethernet port 1 on the EnGo 3x is configured as a WAN port and Ethernet port 2 is configured as a LAN port. To configure both Ethernet ports as WAN ports, contact Dejero Support. - Page 15 If multiple networks are available, you can plug in a second Ethernet cable for additional throughput. Note:By default, Ethernet port 1 on the EnGo 3x is configured as a WAN port and Ethernet port 2 is configured as a LAN port. To configure both Ethernet ports as WAN ports, contact Dejero Support.
- Page 16 In the studio, an external audio interface connects to the WayPoint receiver over USB. This device receives audio inputs from an external source that are mapped to the WayPoint outputs. In the field, you can connect a headset with a 3.5 mm connection to the EnGo 3x to receive and send Intercom audio communication.
-
Page 17: About The Engo Backpack
3. Use Control to assign the EnGo to an output on the WayPoint receiver. 4. Ensure that Intercom is enabled on the EnGo. For more information, see "Enable Intercom" on page . About the EnGo backpack The EnGo backpack provides easy access to the EnGo. 17 | Dejero EnGo 3x User Guide... -
Page 18: Inserting The Engo Into The Backpack
In the battery compartment, ensure that the D-Tap connector is connected to the battery plate. b. Ensure that the battery plate is held in place with the hook-and-loop fasteners. c. Slide the auxiliary battery onto the battery plate. 18 | Dejero EnGo 3x User Guide... - Page 19 The foam should rest on the EnGo 3x, not the cables. Note: You must secure the EnGo in the backpack with the zip cords. If you do not, the EnGo can move around or fall out.
- Page 20 Lift the front access panel from the bottom. b. Open the triangle flaps from the inside of the sun shade to the outside and press them flat. c. Roll the sun shade up toward the cable storage compartment. 20 | Dejero EnGo 3x User Guide...
- Page 21 1. Use the four zippers at the top of the backpack to open the top compartment fully. 2. If the EnGo is in the backpack, remove it. 3. At the top of the backpack, use the zipper to open the cable storage compartment. 21 | Dejero EnGo 3x User Guide...
- Page 22 13. Use the hook-and-loop fasteners to close the slot in the cable storage compartment tightly. 14. Close the cable storage compartment. 15. Reinsert the EnGo into the backpack, ensuring that the zip cords fit around the endcaps to secure it in place. 22 | Dejero EnGo 3x User Guide...
-
Page 23: About The Preview Screen
● Record Menu: Use this menu to set the quality of your recorded clips. Note: If you are using the EnGo in GateWay Mode, GateWay Mode appears as the status below the Go Live and Record buttons. 23 | Dejero EnGo 3x User Guide... - Page 24 The following icons appear on the Preview screen to show the status of the EnGo connections. The icons also appear on the screen when using Control to manage the EnGo remotely. Icon Description Ethernet connection CellSat connection 24 | Dejero EnGo 3x User Guide...
-
Page 25: Changing Sim Modules
3. Insert the replacement SIM module with the end marked TOP oriented toward the Preview screen. 4. Line up and tighten the thumbscrews. Ensure that the module is aligned correctly and tightly connected. 25 | Dejero EnGo 3x User Guide... -
Page 26: Configuring The Engo
SIM set" on page . Configuring the EnGo Use the Settings screen to configure the transmitter settings. Note: When you are streaming live content, you cannot configure the settings for the EnGo. 26 | Dejero EnGo 3x User Guide... - Page 27 4. Select Input. 5. Select Video Input. 6. Set the video input to SDI, IP, or AUTO. 7. Select Back. 8. If you selected SDI, set the Input Resolution and Input Frame Rate. 27 | Dejero EnGo 3x User Guide...
- Page 28 8. In the Source URL field, type the IP address and port for the source IP video stream. 9. Select the network interface of the EnGo that the source IP video is connected to. 28 | Dejero EnGo 3x User Guide...
- Page 29 6. Set the video loss setting to Black Screen or Last Frame. Configure the Live Resolution setting Live resolution is the resolution of the video, as transmitted over-the-air when broadcasting. It is independent of the transmitter input and receiver output resolutions. 29 | Dejero EnGo 3x User Guide...
- Page 30 Each Auto option has a different maximum bandwidth cap, appropriate for the base video resolution that you send. Live Resolution Maximum Connection Bitrate Auto: SD 2.5 Mb/s Auto: SD+ 5.0 Mb/s Auto: HD 5.0 Mb/s Auto: HD+ 10.0 Mb/s Auto: HD+20 20.0 Mb/s 30 | Dejero EnGo 3x User Guide...
- Page 31 7. If you select Custom for the latency value, type a latency value between 0.5 seconds and 20.0 seconds. 8. Select 9. Select Back. 10. Select Latency Mode. 11. Select a latency mode: Fixed, Adaptive, or Up to. 31 | Dejero EnGo 3x User Guide...
- Page 32 1. On the Preview screen, select 2. Select More. 3. Select Settings. 4. Select Operation. 5. Select Auto Start. 6. Select your delay setting: No delay, 1 minute, 2 minutes, 3 minutes, 4 minutes, or 5 minutes. 32 | Dejero EnGo 3x User Guide...
- Page 33 Configure the connection settings You can set the type of connection to use for transmitting data. 1. On the Preview screen, select 2. Select More. 3. Select Settings. 4. Select Connections. 33 | Dejero EnGo 3x User Guide...
- Page 34 6. Depending on your geographic location, select Primary or Secondary. Note: When you define a SIM set, the setting applies when using the EnGo as a hotspot or when using the EnGo in GateWay Mode. 34 | Dejero EnGo 3x User Guide...
- Page 35 GateWay Mode. 1. On the Preview screen, select 2. Select More. 3. Select Settings. 4. Select Connections. 5. Select Hotspot. 6. Select Actions. 7. Select SSID. 8. Type the new hotspot name. 9. Select 35 | Dejero EnGo 3x User Guide...
-
Page 36: Using Gateway Mode
7. Select Info. Using GateWay Mode You can use the EnGo 3x in GateWay Mode to allow access to the internet or to provide increased capacity for data-intensive applications. In this mode, the EnGo uses Smart Blending Technology to combine all the available network connections to increase the device's capability to transmit data. - Page 37 Configure and manage the EnGo 3x in GateWay Mode When the EnGo 3x is in GateWay Mode, you can configure and manage the device in the same way that you manage a Dejero GateWay device. To view more information and review procedures on configuring and managing the EnGo 3x in GateWay Mode, visit support.dejero.com...
-
Page 38: Managing Wi-Fi Connections
Tip: Select ABC for uppercase letters and abc for lowercase letters. Select 123.?! for special characters. Select it again for more special characters. Disconnect a Wi-Fi connection 1. On the Preview screen, select 2. Select Connections. 3. Select Wi-Fi. The current Wi-Fi network is highlighted in green. 38 | Dejero EnGo 3x User Guide... -
Page 39: Managing Return Feeds
5. Select Info. Managing return feeds You can subscribe to return feeds sent from the studio using a Dejero CuePoint server. To use return feeds with the EnGo, connect an external display to the HDMI output on the EnGo. Turn on return video feeds 1. -
Page 40: Managing Sim Cards
When you add a new SIM card, you might need to unlock it prior to use. The PIN to unlock the SIM card is usually available with the packaging but you can also contact your carrier to request 40 | Dejero EnGo 3x User Guide... - Page 41 Disable the PIN for a SIM If you do not want to type the PIN every time you make changes to the SIM card, you can disable the PIN. Disabling the PIN simplifies your future actions. 41 | Dejero EnGo 3x User Guide...
- Page 42 4. Select the connection for the SIM card carrier. SIM cards in the secondary SIM set will have a list of available actions. 5. Select Actions. 6. Select Unblock SIM. 7. Type the PUK code. 42 | Dejero EnGo 3x User Guide...
-
Page 43: Transmitting Live
Prerequisite: Confirm that the latency settings as indicated on the Go Live button are appropriate for the transmission. For more information, see "Configure the latency" on page . 1. Select Go Live. You can monitor the video feed as it transmits. 43 | Dejero EnGo 3x User Guide... -
Page 44: Enabling Stream Encryption
You can encrypt the audio and video streams (including IFB and Intercom) sent between an EnGo and supported Dejero receivers using AES 256 encryption. By default, stream encryption is off but you can enable it by setting a preferred stream encryption mode in Control. -
Page 45: Using The Intercom Feature
Preview screen. Using the Intercom feature The Intercom feature is available when the EnGo 3x is ready to transmit live or when it is live. Audio is only received or transmitted when a headset is connected. - Page 46 Note: By default, the receiver sends the first channel of audio. If you want to send a different channel of audio by default, contact Dejero Support. Enable Intercom By default, Intercom is enabled on the EnGo. If you enable Prompt Audio, you must enable Intercom again before you can use it.
-
Page 47: Using Record Mode
Tip: You can set the quality setting when configuring Record mode. You can also select the quality setting on the Preview screen. 1. On the Preview screen, select 2. Select More. 3. Select Settings. 4. Select Record. 5. Select Quality. 47 | Dejero EnGo 3x User Guide... - Page 48 You can transmit live and record a clip at the same time. Depending on the connection and network conditions, the resolution of the live broadcast might change, but the resolution used when recording the clip does not change. 48 | Dejero EnGo 3x User Guide...
- Page 49 The receiver that receives the transferred clip is defined in Control. Note: You cannot transfer a file or transfer a clip while recording if you are streaming live content. 1. On the Preview screen, select 2. Select Transfer. 49 | Dejero EnGo 3x User Guide...
- Page 50 7. Select Import. Back up a clip 1. On the Preview screen, select 2. Select Transfer. 3. Select Actions. 4. On the Clip Selection screen, select clips. 5. Select Actions. 6. Select Backup. 50 | Dejero EnGo 3x User Guide...
- Page 51 5. Select the clip. 6. Select Actions. 7. Select Change Prefix. 8. Type a new name for the clip. 9. Select Delete a clip 1. On the Preview screen, select 2. Select Transfer. 3. Select Clips. 51 | Dejero EnGo 3x User Guide...
-
Page 52: Transferring Files
If EnGo encounters an issue during a live transmission, the background color of the Preview screen changes. ● If a warning appears, the background color changes to yellow. You can troubleshoot the underlying issue and resolve the problem. 52 | Dejero EnGo 3x User Guide... -
Page 53: Using Control For Remote Management
Note: If you set the display orientation manually, it remains in that orientation until you set it manually again. It does not rotate automatically. 53 | Dejero EnGo 3x User Guide... -
Page 54: Viewing Connection Information
Individual connections show the active data transmission rate and, if enabled, the roaming status. Note: On the Connections screen, the modem number for the connection appears before the network name. 1. On the Preview screen, select 2. Select Connections. 54 | Dejero EnGo 3x User Guide... -
Page 55: About Stream Indicators
Cloud Server. When transmitting live, the glass-to-glass latency appears on the Preview screen, above the Go Live button. 55 | Dejero EnGo 3x User Guide... -
Page 56: Using The Wired Remote
Using the Wired Remote The EnGo 3x backpack comes with a Wired Remote that you can use to go live quickly and easily. You can also use this Wired Remote to monitor the state of the EnGo during the live transmission and the battery level of the EnGo. - Page 57 The battery level is higher than 20%. Solid yellow The battery level is lower than 20%. Flashing red The battery level is lower than 5%. Connect the EnGo to a power source immediately. 57 | Dejero EnGo 3x User Guide...
-
Page 58: Troubleshooting
EnGo. Connect the EnGo to a power outlet or attach a charged auxiliary battery. After you connect to a power source, the EnGo starts immediately. If the EnGo still does not turn on, contact Dejero Support. EnGo does not turn... - Page 59 EnGo appears on the Preview receiver output screen. EnGo is disabled Contact Dejero Support. You will need to restart EnGo after it is re- enabled. Low power If battery power in the EnGo is low, the Power button flashes quickly (approximately two times a second), and a warning appears on the screen and in Control.
- Page 60 Intercom cable extension. Use resilient mode If there is an issue with the Dejero infrastructure, Resilient Mode appears on the Preview screen. In Resilient mode, you can still start a transmission or transfer clips or files.
-
Page 61: Warning And Error Messages
Warning and error messages The following table outlines possible warning or error messages that you might encounter and possible ways to resolve them. If you call Dejero Support, reference the warning or error number, as listed below. Problem... - Page 62 Try repositioning the EnGo for better poor to transmit reliably at wireless coverage, or change the latency the current latency setting. setting to Adaptive or set a longer latency value. See "Configure the latency" on page . 62 | Dejero EnGo 3x User Guide...
- Page 63 Device not licensed Error 24 The device is not licensed Disconnect the satellite connection or for CellSat. Please for CellSat services. contact Dejero Support. disconnect the satellite connection or contact Dejero at 1-519-772-4824. 63 | Dejero EnGo 3x User Guide...
- Page 64 The EnGo turns off automatically if the power level falls below 2%. Battery Error Warning 30 The EnGo recorded an Contact Dejero Support. internal battery fault. 64 | Dejero EnGo 3x User Guide...
- Page 65 Control to select a video format combination is different output. not supported. Invalid assignment Warning 109 Could not broadcast. Invalid Contact your system administrator, or receiver output assignment. use Control to assign a different destination. 65 | Dejero EnGo 3x User Guide...
- Page 66 Cannot stream to the Contact Dejero Support. licensed assigned receiver because the receiver is not licensed. Receiver Error 119 Could not broadcast. The Contact Dejero Support. incompatible receiver is incompatible and requires a software update. 66 | Dejero EnGo 3x User Guide...
-
Page 67: Technical Specifications
Technical specifications Video Resolutions 1080p 23.98/25/29.97/30/50/59.94/60 (3G-SDI Level-A), 1080i 25/29.97/30, 720p 50/59.94/60, 576i 25, 480i 29.97 Encoding H.264 AVC and H.265 HEVC, adaptive encoding Inputs 3G/HD/SD-SDI, HDMI 1.0 67 | Dejero EnGo 3x User Guide... - Page 68 Dual 1 Gb/s port for LAN, WAN, and portable satellite (including BGAN, Ku- band, Ka-band) Wi-Fi Dual-band wireless-AC with Wi-Fi 6 (802.11 a/b/g/n/ac/ax) Open WEP, WPA-PSK, and WPA2-PSK Power DC IN 100-240 VAC adapter, 19VDC 90W (included) 68 | Dejero EnGo 3x User Guide...
- Page 69 Live and Record Transmit live while also recording video for later at a higher quality. mode File transfer Transfer edited video or other files to Dejero receivers. Wi-Fi hotspot Internet access over a single network connection, preserving remaining connections for video...
- Page 70 Reliably transmit to a wide range of outputs including SDI, SMPTE ST formats 2110, MPEG-TS, Content Delivery Networks (CDNs), social networks, and MultiPoint. Regulatory compliance Product EnGo 3x Model EG3x Compliance This product is compliant with international EMC and safety standards. 70 | Dejero EnGo 3x User Guide...
- Page 71 Additional help If you still require assistance operating your Dejero EnGo 3x: ● Visit the Dejero SupportHub online knowledge base at support.dejero.com ● Email the Dejero technical support team at support@dejero.com ● Call the 24-hour technical support number for your region.