Table of Contents
Advertisement
Advertisement
Table of Contents
Troubleshooting

Subscribe to Our Youtube Channel
Related Manuals for Dejero LIVE+ 20/20


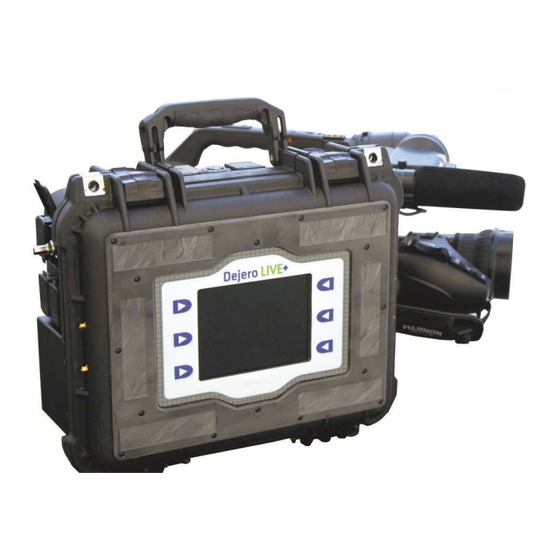
Summary of Contents for Dejero LIVE+ 20/20
- Page 1 Dejero LIVE+ Platform LIVE+ 20/20 Transmitter User Manual...
- Page 2 © 2013 by Dejero Labs Inc. All rights reserved. Patents pending. Document number: 2020.201309a Dejero www.dejero.com General Inquiries: Canada & U.S.: 1.866.808.3665 International: +01 519.772.4824 Service and Support: Canada & U.S.: 1.866.808.3665 International: +01 519.772.4824...
-
Page 3: Table Of Contents
Safety Warnings and Hazards ..................7 Handling and Operating Conditions ................8 Overview ........................10 Installing Batteries ......................11 Removing Batteries ......................11 Powering the LIVE+ 20/20 Transmitter .................12 Connection Ports ......................13 Connect Video ........................13 Connect XLR Audio (optional) ................... 14 Connect Ethernet (optional) ..................... 14 Connect Interruptible Feedback (IFB) ................ - Page 4 Operation Modes ......................30 Operation Mode - Ethernet Type ..................30 Operation Mode - WiFi Configuration ................32 WiFi Password ........................33 Transmitting Live ......................34 Automatic Connection to Cellular Networks ..............34 Start and Stop Transmission ..................... 34 Begin Transmitting Live Video................... 35 End Broadcasting ......................
-
Page 5: Welcome
Transmit broadcast-quality live video over cellular networks using patent pending technology. If you have cellular coverage, you are ready to broadcast. No Trucks. No Cables. No Limits. This guide contains all the information you need to begin broadcasting live with the Dejero LIVE+ 20/20 Transmitter. -
Page 6: The Dejero Live+ Platform
LIVE+ Products. The Dejero LIVE+ Cloud Transcoder Capture and stream your live event easier than ever using Dejero LIVE+ Cloud Transcoder. Drive traffic to your website and expand the reach of your live events to mobile devices. Broadcast government or organizational announcements, corporate meetings, breaking story coverage or any other special event you want to stream from your website. -
Page 7: Warranty And Liability
Dejero accepts no responsibility for and is not liable for any loss or damage, including but not limited to revenue or personal injury, resulting from delays in, errors in, or failure to transmit or receive data using... -
Page 9: Safety Warnings And Hazards
PC-like devices, such as the LIVE+ 20/20 Transmitter to generate sparks, which could trigger an explosion. Do not store the LIVE+ 20/20 Transmitter in the compartment of a vehicle that contains flammable gas, liquid or explosives. -
Page 10: Handling And Operating Conditions
Medical Implant Devices (e.g. cardiac pacemakers/implant defibrillators) It is possible that the radio modems in the LIVE+ 20/20 Transmitter may interfere with some types of medical devices, when operated close to the device. You should seek advice from your doctor before operating the LIVE+ 20/20 Transmitter. - Page 11 Handling and Operating Conditions Keep Device Dry The LIVE+ 20/20 Transmitter case is designed to be weather-resistant, but not weather-proof. Keep device covered during inclement conditions. Do not expose to liquid, moisture or humidity.
-
Page 12: Overview
The LIVE+ 20/20 Transmitter is sometimes referred to as the 20/20 model. For technical specifications, see page 61. The LIVE+ 20/20 Transmitter device can run on AC power or, enjoy a fully mobile experience by attaching a pair of batteries to the battery mounting plates, which are located on the back of the transmitter. -
Page 13: Installing Batteries
3. Slide the battery off the plate. Can I hot-swap batteries while the LIVE+ 20/20 Transmitter is running? If batteries still have some power, it may be possible to “hot swap” – replace one •... -
Page 14: Powering The Live+ 20/20 Transmitter
Display window, see page 17. The LIVE+ 20/20 Transmitter is not powering on Make sure you are using freshly charged batteries and that they are securely seated • in the battery mounting plates. If you are using AC power, confirm all cable connections are secure. Make sure the •... -
Page 15: Connection Ports
Connect your camera and/or microphone(s) to the device by plugging it directly into the correct port on the LIVE+ 20/20 Transmitter case. Note: A 4-prong powered XLR port, labelled DC IN, is located on the side of the LIVE+ 20/20 Transmitter device (by the exhaust vents). The DC IN has a requirement of 6-30V (6-24V for... -
Page 16: Connect Video
Connect Video The transmitter supports HDMI, SDI, Analog and DV. 1. Plug the camera’s output cable into the correct video input port on the LIVE+ 20/20 Transmitter. 2. Make sure all cables are firmly connected. Note: When attaching a DV camera, refer to that product’s documentation for details on how to properly connect and enable power. -
Page 17: Connect Interruptible Feedback (Ifb)
Connection Ports Connect Interruptible Foldback (IFB) IFB acts as a one way communication from the LIVE+ Broadcast Server to the LIVE+ 20/20 Transmitter, which enables communication and cueing from the broadcasting crew to the talent. A program feed is sent to an earpiece worn by the talent (connected to the transmitter), via the LIVE+ Broadcast Server. -
Page 18: Ifb Troubleshooting
Specify Camera Input Type Once the camera is physically connected go to the Configuration window to verify your settings – audio, video and video format type, connection type and latency. See page 20 for more information about configuring the LIVE+ 20/20 Transmitter. -
Page 19: The Display Window
The Display Window The Display Window Main Window When the transmitter is powered on, the main window loads into the Display window. Note: The serial number displayed at the top of the Main window should be referenced when placing a support call. -
Page 20: Device Messages
Dejero LIVE+ 20/20 Transmitter Device Messages Status messages and error messages for the transmitter are displayed in the preview window. On start-up the device performs a self-diagnostic. When successfully complete, Device Ready is displayed. I have an inactive device error The transmitter must be activated by the LIVE+ Portal administrator before it can be used. -
Page 21: Network And Server Indicators
The Display Window Combined Transmission Meter The Combined Transmission Meter shows the total data transmitted by all connections (in kilobits /second, shown in increments of 500 kb/s). The blue bar indicates the total data transmitted by all connections and the blue arrow is the current target rate for encoding the data. - Page 22 Dejero LIVE+ 20/20 Transmitter Mode Selection There is now an option on the Main window to allow quick selection of the Operation Mode of the Dejero LIVE+ 20/20 Transmitter In the centre of the screen on the right hand side there is a button labeled ‘Mode’ which allows quick...
-
Page 23: Video Window
Video Window Video Window The video window allows you to see the live camera feed being broadcast by the transmitter. When the transmitter is actively broadcasting, the ON AIR message appears in the top-right corner of the video window. The destination is also shown. Sound meters are located along the bottom of the video window. -
Page 24: Start, Stop And Configuration Options
Dejero LIVE+ 20/20 Transmitter Start, Stop and Configuration Options Press the touchpad button beside the Play icon to begin broadcasting live video from the transmitter. See page 34 for more information about broadcasting from the transmitter. Press the touchpad button beside the Stop icon to stop broadcasting video from the transmitter. -
Page 25: Configuring The Transmitter
Configuring the Transmitter Configuring the Transmitter Press the lower-right touchpad button to display the Configuration window. Configuration Options The Configuration window displays your options for specifying transmitter settings. Use the touchpad buttons to change settings as required. -
Page 26: Input Selection - Video Input
Dejero LIVE+ 20/20 Transmitter Input Selection - Video Input To set the video input type, from the Configuration window, press the touchpad button corresponding to the Input selection. When selecting an NTSC or PAL input type, be sure that the video standard from the camera matches the input selection on the transmitter. -
Page 27: Input Selection - Audio Input
Configuring the Transmitter Input Selection - Audio Input To set the audio input, press the Input touchpad button from the Configuration window. To toggle through the audio input options use the touchpad button beside the Audio Input selection. Audio settings include: Embedded: The default audio setting for HDMI, SDI and DV is embedded;... -
Page 28: Live Settings - Latency
Dejero LIVE+ 20/20 Transmitter Live Settings - Latency Press the Live button from the Configuration window to set latency (time for the video to arrive at the server). Preset: This is the default latency setting for the transmitter. It is set by the Administrator in the •... - Page 29 Configuring the Transmitter Live Settings - Latency Modes Fixed Latency Mode: When operating in this mode the system attempts to give the glass-to-glass • latency requested (short, medium, long and preset). If the current network conditions cannot support the requested latency, ERROR 17 is displayed on the transmitter. For details, see page 57. Adaptive Latency Mode: In this mode the system measures the network conditions during the •...
-
Page 30: Live Settings - Live Resolution
Dejero LIVE+ 20/20 Transmitter Live Settings - Live Resolution Live resolution is the resolution of the video, as transmitted over-the-air when in LIVE mode. It is independent of the transmitter input and server output resolutions. To access the Live Resolution window press the touchpad button corresponding to the Live selection from the Configuration window. -
Page 31: Operation Mode - Connection
Operation Mode - Connection Operation Mode - Connection From the Configuration window, press the touchpad button corresponding to the Operation selection to access the window shown below. From the Operation Mode window, press the touchpad button corresponding to the Connection selection to set the types of connections you will be using for transmitting data. -
Page 32: Operation Modes
Dejero LIVE+ 20/20 Transmitter Operation Modes From the Operation Mode window, press the touchpad button corresponding to the Mode selection to set the types of operation modes you will be using to broadcast data. See page 37 for details. Live: This selection is used for live broadcast to the assigned server/output. -
Page 33: Operation Mode - Ethernet Type
Operation Mode - Connection Operation Mode - Ethernet Type From the Operation Mode window, press the touchpad button corresponding to the Ethernet Type selection to set the type of connection attached to the wired Ethernet port on the transmitter. Normal: A regular terrestrial Ethernet line – for example a cable/DSL connection, a hotel •... -
Page 34: Operation Mode - Wifi Configuration
Dejero LIVE+ 20/20 Transmitter Operation Mode - WiFi Configuration (when available) To access the WiFi configuration options select the touchpad button beside the WIFI selection from the Operation Mode window. The WiFi Configuration window displays all the networks that are available. -
Page 35: Wifi Password
Operation Mode - Connection WiFi Password The WiFi Password window appears when Connect is selected from the WiFi Configuration window and there is no profile saved for the selected network. Use the arrow buttons to navigate the onscreen keyboard and enter the password for the requested network, ensuring that the Select button is pressed after each character. -
Page 36: Transmitting Live
Dejero LIVE+ 20/20 Transmitter Transmitting Live Automatic Connection to Cellular Networks When the transmitter is on, it automatically detects all available cellular connections. If a successful connection has been made, each of the individual card transmission meters will be displayed in the user interface with the network name and the signal strength. The grey dot will change to green once Play has been pressed for a live broadcast. -
Page 37: Begin Transmitting Live Video
Transmitting Live Begin Transmitting Live Video 1. Check the window on the transmitter for the Device Ready message. 2. Begin transmitting by pressing the top-left button on the touchpad, corresponding to the Play icon in the display window. The video window allows you to monitor the video feed as it is transmitted. The “ON AIR” message is displayed in the preview window when you are operating in LIVE mode. -
Page 38: End Broadcasting
Dejero LIVE+ 20/20 Transmitter End Broadcasting End transmission at any time by pressing the top-right button on the touchpad, corresponding to the Stop button on the display window. The Video window continues to display the input from the camera, but you will see the message Preview in the top-right corner of the window. -
Page 39: Volume Controls
Some input sources may have volume levels that are undesirable. The Dejero LIVE+ 20/20 Transmitter has a control that allows the user to modify the volume level. This control is only visible when the Dejero LIVE+ 20/20 Transmitter is transmitting LIVE. - Page 40 Dejero LIVE+ 20/20 Transmitter 4. In the S&F menu you can set the Quality Level. This controls the encoding rate of the clip being generated. Options include: Low (2.5 Mb/s), Medium (4.0 Mb/s) and High (6.0 Mb/s). Note: Depending on the input content, the actual bit rate of data written to disk may differ from the...
-
Page 41: Store & Forward Settings Window
Store and Forward (S&F) Store & Forward Settings Window Max Clip Length is the amount of recording time remaining on the selected hard drive at the quality level chosen. The value is formatted as: hhh:mm:ss. This value is also displayed on the main screen of the interface when ready to record. -
Page 42: S&F Clip Selection Window
Dejero LIVE+ 20/20 Transmitter S&F Clip Selection Window To access the S&F Clip Selection window, press the lower-left touchpad button on the main user interface. Clip names are the timestamp (UTC) at which the clip finished recording. Format is: YYYY-MM-DD_hhmmss. -
Page 43: S&F Clip Actions
Store and Forward (S&F) S&F Clip Actions The S&F Clip Actions screen enables user to transfer, delete or backup the clips selected from the S&F Clip Selection screen. To transfer the selected clip(s), press Transfer Clips. The Forwarding Clip window appears. -
Page 44: Transfer A Clip
Dejero LIVE+ 20/20 Transmitter Transfer a Clip The Transferring Clip window displays the name of the server the clip is being forwarded to and the percentage transferred. To transfer a clip, press the touchpad button corresponding to the Transfer Clips selection from the S&F Clip Actions window. See page 41. The clip name is shown above the preview window, which seeks forward through the clip based on the percentage transferred. -
Page 45: Backup A Clip
Store and Forward (S&F) Backup a Clip To back up a clip, press the touchpad button corresponding to the Backup Clips selection from the S&F Clip Actions window. See page 41. Use the Up and Down buttons to select the backup drive and then press Select. -
Page 46: Delete A Clip
Dejero LIVE+ 20/20 Transmitter Delete a Clip The Confirmation window, shown below is displayed when a clip is chosen to be deleted. If Yes is pressed, the clip is permanently deleted from the transmitter file system. If No is pressed, the clip will... -
Page 47: Record A Clip - S&F Only Mode
Store and Forward (S&F) Record a Clip – S&F Only mode In S&F Only mode you can begin to record a clip by pressing the Play button from the main window. The Recording Clip window, shown below will appear. The preview window displays the video being recorded. -
Page 48: Recording A Clip - Live & S&F Mode
Dejero LIVE+ 20/20 Transmitter Recording a Clip – Live & S&F mode When in Live & S&F mode, the main Live Broadcast window remains the same, with the addition of [REC] to indicate that the current video is also being recorded to disk while the live broadcast is occurring. -
Page 49: File Transfer
File Transfer File Transfer To access the file transfer feature press the middle touch pad button beside File Transfer icon. Drive Selection The Drive Selection window enables users to select a USB device as a source to transfer files. Press Select to advance to the File Selection window. -
Page 50: File Selection And File Transfer
Dejero LIVE+ 20/20 Transmitter File Selection and File Transfer Use the Up/Down arrow buttons to navigate between the files and directories. Select the file(s) you would like to transfer and press the touchpad button beside the Transfer selection to begin. - Page 51 File Transfer File Transfer – Selected Files The next window that appears displays the files that were previously selected. This allows users to make any changes before transferring the files. Use the selection buttons to make changes and press the Transfer touchpad button to transfer the selected files to the server.
-
Page 52: File Transferring
Dejero LIVE+ 20/20 Transmitter File Transferring The File Transferring window displays the progress of the file transfer. Overall progress is shown on the main progress bar and percentages are displayed beside each individual file. Transfer Complete is displayed once the process is finished and the File Transfer – Transferred Files window appears. See... -
Page 53: Transferred Files/Resume Transfer
File Transfer Transferred Files/Resume Transfer The window, illustrated below displays an overview of the file transfer. A green checkmark indicates files that were transferred successfully. A black checkmark indicates a file that was only partially transferred. To correct this, select the file and press the touchpad button beside Resume Transfer. -
Page 54: File Transfer - Error Codes
Dejero LIVE+ 20/20 Transmitter File Transfer – Error Codes Listed below are the possible errors that may occur on the server while transferring files. The error code is displayed beside the file post-transfer. ER1 Unknown Error • ER2 Invalid File Transfer Session •... -
Page 55: Remote Control
Remote Control Remote Control The Dejero LIVE + 2020 Transmitter can be controlled from a remote location using the ‘Remote Control’ functionality from the Dejero Portal. For further details please see the Dejero LIVE+ Portal User Manual. When a transmitter is being remotely controlled the screen will be surrounded by a blue border and will display a message ‘Remote Control is Active’... -
Page 57: Troubleshooting
2) Disconnect the power source to the transmitter. modems have 3) Wait three seconds, reconnect the power source and restart. malfunctioned. If this does not resolve the problem, contact your local Dejero support center. Restarting this device may resolve the problem.”... -
Page 58: Video, Audio Or Transmission Problems
In the Configuration window, set the latency to Medium (three seconds) or High (8 or poor network seconds). See page 23 for details. connectivity. Poor video result at the server end Device is displaying See page 57 for a complete list of LIVE+ 20/20 Transmitter error messages and an error message solutions. -
Page 59: Error Messages And Solutions
2) Disconnect the power and wait three seconds. 3) Reconnect the power source and restart. If this does not resolve the problem, contact your local Dejero support center. Error 06: No input source detected, or invalid input source selected. - Page 60 LIVE+ Portal User Manual. Error 10: Either the transmitter or assigned server has been disabled in the portal. Device is disabled. Please contact Dejero. Error 11: Either the transmitter or assigned server is inactive in the portal. Device is inactive. Please contact your In order to transmit, the transmitter must be activated and assigned system administrator.
- Page 61 Error Messages and Solutions Error 17: Network conditions are too poor to transmit reliably at the current latency setting. Network conditions are too poor to transmit reliably at the current latency setting. Either switch to the 'Adaptive' latency mode, or change to a longer latency setting.
- Page 62 Dejero LIVE+ 20/20 Transmitter Error 114: This error message is shown when the LIVE+ Broadcast Server is unable to complete the clip transfer due to insufficient available disk space. Failed to complete clip transfer to LIVE+ Broadcast Server. Server does not have enough disk space available to receive more clip data.
-
Page 63: Technical Specifications
Technical Specifications Technical Specifications 20/20 Model 20/20 Transmitter Weight 5.5 kg/12 lb. (without batteries) Battery Dual battery packs compatible with industry standard Gold Mount Anton Bauer or V-mount configurations. Glass-to-Glass Latency Select: 1.5 sec / 3 sec / 8 sec / Custom setting range 0.8 to 20 sec. Incorporates adaptive latency that operates in 100ms increments.
Need help?
Do you have a question about the LIVE+ 20/20 and is the answer not in the manual?
Questions and answers