
Related Manuals for Dejero LIVE+ GoBox


Summary of Contents for Dejero LIVE+ GoBox
- Page 1 LIVE+ GoBox User Guide January 2015 D-UG112-002 www.dejero.com...
- Page 2 Copyright, Trademarks, and Patents Copyright © 2014 Dejero Labs Inc. Dejero and Dejero LIVE+ are trademarks of Dejero Labs Inc. All other trademarks are the property of their respective owners. Dejero products or portions thereof are protected by patents granted and pending.
-
Page 3: Table Of Contents
Contents Warranty and Liability ........................4! Safety Warnings and Hazards ...................... 4! The Dejero LIVE+ Platform ......................7! About the Dejero LIVE+ GoBox ....................7! What’s included ..........................8! LIVE+ Portal ..........................8! Powering the GoBox ........................9! Starting the GoBox ........................10! Connection ports ......................... -
Page 4: Warranty And Liability
Dejero accepts no responsibility for and is not liable for any loss or damage, including, but not limited to, revenue or personal injury, resulting from delays in, errors in, or failure to transmit or receive data using the Dejero LIVE+ Platform. - Page 5 Aircraft The Dejero LIVE+ GoBox should be powered off and not operated in any aircraft, whether in flight or on the ground; systems onboard the aircraft could be affected by radio interference. Driving The driver or operator of any vehicle should not operate the Dejero LIVE+ GoBox while in control of a vehicle.
- Page 6 If the air vents are blocked, the LIVE+ GoBox may overheat and shut down. These vents are located on either end of the device. (The intake is protected by the flat metal panel on the left side.) Please keep these areas clear and unobstructed to ensure adequate airflow.
-
Page 7: The Dejero Live+ Platform
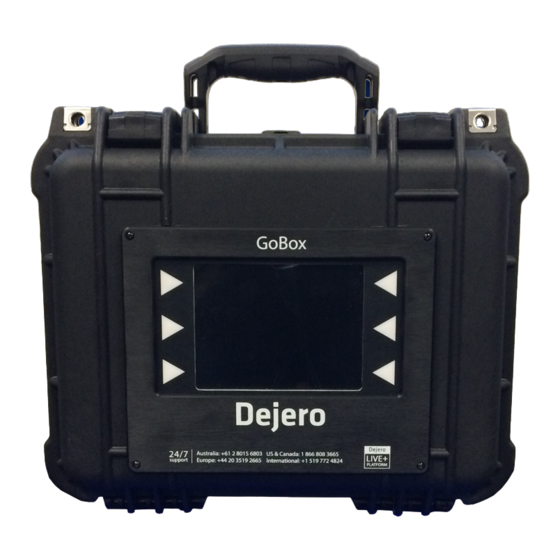
The Dejero LIVE+ Platform of hardware, software, and cloud-based services help you capture, transmit, manage, and distribute high-quality live video from virtually anywhere. The Dejero LIVE+ GoBox is used to capture and transmit video as part of the complete solution. About the Dejero LIVE+ GoBox The LIVE+ GoBox is the most rugged mobile transmitter designed for newsgathering professionals and video content contributors on the go. -
Page 8: What's Included
• Quick Start Guide • LIVE+ Portal The LIVE+ GoBox works with the Dejero LIVE+ Portal in the following ways: Assign live and recorded video, as well as file transfers from the GoBox to a LIVE+ • server LIVE+ GoBox User Guide... -
Page 9: Powering The Gobox
3. Slide the battery off the mounting plate. Note: You can replace hot swap batteries without interrupting the GoBox operation. The GoBox will operate on a single battery, if required, of 85Wh or more, Dejero recommends using two batteries at all times. -
Page 10: Starting The Gobox
Device Ready screen. For more information about the Device Ready screen, see page 13. Connection ports The connection ports are located on the top and side of the GoBox case. LIVE+ GoBox User Guide... -
Page 11: Connect Video
If you are using a supported video format, the format of the incoming video is detected automatically, so you do not need to set this manually. Connect Ethernet Using an optional Ethernet connection, you can choose to transmit using Ethernet only or broadcast over Ethernet and cellular networks simultaneously. LIVE+ GoBox User Guide... -
Page 12: Connect Ifb
For more information about the configuration settings, see page 16. DC output You can use the DC output of the GoBox to power a Dejero LIVE+ Booster or other supported devices (such as a long-range Wi-Fi radio). If you use the DC output, you need a specialized cable. -
Page 13: Usb Ports
(for file transfers), for connecting support peripherals (such as a keyboard or mouse), or for connecting other supported devices. Device Ready screen When the LIVE+ GoBox is on, the Device Ready screen appears. Various messages, including status of the transmitter and error messages, appear on this screen. - Page 14 If the encoder bitrate is consistently low, the indicator displays a value between 0% and 100%. The number under the server percentage shows what the encoder is running at. It corresponds to the blue transmission meter. LIVE+ GoBox User Guide...
-
Page 15: Mode Selection
To stop broadcasting video from the transmitter, press the touchpad button beside the Stop icon. To open the Configuration screen, press the Configuration touchpad button. Use this screen to configure camera, sound type, and latency options. For more information about configuring the transmitter, see page 16. LIVE+ GoBox User Guide... -
Page 16: Configuring The Transmitter
4. Set the video standard to NTSC, PAL, or FILM (1080p, 23.98 fps). Note: When you select either NTSC or PAL, make sure that the video standard from the camera matches your selection on the GoBox. LIVE+ GoBox User Guide... - Page 17 The server output resolution does not change, so the video routed to your internal systems remains constant. Each Auto option has a different maximum bandwidth cap, appropriate for the base video resolution that you send. LIVE+ GoBox User Guide...
-
Page 18: Configuring The Connection Type
If there is no cellular network coverage, but an Ethernet cable is connected to the transmitter, data is sent over Ethernet only. If there is cellular network coverage and an Ethernet cable is also connected, the transmitter uses both connection types simultaneously. LIVE+ GoBox User Guide... - Page 19 To select a specific SSID, press the Up or Down touchpad button. Press the Select • touchpad button. To refresh the list of available networks, press the Rescan touchpad button. • To connect or disconnect from the selected network, press the Connect touchpad • button. LIVE+ GoBox User Guide...
-
Page 20: Transmitting Live
The Preview screen continues to show the input from the camera, but Preview appears in the upper right corner of the window. The device remains ready to resume broadcasting. Press the Play touchpad button to resume the transmission. LIVE+ GoBox User Guide... -
Page 21: Store & Forward
9. To format the video stored into the recorded MP4 clips, press the Clip Compatibility touchpad button. Standard: The standard MP4 clip contains H.264 video and AAC audio. For • interlaced input formats, the video is encoded in MBAFF format. LIVE+ GoBox User Guide... - Page 22 If the selected clip was forwarded to the currently assigned server, the transfer details also appear at the top of the table in red. Transfer a clip 1. On the Device Ready screen, press the Store & Forward touchpad button. LIVE+ GoBox User Guide...
- Page 23 Import a clip You can import your edited MP4 clips to the LIVE+ GoBox transmitter. Imported clips appear with the Store & Forward clips. You can transfer them to your server to view and play them back from the LIVE+ Portal.
- Page 24 Record a clip in Live and S&F mode After you configure the Operation mode to Live and S&F Only, press the Play touchpad button to record a clip. The Preview screen shows the video that you are recording and [REC] appears LIVE+ GoBox User Guide...
-
Page 25: File Transfer
4. Use the Up and Down touchpad buttons to navigating to a file. 5. Press the Select touchpad button. 6. Press the Transfer button. Note: You can select multiple files to transfer from within the same folder. LIVE+ GoBox User Guide... - Page 26 ER3: Could not create file – invalid file transfer session • ER4: Could not create file – invalid directory structure • ER5: File Not Found • ER6: MD5 Checksum Failed • ER7: Could not create file – filename too long • LIVE+ GoBox User Guide...
-
Page 27: Remote Control
3. To set a delayed start for the live transmission, scroll through the Auto Start touchpad button options and choose and option: 1 min, 2 min, 3 min, 4 min, or 5 min. Note: If you turn on Auto Start, the live stream starts when the transmitter detects video. LIVE+ GoBox User Guide... -
Page 28: Troubleshooting
2. Disconnect the power source. modems have malfunctioned. 3. Wait 30 seconds, reconnect the power source, and restart. Restarting this If this does not resolve the problem, contact Dejero Support. device may resolve the problem.” LIVE+ GoBox is Contact your system administrator to activate your transmitter. - Page 29 GoBox appears on the Preview assigned to a screen. server output LIVE+ GoBox is Contact Dejero Support. You will need to restart the GoBox after it is re- disabled enabled. Video, audio, or transmission problems Problem...
-
Page 30: Error Messages
The following table outlines possible error messages that you might encounter and possible ways to resolve them. If you call Dejero Support, reference the error number, as listed below. A complete table is also available in the Dejero Support Hub at http://support.dejero.com... - Page 31 Error 09: The transmitter may not be Use the LIVE+ Portal to assigned to a server output in assign a receiver. For more Device needs to be LIVE+ Portal. information, see the LIVE+ assigned to a server LIVE+ GoBox User Guide...
- Page 32 If the networks. streaming is stopped, Error 14 appears. Error 16: No Ethernet connections exist. Connect an Ethernet cable to the GoBox. The Ethernet connection type has been enabled, but there are no Ethernet LIVE+ GoBox User Guide...
- Page 33 Attempt to transmit the clip was an error creating a new Store & again. If the problem Failed to create clip on Forward clip transfer session. persists, contact your system server administrator. Consider managing the clips LIVE+ GoBox User Guide...
- Page 34 LIVE+ server did not initialize Technical Support. Could not broadcast. The correctly. LIVE+ Broadcast Server Access the Dejero LIVE+ could not be started. Portal and Ensure that the user name and password are correct. Ensure that the software is LIVE+ GoBox User Guide...
-
Page 35: Technical Specifications
5.2 kg (11.5 lbs) without batteries Operating -10° C to +50° C (15° F to 122° F) qualified operation up to 95% RH Temperature (non-condensing) Connectors SDI, HDMI, Ethernet, IFB, 2 x USB, DC In, DC Out LIVE+ GoBox User Guide... -
Page 36: Additional Help
Additional help If you still require assistance operating your LIVE+ GoBox after reading this guide: Visit the Dejero Support Hub online knowledge base at support.dejero.com • Email the Dejero technical support team at support@dejero.com • Call the 24-hour technical support number for your region. - Page 37 September 24, 2014 New Document D-UG112 January 2015 Hardware spec updates Technical Support: support@dejero.com US & Canada (Toll Free): 1 866 808 3665 Europe: +44 20 3519 2665 Australia: +61 2 8015 6803 International: +1 519 772 4824 LIVE+ GoBox User Guide...
Need help?
Do you have a question about the LIVE+ GoBox and is the answer not in the manual?
Questions and answers