Table of Contents
Advertisement
Advertisement
Table of Contents

Related Manuals for Dejero EnGo 260


Summary of Contents for Dejero EnGo 260
- Page 1 User May 2019 D-UG114-015 Guide November 2019...
- Page 2 Copyright, Trademarks, and Patents Copyright © 2019 Dejero Labs Inc. Dejero is a trademark of Dejero Labs Inc. All other trademarks are the property of their respective owners. Dejero products or portions thereof are protected by patents granted and pending.
-
Page 3: Table Of Contents
Contents Warranty and Liability ........................4 Safety Warnings and Hazards ...................... 4 Handling and Operating Conditions ....................6 About the Dejero EnGo 260 ......................7 What’s included ..........................8 About Dejero Control ........................8 Powering the EnGo ........................9 Starting the EnGo ........................10 Using the EnGo ........................... -
Page 4: Warranty And Liability
Dejero’s control may result in data delay, corruption, or loss. Dejero accepts no responsibility for and is not liable for any loss or damage, including, but not limited to, revenue or personal injury, resulting from delays in, errors in, or failure to transmit or receive data using the Dejero platform. - Page 5 EnGo must be treated as carry-on luggage. The EnGo 260 has an internal battery that is less than 100 watt hours (Wh). The battery, if left inside the EnGo, is rated by the TSA and FAA as safe for travel on aircraft.
-
Page 6: Handling And Operating Conditions
Warning: The battery installed in this device may present a risk of fire or chemical burn if mistreated. Do not attempt to disassemble the device to access or replace the internal battery. Only authorised Dejero personnel can service the internal battery and the unit. Handling and Operating Conditions Read this section in its entirety before operating the EnGo. -
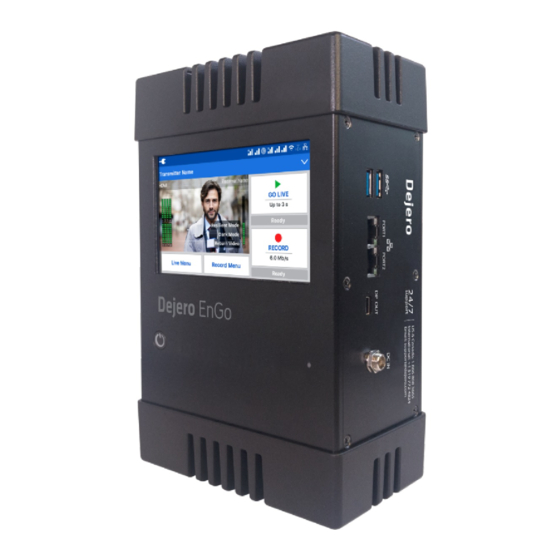
Page 7: About The Dejero Engo 260
Do Not Disassemble the Product Only authorized Dejero personnel can open, modify, or repair the EnGo unit. Unless authorized by Dejero personnel, any attempt by the user to open, disassemble, or repair the device renders the warranty null and void. -
Page 8: What's Included
About Dejero Control When you manage the EnGo with Dejero Control, you can: • Assign live and recorded video, as well as file transfers, from the EnGo to a Dejero receiver. Geolocate the EnGo mobile transmitter. • •... -
Page 9: Powering The Engo
Gold Mount battery plates to charge the EnGo. 1. Connect the power cord to the DC IN port on the side of the EnGo. 2. Perform one of the following actions: Connect the power cord directly to an auxiliary battery. • Dejero EnGo 260 User Guide... -
Page 10: Starting The Engo
File Transfer: Quickly transfer photos, scripts, graphics, or edited video packages to the • Dejero receivers using the blended network connectivity. Connecting to the EnGo You can use the connection ports on the EnGo to connect video and audio, Ethernet, or IFB. - Page 11 Configuring the transmitter on page 16. Connect IFB IFB acts as a one-way audio communication tool from Dejero receivers to the EnGo. It enables communication and cueing from the studio crew to the reporter in the field. The station sends a program feed to the reporter’s earpiece, which is connected to the EnGo.
-
Page 12: Inserting The Engo Into The Backpack
EnGo receives voice packets from the receiver, the sound level varies. Note: If you are using a Dejero Broadcast Server or a Dejero Transceiver, the audio is unbalanced. If you are using a Dejero WayPoint receiver, the audio is balanced. -
Page 13: About The Preview Screen
When you tap the Record button, the Preview screen shows the clip run time below the button. Above the button, the screen shows the amount of remaining video time that you can record and store in the device storage. Dejero EnGo 260 User Guide... - Page 14 The following icons appear on the Preview screen to show the status of the EnGo’s connections. The icons also appear on the screen when using Remote Control with the EnGo. Icon Description Ethernet connection CellSat connection Dejero EnGo 260 User Guide...
-
Page 15: Specifying The Camera Input Type
The EnGo has a user-changeable SIM module for regional cellular network access. You can access the SIM module to change the SIM cards to ones from a different region. The SIM module uses nano SIM cards. Dejero EnGo 260 User Guide... -
Page 16: Configuring The Engo
8. Replace the SIM module by lining up and tightening the thumbscrews. Ensure that the module is aligned correctly and tightly connected. Configuring the EnGo Use the Settings screen to configure the transmitter settings. Note: When you are streaming live content, you cannot configure the settings for the EnGo. Dejero EnGo 260 User Guide... - Page 17 23.98, 25, 29.97, 30 1080p 50, 59.94, 60 (3G-SDI Level-A) 8. To exit from Input, tap Back. 9. Tap to close the menu. Note: Depending on the frame rate that you select, the available input resolutions change. Dejero EnGo 260 User Guide...
- Page 18 5. Set the live resolution to Auto: SD, Auto: SD+, Auto: HD, Auto: HD+, Auto: HD+20, or Manual. 6. If you set the live resolution to Manual, perform the following actions: Tap Back. • Tap Bit Rate. • Dejero EnGo 260 User Guide...
- Page 19 Dejero receiver. Tip: In an area of poor coverage, or very high cellular network traffic, you might achieve better video transmission results with a medium or long latency.
- Page 20 1.5 seconds. If the latency is set to less than 1.5 seconds, the EnGo changes the latency to Short (1.5 seconds). If there is the potential to lose cellular connections completely, Dejero recommends setting the latency to Preset (at 2.2 seconds) for maximum reliability.
- Page 21 Configure the connection settings 1. On the Preview screen, tap 2. Tap Settings. 3. Tap Connections. 4. Tap Preferred Connection. 5. Tap Automatic, Ethernet, or Cellular. 6. Tap Back. Dejero EnGo 260 User Guide...
- Page 22 When not in use, deactivate the hotspot to free up connections for live streams. 1. On the Preview screen, tap 2. Tap Settings. 3. Tap Connections. 4. Tap Hotspot. 5. Tap a connection to use for the hotspot. Dejero EnGo 260 User Guide...
- Page 23 7. Delete the old password. 8. Type the new hotspot password. 9. Tap View devices connected to the hotspot 1. On the Preview screen, tap 2. Tap Settings. 3. Tap Connections. 4. Tap Hotspot. 5. Tap Actions. Dejero EnGo 260 User Guide...
-
Page 24: Managing Wi-Fi Connections
6. Tap Disconnect. Delete a saved Wi-Fi profile 1. On the Preview screen, tap 2. Tap Settings. 3. Tap Connections. 4. Tap Wi-Fi. The current Wi-Fi network is highlighted in green. 5. Tap Actions. 6. Tap Forget. Dejero EnGo 260 User Guide... -
Page 25: Managing Return Feeds
4. Tap Wi-Fi. The current Wi-Fi network is highlighted in green. 5. Tap Actions. 6. Tap Info. Managing return feeds You can subscribe to return feeds sent from the studio using a Dejero CuePoint server. Turn on return video feeds 1. On the Preview screen, tap 2. Tap Return Video. - Page 26 If necessary, you can change the PIN for a SIM card, such as if there are security reasons to change it, or you want to change it to something that’s easier to remember. 1. On the Preview screen, tap Dejero EnGo 260 User Guide...
- Page 27 If you type the PIN wrong the maximum number of times, the carrier blocks the SIM card. To unblock a SIM card, call the carrier or access your account online and request a Personal Unlocking Key (PUK) code. 1. On the Preview screen, tap Dejero EnGo 260 User Guide...
-
Page 28: Transmitting Live
After you connect your camera to the EnGo, you can start a transmission. Prerequisite: Confirm that the latency settings as indicated on the Go Live button are appropriate for the transmission. For more information, see Change the settings for a live transmission on page 14. Dejero EnGo 260 User Guide... -
Page 29: Using Store & Forward
Recording mode. The selected quality setting impacts the file size of the clip; a higher quality setting results in a larger file. You can set the quality setting when configuring Store & Forward. You can also select the quality setting on the Preview screen. Dejero EnGo 260 User Guide... - Page 30 This format creates usable clips, even if the power is lost during recording. Note: Your administrator can create custom metadata profiles for clips using Control. For more information on how to add a profile to your device, visit support.dejero.com to read the Dejero Control User Guide. Dejero EnGo 260 User Guide...
- Page 31 4. Tap a clip. 5. Tap Actions. 6. Tap Info. 7. Tap Back. Change the prefix for a clip You can change the prefix for a single clip before you transfer it to a receiver. Dejero EnGo 260 User Guide...
- Page 32 5. Using the arrows on the right side of the screen, navigate to the file that you want to import. 6. Tap the file to select it. 7. Tap Actions. 8. Tap Import. Backup clips or files 1. On the side of the EnGo, insert a USB drive. Dejero EnGo 260 User Guide...
- Page 33 Store & Forward clip does not change. 1. On the Preview screen, tap Go Live. 2. Tap Record. The Preview screen shows the video that you are transmitting and recording. Dejero EnGo 260 User Guide...
-
Page 34: Transferring Files
If an error appears, the background color changes to red. The EnGo requires more • advanced troubleshooting and might require support from your system administrator. View error or warning information 1. On the Preview screen, tap 2. Tap Error or Warning. Dejero EnGo 260 User Guide... -
Page 35: Using The Remote Control
For more information, visit support.dejero.com to read the Dejero Control User Guide. When the EnGo is under remote control, a blue border appears on the Preview screen. The blue border only appears at the top of the menu screen. The Info screen shows the name of the user who is controlling the EnGo. -
Page 36: Viewing Connection Information
You can view SIM-specific details for any cellular connection that you changed the APN for. For more information on changing an APN, see Change the Access Point Name on page 25. 1. On the Preview screen, tap 2. Tap Settings. Dejero EnGo 260 User Guide... -
Page 37: About Stream Indicators
When neither of these events occurs, the Stream Health indicator appears as Good. Troubleshooting No display on Preview screen If you do not see a video on the Preview screen, perform the following actions: Dejero EnGo 260 User Guide... - Page 38 When assigned, the output destination for the EnGo appears on output the Preview screen. EnGo is disabled Contact Dejero Support. You will need to restart the EnGo after it is re-enabled. Dejero EnGo 260 User Guide...
- Page 39 On the Preview screen, the IFB indicator shows X. • To resolve the problems, perform one or more of the following actions: • Adjust the IFB volume on the receiver. Check the IFB connection to the EnGo. • Dejero EnGo 260 User Guide...
-
Page 40: Warning And Error Messages
Dejero Support. Resilient mode If there is an issue with the Dejero infrastructure, Resilient Mode appears on the Preview screen. In Resilient mode, you can still start a transmission or transfer clips or files. When you start a transmission, the Confirm Live Assignment dialog box appears, showing the last receiver and output assignment used for a live transmission. - Page 41 Either the EnGo or Enable the EnGo or the Please contact the assigned receiver assigned receiver in Control. Dejero. is disabled in Control. For more information, visit support.dejero.com to read the Dejero Control User Guide. Dejero EnGo 260 User Guide...
- Page 42 Unsupported Error 20 The assigned output Use Control to select a output is set to an different output video format. unsupported video For more information, visit format. support.dejero.com to read the Dejero Control User Guide. Dejero EnGo 260 User Guide...
- Page 43 You cannot use Change the Connection allowed in CellSat services in Type setting to All. For more Ethernet-only Ethernet-only mode. information, see Configure mode. Please the connection type on page change the Connection Types setting to ‘All’. Dejero EnGo 260 User Guide...
- Page 44 Control to select a format combination is different output. not supported. Invalid assignment Warning 109 Could not broadcast. Contact your system Invalid receiver administrator, or use Control output assignment. to assign a different destination. Dejero EnGo 260 User Guide...
- Page 45 – the appears if the assigned output receiver did not has malfunctioned. initialize correctly. Receiver not Warning 118 Cannot stream to the Contact Dejero Support. licensed assigned receiver because the receiver is not licensed. Dejero EnGo 260 User Guide...
-
Page 46: Technical Specifications
Contact Dejero Support. unexpectedly and was restarted automatically. Technical specifications Video Resolution 480i 29.97, 576i 25, 720p 50/59.94/60, 1080i 25/29.97/30, 1080p 23.98/25/29.97/30/50/59.94/60 (3G-SDI Level-A) Encoding H.264 AVC and H.265 HEVC, adaptive encoding Inputs 3G-SDI, HDMI 1.3 Dejero EnGo 260 User Guide... - Page 47 2 x USB 3.0, IFB (mini-XLR connector), DC In Adapters (included IFB adapter (mini-XLR to XLR adapter), D-Tap adapter with the EnGo) (DC In to D-Tap cable) Key functions Live Transmit broadcast-quality live video over IP networks. Dejero EnGo 260 User Guide...
-
Page 48: Additional Help
Transmit live while also recording video for later at a higher Forward quality. File Transfer Transfer edited video or other files to Dejero receivers. Hotspot Connect laptop, phone, or other devices to the Internet leveraging the EnGo connectivity. Multiple Output... - Page 49 Technical Support: support@dejero.com US & Canada (Toll Free): 1 866 808 3665, ext. 2 International: +1 519 772 4824, ext. 2 Dejero EnGo 260 User Guide...
Need help?
Do you have a question about the EnGo 260 and is the answer not in the manual?
Questions and answers