Table of Contents
Advertisement
Quick Links
Growatt New Energy
Download
Manual
Shenzhen Growatt New Energy Co., Ltd
4-13/F,Building A,Sino-German(Europe) Industrial Park,
Hangcheng Ave, Bao'an District, Shenzhen, China
T
+86 0755 2747 1942
E
service@ginverter.com
W
www.ginverter.com
GR-UM-257-A-00
Installation
&
Operation Manual
MIN 2500TL-XA
MIN 3000TL-XA
MIN 3600TL-XA
MIN 4200TL-XA
MIN 4600TL-XA
MIN 5000TL-XA
MIN 6000TL-XA
Advertisement
Table of Contents

Related Manuals for Growatt MIN 2500TL-XA


Summary of Contents for Growatt MIN 2500TL-XA
- Page 1 MIN 4200TL-XA MIN 4600TL-XA MIN 5000TL-XA MIN 6000TL-XA Installation & Operation Manual Growatt New Energy Download Manual Shenzhen Growatt New Energy Co., Ltd 4-13/F,Building A,Sino-German(Europe) Industrial Park, Hangcheng Ave, Bao'an District, Shenzhen, China +86 0755 2747 1942 service@ginverter.com www.ginverter.com GR-UM-257-A-00...
- Page 2 Index Notes on this manual 1.1 Validity 1.2 Target Group 1.3 Additional information 1.4 Symbols in this document 1.5 Glossary 2 Safety 2.1 Intended Use 2.2 Qualification of skilled person 2.3 Safety instruction 2.4 Assembly Warnings 2.5 Electrical Connection Warnings 2.6 Operation Warnings 3 Product Introduction 3.1 TL-XA Overview...
- Page 3 6 Electrical connection Trouble shooting 6.1 Safety 11.1 Error Messages displayed on OLED 6.2 Wiring AC Output 11.2 System fault 6.3 Connecting the second protective 11.3 Inverter warning conductor 11.4 Inverter fault 6.4 Connecting the Battery 6.5 Connecting signal cable 6.6 Grounding the inverter 6.7 Active power control with smart meter , ripple control signal...
-
Page 4: Notes On This Manual
Alternating Current (AC) destruction of part or all of the Growatt equipment and/or other equipment connected to the Growatt equipment or personal injury. Symbol... -
Page 5: Intended Use
Safety 2 1.5 Glossary 2.1 Intended Use The unit converts the DC current generated by the battery (BAT) to grid- compliant Abbreviation for "Alternating Current” alternating current and performs single-phase feed-in into the electricity grid.MIN 2500TL-XA, MIN 3000TL-XA, MIN 3600TL-XA, MIN 4200TL-XA, MIN 4600TL- Abbreviation for battery. -
Page 6: Safety Instruction
Read and follow all instructions, cautions and warnings in this installation the risk of injury, do not touch the heat sink at the back of the manual. If questions arise, please contact Growatt's technical services at +86 (0)755 Inverter or nearby surfaces while Inverter is operating. -
Page 7: Product Description
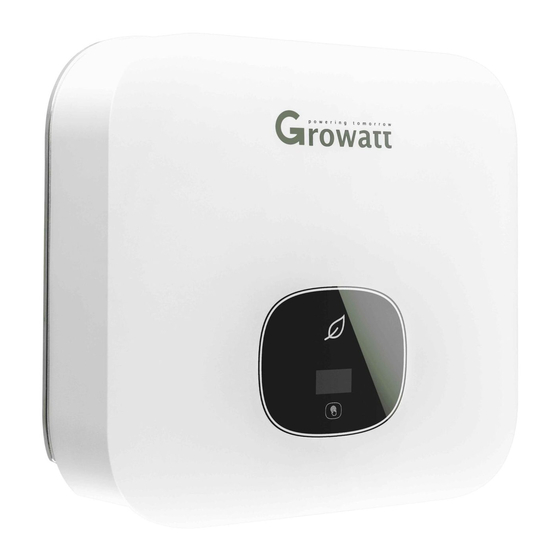
3 Product description 3.2 Type label 3.1 TL-XA Overview The type labels provide a unique identification of the inverter (The type of product, Device-specific characteristics, Certificates and approvals). The type labels are on the left-hand side of the enclosure. MIN 6000 TL-XA 5000/6000 W 6000 VA Position... -
Page 8: Size And Weight
If there are a batch of inverters need to be stored, the maximum layers for original Ø range carton is four. DC Max Ø After long term storage, local installer or service department of GROWATT should input/output current erform a comprehensive test before installation. AC nominal 230VAC voltage 3.5 The advantage of the unit... -
Page 9: Unpacking And Inspection
Do not stay closer than 20 cm to the inverter for any length of time unless it is absolutely necessary. Ø Growatt assumes no responsibility for compliance to EMC regulations for the complete system. All electrical installations shall be done in accordance with the local and national Ø... -
Page 10: Selecting The Installation Location
5.2 Selecting the installation location Ø This is guidance for installer to choose a suitable installation location, to avoid potential damages to device and operators. The installation location must be suitable for the inverter's weight and dimensions Ø ≥ 300mm for a long period time. -
Page 11: Fixed The Inverter On The Wall
5.3.2 Fixed the inverter on the wall Please make sure the inverter is installed at the right place.The inverter can't install Ø close to trunk. Falling equipment can cause serious or even fatal injury, never mount the inverter on the bracket unless you are sure that the mounting frame is really firmly mounted on the wall after carefully checking. -
Page 12: Electrical Connection
6 Electrical connection The AC wiring step: Decisive Voltage Class (DVC) indicated for ports 1.Uninstall the parts of the AC connection plug from the accessory bag. Port Name Class AC Output DC Input Pressure Seal ring Threaded Connection screw COM&SYS COM Port sleeve termimal RS485&USB... - Page 13 3.Push the threaded sleeve into the socket, Tighten up the cap on the terminal. 5.To remove the AC connector, press the bayonet out of the slot with a small screwdriver and pull it out,or unscrew the threaded sleeve,then pull it out. The Inverter Side The Inverter Side Unlock the housing...
-
Page 14: Connecting The Second Protective Conductor
6.3 Connecting the second protective conductor 6.4.2 Connecting the Battery In some installation countries, a second protective conductor is required to prevent a Danger to life due to lethal voltages! touch current in the event of a malfunction in the original protective conductor.For Before connecting the Battery, ensure that it does not connect any installation countries falling within the scope of validity of the IEC standard 62109, you power supply. -
Page 15: Connecting Signal Cable
6.5 Connecting signal cable MIN XA series inverters are connected by the following wires.The BAT+/BAT- of the inverter are connected to the BAT+/BAT- of the battery in turn. This series inverter has two 8 Pin signal connectors,one is COM PORT connector,another is SYS COM PORT connector. -
Page 16: Grounding The Inverter
Step 3 Push the threaded sleeve to connection terminal until both are locked tightly on This series inverter has integrated generation limitation control and export limitation the inverter. Functionality.The generation control function is used to control the active or apparent power output levels of an inverter.The export limit control function for an inverter is used to control the generation from an inverter to manage the export power level from an The inverter side... - Page 17 Active power control with a Radio Ripple Control Receiver(RRCR). Environment Operating temperature -25℃ to +55℃ Storage and transportation temperature -40℃ to +70℃ Reference temperature 23℃ ± 2℃ Relative humidity 0 to 95%, non-condensing Altitude up to 2000m Warm up time Installation category CAT II 6.8 Connecting the COM PORT...
-
Page 18: Earth Fault Alarm
6.8.1.1 8Pin socket pin assignment 6.8.2.1 8Pin socket pin assignment Assignment for inverters capable of both Description Connect to RRCR charging and discharging +12V +12V Not connected DRM 1/5 Relay contact 1 input K1 – Relay 1 output DRM 2/6 Relay contact 2 input K2 –... -
Page 19: Start The Inverter
When inverter powered on, OLED will light automatically. Once the BAT power is sufficient, OLED displays the following: Single touch Country/Area Growatt Inverter Do not disconnect the BAT connectors under load. XXXX DANGER Press the touch key once a second to scroll through the different Country, showing on the screen will constantly change.For example, if you want to choose Newzealand, press... -
Page 20: General Setting
7.1.4 Check firmware version,Region,Country/Area and Power 7.2.2 Set inverter date Quality Response Modes Single touch make the number up.Double touch to confirm the setting. Set inverter date Single touch to switch display as described below: Double touch to enter next stage menu. Single touch Single touch Single touch... -
Page 21: Advanced Setting
7.3.2 Export limitation setting 7.3 Advanced setting The –XA series inverters can work in anti-backflow mode through external power 7.3.1 Reset Country,Region and Power Quality Response Modes(PQRM) meter,the user can set the percentage of power allowed to flow backward through the Single touch to switch display or make the number +1. - Page 22 7.3.3 Reset factory 7.3.5 Work mode setting When the –XA series inverter is used together with the Battery, the inverter has three Perform this operation with caution because all configured parameters working modes, Grid priority,Battery priority and Load priority(default is Load priority except the current date,time, and model parameters will be restored to mode), Users can set the inverter to work in different modes in different time periods their factory defaults.
-
Page 23: Communication Interfaces
7.4.3 USB-A 7.3.6 Grid Charge setting When the –XA series inverter is used together with the Battery, the inverter can absorb USB-A port is mainly for connecting monitor or firmware updage: the energy from the grid to charge the battery, and the user can enable the grid charging Through USB connection,we can connect external optional monitor ,for example :Shine function(default is disable) through the OLED. -
Page 24: Startup And Shutdown The Inverter
Maintenance and Cleaning 9 8 Startup and Shutdown the inverter 8.1 Startup the inverter Connect the AC circuit breaker of the inverter.Then open the DC switch of the lithium Prior to removal of any cover for maintenance or repair, turn off the battery, the battery will be awakened, and the inverter will start automatically. -
Page 25: Eu Declaration Of Conformity
An error message will be displayed on the OLED screen when a fault occurs. The faults consist of system fault and inverter fault. You may be advised to contact Growatt in some situation, please provide the following 1.After shutdown,Check the dry information. -
Page 26: Manufacturer Warranty
Store the inverter in a dry place where ambient temperatures are always between -25°C and +60°C. 1.Restart inverter. Error: 414 EEPROM fault. 2.I f problem still exist,contact Growatt The data sampled by the 1.Restart inverter. 13.4 Disposing of the Inverter Error: 417 DSP and redundant M3 is 2.I f problem still exist,contact... -
Page 27: Technical Data
14 Technical Data 14.1 Specification Model 2500 TL-XA 3000 TL-XA 3600 TL-XA 4200 TL-XA Specifications Model 2500 TL-XA 3000 TL-XA 3600 TL-XA 4200 TL-XA Specifications AC input quantities DC input quantities Nominal AC input voltage 230V AC input voltage range 160-276V Nominal DC input voltage 400V... - Page 28 Model Model 4600 TL-XA 5000 TL-XA 6000 TL-XA 2500 TL-XA 3000 TL-XA 3600 TL-XA 4200 TL-XA Specifications Specifications Overvoltage category AC:III BAT:II Others:I DC input quantities Cooling Natural convection Nominal DC input voltage 400V Ingress protection IP65 DC input voltage range 360-550V Pollution degree outside DC input current...
- Page 29 Model Model 4600 TL-XA 5000 TL-XA 6000 TL-XA 4600 TL-XA 5000 TL-XA 6000 TL-XA Specifications Specifications Pollution degree outside the AC input quantities enclosure Nominal AC input voltage 230V Pollution degree inside the AC input voltage range 160-276V enclosure AC input current(maximum Relative humidity 0~100% 20.9A...
-
Page 30: Compliance Certificates
Shipped to a Growatt service centre for repair, or repaired on-site, or exchanged for a replacement device of equivalent value according to model and age. The warranty shall not cover transportation costs in connection with the return of defective modules .
Need help?
Do you have a question about the MIN 2500TL-XA and is the answer not in the manual?
Questions and answers