
Subscribe to Our Youtube Channel
Related Manuals for Growatt MIN 2500TL-XA


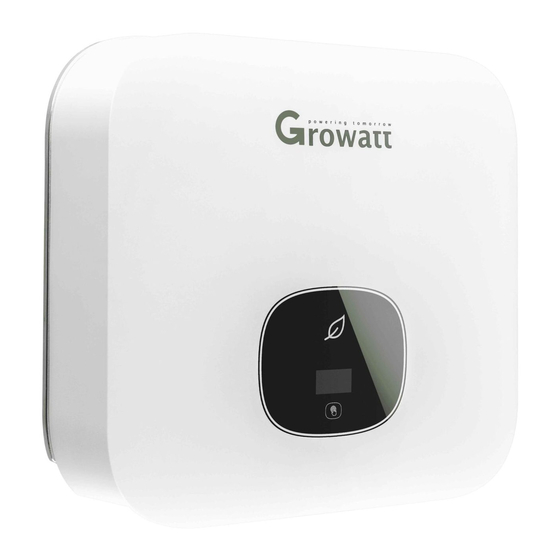
Summary of Contents for Growatt MIN 2500TL-XA
- Page 1 & Installation Operation Manual MIN 2500TL-XA MIN 3000 TL-XA MIN 3600 TL-XA MIN 4200 TL-XA MIN 4600 TL-XA MIN 5000 TL-XA MIN 6000 TL-XA...
-
Page 2: Table Of Contents
Notes on this manual ......................5 1.1. Validity ........................ 5 1.2. Target Group...................... 5 1.3. Additional information ..................5 1.4. Symbols in this document .................. 5 1.4.1. Warings in this document .................. 5 1.4.2. Markings on this product................... 6 1.5. Glossary ...................... - Page 3 6.2. Wiring AC Output..................... 21 6.3. Connecting the second protective conductor ..........24 6.4. Connecting the Battery..................25 6.4.1. Conditions for the Battery ................25 6.4.2. Connecting the Battery..................25 6.4.3. Connecting to Battery Pack ................26 6.5. Connecting signal cable ..................27 6.6.
- Page 4 7.4.1. SYS COM Port....................42 7.4.2. COM Port ......................42 7.4.3. USB-A ........................ 43 Startup and Shutdown the inverter ................43 8.1. Startup the inverter ..................43 8.2. Shutdown the Inverter ..................43 Maintenance and Cleaning....................43 9.1. Checking Heat Dissipation ................44 9.2.
-
Page 5: Notes On This Manual
A warning describes a hazard to equipment or personnel. It calls attention to a procedure or practice, which, if not correctly performed or adhered to, could result in damage to or destruction of part or all of the Growatt equipment and/or other equipment connected to the Growatt equipment or personal injury. -
Page 6: Markings On This Product
DANGER WARNING indicates a hazardous situation which, if not avoided, could result in death or serious injury. WARNING CAUTION indicates a hazardous situation which, if not avoided, could result in minor or moderate injury. CAUTION NOTICE is used to address practices not related to personal injury. NOTICE Information that you must read and know to ensure optimal operation of the system. -
Page 7: Glossary
CE mark. The inverter complies with the requirements of the applicable CE guidelines. Discard this product according to local regulations. 1.5. Glossary Abbreviation for "Alternating Current" Abbreviation for battery Abbreviation for "Direct Current" Energy Energy is measured in Wh (watt hours), kWh (kilowatt hours) or MWh (megawatt hours). The energy is the power calculated over time. -
Page 8: Safety
2.1. Intended Use The unit converts the DC current generated by the photovoltaic (PV) modules to grid- compliant alternating current and performs single-phase feed-in into the electricity grid.MIN 2500TL-XA, MIN 3000TL-XA, MIN 3600TL-XA, MIN 4200TL-XA, MIN 4600TL- XA, MIN 5000TL-XA, MIN 6000TL-XA inverters are built according to all required safety rules. -
Page 9: Safety Instruction
Read and follow all instructions, cautions and warnings in this installation manual. If questions arise, please contact Growatt's technical services at +86 (0)755 2747 1942. 2.4. Assembly Warnings Prior to installation, inspect the unit to ensure absence o ➢... -
Page 10: Operation Warnings
Make all electrical connections (e.g. conductor termination, fuses, ➢ PE connection, etc.) in accordance with prevailing regulations. When working with the inverter powered on, adhere to all prevailing safety regulations to minimize risk of accidents Systems with inverters typically require additional control (e.g., WARNING ➢... -
Page 11: Product Description
Product description 3.1. TL-XA Overview Position Description Position Description Cover DRM PORT AC output OLED Ventilation valve USB port Touch button Battery input+ SYS COM port Battery input- Symbol on the inverter Symbol Description Explanation Touch button.We can switch the OLED display Touch symbol and set parameter by touching. -
Page 12: Type Label
3.2. Type label The type labels provide a unique identification of the inverter (The type of product, Device-specific characteristics, Certificates and approvals). The type labels are on the left-hand side of the enclosure. More detail about the type label as the chart below: MIN 2500 TL-XA MIN 3000 TL-XA MIN 3600 TL-XA... -
Page 13: Size And Weight
- 25...+60℃ (-13...+ 140°F) Operation Ambient temperatu with derating above 45°C( 113°F) Model Name 4200 TL-XA 4600 TL-XA 5000 TL-XA 6000 TL-XA 400V DC nominal input voltage 360~550V DC input voltage range DC Max input/output current 230VAC AC nominal voltage 50/60 Hz AC grid frequency 4200VA... -
Page 14: Storage Of Inverter
If there are a batch of inverters need to be stored, the maximum layers for origi nal carton is four. ➢ After long term storage, local installer or service department of GROWATT should erform a comprehensive test before installation. 3.5. - Page 15 Object Description Quantity AC coupled Inverter Mounting bracket Quick Guide Monitor(Optional) COM PORT Signal connector SYS COM PORT Signal connector Self-tapping screws Safety-lock screw Plastic expansion pipe AC connector Uninstall signal or AC connector tool Uninstall PV or Battery terminal tool...
-
Page 16: Installation
➢ All electrical installations shall be done in accordance with the local and national electrical Growatt assumes no responsibility for compliance to EMC regulations for codes. Do not remove the casing. Inverter contains no user serviceable parts. Refer servicing ➢... -
Page 17: Selecting The Installation Location
eat sink at the back of the Inverter or nearby surfaces while Inverter is operating. 5.2. Selecting the installation location ➢ This is guidance for installer to choose a suitable installation location, to avoid pote ntial damages to device and operators. ➢... - Page 18 ➢ Do not expose the inverter to direct sunlight, as this can cause excessive heating an d thus power reduction. ➢ Observe the Min. clearances to walls, other inverters, or objects as shown below: Ambient dimensions of one inverter Ambient dimensions of series inverters ➢...
-
Page 19: Mounting The Inverter
5.3. Mounting the Inverter 5.3.1. Mounting the Inverter with bracket In order to avoid electrical shock or other injury, inspect existing electronic or plumbing installations before drilling holes. DANGER Fix the mounting bracket as the figure shows. Do not make the screws to be flush to the wall. -
Page 20: Electrical Connection
Hang the inverter on the bracket through the match hooks on bracket. ➢ After confirming the inverter is fixed reliably, fasten one M6 safety-lock sockets head cap screws on the right or left side firmly to prevent the inverter from being lifted off the bracket. -
Page 21: Wiring Ac Output
You must install a separate single-phase circuit-breaker or other load disconnection unit for each inverter in order to ensure that the inverter can be safely disconnected under load. We suggest you choice the AC breaker rating current in this table: MIN 2500TL-XA 16A/230V MIN 3000TL-XA... - Page 22 2. Insert the stripped and bared cable through pressure screw, seal ring, threaded sleeve in sequence, insert cables into connection terminal according to polarities indicates on it and tighten the screws firmly. Please try to pull out the wire to make sure the it’s well connected. 3.
- Page 23 4. Finally, Push or screw the threaded sleeve to connection terminal until both are locked tightly on the inverter. 5. To remove the AC connector, press the bayonet out of the slot with a small screwdriver and pull it out,or unscrew the threaded sleeve,then pull it out.
-
Page 24: Connecting The Second Protective Conductor
Wire suggestion length Max. cable length Conductor cross section MIN 2500 TL-XA MIN 3000 TL-XA MIN 3600 TL-XA 4 mm² 12AWG 5.2 mm² 10AWG Max. cable length Conductor cross section MIN 4200 TL-XA MIN 6000 TL-XA MIN 5000TL-XA MIN 4600 TL-XA 5.2 mm²... -
Page 25: Connecting The Battery
6.4. Connecting the Battery 6.4.1. Conditions for the Battery The MIN TL-XA single-phase inverter has one independent Battery input : BAT+/BAT- connecting to the output of the Battery. Notice that the connectors are in paired (male and female connectors). The connectors for the Battery and inverters are Helios H4-R/VP-D4 connectors;... -
Page 26: Connecting To Battery Pack
BAT+ BAT- Battery wiring panel BAT- BAT+ MIN XH series inverters are connected by the following wires 。 The BAT+/BAT- of the inverter are connected to the BAT+/BAT- of the battery in turn 6.4.3. Connecting to Battery Pack This series inverter support to connect lithium ion battery pack, the lithium ion battery pack has its own battery management system, the bidirectional DC/DC box connect to battery pack by RS485 or CAN,the XA series inverters connect to DC-DC box by RS485. -
Page 27: Connecting Signal Cable
wires. The communication interface RS485 or CAN between the Battery and the lithium ion battery pack is not properly connected or the electrical disconnection will cause the equipment to work abnormally,or even damage CAUTION the equipment! 6.5. Connecting signal cable This series inverter has two 8 Pin signal connectors,one is COM PORT connector,another is SYS COM PORT connector. -
Page 28: Grounding The Inverter
Step 3 Push the threaded sleeve to connection terminal until both are locked tightly on the inverter. Step 1 Press the fasteners and pull it out from the inverter. Step 2 Insert the H type tool and pull it out from the socket 6.6. - Page 29 This series inverter has integrated generation limitation control and export limitation Functionality.The generation control function is used to control the active or apparent power output levels of an inverter.The export limit control function for an inverter is used to control the generation from an inverter to manage the export power level from an electrical installation to the grid.
-
Page 30: Connecting The Com Port
Degree of pollution Mechanics Din rail dimensions 18x118x64 (WxHxD) DIN 43880 Mounting DIN rail 35mm Ingress protection IP51 (indoor) Material self-extinguishing UL94V-0 The following table describes how we can connect EASTRON meter (SDM120CT(40mA) to inverter: Meter Description Meter Connection CT-P(White) CT-input CT-N(Black or Blue) N-in... -
Page 31: Inverter Demand Response Modes-Power Control Interface(Pci) For Eu
Information DRM0-DRM8 are available. Damage to the inverter due to moisture and dust penetration Make sure the cable gland has been tightened firmly. If the cable gland are not mounted properly, the inverter can be destroyed due to CAUTION moisture and dust penetration. All the warranty claim will be invalid. 8Pin socket pin assignment 6.8.1.1. - Page 32 PORTas Power Control Interface(PCI) for European models. Excessive voltage can damage the inverter! External voltage of PCI PORT don't over +5V. WARNING RRCR PCI Connector The connector pin assignment and function definition 6.8.2.1. Description Connect to RRCR Not connected +12V Relay contact 1 input K1 –...
-
Page 33: Earth Fault Alarm
Short circuit with Pin7 Active power control and reactive power control are enabled separately 6.9. Earth Fault Alarm The inverter complies with AS/NZS 5033.The installer does not need to perform any additional actions, as this is already set up.When the Earth fault occurs,the Red LED will light up. The buzzer in the inverter will keep ringing unless the fault condition is cleared(This function is only av ilable for Australia and New Zealand). -
Page 34: Country Setting Country/Area And Region Setting
When inverter powered on, OLED will light automatically. Once the BAT power is sufficient, OLED displays the following: Country/Area Single touch Growatt Inverter XXXX Press the touch key once a second to scroll through the different Country, showing on the screen will constantly change.For example, if you want to choose Newzealand, press the control key until the OLED display shows “Newzealand”... -
Page 35: Enabling/Disabling Power Quality Response Modes ( Pqrm
Enabling/Disabling Power Quality Response Modes ( PQRM ) 7.1.3. PQRM setting ➢ When the Region setting is completed, the inverter will operate under default mode Information different from region. MIN TL-XA contains five types Power Quality Response Modes: Volt-Var, Volt-watt, Fixed PF, Reactive power, Power limit.If you want to change the Power Quality Response Modes please refer to chapter 7.3.1. -
Page 36: Set Inverter Date
Double touch Doubletouch Doubletouch Double touch Address Address Address Address Doubletouch Doubletouch Set OK Singletouch Singletouch Doubletouch Singletouch Singletouch Double touch Doubletouch Double touch Doubletouch Language Address Address Address Doubletouch English Doubletouch Doubletouch General Multiplesingle Multiplesingle Multiplesingle Multiplesingle touch Advanced touch touch touch... -
Page 37: Advanced Setting
Double touch Double touch Doubletouch Time Setting Time Setting Time Setting Doubletouch Time Setting Doubletouch Doubletouch Set OK NN:05:00 20:05:00 20:05:00 NN:NN:00 Singletouch Singletouch Singletouch Singletouch Singletouch Singletouch Singletouch Singletouch Doubletouch Doubletouch Doubletouch Time Setting Time Setting Date Setting Doubletouch Time Setting NN:NN:01 21:05:00... -
Page 38: Export Limitation Setting
Password Set parameter General Advanced Set Region Set OK Reset PQRM Password General Set parameter Advanced Set PQRM Set Region Country/Aera Australia Disable Enable Set PQRM Set PQRM xxxxxxx Set OK Volt-Var 7.3.2. Export limitation setting The –XA series inverters can work in anti-backflow mode through external power meter,the user can set the percentage of power allowed to flow backward through the OLED, Single touch to switch display or make the number + 1.Double touch to confirm the setting, as described below:... -
Page 39: Reset Factory
Double touch Double touch ExportLimit Double touch ExportLimit Double touch Set OK OFF ON Single touch Multiple single touch Double touch Double touch ExportLimit ExportLImit Rate Country/Area 000.0% VDE0126 Multiple single touch Double touch Double touch Double touch Double touch Double touch ExportLImit Rate Double touch... -
Page 40: Work Mode Setting
Double touch General Double touch Reset Factory Set OK Advanced Single touch Double touch Multiple single Double touch touch Double touch Double touch Password Double touch Country/Area Double touch VDE0126 7.3.4. Work mode setting When the –XA series inverter is used together with the Battery, the inverter has three working modes, Grid priority,Battery priority and Load priority(default is Load priority mode), Users can set the inverter to work in different modes in different time periods through OLED,Single touch to switch display or make the number +1.Double... -
Page 41: Grid Charge Setting
Doubletouch Doubletouch LoadFirst 00-01 Doubletouch LoadFirst 00-01 LoadFirst 00-01 LoadFirst 00-01 TimePeriod Set Doubletouch Time1: Disable Time1: Disable Time1: Disable Time1: Disable Multiplesingle Multiplesingle Singletouch Multiplesingle Multiplesingle touch touch touch touch Doubletouch Doubletouch Doubletouch DoubletouchDoubletouch BatFirst 00-01 Doubletouch LoadFirst NN-01 LoadFirst 00-NN LoadFirst 00-01 Grid Charge... -
Page 42: Communication Interfaces
Double touch Double touch General Disable Grid Charge Set OK Advanced Enable Double touch Single touch Double touch Double touch Double touch Double touch Disable Password Double touch Strorage Setting Enable Double touch Double touch Country/Area VDE0126 7.4. Communication interfaces 7.4.1. -
Page 43: Usb-A
7.4.3. USB-A USB-A port is mainly for connecting monitor or firmware updage: Through USB connection,we can connect external optional monitor ,for example :Shine WIFI-X,Shine 4G-X, Shine LAN-X,ShineRFStick-X,ect. And also you can quickly update the software by U disk. We can monitor as below: Make sure the on the front side, then insert the monitor,fasten the screw. -
Page 44: Checking Heat Dissipation
An error message will be displayed on the OLED screen when a fault occurs. The faults consist of system fault and inverter fault. You may be advised to contact Growatt in some situation, please provide the following information. Information concerning the inverter: ·... -
Page 45: System Fault
Suggestion Residual I High Error: 201 Leakage current too high Restart the invert. If error message still exists, contact Growatt. AC V Outrange Error: 300 Utility grid voltage is out of p 1.Please switch off DC switch. 2.Check AC wiring, ermissible range. -
Page 46: Inverter Fault
Check the inverter and the meter connection is normal . Warning404 EEPROM abnormal Restart the inverter. If the warning still exist, p lease contact Growatt customer service to repla ce the M3 board. Uptate the right version firmware Warning405 Firmware version is not consistent 11.4. -
Page 47: Decommissioning 13
13.Decommissioning 13 13.1. Dismantling the Inverter Disconnect the inverter as described in section. Remove all connection cables from the inverter. Screw off all projecting cable glands. Lift the inverter off the bracket and unscrew the bracket screws. Danger of burn injuries due to hot enclosure parts! Wait 20 minutes before disassembling until the housing has cooled down. - Page 48 DC input quantities Nominal DC input voltage 400V DC input voltage range 360-550V 360-550V DC input current (maximum continuous) DC output quantities Nominal DC input voltage 400V DC input voltage range 360-550V DC input current (maximum continuous) Battery type Lithium ion battery AC output quantities Rated output power 2500W...
- Page 49 DC reverse-polarity protection Integrated DC Surge protection class Type II Insulation resistance monitoring Integrated AC surge protection class Type III AC short-circuit protection Integrated Ground fault monitoring Integrated Grid monitoring Integrated Anti-islanding protection Integrated(Active Frequency Drift) Residual-current monitoring unit Integrated General data Dimensions (W / H / D) in mm 375*350*160...
- Page 50 DC input current (maximum continuous) Battery type Cobalt Free Lithium Iron Phosphate (LFP) AC output quantities Rated output power 4600W 5000W 6000W Rated apparent power 4600VA 5000VA 6000VA Nominal AC voltage 230V AC voltage range 160-276V Norminal AC grid frequency 50/60Hz AC grid frequency range 45-55Hz/55-65Hz...
-
Page 51: Bat &Ac Connectors Info
Residual-current monitoring unit Integrated General data Dimensions (W / H / D) in mm 375*350*160 Weight 10.8 kg Operating temperature range –25 °C ... +60 °C <25 dB(A) Noise emission (typical) Altitude 4000m Internal consumption at night <5W@storage mode Topology Non-isolated Overvoltage category AC:III BAT:II Others:I... -
Page 52: Accessories
Shine Master Shine master for inverter Shipped to a Growatt service centre for repair, or repaired on-site, or exchanged for a r eplacement device of equivalent value according to model and age. The warranty shall not cover transportation costs in connection with the return of defec tive modules .
Need help?
Do you have a question about the MIN 2500TL-XA and is the answer not in the manual?
Questions and answers