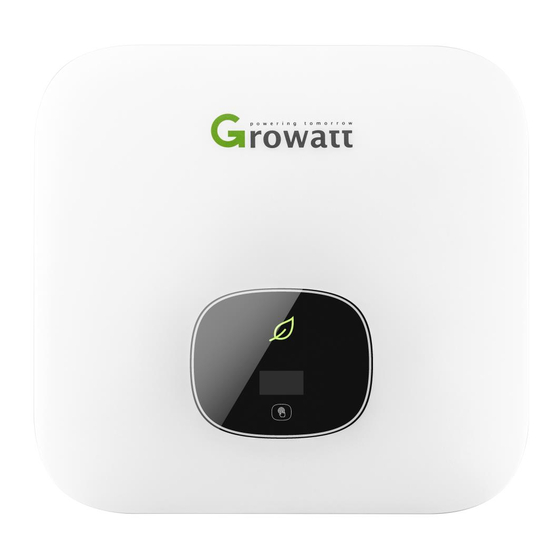
Page 1
& Installation Operation Manual MIN 2500TL-X MIN 3000 TL-X MIN 3600 TL-X MIN 4200 TL-X MIN 4600 TL-X MIN 5000 TL-X MIN 6000 TL-X...
Page 2
Specifications are subject to change without notice. Every attempt has been made to make this document complete, accurate and up-to-date. Readers are cautioned, however, that Growatt reserves the right to make changes without notice and shall not be responsible for any damages, including indirect, incidental or consequential...
Index Index ..............................3 1 Notes on this manual ........................5 1.1 Validity ..........................5 1.2 Target Group ........................5 1.3 Additional information ......................5 1.4 Symbols in this document ....................6 1.4.1 Warnings in this document ..................6 1.4.2 Markings on this product..................6 1.5 Glossary ..........................
Page 4
6.8.2 Method of asserting demand response modes ............33 7 Commissioning ..........................33 7.1 Start the inverter ........................ 34 7.1.1 Touch control ......................34 7.1.2 Country setting ....................... 34 7.2 General setting ........................35 7.2.1 Set inverter display language ................. 35 7.2.2 Set inverter COM address ..................
The manual and other documents must be stored in a convenient place and be available at all times. We assume no liability for any damage caused by failure to observe these instructions. For possible changes in this manual, GROWATT NEW ENERGY TECHNOLOGY CO.,LTD accepts no responsibilities to inform the users.
A warning describes a hazard to equipment or personnel. It calls attention to a procedure or practice, which, if not correctly performed or adhered to, could result in damage to or destruction of part or all of the Growatt equipment and/or other equipment connected to the Growatt equipment or personal injury.
Page 7
Risk of burns Operation after 5 minutes Point of connection for grounding protection Direct Current (DC) Alternating Current (AC) Read the manual CE mark. inverter complies with requirements of the applicable EC guidelines. The inverter must not be disposed of with the household waste.
1.5 Glossary Abbreviation for "Alternating Current" Abbreviation for "Direct Current" Energy Energy is measured in Wh (watt hours), kWh (kilowatt hours) or MWh (megawatt hours). The energy is the power calculated over time. For example, your inverter operates at a constant power of 4600 W for half an hour and then at a constant power of 2300 W for another half an hour, it has fed 3450Wh of energy into the power distribution grid within that hour.
2 Safety 2.1 Intended Use The unit converts the DC current generated by the photovoltaic (PV) modules to grid-compliant .MIN alternating current and performs single-phase feed-in into the electricity grid 2500TL-X ,MIN 3000TL-X,MIN 3600TL-X,MIN 4200TL-X,MIN 4600TL-X,MIN 5000TL-X inverters are built according to all required safety rules. Nevertheless, improper use may cause lethal hazards for the operator or third parties, or may result in damage to the units and other property.
(IEC62109-1,CE,VDE0126-1-1, AS4777) ; however, certain safety precautions must be observed when installing and operating this inverter. Read and follow all instructions, cautions and warnings in this installation manual. If questions arise, please contact Growatt’s technical services at +86 (0)755 2747 1900.
Persons with limited physical or mental abilities may only work with the Growatt inverter following proper instruction and under constant supervision. Children are forbidden to play with the Growatt inverter. Must keep the Growatt inverter away from children. ...
create a shock hazard; to minimize occurrence of such conditions, comply with all corresponding safety symbols and markings present on the unit and in this manual. In special cases, there may still be interference for the specified application area despite maintaining standardized emission limit values (e.g.
Cover DC SWITCH PV INPUT + OLED TOUCH BUTTON DRM PORT AC OUTPUT VENTILATION VALVE PV INPUT- USB PORT COM PORT Symbol on the inverter Symbol Description Explanation Touch button.We can switch the OLED display Touch symbol and set parameter by touching. Indicates inverter operation status: Red:Fault.
Page 14
More detail about the type label as the chart below: Model Name MIN 2500 TL-X MIN 3000 TL-X MIN 3600 TL-X 500V Max input DC voltage 12.5A/12.5A Max input DC current Start voltage 100V MPP voltage range 80V~500V AC nominal voltage 230V AC grid frequency 50/60 Hz...
MIN 6000 Model Name MIN 4200 TL-X MIN 4600 TL-X MIN 5000 TL-X TL-X 550V Max input DC voltage Max input DC current 12.5A/12.5A Start voltage 100V MPP voltage range 80V~550V AC nominal voltage 230V AC grid frequency 50/60 Hz Max.
If there are a batch of inverters need to be stored, the maximum layers for original carton is four. After long term storage, local installer or service department of GROWATT should perform a comprehensive test before installation. 3.5 The advantage of the unit ...
Page 17
Object Description Quantity Inverter Mounting bracket Quick Guide Monitor(Optional) Signal connector DRED connector (only for Australia) Self-tapping screws Plastic expansion pipe PV+/PV- terminal PV+/PV- metal terminal AC connector Uninstall PV tool Uninstall signal or AC connector tool...
Do not stay closer than 20 cm to the inverter for any length of time unless it is absolutely necessary. Growatt assumes no responsibility for compliance to EMC regulations for the complete system All electrical installations shall be done in accordance with the local and national electrical codes.
When a photovoltaic panel is exposed to light, it generates a DC voltage. When connected to this equipment, a photovoltaic panel will charge the DC link capacitors. Energy stored in this equipment’s DC link capacitors presents a risk of electric shock.
Page 20
Be sure that the inverter is out of the children’s reach. Don’t put any things on the inverter. Do not cover the inverter. Do not install the inverter near television antenna or any other antennas and antenna cables. ...
Page 21
Ambient dimensions of series inverters There must be sufficient clearance between the individual inverters to ensure that the cooling air of the adjacent inverter is not taken in. If necessary, increase the clearance spaces and make sure there is enough fresh air supply to ensure sufficient cooling of the inverters.
5.3 Mounting the Inverter 5.3.1 Mounting the Inverter with bracket In order to avoid electrical shock or other injury, inspect existing electronic or plumbing installations before drilling holes. DANGER Fix the mounting bracket as the figure shows. Do not make the screws to be flush to the wall.
5.3.2 Fixed the inverter on the wall Falling equipment can cause serious or even fatal injury, never mount the inverter on the bracket unless you are sure that the mounting frame is really firmly mounted on the wall after WARNING carefully checking.
6 Electrical connection Decisive Voltage Class (DVC) indicated for ports Port Name Class DRMS RS485&RS232 6.1 Safety Danger to life due to lethal voltages! High voltages which may cause electric shocks are present in the conductive parts of the inverter. Prior to performing any work on the inverter, disconnect the inverter on the AC and DC sides Danger of damage to electronic components due to electrostatic discharge.
Page 25
unit for each inverter in order to ensure that the inverter can be safely disconnected under load. We suggest you choice the AC breaker rating current in this table: MIN 2500 TL-X 16A/230V MIN 3000 TL-X 16A/230V MIN 3600 TL-X 20A/230V MIN 4200 TL-X 25A/230V...
Page 26
Push the threaded sleeve into the socket, Tighten up the cap on the terminal. Finally, Push or screw the threaded sleeve to connection terminal until both are locked tightly on the inverter.
Page 27
5:To remove the AC output terminal, press the bayonet out of the slot with a small screwdriver and pull it out,or unscrew the threaded sleeve,then pull it out. Wire suggestion length: Max. cable length Conductor cross section MIN 2500 TL-X MIN 3000 TL-X MIN 3600 TL-X 4 mm²...
5.2 mm² 10AWG Max. cable length Conductor cross MIN 4200 TL-X MIN 5000 TL-X MIN 6000 TL-X section MIN 4600 TL-X 5.2 mm² 10AWG 6.6 mm² 9AWG 6.3 Connecting the second protective conductor In some installation countries, a second protective conductor is required to prevent a touch current in the event of a malfunction in the original protective conductor.For installation countries falling within the scope of validity of the IEC standard 62109, you must install the protective conductor on the AC terminal with a conductor cross-section of at least 10 mm²Cu.Or Install a second...
WARNING The MIN TL-X single-phase inverter has 2 independent input : PV1 & PV2 Notice that the connectors are in paired (male and female connectors). The connectors for PV arrays and inverters are VP-D4 connectors; If the inverter is not equipped with a DC switch but this is mandatory in the country of installation, install an external DC switch.
voltage of the inverter. Improper operation during the wiring process can cause fatal injury to operator or unrecoverable damage to the inverter. Only qualified personnel can perform the wiring work. Please don’t connect PV array positive or negative pole to the ground, it could cause serious damages to the inverter WARNING Check the connection cables of the PV modules for correct polarity and make...
Page 31
Procedure Step 1 Insert the stripped and bared cable through pressure screw, seal ring, threaded sleeve in sequence, insert cables into connection terminal according to number indicates on it and tighten the screws firmly. Please try to pull out the wire to make sure the it’s well connected. Step 2 Push the threaded sleeve into the socket, Tighten up the cap on the terminal.
6.6 Grounding the inverter The inverter must be connected to the AC grounding conductor of the power distribution grid via the ground terminal (PE) . Because of the transformerless design, the DC positive pole and DC negative pole of PV arrays are not permitted to be grounded. WARNING 6.7 Active power control with smart meter , CT or ripple control signal receiver...
6.8 Inverter demand response modes (DRMS) This series inverter has the function of demand response modes, We use 8Pin socket as inverter DRMS connection. DRMS application description Only applicable to AS/NZS4777.2:2015. DRM0, DRM5, DRM6, DRM7, DRM8 are available. Information Damage to the inverter due to moisture and dust penetration ...
AS/NZS4777.2 as default for Australia,or run under Information VDE0126-1-1 for other region after 30s. When inverter powered on, OLED will light automatically. Once the PV power is sufficient, OLED displays the following: Growatt Set Country PV inverter XXXX...
Press the touch key once a second to scroll through the different Country, showing on the screen will constantly change.For example, if you want to choose Newzealand, press the control key until the OLED display shows “Newzealand” as below: Set Country Newzealand Press the touch key 5S, the OLED shows Country setting is complete.
Set parameter General Advanced Set Language English Set Comaddr 7.2.3 Set inverter date & time Single touch make the number Double touch to confirm you setting. Hold 5s recover defaut value. Set Date Set Time Set parameter 2018-12-14 12:30:30 General Set Date Set Time Advanced...
7.3 Advanced setting 7.3.1 Reset Country Single touch to sw make the number itch display or Double touch to confirm you setting. The password of advanced setting is 123. General Password Set parameter Advanced Set Country Set Country Set OK VDE0126 xxxxxxx 7.3.2 Export limitation setting...
Single touch to sw make the number itch display or Double touch to confirm you setting. General Password Set parameter Advanced Reset factory Set OK 7.3 Communications 7.4 RS485 This series inverter provides two RS485 ports. You can monitor one or more inverters by RS485.Another RS485 port is for smart meter(Export limitation functionality.).
8 Start-Up and shut down the inverter 8.1 Start-Up the inverter 1. Connect the AC breaker of the inverter. 2. Turn on the dc switch, and the inverter will start automatically when the input voltage is higher than 70 V. 8.2 Turn-off the Inverter Do not disconnect the DC connectors under load.
An error message will be displayed on the OLED screen when a fault occurs. The faults consist of system fault and inverter fault. You may be advised to contact Growatt in some situation, please provide the following information. Information concerning the inverter: ...
Please switch off DC switch. Check AC wiring, especially neutral and AC V Outrange Utility grid voltage is out of ground wire. Error: 300 permissible range. Check grid voltage is complied with local grid standard. Restart inverter, if problem still exist, Contact Growatt.
Page 42
Voltage of Neutral and PE above 2. Check AC wiring. 30V. 3. Restart inverter, if error message still Error: 304 exisits,contact Manufacturer Auto Test Failed Restart inverter, repeat Auto Test, if Auto test didn’t pass. problem still exist, contact Growatt. Error: 407...
Check the PV panel polarity. Restart the inverter. If the warning still Warning 203 PV1 or PV2 Circuit short exist, please contact Growatt customer service to replace the POWER board. 1.After shutdown,Check the dry Dryconnect wiring. Warning204 Dryconnect function abnormal 2.If the error message still exists, contact...
Page 44
Contact Growatt. Restart inverter, if problem still exist, The data sampled by the DSP and Error: 417 Contact Growatt. redundant M3 is not the same. Restart inverter, if problem still exist, Error: 420 GFCI fault. change power board, or contact Growatt.
11 Manufacturer Warranty Please refer to the warranty card. 12 Decommissioning 12.1 Dismantling the Inverter 1 Disconnect the inverter as described in section 8 2 Remove all connection cables from the inverter. Danger of burn injuries due to hot enclosure parts! Wait 20 minutes before disassembling until the housing has cooled down.
13 Technical Data 13.1 Specification Model 2500TL-X 3000TL-X 3600TL-X 4200TL-X Specifications Input data(DC) Max. recommended PV 3500W 4200W 5040W 5880W power(for module STC) Max. DC voltage 500V Start voltage 100V Nominal voltage 360V MPP voltage range 80-500 80-500 80-550 80-550 MPP voltage range at Full 100V-450V 120V-450V...
Page 47
Max. efficiency 98.2% 98.2% 98.2% 98.4% Euro-eta 97.1% 97.1% 97.2% 97.2% Protection devices DC reverse-polarity protection Integrated DC switch Integrated DC Surge protection Type II Insulation resistance Integrated monitoring AC surge protection Type III AC short-circuit protection Integrated Ground fault monitoring Integrated Grid monitoring Integrated...
Page 48
MPP voltage range 80-550 80-550 80-550 MPP voltage range at Full 185V-500V 200V-500V 235V-500V Power No. of MPP trackers No. of PV strings per MPP trackers Max. input current per MPP 12.5A trackers Max. short-circuit current per MPP trackers DC overvoltage category Category II Output data(AC) AC nominal power...
12kg.cm AC terminal 6kg.cm Signal terminal 4kg.cm Safety screw 12kg.cm Additional ground screws 12kg.cm 13.4 Accessories In the following table you will find the optional accessories for your product. If required, you can order these from GROWATT NEW ENERGY TECHNOLOGY...
Shine LAN-X LAN monitor with USB interface Shipped to a Growatt service centre for repair, or repaired on-site, or exchanged for a replacement device of equivalent value according to model and age. The warranty shall not cover transportation costs in connection with the return of defective modules .
Need help?
Do you have a question about the MIN 2500TL-X and is the answer not in the manual?
Questions and answers