Table of Contents
Advertisement
Quick Links
Download this manual
See also:
User Manual
Advertisement
Table of Contents

Related Manuals for MINOLTA-QMS Magicolor 6110 GN


Summary of Contents for MINOLTA-QMS Magicolor 6110 GN
- Page 1 magicolor 6110 ® Installation Guide 1800645-001A...
-
Page 2: Thank You
Proprietary Statement The digitally encoded software included with your printer is Copyrighted © 2001 by MINOLTA-QMS, Inc. All Rights Reserved. This software may not be reproduced, mod- ified, displayed, transferred, or copied in any form or in any manner or on any media, in whole or in part, without the express written permission of MINOLTA-QMS, Inc. -
Page 3: Table Of Contents
Contents Getting Acquainted with Your Printer ... 5 magicolor 6110 Features Location Requirements Printer Parts Front View Top Internal View Front Internal View Cross Section Side View Rear View Rear Internal View—Transfer Unit Documentation Set Setting up Your Printer ... 11... - Page 4 About the Interface Panel ... 29 Software Utilities CD-ROM ... 29 Regional Settings Drivers and Utilities Installing Printer Drivers and Software ... 31 Installing Windows Drivers and Utilities via a Parallel Connection Installing Windows Drivers and Utilities via an Ethernet...
-
Page 5: Getting Acquainted With Your Printer
Getting Acquainted with Your Printer magicolor 6110 Features Features/Model Print Speed SPM (Letter/A4) 6/24* SDRAM Resolution 250-sheet Universal Upper Media Tray 250-sheet Letter/A4 Upper Media Tray Standard Interfaces Internal IDE Hard Disk Time-of-Day Clock Lower Feeder Unit (each lower feeder unit comes with... -
Page 6: Location Requirements
A surface can be tested for levelness with a standard round pencil. If the pencil rolls, the surface is not level. Clear the area of any obstruction or items such as cables that might prevent the printer from sitting directly on the flat, level surface. Component Printer... - Page 7 (such as that created by an air conditioner). If the printer is located in a cold room that is rapidly heated, or if the printer is moved from a cold place to a warm, humid place, condensa- tion may occur within the printer, degrading print quality.
-
Page 8: Printer Parts
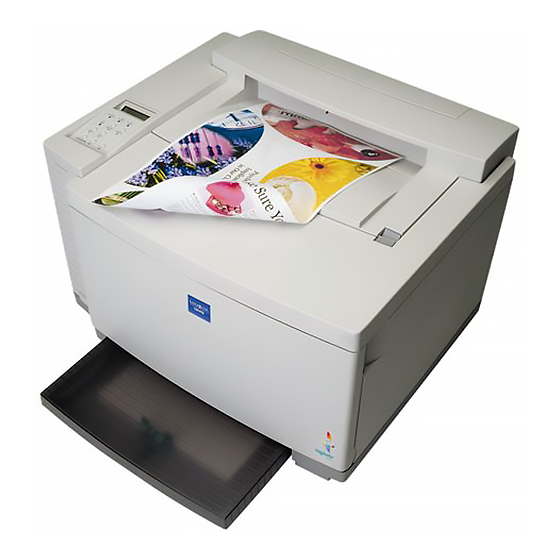
Printer Parts The drawings on these pages illustrate the parts of your printer referred to throughout this guide, so please take some time to become familiar with the printer. Front View 1—Output tray 2—Control panel and message window 3—Top cover 4—Top cover latch... -
Page 9: Cross Section Side View
9—OPC belt Rear View 1—Control panel 2—Top cover 3—Ventilation grille 4—Rear cover 5—Ozone filter 6— Lower rear cover 7—Interface panel 8—AC power connector Rear Internal View—Transfer Unit 1—Registration rollers 2—Transfer roller 3—Paper discharger and wire Getting Acquainted with Your Printer... -
Page 10: Documentation Set
This guide is a handy item to keep close to the printer for quick reference information regarding operation and care of the printer. -
Page 11: Setting Up Your Printer
Your printer weighs approximately 101 lbs (46 kg) without consumables. Be sure to have help when lifting and moving it. Attention Never lift a printer with the fuser oil bottle installed. When lifting and carrying the printer, use the carrying grips on the bottom sides. Shipment Contents „... -
Page 12: Installing The Toner Cartridges
Remove the consumables kit. Fold back the plastic protective bag from the printer. With another person’s help, lift the printer from the pallet, and place it in its intended location. 5 "... - Page 13 Do not hold the toner cartridge vertically. Holding a cartridge with both hands, gently rock it five or six times horizontally to distribute the toner. Pull the tab to remove the tape. Remove the orange protective cover from each cartridge. Setting up Your Printer...
- Page 14 Install the other toner cartridges. Leave the printer’s front cover open while installing the OPC belt cartridge as described in the next section. Setting up Your Printer...
-
Page 15: Installing The Opc Belt Cartridge
(A) (one on each side of the cartridge). Remove the protec- tive sheet (B) from the cartridge. 5 " The white powder lubricant on a new OPC belt is normal; it won’t affect quality. Setting up Your Printer... - Page 16 The cartridge should slide easily into the printer. Don’t force it. Gently guide the cartridge into the printer. Rotate the two lock levers toward the back of the printer to secure the cartridge in the printer.
-
Page 17: Front Of Printer
Installing the Cleaning Roller and Fuser Oil Bottle Push the two tension release levers toward the rear of the printer. 5 " The printer is shipped with the tension release levers in the for- ward position. Open the two cleaning... -
Page 18: Loading The Media Tray
Insert the new oil bottle with the noz- zle pointed down. Close the two oil bottle lock levers. Close the printer’s top cover. Loading the Media Tray Unpack the media tray. 5 " The illustration shows a universal media tray; however, instructions are the same for a letter/A4 media tray. -
Page 19: Accessories
Installing accessories always requires that the printer and accessories are turned off and unplugged during installation. If you purchased any additional printer accessories, then install them now. If installation instructions are included with the accessory, follow them. If not, Accessories... -
Page 20: Plugging In/Turning On The Printer
“IDLE” on the message window. If “IDLE” is not displayed in the message window after the power switch is turned on, the setup operation is not proceeding correctly or the printer may be malfunctioning. Recheck the setup. If the startup page doesn’t print or the print quality is not good, skip ahead to... -
Page 21: Configuration Menu Overview
For more menu details, refer to the CrownBook. Installation* Menu Installation* Operator Passwrd Use Operator Pwd Admin Password Use Admin Pwd Configuration Menu Overview IDLE Printer Configuration Operator Control (Enter password) Off , On (Enter password) Off , On *Requires optional security key Administration... -
Page 22: Operator Control Menu
Color Separation Color Model Media Mode Color Matching Media Custom Inputbin Accounting*** Proof-Then-Print*** Consumables IDLE Printer Configuration Administration 001-999 Off, Long Edge, Short Edge Off, On Portrait, Landscape Upper, Optional1*, Optional2* Off, On Off, On Full Color, Monochrome Single User Mode, Network Mode... -
Page 23: Administration Menu
Administration Menu Administration Communications Emulations Special Pages Startup Options Memory Engine Consumables Miscellaneous Disk Operations*** Configuration Menu Overview IDLE Printer Configuration Installation* Optional NIC* Timeouts Resident NIC Parallel Serial ESP Default HP-GL LN03+* QUIC* PostScript LinePrinter PCL 5e Image Server (TIFF & CALS)*... -
Page 24: Administration/Communications/Resident Nic/ Crownnet Menu
Status messages and configuration menus can be displayed in the message window in Czech, Danish, Dutch, English, French, German, Italian, Portuguese, and Spanish. When you receive your printer, the default lan- guage is set to *English. Chinese (Simplified), Japanese (Kanji), Korean (Hangul), and Taiwanese (Traditional) do not display in the control panel message window, but choos- ing them makes the correct language display in CrownView. - Page 25 5 " The printer must be restarted for changes to the Keypad Language menu to take effect. You can either let the printer restart automatically after you save the change and exit from the Configuration menu, or you can wait for the change to take effect the next time you manually turn on the printer.
-
Page 26: About The Control Panel
About the Control Panel The control panel, located on the front of the printer, allows you to direct the printer’s operation. In addition, it displays the current status of the printer, including any condition that needs your attention. 4 indicators... -
Page 27: Control Panel Keys
Online key on the control panel will not take effect until the remote console puts the printer back on line. You must take the printer off line before using all other keys except the Cancel and Media keys. Use the Media key to set the media tray to the correct media... -
Page 28: Menu, Select, Previous, And Next Keys
(See the CrownBook for complete information.) It also allows the user to end a job. If the printer is on line, press the Cancel key to cancel the job currently printing. To cancel the entire print job if the com- puter has not completely sent the job, use the printer driver. -
Page 29: About The Interface Panel
About the Interface Panel The interface panel is located on the back right of the printer. Serial port—This is an RS-232C serial interface. SCSI—Up to 3 optional SCSI devices are allowed. Security key—This is for the optional security key. Ethernet port—Using a twisted-pair... -
Page 30: Drivers And Utilities
Drivers and Utilities The printer driver and additional software found on the Software Utilities CD-ROM can be installed on PCs using any of the following: „ Windows Me „ Windows 2000 „ Windows NT4 „ Windows 98 „ Windows 95 (B minimum) „... -
Page 31: Installing Printer Drivers And Software
With your PC turned off, turn on the printer (the power switch is on the left side of the printer), and then turn on your PC. A Found New Hardware message appears. Follow the directions for your operat-... -
Page 32: Manual Installation
Help button. Manual Installation 5 " If you installed the printer driver using Plug and Play technology, skip to “Installing Windows Drivers and Utilities via an Ethernet TCP/IP Interface Configuration” on page 33. Connect your printer to your PC with a parallel cable. -
Page 33: Installing Windows Drivers And Utilities Via An Ethernet Tcp/Ip Interface Configuration
When the installation application window appears, select Install Printer Utility and Driver, and then follow the on-screen instructions to install the printer driver and Crown Port Monitor. Installing Windows Drivers and Utilities via an Ethernet TCP/IP Interface Configuration Detailed instructions for configuring TCP/IP can be found in the CrownBook (in PDF format on the Software Utilities CD-ROM). -
Page 34: Selecting The Crown Port
If you identify a subnet mask, automatic sensing is disabled. If you want to refer to the printer by host name instead of IP address, edit the system host table by adding the following line to the host file:... -
Page 35: Installing Macintosh Drivers And Utilities
Remote Console „ CrownView When your printer boots up, it will find a default zone. If your network has more than one zone, use the Administration/Communications/Resident NIC/ CrownNet/EtherTalk/Zone Name/Zone Part 1 and Zone Part 2 menus to enter Installing Printer Drivers and Software... -
Page 36: Installing Drivers And Utilities On Unix And Others
5 " The two Zone Part x menus allow you to identify 1 zone with a name up to 32 characters long. -
Page 37: Troubleshooting
The media guides are tation. not accurately set in the media tray. The printer is The printer is not on line. Put the printer on line and check if not receiv- ing data from the com- The emulation has been puter. - Page 38 Solution Turn the printer off line before print- ing a status page. Check that the media trays are loaded with media, in place and secure. Make sure the front and top covers are closed securely.
- Page 39 Did you wait long enough? From a cold start, the printer takes approxi- mately 3 minutes to warm up. Be sure you wait long enough for a startup page before suspecting a problem.
- Page 40 Solution Level the printer surface. The slant of the printer should not exceed 1.5° after the printer is placed on it (for example, a round pencil laid on the surface shouldn’t roll in any direction). Turn the power switch off, remove...
-
Page 41: Accessories And Consumables
Equipped with STP and UTP connectors Equipped with 10BaseT Additional memory must be 32, 64, or 128 MB, PC-100 Compliant SDRAM DIMMs, up to a printer maximum of 384 MB (up to 128 MB for each DIMM slot). Installation of a duplex unit requires at least one LFU be installed. - Page 42 Description Media Tray, Universal, 250 Sheet Purchasing extra trays may be conve- Media Tray, Letter/A4, 250 Sheet Media Tray, Lower Feeder Unit, 500 Sheet PlanetPress Postcard Feeder QFORM SC-210 Color Convenience Copier SCSI Interface Security Key Serial Interface Time-of-Day Clock VMS Host Software Remark(s) nient when media formats change and/or...
-
Page 43: Consumables
< COLOR > TONER EMPTY displays in the message window (after approximately 14,000 planes per black cartridge and 8,500 planes per yellow, magenta, and cyan cartridge). The printer ships with an initial starter toner kit—this means the black toner cartridge has a life of 7,000 planes, while cyan, magenta, and yellow initial starter cartridges each have a life of 4,250 planes —... -
Page 44: Regulatory Compliance
Regulatory Compliance CE Marking and International (EU) Immunity EN 55024 Requirements EN 50081-1 (EU) IEC 61000-4-2 IEC 61000-4-3 IEC 61000-4-4 IEC 61000-4-5 IEC 61000-4-6 IEC 61000-4-8 IEC 61000-4-11 cTick Mark ACA (Australia) AS/NZS 4251 AS/NZS 3458 Electromagnetic FCC (USA) Emissions (EMI) Title 47 CFR Ch. -
Page 45: Regulatory Compliance
FCC Compliance Statement This equipment has been tested and found to comply with the limits for a Class A digital device, pursuant to Part 15 of the FCC Rules. These limits are designed to provide reasonable protection against harmful interference in a residential installation. -
Page 46: Canadian Users Notice
Cet appareil numérique de la classe A est conforme à la norme NMB-003 du Canada. Laser Safety This printer is certified as a Class 1 laser product under the U.S. Department of Health and Human Services (DHHS) Radiation Performance Standard according to the Radiation Control for Health and Safety Act of 1968. This means that the printer does not produce hazardous laser radiation. -
Page 47: Warranty Considerations
Return Merchandise Authorization (RMA) number. Refer to the Service & Support Guide for the Support telephone number where you can obtain an RMA number. If the printer is not strapped to the pallet or if the RMA number is not prominently visible on the outside of return inventory, MINOLTA-QMS will not accept receipt. - Page 48 Check with our web site www.minolta-qms.com for a list of current approved media. To order consumables and accessories, go to www.q-shop.com or check the Service &...
-
Page 49: Manufacturer's Declarations Of Conformity
Manufacturer’s Declaration of Conformity Europe 220 Volt MINOLTA-QMS Europe B.V. (supplier’s name) Reactorweg 160, 3542 AD Utrecht, The Netherlands (address) declare under our sole responsibility that the product magicolor 6110 (base product family name) MC6100-V2-2 (model number located on dataplate) SL3-U (print engine model/type number) to which this declaration relates is in conformity with the following standard(s) -
Page 50: Latin America 110 Volt
Manufacturer’s Declaration of Conformity Latin America 110 Volt MINOLTA-QMS, Inc. (supplier’s name) One Magnum Pass, Mobile, Alabama, USA, 36618 (address) declare under our sole responsibility that the product magicolor 6110 (base product family name) MC6100-V2-1 (model number located on dataplate) SL3-U (print engine model/type number) to which this declaration relates is in conformity with the following standard(s) -
Page 51: Latin America 220 Volt
Manufacturer’s Declaration of Conformity Latin America 220 Volt MINOLTA-QMS, Inc. (supplier’s name) One Magnum Pass, Mobile, Alabama, USA, 36618 (address) declare under our sole responsibility that the product magicolor 6110 (base product family name) MC6100-V2-2 (model number located on dataplate) SL3-E (print engine model/type number) to which this declaration relates is in conformity with the following standard(s)
Need help?
Do you have a question about the Magicolor 6110 GN and is the answer not in the manual?
Questions and answers