Juniper PTX3000 Quick Start Manual
Packet transport router
Hide thumbs
Also See for PTX3000:
- Quick start manual (48 pages) ,
- Hardware manual (174 pages) ,
- Features manual (506 pages)
Table of Contents
Advertisement
Quick Links
PTX3000 Packet Transport Router
Quick Start
January 2014
Part Number: 530-056448
Revision 01
Contents
Copyright © 2014, Juniper Networks, Inc.
This document describes how to install the PTX3000 Packet Transport Router.
Quick Start Description . . . . . . . . . . . . . . . . . . . . . . . . . . . . . . . . . . . . . . . . . . . . . . . 3
Step 1: Prepare the Site for the PTX3000 Packet Transport Router . . . . . . . . . . . . 3
Rack-Mounting Requirements . . . . . . . . . . . . . . . . . . . . . . . . . . . . . . . . . . . . . . 3
Router for Installation . . . . . . . . . . . . . . . . . . . . . . . . . . . . . . . . . . . . . . . . . 5
Step 2: Unpack the PTX3000 Packet Transport Router . . . . . . . . . . . . . . . . . . . . . . 5
Install Cage Nuts, If Needed . . . . . . . . . . . . . . . . . . . . . . . . . . . . . . . . . . . . . . . . 5
Install the Mounting Shelf . . . . . . . . . . . . . . . . . . . . . . . . . . . . . . . . . . . . . . . . . 6
Step 4: Install the PTX3000 Packet Transport Router . . . . . . . . . . . . . . . . . . . . . . . 7
Install the Packet Transport Router By Using a Lift . . . . . . . . . . . . . . . . . . . . . . 7
Step 6: Connect External Devices and PIC Cables to the PTX3000 Packet
Transport Router . . . . . . . . . . . . . . . . . . . . . . . . . . . . . . . . . . . . . . . . . . . . . . . . 14
Connect the PTX3000 to a Console or Auxiliary Device . . . . . . . . . . . . . . . . . 14
Connect the PTX3000 to a Network for Out-of-Band Management . . . . . . . 15
Connect PIC Cables to the PTX3000 . . . . . . . . . . . . . . . . . . . . . . . . . . . . . . . . 16
1
Advertisement
Table of Contents

Related Manuals for Juniper PTX3000


Summary of Contents for Juniper PTX3000
-
Page 1: Table Of Contents
Connect the PTX3000 to a Network for Out-of-Band Management ..15 Connect PIC Cables to the PTX3000 ....... . 16... - Page 2 Modules ..........24 Step 8: Power On the PTX3000 Packet Transport Router ....26 Power On the DC-Powered PTX3000 Packet Transport Router .
-
Page 3: Quick Start Description
See the site preparation guidelines in the PTX3000 Packet Transport Router Hardware Guide. Rack-Mounting Requirements on page 3 Tools Required to Unpack and Prepare the PTX3000 Packet Transport Router for Installation on page 5 Rack-Mounting Requirements You can install the packet transport router in many types of racks, including a four-post rack or cabinet or an open-frame rack. - Page 4 The mounting brackets extend the width to fit into standard 19-in. (48.3 cm) racks. The rack rails must be spaced widely enough to accommodate the external dimensions of the PTX3000 chassis. The rack must be strong enough to support the weight of the fully configured packet transport router, up to about 200 lb (90.7 kg).
-
Page 5: Tools Required To Unpack And Prepare The Ptx3000 Packet Transport Router For Installation
Tools Required to Unpack and Prepare the PTX3000 Packet Transport Router for Installation Tools Required to Unpack and Prepare the PTX3000 Packet Transport Router for Installation The following tools and parts are required to unpack and prepare the PTX3000 router for installation: A mechanical lift—recommended... -
Page 6: Install The Mounting Shelf
PTX3000 Packet Transport Router Quick Start Table 1: Mounting Hole Locations for Installing a PTX3000 Mounting Shelf Hole Distance Above U Division 0.02 in. (.06 cm) 0.01 U 0.2 in. (0.4 cm) 0.08 U Insert cage nuts in the holes specified for mounting the chassis (see... -
Page 7: Step 4: Install The Ptx3000 Packet Transport Router
Step 4: Install the PTX3000 Packet Transport Router Step 4: Install the PTX3000 Packet Transport Router Because of the size and weight of the device, we recommend that you install the packet transport router by using a mechanical lift. Install the Packet Transport Router By Using a Lift on page 7... - Page 8 PTX3000 Packet Transport Router Quick Start should be aligned with the mounting screws on the opposite side, and the packet transport router should be level. Move the lift away from the rack. If you are installing two to four routers in the rack, repeat this procedure for each router.
- Page 9 Install the Packet Transport Router By Using a Lift Figure 3: Loading the PTX3000 onto the Lift Copyright © 2014, Juniper Networks, Inc.
- Page 10 PTX3000 Packet Transport Router Quick Start Figure 4: Installing the PTX3000 in a Rack Copyright © 2014, Juniper Networks, Inc.
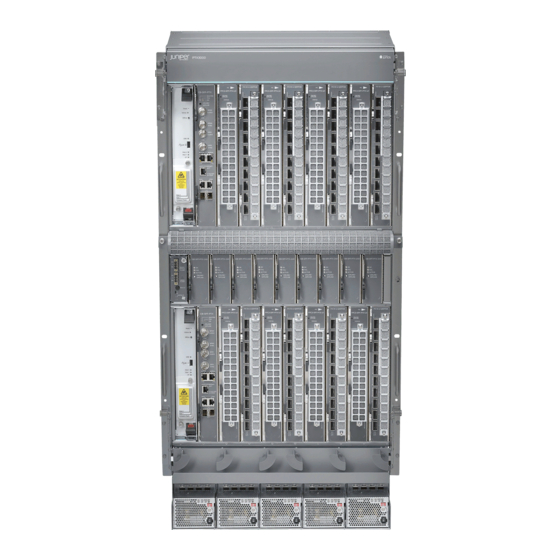
- Page 11 Install the Packet Transport Router By Using a Lift Figure 5: Installing Two PTX3000 Packet Transport Routers in a Rack (Front View) PTX3000 PTX3000 1— Upper chassis 2— Lower chassis Copyright © 2014, Juniper Networks, Inc.
-
Page 12: Step 5: Connect The Ptx3000 Packet Transport Router Grounding Cable
Lower chassis 2 Step 5: Connect the PTX3000 Packet Transport Router Grounding Cable You ground the PTX3000 Packet Transport Router by attaching a grounding cable to the chassis. You must provide the grounding cable. A 4-AWG cable lug is supplied with the packet transport router for grounding the router. - Page 13 Step 5: Connect the PTX3000 Packet Transport Router Grounding Cable Connect the grounding cable to a proper earth ground. Verify that a licensed electrician has attached the cable lug provided with the packet transport router to the grounding cable. Ensure that grounding surfaces are clean and brought to a bright finish before you connect the grounding cable.
-
Page 14: Transport Router
PTX3000 Packet Transport Router Quick Start Step 6: Connect External Devices and PIC Cables to the PTX3000 Packet Transport Router To connect external devices and PIC cables, perform the following procedures: Connect the PTX3000 to a Console or Auxiliary Device on page 14... -
Page 15: Connect The Ptx3000 To A Network For Out-Of-Band Management
Figure 8: Connecting to the Console or Auxiliary Port on the Control Board Connect the PTX3000 to a Network for Out-of-Band Management To connect the Routing Engines in a PTX3000 Packet Transport Router to a network for management of the packet transport router, connect a UTP Category 5 Ethernet cable with an RJ-45 connector to the port on a Control Board. -
Page 16: Connect Pic Cables To The Ptx3000
Figure 10: Connecting to the Host/Ethernet Port on the Control Board Connect PIC Cables to the PTX3000 The PTX3000 Packet Transport Router supports PICs that use various kinds of network cable, including multimode and single-mode fiber-optic cable. For information about the type of cable used by each PIC, see the PTX Series Interface Module Reference. - Page 17 Connect PIC Cables to the PTX3000 If the PIC cable connector port is covered by a rubber safety plug, remove the plug. WARNING: Do not look directly into a fiber-optic transceiver or into the ends of fiber-optic cable. Fiber-optic transceivers and fiber-optic cable connected to a transceiver emit laser light that can damage your eyes.
- Page 18 PTX3000 Packet Transport Router Quick Start Figure 11: Connecting PIC Cables Figure 12: Upper Cable Management System Figure 13: Lower Cable Management System Copyright © 2014, Juniper Networks, Inc.
-
Page 19: Step 7: Connect The Ptx3000 Packet Transport Router To Power
Connect Nonredundant DC Power to the PTX3000 DC Power Supply Modules on page 19 Connect Redundant DC Power to the PTX3000 DC Power Supply Modules on page 20 Connect Nonredundant DC Power to the PTX3000 DC Power Supply Modules To connect nonredundant power, see Connecting Nonredundant DC Power to the PTX3000 DC Power Supply Modules in the PTX3000 Packet Transport Router Hardware Guide. -
Page 20: Modules
PTX3000 Packet Transport Router Quick Start Connect Redundant DC Power to the PTX3000 DC Power Supply Modules To connect the DC source power cables to both DC PSM inputs for redundant power: To connect the packet transport router to DC power, you need the following tools and parts: 7/16-in. - Page 21 Connect Redundant DC Power to the PTX3000 DC Power Supply Modules Figure 16: Setting the Input Switches for Redundant Power 1— 2— Input switch Input switch Use a number 1 Phillips (+) screwdriver to loosen the screws on the input terminal cover, and remove the input terminal cover.
- Page 22 PTX3000 Packet Transport Router Quick Start Figure 17: DC PSM Inputs Figure 18: Connecting the Positive DC Source Power Cable Lugs to a PSM Connect the negative (–) DC source power cables to input and input input 2 –48V terminals...
- Page 23 Connect Redundant DC Power to the PTX3000 DC Power Supply Modules Figure 19: Connecting the Negative DC Source Power Cable Lugs to a PSM Verify that the source power cables are connected to the appropriate terminal: the positive (+) source cable to the return terminal (labeled ) and the negative (–)
-
Page 24: Connect Ac Power To The Ptx3000 Ac Power Supply Modules
Connect Nonredundant AC Power to the PTX3000 AC Power Supply Modules on page 24 Connect Redundant AC Power to the PTX3000 AC Power Supply Modules on page 24 Connect Nonredundant AC Power to the PTX3000 AC Power Supply Modules To connect nonredundant power, see Connecting Nonredundant AC Power to the PTX3000 AC Power Supply Modules in the PTX3000 Packet Transport Router Hardware Guide. - Page 25 Connect Redundant AC Power to the PTX3000 AC Power Supply Modules Figure 22: Setting the Input Switches for Redundant Power 1— Input switch 2— Input switch Insert the AC power cord couplers into input and input on the PSM (see Figure 23 on page 25).
-
Page 26: Step 8: Power On The Ptx3000 Packet Transport Router
Step 8: Power On the PTX3000 Packet Transport Router To power on the packet transport router, perform one of the following procedures: Power On the DC-Powered PTX3000 Packet Transport Router on page 26 Power On the AC-Powered PTX3000 Packet Transport Router on page 27... -
Page 27: Power On The Ac-Powered Ptx3000 Packet Transport Router
The Routing Engine boots as the PSM completes its startup sequence. If the Routing Engine finishes booting and you need to power off the system, see Powering Off the PTX3000 Packet Transport Router in the PTX3000 Packet Transport Router Hardware Guide. -
Page 28: Router
Step 9: Install the Card Cage Screens on the PTX3000 Packet Transport Router You can optionally install a screen over the upper and lower card cages. Each PTX3000 is shipped with two card cage screens, one screen for the upper card cage and one screen that covers the SIBs and lower card cage. -
Page 29: Step 10: Perform The Ptx3000 Packet Transport Router Initial Software
Step 10: Perform the PTX3000 Packet Transport Router Initial Software Configuration Step 10: Perform the PTX3000 Packet Transport Router Initial Software Configuration The procedures below connect a packet transport router to the network but do not enable it to forward traffic. For complete information about enabling the packet transport router to forward traffic, including examples, see the Junos OS configuration guides. -
Page 30: Configure User Accounts And Passwords
PTX3000 Packet Transport Router Quick Start Configure User Accounts and Passwords For information about using an encrypted password or an SSH public key string (DSA or RSA), see the Junos OS Administration Library for Routing Devices. To configure user accounts and passwords: Add a password to the root administration user account. -
Page 31: Commit The Configuration
Display the configuration to verify that it is correct. [edit] root@host# show ## Last changed: 2008-10-17 18:32:25 UTC version 9.1R1.8; groups { re0 { system { host-name host-re0; interfaces { fxp0 { unit 0 { family inet { address 192.168.69.155/21; Copyright © 2014, Juniper Networks, Inc. - Page 32 PTX3000 Packet Transport Router Quick Start re1 { system { host-name host-re1; interfaces { em0 { unit 0 { family inet { address 192.168.70.72/21; global; apply-groups [ re0 re1 ]; system { domain-name juniper.net; backup-router 192.168.71.254; root-authentication { encrypted-password "xxxxxxxxxxx"; ## SECRET-DATA name-server { 192.168.1.1;...
-
Page 33: Safety Warnings
See installation instructions before connecting the packet transport router. This is a summary of safety warnings. For a complete list of warnings for this packet transport router, including translations, see the PTX3000 Packet Transport Router Hardware Guide at http://www.juniper.net/techpubs/hardware/ WARNING: The intrabuilding port(s) of the packet transport router is suitable for connection to intrabuilding or unexposed wiring or cabling only. - Page 34 Only trained and qualified personnel should install or replace the packet transport router. Perform only the procedures described in this Quick Start or in the PTX3000 Packet Transport Router Hardware Guide. Other services should be performed by authorized service personnel only.
-
Page 35: Compliance Statements For Nebs
Junos OS Documentation and Release Notes For a list of related Junos OS documentation, see http://www.juniper.net/techpubs/software/junos/ If the information in the latest release notes differs from the information in the documentation, follow the Junos OS Release Notes. Copyright © 2014, Juniper Networks, Inc. -
Page 36: Requesting Technical Support
7 days a week, 365 days a year. Self-Help Online Tools and Resources For quick and easy problem resolution, Juniper Networks has designed an online self-service portal called the Customer Support Center (CSC) that provides you with the following features: Find CSC offerings: http://www.juniper.net/customers/support/... -
Page 37: Revision History
Juniper Networks, Junos, Steel-Belted Radius, NetScreen, and ScreenOS are registered trademarks of Juniper Networks, Inc. in the United States and other countries. The Juniper Networks Logo, the Junos logo, and JunosE are trademarks of Juniper Networks, Inc. All other trademarks, service marks, registered trademarks, or registered service marks are the property of their respective owners.
Need help?
Do you have a question about the PTX3000 and is the answer not in the manual?
Questions and answers