Advertisement
Quick Links
Day One+
EX3400
IN THIS GUIDE
Step 1: Begin | 1
Step 2: Up and Running | 6
Step 3: Keep Going | 10
Step 1: Begin
IN THIS SECTION
Meet the EX3400 Ethernet Switch | 2
Install the EX3400 Switch | 2
Power On | 5
In this guide, we provide a simple, three-step path, to quickly get you up and running with your new EX3400. We've
simplified and shortened the installation and configuration steps, and included how-to videos. You'll learn how to install
an AC-powered EX3400, power it up, and configure basic settings.
NOTE:
Are you interested in getting hands-on experience with the topics and operations covered in this guide?
Visit
Juniper Networks Virtual Labs
sandbox in the stand alone category. EX switches are not virtualized. In the demonstration, focus on the virtual
QFX device. Both the EX and QFX switches are configured with the same Junos commands.
and reserve your free sandbox today! You'll find the Junos Day One Experience
Advertisement

Subscribe to Our Youtube Channel
Related Manuals for Juniper Day One+


Summary of Contents for Juniper Day One+
- Page 1 Are you interested in getting hands-on experience with the topics and operations covered in this guide? Visit Juniper Networks Virtual Labs and reserve your free sandbox today! You’ll find the Junos Day One Experience sandbox in the stand alone category. EX switches are not virtualized. In the demonstration, focus on the virtual...
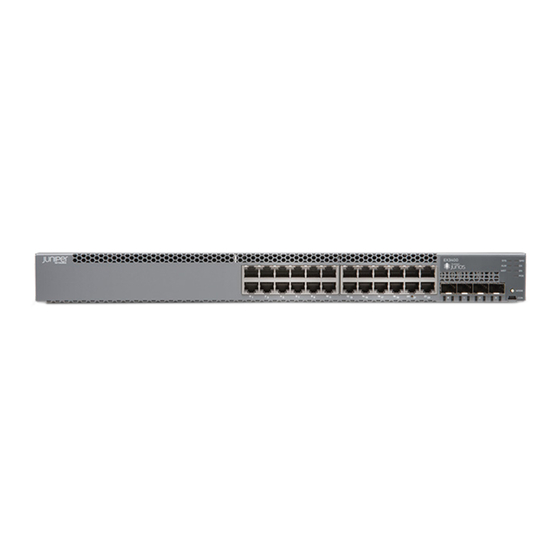
- Page 2 Meet the EX3400 Ethernet Switch The Juniper Networks EX3400 Ethernet Switches are a cost-effective solution for today’s most demanding converged data, voice, and video enterprise access networks. The fixed-configuration 1-RU switches are perfect for campus wiring closet deployments. They offer levels of performance and management previously available only with high-end access switches.
- Page 3 You can install the EX3400 switch on a desk or table, on a wall, or in a two-post or four-post rack. The accessory kit that ships in the box has the brackets you need to install the EX3400 switch in a two-post rack. In this guide, we walk you through how to do that.
- Page 4 You’ll notice there are three locations on the side panel where you can attach the mounting brackets: front, center, and rear. Attach the mounting brackets to the location that best suits where you want the EX3400 switch to sit in the rack.
- Page 5 Power On Now you’re ready to connect the EX3400 switch to a dedicated AC power source. The switch comes with the AC power cord for your geographic location. Here’s how to connect an EX3400 switch to AC power: 1. On the rear panel, connect the power cord retainer clip to the AC power supply: a.
-
Page 6: Step 2: Up And Running
It’s simple to provision and manage the EX3400 switch and other devices on your network. Choose the configuration tool that’s right for you: Juniper Mist. To use Mist, you’ll need an account on the Mist Cloud Platform. See Overview of Connecting Mist Access Points and Juniper EX Series Switches. -
Page 7: Plug And Play
Plug and Play EX3400 switches already have factory-default settings configured right out of the box to make them plug-and-play devices. The default settings are stored in a configuration file that: Sets Ethernet switching and storm control on all interfaces Sets Power over Ethernet (PoE) on all RJ-45 ports of models that provide PoE and PoE+ Enables the following protocols: Internet Group Management Protocol (IGMP) snooping Rapid Spanning Tree Protocol (RSTP) - Page 8 3. At the Junos OS login prompt, type root to log in. You don't need to enter a password. If the software boots before you connect your laptop or desktop PC to the console port, you might need to press the Enter key for the prompt to appear.
- Page 9 root# commit configuration check succeeds commit complete 9. Configure the hostname. {master:0}[edit] root# set system host-name name 10. Configure the IP address and prefix length for the management interface on the switch. As part of this step, you remove the factory default DHCP setting for the management interface. {master:0}[edit] root# delete interfaces vme unit 0 family inet dhcp root# set interfaces vme unit 0 family inet address address/prefix-length...
-
Page 10: What's Next
Download, activate, and manage your software licenses to unlock Activate Junos OS Licenses in the additional features for your EX series switch Juniper Licensing Guide Find more in-depth information about installing your EX3400 series Browse through the EX3400 Switch switch... -
Page 11: General Information
Jump in and start configuring your EX Series switch with the Junos OS Start with the Day One+ for Junos OS guide See, automate, and protect your network with Juniper Security Visit the Security Design Center Get hands-on experience with the procedures covered in this guide... - Page 12 Juniper Portal Juniper Networks, the Juniper Networks logo, Juniper, and Junos are registered trademarks of Juniper Networks, Inc. in the United States and other countries. All other trademarks, service marks, registered marks, or registered service marks are the property of their respective owners. Juniper Networks assumes no responsibility for any inaccuracies in this document. Juniper Networks reserves the right to change, modify, transfer, or otherwise revise this publication without notice.
Need help?
Do you have a question about the Day One+ and is the answer not in the manual?
Questions and answers