Juniper SRX320 Quick Start Manual
Hide thumbs
Also See for SRX320:
- Hardware manual (154 pages) ,
- Quick start manual (12 pages) ,
- Setup (9 pages)
Table of Contents
Advertisement
Quick Links
Quick Start
SRX320
IN THIS GUIDE
Step 1: Begin | 1
Step 2: Up and Running | 6
Step 3: Keep Going | 12
Step 1: Begin
IN THIS SECTION
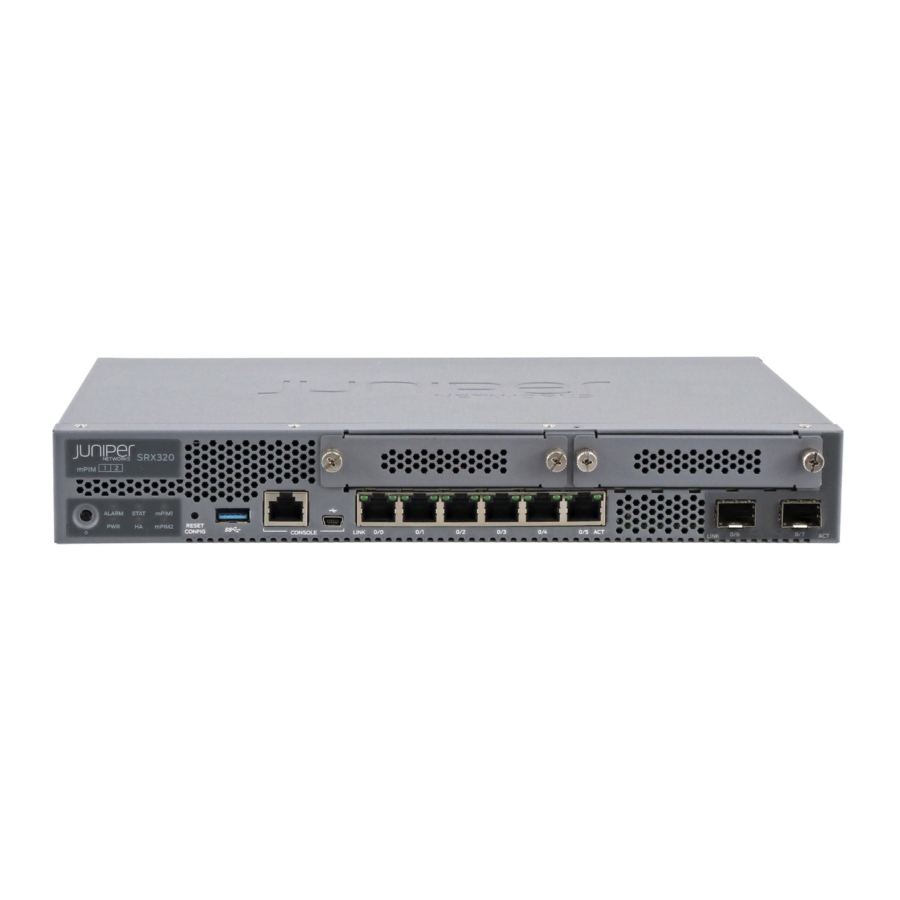
Meet the SRX320 | 2
Install the SRX320 in a Rack | 2
Power On | 5
In this guide, we provide a simple, three-step path, to quickly get you up and running with your new SRX320. We've
simplified and shortened the installation and configuration steps, and included how-to videos. You'll learn how to install
the SRX320 in a rack, power it up, and deploy it on your network using the CLI.
NOTE:
We think you'll want to check out our
up where this Day One+ ends, providing step-by-step instructions on how to easily secure and validate your
branch location.
Are you interested in getting hands-on experience with the topics and operations covered in this guide? Visit
Juniper Networks Virtual Labs
sandbox in the stand alone demonstration category.
Guided Setup: SRX300 Line
and reserve your free sandbox today! You'll find the Junos Day One Experience
Firewalls. Our Guided Setup picks
Advertisement
Table of Contents

Related Manuals for Juniper SRX320


Summary of Contents for Juniper SRX320
- Page 1 Power On | 5 In this guide, we provide a simple, three-step path, to quickly get you up and running with your new SRX320. We’ve simplified and shortened the installation and configuration steps, and included how-to videos. You'll learn how to install the SRX320 in a rack, power it up, and deploy it on your network using the CLI.
-
Page 2: In This Section
What Else Do I Need? | 2 Rack It | 3 You can install the SRX320 on a table or desk, on a wall, or in a rack. We show you how to install it in a rack. What’s in the Box? - Page 3 To mount the SRX320 in a rack, you’ll need to order the rack mount kit appropriate for your installation. The required rack mount kit depends on whether you have a PoE or non-PoE SRX320 model, and whether you already have a power supply adapter tray.
- Page 4 4. Place the power supply adapter in the tray. 5. Lift the SRX320 and position it in the rack. Line up the bottom hole in the mounting brackets with a hole in each rack rail, making sure the SRX320 is level.
- Page 5 6. While you’re holding the SRX320 in place, have a second person insert and tighten the rack mount screws to secure the adapter tray and mounting brackets to the mounting rails. Make sure to tighten the screws in the two bottom holes first and then tighten the screws in the two top holes.
-
Page 6: Step 2: Up And Running
6. If the AC power source outlet has a power switch, turn it on. The SRX320 powers up as soon as you connect it to power. When the STAT LED on the front panel is lit solid green, the SRX320 is ready to use. - Page 7 It’s simple to provision and manage the SRX320 and other devices on your network. Choose the configuration tool that’s right for you: Junos CLI commands. In this guide we show you how to configure the SRX320 with CLI commands that leverage the plug and play factory defaults.
- Page 8 SRX320 Firewall Hardware Guide for details on the SRX320 factory default configuration. After you configure the SRX320, you can log in on a local LAN port, or remotely over the WAN interface, to manage and configure the SRX using the CLI or J-Web.
-
Page 9: Perform Initial Configuration
Data bits—8 Stop bits—1 Flow control—none NOTE: You can also connect to the SRX320 using a mini-USB console port. See the SRX320 Hardware Guide. Perform Initial Configuration 1. Login as the root user and start the CLI. You don't need a password if you're running the factory default. - Page 10 Retype new password: password Issue the commit command to activate the candidate configuration that disables ZTP: [edit] root# commit 4. Enable root login over SSH, and allow SSH access over the WAN interface (ge-0/0/0). [edit] root# set system services ssh root-login allow root# set security zones security-zone untrust interfaces ge-0/0/0.0 host-inbound-traffic system-services ssh 5.
- Page 11 Congratulations! Your SRX is Up and Running Your SRX320 is now online and providing secure Internet access to devices attached to the LAN ports. You can manage the device locally and remotely, using the Junos CLI, J-Web, or a cloud based provisioning service. Here's what your...
-
Page 12: What's Next
What’s Next? | 12 General Information | 13 Learn With Videos | 13 Congratulations! Your SRX320 is configured and ready to go. Here are some things you can do next. What’s Next? NOTE: Quickly configure and validate a secure branch office in a few simple steps with our... -
Page 13: General Information
If you want to Then View a Web-based training video which provides an SRX300 and SRX320 Firewalls Overview and Deployment overview of the SRX320 and describes how to install and (WBT) configure it Get short and concise tips and instructions that provide... - Page 14 Juniper Networks, the Juniper Networks logo, Juniper, and Junos are registered trademarks of Juniper Networks, Inc. in the United States and other countries. All other trademarks, service marks, registered marks, or registered service marks are the property of their respective owners. Juniper Networks assumes no responsibility for any inaccuracies in this document. Juniper Networks reserves the right to change, modify, transfer, or otherwise revise this publication without notice.
Need help?
Do you have a question about the SRX320 and is the answer not in the manual?
Questions and answers
how can i fiind user id and password of my srx320