Advertisement
- 1 Safety instructions
- 2 Packing list
- 3 Function introduction
- 4 Startup and shutdown operation
- 5 How to use the touch screen
- 6 The operation steps of touch screen
- 7 Charging the product
- 8 Discharging
- 9 Application scenario
- 10 Examples of loads
- 11 Estimation of operating time
- 12 Specifications
- 13 Storage and maintenance instructions
- 14 Declaration
- 15 Common faults and troubleshooting
- 16 FAQ (Frequently Asked Questions)
- 17 Videos
- 18 Documents / Resources
Safety instructions
Please observe the following instructions to ensure safe usage:
- Do not alter or disassemble this product.
- Do not move during charging or using it, because the vibration and impact during
- moving will lead to poor contact of output interface.
- In case of fire, use dry powder fire extinguishers for this product. Do not use water fire extinguisher, which may cause electric shock.
- Close supervision is required when using this product near children.
- Please confirm the rated specification of your load, and do not use it beyond the specification.
- Do not place the product near heat sources, such as electric furnace and heaters.
- Not permitted on aricrafts because the battery capacity exceeds 100Wh.
- Do not touch the product or the plug-in points if your hands are wet.
- Check the product and accessories prior to every use. Do not use if it is damaged or broken.
- Please unplug the AC adapter from the wall outlet immediately in case of lightning stroke, which may cause heating, fire and other accidents.
- Use original charger and cables.
Packing list
| No. | Product | Quantity(pcs) | Standard | Option |
| 1 | Power Station | 1 | √ | |
| 2 | AC adapter (including AC charging cable) | 1 | √ | |
| 3 | MC4 Solar charging cable (MC4 to XT90) | 1 | √ | |
| 4 | Car charging cable (car to XT90) | 1 | √ | |
| 5 | XT90 to aviation plug (input) | 1 | √ | |
| 6 | User manual | 1 | √ | |
| 7 | Warranty card | 1 | √ | |
| 8 | Certificate | 1 | √ | |
| 9 | 12V / 25A aviation plug to XT60 (output) | √ | ||
| 10 | 12V / 25A XT60 to spc45 (output) | √ | ||
| 11 | 12V / 24V lead acid battery charging cable XT90 to Red Black clamp (input) | √ | ||
| 12 | Connector for dual AC adapter (Female 7909 to XT90) | √ | ||
| 13 | Trolley | √ | ||
| 14 | Carry bag | √ |
(1) Standard (accessories included)


(2) Options (not included, buy separately from seller)


The picture is for reference only, take the object for standard.
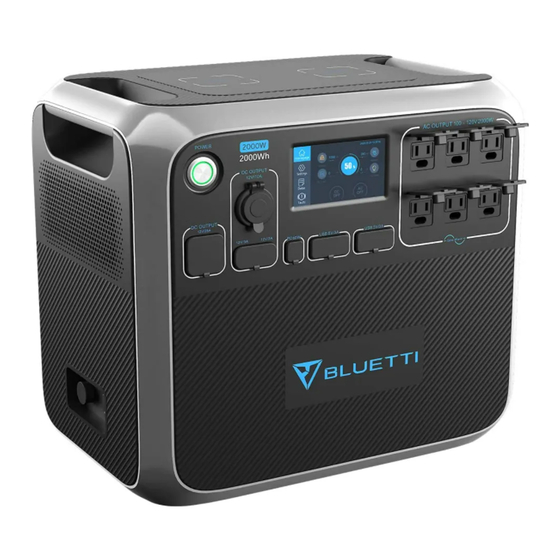
Function introduction

- Power button
- 12V / 10A cigarette lighter port
- Type-C charging port
- Touchable interaction LCD display
- USB output x 4pcs
- US AC output x 6pcs (EU/UK AC output x 2 pcs)
- 12V / 25A output
- 12V / 3A output
- PV / car input port
- AC adapter input port
- Wireless charging x 2pcs
Note:
AC stands for alternating current.
PV stands for photovoltaic (solar charging).
DC stands for direct current.
Car stands for automobile electric energy.
Startup and shutdown operation
(1) Start up: short press the power button, the indicator light is on, and the machine is in standby mode.
(2) Shutdown: press and hold the power button for more than 2 seconds, and the indicator light will be off and the machine shut off.
| The LED indicator lamp status warning | |
| BMS Over current or short circuit protection | Turn off after the indicator light flashes |
| BMS Startup timeout | The indicator light flashes and not shut down |
| Normal startup | The indicator light on |
| Normal shutdown | The indicator light off |
(3) DC power switch and AC power switch are integrated in the interaction LCD screen(Figure 1),press"DC ON/OFF"button and "AC ON/OFF"button on the screen to turn on/off the DC/AC output.
How to use the touch screen
Interaction LCD screen(Information Vision) supports below functions:
(1) Real time display of voltage, current, power, temperature and state of charge and discharge.
(2) The user can adjust the output voltage, frequency, charging mode, power consumption mode and time information according to the setting column.
(3) Support energy-saving, and enable Super ECO mode to save more than 30% of useless energy loss.
(4) Support users to view fault information, historical fault information, software and hardware version number and SN code independently.
The operation steps of touch screen
Warm tip:
- The touchable LCD screen is a resistance screen. we recommend to press the touch button by fingernail lightly until it "beeps".
- In order to maximize the lifespan of the LCD screen, please avoid direct sunlight on it.
(1) When press the power button, it will enter the main interface of the LCD display screen:

- Homepage button
- Settings button
- Data button
- Faults button
- PV/Car charging display button
- BMS information display button
- Date/Time
- DC load information display button
- DC ON/OFF button
- AC ON/OFF button
- Adapter charging display button
- AC load information display button
(2) Click the settings button in the main interface (Figure 2) to enter the setting interface as follows (Figure 3):
Warm tip: Please enter the setting interface to set the date and time according to the local time zone, and check the output voltage, frequency and other parameters for the first time.
The default:
JP output: 100V/50Hz
US output: 120V/60Hz
EU output: 230V/50Hz
UK output: 230V/50Hz
DC Input Source: PV (solar)
ECO Mode: NO
Press "Next" button to enter language and date setting as below (Figure 3):
Language: Japanese, English
Date and time: 2000-00-00, 00:00:00
Please set the "Date and time" at least once every 2 weeks.
Press to configure it.

(3) Return to the main interface (Figure 1), click the "Data" button to enter the page (Figure 4):
- Click the "Product Info" button, you can view the product model, SN code, control software version, monitoring software version, BMS monitoring software version and display software version in turn;
- Click the "Inverter & Charger Info" button, you can view the PV / Car operation and the adapter operation status, DC out operation and AC out operation in turn, which can also be accessed directly from the shortcut key on the main interface;
- Click the "BMS Maintenance" button, you can view the operation information of BMS, and this part can also be accessed directly from the shortcut key in the main interface;
- Click the "Fault History" button, you can view all the fault information generated by the machine. All the fault codes recorded here. According to the fault codes, return to the main interface and click the fault button to view the corresponding fault information. Fault History is retained up to 10 years if not manually cleared.

(4) Return to the main interface and click the fault button (Figure 1) to view the current fault information: the fault button will display red if there is a fault, click to enter the corresponding fault information, then the green dot will turn into red dot.
Charging the product
There are five ways to charge:
(1) Charging mode 1: From AC Wall outlet
- Press the main power button to start charging after connecting the product to the AC wall outlet, the charging will automatically stop when it reaches 100%.

(2) Charging mode 2: From the solar panels
- Choose the solar panel with working voltage DC 35V-150V.
- Connect the solar panel to the product via solar charging cable included.
- Plug and play charging: it will start charging automatically after connecting the solar panel to the product even it is off status.
- Max. current of the solar is 12A.

(3) Charging mode 3: From the car lighter port
- Press the power button and connect it to the cigarette lighter port through the car charging cable.
- Enter the setting interface as shown in (Figure 2) through the display screen to set DC input source to car mode; The product can be charged with 8.2A maximum current.

(4) Charging Mode 4: From a generator (gasoline, propane or diesel)
- Connect the AC adapter input to the generator and the output port to the AC charging port of the machine.
- Press the power button, the product will be charged, the charging will automatically stop when it reaches 100%.
")
(5) Charging mode 5: from lead acid battery
- Connect to the positive and negative poles of the battery through the provided solar charging cable(pay attention to distinguish the positive and negative poles of the battery, the red head is the positive pole, and the black head is the negative pole).
- Enter the setting interface as shown in (Figure 2) through the display screen to set DC input source to "car mode".The product can be used for car charging mode, with the maximum current of 8.2A. The product has the function of anti over discharge for lead-acid battery.

Discharging
(1) Turn on 12V / 25A, 12V / 3A, cigarette lighter port, USB and type C output: first, press the power button, then enter the main interface through the touch screen, click the DC ON/ OFF button and confirm, Turn off these output, and also click the DC on / off button and confirm.
(2) Turn on AC output: first, press the power button, then enter the main interface through the touch screen, click the AC ON/ OFF button and confirm. Turn off these AC output ports, and also click the AC ON/ OFF button and confirm.
Application scenario
(1) Outdoor: Car equipment: car fridge, car vacuum cleaner and other car equipment; Camping equipment: garden electric tools (power tools such as blowers, lawn mowers, electric drills, electric saws), BBQ grills, LED lights, etc.
(2) Indoor: Refrigerator, kitchen devices such as kettle, toaster, blender, coffee maker, rice cooker, laptops, phones, lighting, etc.
Examples of loads
(1) 12V / 25A, 12V / 3A, cigarette lighter port, USB and type C output port are suitable for most products in the market, but some products may trigger overcurrent protection if there is a large current impact at the moment of starting.
(2) The power of electrical products used for AC output should be less than 2000W. According to the different electrical products, when the rated power is less than 2000W, some air conditioners, motors and other devices that need instantaneous high current when starting may trigger overcurrent when the ratio of peak value of rated current exceeds 3:1. At this time, we recommended that you select the electrical appliances with lower power rate.
(3) When the output is overload, over-current or short circuit, the product will turn off the corresponding output, and then it will automatically start twice (at an interval of 20s). If there is still an overload, over-current or short circuit alarm, the output will be locked, and it needs to be manually troubleshooting and then restart. If the output stops repeatedly after restart, please stop using it immediately (only after troubleshooting) or contact the seller or maintenance agent for help.
(4) When the battery power is discharged to 0%, the DC and AC output will automatically turn off. Only when the battery power is charged to more than 5%, the DC and AC output can be turned on, which is to protect the battery and enhance its cycle life.
(5) This machine supports charging and discharging simultaneously.
Estimation of operating time

1700Wh × DOD × η ÷ (load W) = charging time (unit: h)
Note: DOD is the battery discharge depth, η is the local inverter efficiency, DOD=90%, η=88%.
Specifications
| Output | ||
| AC output | Rated output power | 2000W |
| Low rated voltage | 100-120Vac | |
| High rated voltage | 220-240Vac | |
| THD | ||
| Efficiency | >88%(R load) | |
| Overload capacity | 2000W<load<2500W, 2min; 2500W<load, immediately | |
| Short circuit protection | yes | |
| Over temperature protection yes | ||
| Noise | load<1500W, Max.45dB; load>1500W, Max.54dB | |
| DC12V/25A | Rated voltage | 12V |
| Rated current | 25A | |
| Overload power | 330W<load, 2S | |
| Short circuit protection | yes | |
| DC12V/10A output | Rated voltage | 12V |
| Rated current | 10A | |
| Overload power | >120W, 2s | |
| Short circuit protection | yes | |
| DC12V/3A output | Rated voltage | 12V |
| Rated current | 3A | |
| Overload power | >40W, 2S | |
| Short circuit protection | Yes | |
| USB output | Rated voltage | 5V |
| Maximum current | 3A | |
| Short circuit protection | Yes | |
| Type-C output | Fast charging type | PD2.0 (60W Max) |
| Rated output | 5V/3A, 9V/3A, 12V/3A,15V/3A, 20V/3A | |
| Short-circuit protection | Yes | |
| Wireless charging | QI1.2.4 standard compatible | |
| Output power | 5W/7.5W/10W/15W | |
| Input | ||
| AC charging | Input voltage | 100-240VAC |
| Maximum charging voltage | 58.8 VDC | |
| Maximum charging power | 500W | |
| Car input | Input voltage | 11.5V-14.4V/23V-28.8V |
| Input current | 8.2A | |
| Solar panel | Input voltage | 35V-150V |
| Input current | 12A (only 12A will be received When the current exceeds 12A) | |
| Input maximum power | 700W | |
Remarks:
| ||
| Battery Pack | ||
| Rated capacity | 1700Wh, 33.1Ah | |
| Voltage | 42V-58.8V | |
| Short circuit protection | yes | |
| Output overcurrent protection | 70A | |
| Discharge high temperature protection | 65°C/149°F | |
| Recovery of discharge high temperature protection | 55°C/131°F | |
| Charging high temperature protection | 55°C/131°F | |
| Charging high temperature protection recovery | 45°C/113°F | |
| Charging low temperature protection | 0°C/32°F | |
| Product | ||
| Product size | 420*280*386mm(16.5*11*15.2inch) | |
| Net weight | 23.8Kg(52.5lbs) | |
| Working environment temperature | 0°C-40°C/32°F-104°F | |
| Storage ambient temperature | -10°C-45°C/14°F-113°F | |
| Working environment humidity | 10-90% | |
Storage and maintenance instructions
(1) Please fully charge the machine before storing it.
(2) Turn off all power buttons.
(3) To preserve the battery liftspan, please use and recharge at least once every 6 months.
(4) Ensure proper ventilation while in use or store and keep away from any combustible materials or gases. Do not stack anything on top of the unit in storage or in use. Inadequate ventilation and/or improper storing may cause damage to the unit.
(5) Avoid exposing the product to rain or using the product in humid environment.
(6) Use and store the product in a clean and dry environment.
(7) Keep this product away from children and pet.
(8) Wring the cloth with water and wipe it clean In case of dirt.
Declaration
- Some changes may be made to the appearance and specifications without prior notice due to the improvement of the product.
- Our company shall not be liable for any damage caused by force majeure such as fire, typhoon, flood, earthquake or the user's intentional negligence, misuse or other abnormal conditions.
- No compensation shall be made for the failure of non standard connector/accessories.
- Our company will not bear all responsibilities if the damage is caused by not operating the product according to the use method in the operation manual.
- This product is not suitable for use on the relevant equipment or machines involving personal safety, such as atomic energy devices, aerospace devices, transportation devices, medical devices, etc., or the equipment or machines that must be highly reliable in electricity. If we use this product on the above-mentioned equipment or machine, we will not be responsible for personal accident, fire accident or wrong action of the machine and equipment caused by the failure of this product.
Common faults and troubleshooting
If this product is unable to charge or power other equipment, please check according to the following steps.
(1) Ensure that the power button is on and the power button light is always on(green).
(2) Make sure the DC ON / OFF button and AC ON / OFF button are on.
(3) Check whether the left of battery capacity is more than 5%. If the left of battery capacity is less than 5%, please charge as soon as possible.
(4) Ensure that the load equipment meets the power limit of the product, that is, the load power is within the maximum input range of each output interface;
If the above steps still do not solve the problem, please contact the seller for help.
FAQ (Frequently Asked Questions)
- What is the depth of discharge (DoD)?
To extend battery life, the portable power station has a DOD setting of 90%, which means that only 90% of the battery capacity can be discharged. Reserve 10% of the energy to avoid damage to the battery due to over discharge. - Can it be charged and discharged at the same time?
Yes, it supports pass through charging for both AC and DC loads. We recommend if you do this that you make sure to fully charge the AC200 at least once per month to extend battery life. - Can AC output charge refrigerator, air conditioner or electric drill?
Lower power for those devices can becharged. It is not recommended to use more than 1400W power. The starting power of refrigerator, air conditioner and electric drill is generally 5-7 times of the nominal power, which is easy to trigger AC overload. - Can two products be used in parallel?
No. - Can I use third-party solar panels?
You can use any solar panels available as long as they have MC4 connectors and when wired together the voltage is between 35V to 150V and no more than 700W. - How do I know if my appliance will work with the product?
When figuring what appliances can be powered with your portable power station, you will need to calculate how much the continuous loads are of each appliance you want to run simultaneously to determine if the total amount of watts is within the capacity of the generator. You can find the wattage of the appliance by looking at the manufacturer's information (this information is usually stamped or printed on most appliances and equipment) to measure it's wattage. Add all wattages of appliances to be run to determine if the total amount of watts is within the maximum continuous and surge watts. - Can I connect the product to my home circult breaker box?
Can not.

VideosIssues are Plaguing the Bluetti AC200 Video
Bluetti AC200 Stress Test Video
Documents / ResourcesDownload manual
Here you can download full pdf version of manual, it may contain additional safety instructions, warranty information, FCC rules, etc.
Advertisement


Need help?
Do you have a question about the AC200 and is the answer not in the manual?
Questions and answers