
Subscribe to Our Youtube Channel
Related Manuals for Bluetti AC500


Summary of Contents for Bluetti AC500
- Page 1 AC500 Portable Power Station User Manual V1.0 Please Read This Manual Before Use And Follow Its Guidance. Keep This Manual For Future Reference.
- Page 2 Thank You! Thank you for making BLUETTI a part of your family. From the very beginning, BLUETTI has tried to stay true to a sustainable future through green energy storage solutions for both indoor and outdoor use while delivering an exceptional eco-friendly experience for our homes and our world.
-
Page 3: Table Of Contents
Before You Begin Safety Instructions General Safety Maintenance Handling & Storage What’s In The Box Standard Packaging Product Overview Diagram Specifications Operation Powering On/Off LCD Screen Charging Discharging Capacity Expansion BLUETTI App Power Lifting Mode Appendix FAQs (Frequently Asked Questions) Technical Support... -
Page 4: Before You Begin
• BLUETTI recommends that you use genuine accessories from BLUETTI. • BLUETTI shall not be responsible for any damage or expense that might result from the use of parts other than genuine parts from the BLUETTI. • For your safety and benefit, please read carefully before using and keep it handy for future reference. -
Page 5: Safety Instructions
Safety Instructions General Safety BLUETTI products are developed to be safe and reliable. Please read this guide for important safety information about your device. The guide is intended to help you be more comfortable and productive while using this device. Failure to follow these guidelines for proper set up, use, and care for your device may... -
Page 6: Maintenance
Maintenance • When not using the unit for extended periods of time, power off the unit and disconnect the AC charging cable from the outlet. • Charge the unit to 50-70% SOC every 6 months for long-term storage. • Clean the unit with a dry cloth gently and carefully. Handling and Storage •... -
Page 7: What's In The Box
What’s In The Box Standard Packaging Portable Power Station AC Charging Cable DC Input Cable AC500 Portable Power Station User Manual V1.0 Please Read This Manual Before Use And Follow Its Guidance. Keep This Manual For Future Reference. Car Charging Cable... - Page 8 Lead-acid Battery Charging Cable: 19.7in/50cm. Clamp-MC4. D300S PV Voltage Step Down Module: 65in/165cm(output cable). Cigarette Lighter-F to DC5521 Cable(24V): 28.3in/72cm. 32A Aviation Plug: Used to obtain 5000W AC output.Please refer to AC500 32A Aviation Plug Guide for details. Note: All measurements are for reference only.
-
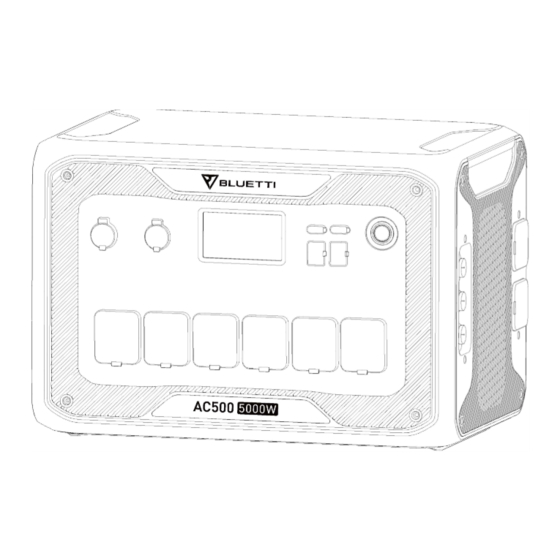
Page 9: Product Overview
Product Overview Diagram 24V Cigarette Lighter Port Wireless Charging Pad 12V/30A RV Port Power Button LCD Screen Battery Expansion Port USB-C PD3.0 AC Input 18W USB-A Port DC1/DC2 Input USB-A Port Communication Port AC Output JUST POWER ON... -
Page 10: Specifications
Specifications AC500 General Battery Capacity (With 1-6 B300S) 3072-18432Wh/60-360Ah Dimensions (L*W*H) 20.5*12.8*14.1inch/520*325*358mm Weight 66.2lb/30kg Discharging Temperature -4-104°F/-20-40°C Charging Temperature -4-104°F/-20-40°C Storage Temperature -13-104°F/-25-40°C Discharging 65°C (Recovery at 55°C) Over Temperature Protection (With B300S) Charging 55°C (Recovery at 45°C) Working Humidity... - Page 11 15A Max. Note: If there’s only one B300S, the combo gets a maximum of 4500W output. When connecting B300S with T500 adapter or AC500 to the grid, B300S is able to self-heat and get charged even at -4°F/-20°C. JUST POWER ON...
-
Page 12: Operation
Operation Powering On/Off Startup and shutdown: Press and hold the power button on AC500 or B300S to turn the combo on or off. AC/DC Output: Tap 'AC ON/OFF' or 'DC ON/OFF' on the screen to enable/ disable the AC/DC output. -
Page 13: Charging
(1) Consider the specifications of utility, AC outlet and charging cable before setting the Max. Grid Input Current. Note: The Max. Grid Input Current is set at 10A by default and only works when AC500 connects to the grid. Email to BLUETTI Customer Service for password. JUST POWER ON... - Page 14 NEXT avoiding accidents. NEXT (2) Plug the AC500 into the wall outlet via the AC charging cable. Generator Charging Connect AC500 to the generator via the charging cable*. * Sold separately.
- Page 15 Vmp: Voltage at maximum power. The voltage available when the panel is operating at its peak performance output. The roof panel can also charge the AC500. If the panel’s OCV falls in 150-550V, please use the D300S to lower the voltage. Find details in D300S PV Voltage Step Down Module User Manual.
- Page 16 Car Charging Connect the AC500 to the vehicle plug-in cigarette lighter port via the DC input cable and car charging cable. Note: Set ‘Others’ as DC1/DC2 input source to enable car charging. The Max. input current is 8.2A. Lead-acid Battery Charging Connect the AC500 with the lead-acid battery via the DC input cable and lead-acid battery charging cable.
-
Page 17: Discharging
1800W 18Wh 6144Wh* × DoD × η ÷ (load power) = discharging time (estimated) * Take the AC500+2*B300S combo as an example. Note: DoD refers to the Depth of Discharge, η is the local inverter efficiency. DoD=95%, η=90%. DoD may vary depending on ambient-operating temperature and discharge rate. -
Page 18: Capacity Expansion
4500W. To get 5000W output, please connect at least one expansion battery to each expansion port. Plug the AC500 + B300S combo to a standard wall outlet or tie them to the grid. When the grid fails, the combo steps in and provides power for connected devices. - Page 19 Transfer Switch AC Output AC Input * The grid-tied UPS should be built by a qualified electrician. Please contact BLUETTI Customer Service for details. AC500 has 4 UPS modes-Standard, Time Control, PV Priority, and Customized UPS, and BLUETTI’s UPS mode guide is as follows: 1.
-
Page 20: Bluetti App
INSTRUCTIONS to better control and monitor the AC500 + B300S combo. Power Lifting Mode This mode can be enabled in BLUETTI App. When on this mode, the combo can power high drain pure resistive loads (≤6000W), while the rated output power remains 5000W. -
Page 21: Appendix
Q: How long will it take to switch the UPS? A: 20ms. Q: How to upgrade the firmware? A: Connect the unit with BLUETTI App, then you can over-the-air (OTA) upgrade the firmware including ARM, DSP, HMI, and BMS. Technical Support Should you require any further assistance, please do not hesitate to contact BLUETTI Customer Service. - Page 23 AC500 Estação elétrica portátil Manual do usuário Leia este manual antes do uso e siga as orientações. Guarde este manual para referência futura.
- Page 24 É por isso que a BLUETTI está presente em mais de 70 países e tem a confiança de milhões de clientes em todo o mundo.
- Page 25 Antes de começar Instruções de segurança Segurança geral Manutenção Manuseio e armazenamento Conteúdo da caixa Embalagem padrão Resumo do produto Diagrama Especificações Operação Ligar/Desligar Tela LCD Carregamento Descarregamento Expansão da capacidade Aplicativo BLUETTI Modo Power Lifting Anexo Perguntas frequentes Suporte técnico...
-
Page 26: Antes De Começar
• A BLUETTI recomenda o uso de acessórios originais da BLUETTI. • A BLUETTI não será responsável por danos ou despesas que possam resultar do uso de peças não genuínas da BLUETTI. • Para sua segurança e benefício, leia com atenção antes de usar e mantenha-o à... -
Page 27: Instruções De Segurança
Instruções de segurança Segurança geral Os produtos BLUETTI são desenvolvidos para serem seguros e confiáveis. Leia neste guia as informações importantes de segurança sobre o seu dispositivo. O guia ajudará você a se sentir mais à vontade e produtivo ao usar este dispositivo. -
Page 28: Manutenção
incorreta pode resultar em risco de incêndio ou choque elétrico. Manutenção • Quando não for usar a unidade por um período prolongado, desligue-a e desconecte o cabo de carregamento CA da tomada. • Carregue a unidade com 50% a 70% da SOC a cada 6 meses quando guardada por um longo período. -
Page 29: Conteúdo Da Caixa
Conteúdo da caixa Embalagem padrão Estação elétrica portátil Cabo de carregamento CA Cabo de entrada CC AC500 Estação elétrica portátil Manual do usuário Leia este manual antes do uso e siga as orientações. Guarde este manual para referência futura. Cabo de carregamento Manual do usuário... - Page 30 Cabo acendedor de cigarros F para DC5521 (24 V): 72 cm. Plugue de aviação de 32 A: usado para obter saída CA de 5.000 W. Consulte o Guia do plugue de aviação AC500 de 32 A para obter mais informações.
-
Page 31: Resumo Do Produto
Resumo do produto Diagrama Saída de acendedor de cigarros de 24 V Pad de carregamento sem fio Porta RV 12 V/30 A Botão liga/desliga Tela LCD Porta de expansão da bateria USB-C PD3.0 Entrada CA Porta USB-A de 18 W Entradas DC1/DC2 Porta USB-A Porta de comunicação Saída CA de 16 A... -
Page 32: Especificações
Especificações AC500 Geral Capacidade da bateria (com 1 a 6 B300S) 3.072–18.432 Wh/60–360 Ah Dimensões (C x L x A) 520 x 325 x 358 mm Peso 30 kg / 66,2 lb Temperatura de descarregamento -20 °C a 40 °C Temperatura de carregamento -20 °C a 40 °C... - Page 33 15 A máx. Nota: com apenas um B300S conectado, o combo terá uma potência máxima de 4.500 W. Ao conectar o B300S com o adaptador T500 ou AC500 à rede, o B300S pode autoaquecer e ser carregado mesmo a -20 °C.
-
Page 34: Operação
Operação Ligar/Desligar Inicialização e desligamento: mantenha pressionado o botão liga/desliga no AC500 ou B300S para ligar ou desligar o combo. Saída CA/CC: toque em "AC ON/OFF" ou "DC ON/OFF" na tela para ativar e desativar a saída CA/CC. Operação Luz verde (nos botões) -
Page 35: Carregamento
Nota: a Corrente de entrada máx. da rede é definida como 10 A por padrão e só funciona quando o AC500 se conecta à rede. Envie um e-mail para o Atendimento ao Cliente da BLUETTI para obter a senha. JUST POWER ON... - Page 36 (2) Conecte o AC500 à tomada de parede usando o cabo de carregamento CA. Carregamento pelo gerador Conecte o AC500 ao gerador com o cabo de carregamento CA*. * Vendido separadamente. Nota: a BLUETTI recomenda um gerador inversor que forneça pelo menos 5.000 W de energia CA de onda senoidal pura.
- Page 37 Vmp: tensão na potência máxima. A tensão disponível quando o painel está operando em sua saída de desempenho máximo. O painel do teto também pode carregar o AC500. Se a tensão de circuito aberto (OCV) do painel for de 150 a 550 V, use o D300S para diminuir a tensão.
- Page 38 Carregamento pelo carro Conecte o AC500 à porta do acendedor de cigarros do veículo por meio do cabo de entrada CC e do cabo de carregamento do carro. Nota: defina "Others" como fonte de entrada DC1/DC2 para permitir o carregamento pelo carro.
-
Page 39: Descarregamento
18 Wh 6.144 Wh* × DoD × η ÷ (potência de carga) = tempo de descarga (estimado) * Tomemos como exemplo o combo AC500 + dois B300S. Nota: DoD refere-se à profundidade de descarga, η é a eficiência do inversor local. -
Page 40: Expansão Da Capacidade
AC500 aceita até 6 baterias de expansão para uma capacidade total de 18.432 Wh. Conecte o AC500 ao B300S usando o cabo de expansão de bateria P150D ou ao B300 usando o cabo P150D a P090D. Para obter mais informações, consulte o Manual do Usuário do B300S ou B300. - Page 41 * A UPS conectada à rede deve ser feita por um eletricista qualificado. Entre em contato com o Atendimento ao Cliente da BLUETTI para obter mais informações. O AC500 tem 4 modos de UPS: Standard (Padrão), Time Control (Controle de Tempo), PV Priority (Prioridade Fotovoltaica) e Customized UPS (UPS Personalizada).
-
Page 42: Aplicativo Bluetti
Nota: certifique-se de que o combo desconecte a rede e que o B300S não sobrecarregue. O AC500 detecta a resistência dos dispositivos e ajusta a tensão de saída automaticamente. O modo falha quando a tensão nominal do AC500 está abaixo de 70%. -
Page 43: Anexo
P: Quanto tempo demora para trocar para a UPS? R: 20 ms. P: Como atualizar o firmware? R: Conecte a unidade com o aplicativo BLUETTI e, em seguida, você poderá atualizar o firmware over-the-air (OTA), incluindo ARM, DSP, HMI e BMS. Suporte técnico Caso necessite de mais ajuda, entre em contato com o Atendimento ao Cliente da BLUETTI. - Page 44 SHENZHEN POWEROAK NEWENER CO., LTD. Address: F19, BLD No.1, Kaidaer, Tongsha Rd No.168, Xili Street, Nanshan, Shenzhen, China Customer Service Email: support-br@bluettipower.com , suporte@bluetti.com Web: https://br.bluettipower.com/ P/N:17.0303.0671-00A0...
Need help?
Do you have a question about the AC500 and is the answer not in the manual?
Questions and answers
Dose the grid input get restricted when pv is charging It is allowing voltage input but not watts