Table of Contents
Advertisement
Quick Links
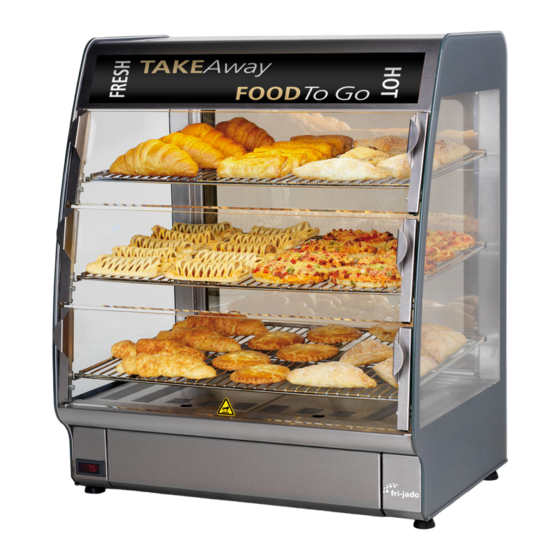
SERVICE MANUAL
Convenience Store Displayer
MODEL
CSD 180 Hot
fri-jado
WWW.FRIJADO.COM
This manual is prepared for the use of trained Service Technicians
and should not be used by those not properly qualified. If you
have attended a trianing for this product, you may be qualified to
perform all the procedures in this manual.
This manual is not intended to be all encompassing. If you have
not attended a training for this product, you should read, in its
entirety, the repair procedure you wish to perform to determine
if you have the necessary tools, instruments and skills required to
perform the procedure. Procedures for which you do not have the
necessary tools, instruments and skills should be performed by a
Reproduction or other use of this Manual, without the express
written consent of Fri-Jado, is prohibited.
CSD
- NOTICE -
trained technician.
Service Manual CSD 180 Hot form 9123877 rev. 00/2011
Advertisement
Table of Contents

Related Manuals for Fri-Jado CSD 180 Hot


Summary of Contents for Fri-Jado CSD 180 Hot
- Page 1 Procedures for which you do not have the necessary tools, instruments and skills should be performed by a trained technician. Reproduction or other use of this Manual, without the express written consent of Fri-Jado, is prohibited. fri-jado WWW.FRIJADO.COM Service Manual CSD 180 Hot form 9123877 rev. 00/2011...
- Page 2 Page 2 Service Manual CSD 180 hot form 9123877 rev. 07/2011...
-
Page 3: Table Of Contents
General troubleshooting list ........................14 Troubleshooting for the CSD180 ......................14 Exploded view and partslist ........................15 CSD180 ..............................15 Electrical diagram ............................ 17 Circuit diagram CSD180 ........................17 Service Manual CSD 180 hot form 9123877 rev. 07/2011 Page 3... -
Page 4: General Technical Data
Two-pole earthed plug 16 A Temperature range 22-90˙C Lighting 2x TL lamp 18W 1x PLL lamp 55W Net weight (kg) Gross weight (kg) Height (mm) Width (mm) Depth (mm) • Standard set of tools. • Metric wrenches, sockets and hex socket key wrenches. • Multi-meter and AC current clamp meter. • Temperature tester. • Insulation value tester (Megger). • Field Service Grounding Kit. Page 4 Service Manual CSD 180 hot form 9123877 rev. 07/2011... -
Page 5: Removal And Replacement Of Parts
Loosen the 7 screws on the bottom side of the headlight: (1) and (2). Press the headlight from the front side backwards till the end position. See next page... Service Manual CSD 180 hot form 9123877 rev. 07/2011 Page 5... -
Page 6: Dia Lamp (Continued)
Check the lamps on function, discolora- tion and dirt. Remove the lamp by turning this a quar- ter and pulling it forward. See next page... Note: Romove the lamp carefully without breaking it. Page 6 Service Manual CSD 180 hot form 9123877 rev. 07/2011... -
Page 7: Tl Light On Backside (Continued)
Remove the 2 screws that sucure the back panel and remove this panel (1). 2. Open the back door and remove the two bottom plates (4). See next page... Service Manual CSD 180 hot form 9123877 rev. 07/2011 Page 7... -
Page 8: Heating Element (Continued)
Note: When changing thetemperature sensor it is recommended to ty a pull wire around the old sensor in order to pull the new wire through the plastic protection tube. Page 8 Service Manual CSD 180 hot form 9123877 rev. 07/2011... -
Page 9: Main Switch
Open the door and remove the 2 screws that secure the hinge plate and remove this plate. Lift the complete door out of the bottom hinge. See next page... Service Manual CSD 180 hot form 9123877 rev. 07/2011 Page 9... -
Page 10: Door Glass (Continued)
Reverse the procedure to install. SIDEGLASS Remove the screws (1) and (2) that se- cure the cover plate (3) on the inside and remove this plate. See next page... Page 10 Service Manual CSD 180 hot form 9123877 rev. 07/2011... -
Page 11: Sideglass (Continued)
Now press the glass, beginning on the bottom side, against the frame to spread the sealant in an equal way. Now tighten the locknut (5). 10. Mount the cover plate on the inside. Service Manual CSD 180 hot form 9123877 rev. 07/2011 Page 11... -
Page 12: Glass Swingdoor
Now carefully remove the clamp and and magnets and take out the glass (6). Reverse the procedure to install. Note: The bolt (1) is secured with Loctite 271. Page 12 Service Manual CSD 180 hot form 9123877 rev. 07/2011... -
Page 13: Electrical Tests And Service Procedures
ELECTRICAL TESTS AND SERVICE PROCEDURES HEATING ELEMENT TEST Note: When testing the resistance of the element remove the wiring. Type Wattage/Voltage Resistance Ω Current A -0% + 10% CSD180 2500 21.2 10.8 Service Manual CSD 180 hot form 9123877 rev. 07/2011 Page 13... -
Page 14: General Troubleshooting List
3. Wiring loose. When 1 lamp brakes the other does not work also. Products dry out too fast. 1. No water in water drawer. 2. thermostat setting too high. Page 14 Service Manual CSD 180 hot form 9123877 rev. 07/2011... -
Page 15: Exploded View And Partslist
EXPLODED VIEW AND PARTSLIST fri-jado EXPLODED VIEW AND PARTSLIST CSD180 D-0168 Service Manual CSD 180 hot form 9123877 rev. 07/2011 Page 15... - Page 16 Door handle 9272016 Thermostat 9281001 Ballast 2x14W 9191181 Contactor 9222076 Strain relief 9222077 Nut, strain releaf 9160865 Heating element 9274034 Support profile, right 9270403 Drawer 9086118 Knob 9274009 Swing drawer Page 16 Service Manual CSD 180 hot form 9123877 rev. 07/2011...
-
Page 17: Electrical Diagram
ELECTRIC DIAGRAM fri-jado ELECTRICAL DIAGRAM CIRCUIT DIAGRAM CSD180 Service Manual CSD 180 hot form 9123877 rev. 07/2011 Page 17... - Page 18 Page 18 Service Manual CSD 180 hot form 9123877 rev. 07/2011...
- Page 19 Service Manual CSD 180 hot form 9123877 rev. 07/2011 Page 19...
- Page 20 Fri-Jado B.V. • P.O. Box 560 • 4870 AN • Etten-Leur • The Netherlands • tel +31 76 50 85 400 • fax +31 76 50 85 444 • info@frijado.com • www.frijado.com Service Manual CSD 180 hot form 9123877 rev. 07/2011...
Need help?
Do you have a question about the CSD 180 Hot and is the answer not in the manual?
Questions and answers