Table of Contents
Advertisement
Available languages
Available languages
Quick Links
Advertisement
Table of Contents

Related Manuals for ProLights V200SPOT


Summary of Contents for ProLights V200SPOT
- Page 1 V200SPOT Moving head Manuale Utente User Manual...
- Page 2 Music & Lights Srl si riserva ogni diritto di elaborazione in qualsiasi forma delle presenti istruzioni per l’uso. La riproduzione - anche parziale - per propri scopi commerciali è vietata. All rights reserved by Music & Lights Srl. No part of this instruction manual may be. Reproduced in any form or by any means for any commercial use.
-
Page 3: Table Of Contents
V200SPOT INTRODUZIONE Vi ringraziamo per aver scelto un prodotto PROLIGHTS. Il V200SPOT è un proiettore motorizzato intelligente a testa mobile per lampada a scarica da 150W. INDICE Sicurezza Avvertenze generali Attenzione e precauzioni per l’installazione Informazioni generali 1 Descrizione e specifiche tecniche 1.1 Elementi di comando e collegamenti... -
Page 4: Sicurezza
V200SPOT ATTENZIONE! Prima di effettuare qualsiasi operazione con l’unità, leggere con atten- zione questo manuale e conservarlo accuratamente per riferimenti futuri. Contiene informazioni importanti riguardo l’installazione, l’uso e la manutenzione dell’unità. SICUREZZA Avvertenze generali • I prodotti a cui questo manuale si riferisce sono conformi alle Direttive della Comunità Europea e pertanto recano la sigla . -
Page 5: Descrizione E Specifiche Tecniche
EC800; SLAVE: comando 18. Tasto MODE: per cambiare fra: per mezzo di un ulteriore V200SPOT; SOUND: si - modo strobo; il led vicino al tasto mode è spento; accende brevemente, se l’unità, in seguito ai se- - modo show : il led lampeggia lentamente;... -
Page 6: Descrizione
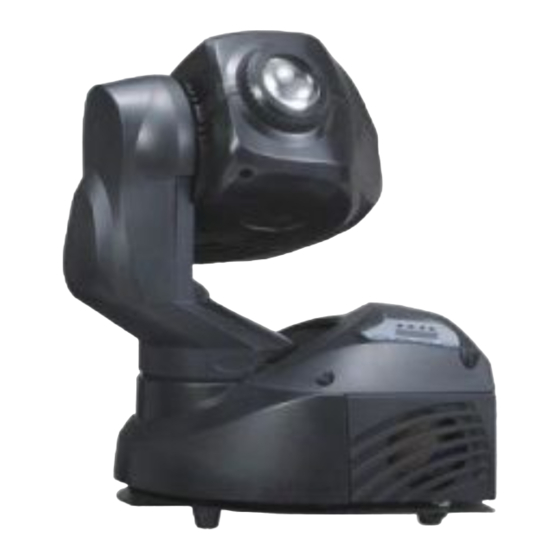
V200SPOT 1.2 Descrizione Proiettore monobraccio estremamente leggero e compatto, il V200SPOT, dal design moderno e al tempo stes- so elegante, impiega lampade a scarica 150W ad altissima luminosità. La rapidità e la linearità dei movimenti arricchiscono un proiettore versatile e in grado di farsi notare in ogni contesto d’illuminazione professionale. -
Page 7: Installazione
2.3 Montaggio Il V200SPOT può essere collocato su un piano solido. Inoltre, grazie alle possibilità di fissaggio della piastra alla base (vedi fig. 5), l’unità può essere montata anche a testa in giù, su una traversa. Per il fissaggio occorrono dei supporti robusti per il montaggio. -
Page 8: Funzioni E Impostazioni
Per memorizzare premere il tasto ENTER. Direzione di rotazione normale ed opposta. Impiegando almeno due V200SPOT, in un’unità il braccio può girare in un senso, mentre nell’altra il braccio gira in senso opposto. Con il tasto DOWN o UP (3) scegliere:... -
Page 9: Funzionamento In Modalità Automatica
V200SPOT 3.3 Funzionamento in modalità automatica Se alla presa DMX IN (11) non è presente alcun segnale di comando DMX, il led giallo di controllo MASTER (5) si accende, il display (1) indica (Show 1) e l’unità svolge il suo programma Show autonomamente. -
Page 10: Collegamenti Della Linea Dmx
V200SPOT 3.6 Collegamenti della linea DMX La connessione DMX è realizzata con connettori standard XLR. Utilizzare cavi schermati, 2 poli ritorti, con impe- denza 120Ω e bassa capacità. Per il collegamento fare riferimento allo schema di connessione riportato di seguito:... -
Page 11: Impostazione Dell'indirizzo Di Start E Canali Dmx
DMX per il primo canale DMX. Se, p. es., sull’unità di comando l’indirizzo 17 è previsto per comandare la rotazione della testa mobile, si deve impostare sul V200SPOT l’indirizzo di start 17. Le altre funzioni dell’unità sono quindi assegnate automaticamente ai 13 canali successivi (in questo esempio 18 –... -
Page 12: Tabella Canali Dmx (Funzionamento A 13 Canali)
V200SPOT 3.9 Tabella canali DMX (funzionamento a 13 canali) Channel Function in the 13 channel mode DMX value Channel Function in the 13 channel mode DMX value 000-255 Shutter/ Shaking Pan - 16 Bit (fine adjustment) 000-255 Blackout 000-007 Open... -
Page 13: Tabella Canali Dmx (Funzionamento A 8 Canali)
V200SPOT 3.10 Tabella canali DMX (funzionamento a 8 canali) Channel Function in the 8 channel mode DMX value Channel Function in the 8 channel mode DMX value 000-255 Gobo 1 Rotation Tilt 000-255 Stop 000-009 Fast - Slow 010-120 Shutter/ Shaking... -
Page 14: Preimpostazione Dei Valori Correttivi (Modalità Offset)
Per la regolazione fine della posizione della testa mobile nonché della ruota dei colori e della ruota gobo, si possono impostare dei valori correttivi. Se più V200SPOT devono essere comandati in sincronia per mezzo di indirizzi DMX identici, è possibile, p. es., minimizzare le divergenze nell’orientamento del raggio di luce. -
Page 15: Modalità Display Master
3.13 Modalità display master Nel modo display master è possibile, per esempio, verificare senza unità di comando DMX le più importanti funzioni di comando del V200SPOT: 1. Premere il tasto MENU (2) tante volte finché il display indica (master display mode). Da notare: se entro 8 secondi non si aziona alcun tasto, l’unità... -
Page 16: Telecomando Ec800 (Opzionale)
2. L’ingresso DMX (11) non deve essere collegato; il led giallo MASTER (5) dev’essere acceso. 3. All’uscita DMX si possono collegare altri V200SPOT per movimenti sincronizzati con l’unità principale. 4. Con il tasto STAND BY si può attivare e disattivare la funzione blackout. Se la funzione è attivata, il led vicino al tasto è... - Page 17 V200SPOT INTRODUCTION Thank you for purchasing a PROLIGHTS product. The V200SPOT is a single arm moving head projector for the creative lighting of shows and places of entertainment with 150W discharge lamp. INDEX Safety General instructions Warnings and installation precautions...
- Page 18 V200SPOT WARNING! Before carrying out any operations with the unit, carefully read this instruction manual and keep it with cure for future reference. It contains important information about the installation, usage and maintenance of the unit. SAFETY General instructions • The products referred to in this manual conform to the European Community Directives and are therefore marked with .
- Page 19 EC800; - show mode; led flashes slowly; SLAVE: control via another V200SPOT; SOUND: - manual selection of colour and light pattern; shortly lights up when the unit changes the col- led lights up continuously;...
- Page 20 V200SPOT 1.2 Description Single arm projector with extremely compact dimensions and lightweight, the V200SPOT with the elegant and modern design, equipped with 150W discharge lamp with powerful light output. The fast and high precision movements enrich a high versatility projector highlighting it self in any professional applications.
- Page 21 2.3 Mounting The V200SPOT may be set up on a solid and even surface. By means of the fixing facilities of the base plate, the unit can also be mounted upside down to a cross arm. The base plate is shown in fig. 6. For fixing, stable mounting clips are required.
- Page 22 V200SPOT - 3 - FUNCTIONS AND SETTINGS 3.1 Operation Connect the supplied main cable to the main jack first and then to a socket (230V~/50Hz). The pan head and all control motors go to a defined starting position. The display (1) meanwhile indicates .
- Page 23 V200SPOT 3.3 Operation without DMX controller If no DMX control signal is present at the jack DMX INPUT (11), the yellow indicating led MASTER (5) lights up, the display (1) indicates (Show 1) and the unit independently runs through its show programme (provided that the blackout mode is switched off.
- Page 24 V200SPOT 3.6 Connection of the DMX line DMX connection employs standard XLR connectors. Use shielded pair-twisted cables with 120Ω impedance and low capacity. The following diagram shows the connection mode: DMX - INPUT DMX - OUTPUT Spina XLR Presa XLR...
- Page 25 If e. g. on the controller the address 17 is provided for controlling the pan motion of the moving head, adjust the start address 17 on the V200SPOT. Then the other functions of the unit are automatically assigned to the following 13 channels (in this example 18 to 30). As the next possible start address for the following DMX-controlled unit, the address 31 could be used for this example.
- Page 26 V200SPOT 3.9 DMX control (13 channels operation) Channel Function in the 13 channel mode DMX value Channel Function in the 13 channel mode DMX value 000-255 Shutter/ Shaking Pan - 16 Bit (fine adjustment) 000-255 Blackout 000-007 Open 008-015 Tilt...
- Page 27 V200SPOT 3.10 DMX control (8 channels operation) Channel Function in the 8 channel mode DMX value Channel Function in the 8 channel mode DMX value 000-255 Gobo 1 Rotation Tilt 000-255 Stop 000-009 Fast - Slow 010-120 Shutter/ Shaking Stop...
- Page 28 For fine adjustment of the pan head position and the colour and gobo wheels, correction values can be adjusted. For synchronous control of several V200SPOT via the same DMX addresses it is e. g. possible to minimize deviations of the light beam direction.
- Page 29 V200SPOT 3.13 Master display mode In the master display mode e. g. the most important control functions of the V200SPOT can be checked without DMX controller. 1. Press the button MENU (2) so many times until the display shows (master display mode).
- Page 30 V200SPOT 3.17 Remote control EC800 (optional) The remote control EC800 (fig. 2) available as an accessory allows to control different functions: 1. Connect the remote control to the jack REMOTE CONTROL ONLY (10). 2. No DMX signal must be present at the DMX IN. The yellow led MASTER (5) must light up.
- Page 31 Place Stamp Here Affrancare Spett.le Music&Lights s.r.l. Via Appia Km 136.200 04020 Itri (LT) Italy "...
- Page 36 Music & Lights Srl entertainment technologies Via Appia Km 136,200 - 04020 Itri (LT) ITALY ISO 9001:2000 tel. +39 0771 72190 fax +39 0771 721955 Certified Company www.musiclights.it info@musiclights.it...
Need help?
Do you have a question about the V200SPOT and is the answer not in the manual?
Questions and answers