Advertisement
Quick Links
ASSEMBLY INSTRUCTIONS
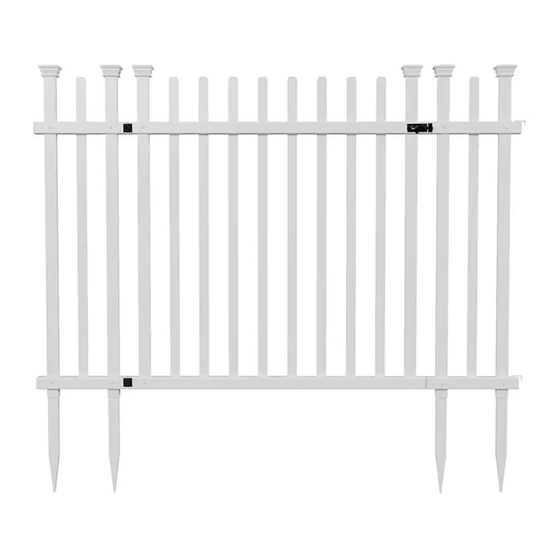
BURBANK
VINYL GATE KIT
(41"H X 591/2"W)
Approximate assembly time
Want to see a video on how to
WWW.ZIPPITY-OUTDOOR.COM
WWW.ZIPPITY-OUTDOOR.COM
60 MIN
assemble this product?
Scan the QR code
ASSEMBLY
INSTRUCTIONS
ZP19071
ZP19071
1
VER. 032422
Advertisement

Summary of Contents for Zippity BURBANK ZP19071
- Page 1 ZP19071 ASSEMBLY INSTRUCTIONS BURBANK ASSEMBLY INSTRUCTIONS VINYL GATE KIT (41”H X 591/2”W) ZP19071 60 MIN Approximate assembly time Want to see a video on how to assemble this product? Scan the QR code WWW.ZIPPITY-OUTDOOR.COM WWW.ZIPPITY-OUTDOOR.COM VER. 032422...
- Page 2 If you experience any further trouble with your product, please contact our customer service department. parts.nychbrands.com support@zippity-outdoor.com 704-892-5222 877-234-6196 Customer service agents are available to take calls weekdays from 9am- 5pm EST. If you call outside of business hours, please leave a voicemail.
- Page 3 ZP19071 ASSEMBLY INSTRUCTIONS 59.7 in 36.7 in 2.4 in WWW.ZIPPITY-OUTDOOR.COM...
- Page 4 ZP19071 ASSEMBLY INSTRUCTIONS LAY OUT MATERIALS STEP 1: STEP 1.1 Check the inside of the larger pieces in your box for other materials packed inside. WWW.ZIPPITY-OUTDOOR.COM...
- Page 5 1½” x 1½” x 36½” 1/16” Drill Bit (1) Wing Bottom Rail (2) Wing Top Rail (2) Post Anchor (4) Rail End Cap (12) 1½” x 1½” x 111/4” 1½” x 1½” x 111/4” 13/8” x 3/4” x 16” (10 pre-installed, 2 loose) WWW.ZIPPITY-OUTDOOR.COM...
- Page 6 Keeping the pre drilled holes aligned, slide the Post Anchors up into the wing posts until the pre drilled holes in the post anchors and bottom of the wing posts align. Drive (2) ¾” white self-tapping stainless steel screws to temporarily secure the post anchors. Align Align WWW.ZIPPITY-OUTDOOR.COM...
- Page 7 Drive (7) total 3/4” white self-tapping stainless steel screws through the pre-drilled holes in the rails. One screw will be left off the top right of the frame for future latch installation. Leave screw off here for latch installation. Align WWW.ZIPPITY-OUTDOOR.COM...
- Page 8 STEP 5: STEP 5.1 Place (2) Hinges against the gate rails and drill two holes per hinge through the pre drilled holes in the hinges. Drive (4) total 1/2” Black Self-Tapping Stainless Steel Screws through the holes in the hinges. WWW.ZIPPITY-OUTDOOR.COM...
- Page 9 36 ¾” apart from rail end cap to rail end cap or 39 ¼” from outside of wing post to outside of wing post. Note: It is recommended to use two people for in-ground installation. 36 3/4” 39 1/4” WWW.ZIPPITY-OUTDOOR.COM...
- Page 10 Add water to soften the soil. Use a block of wood to protect the top of the wing post and gently hammer each wing post into the ground until the bottom wing rails are roughly 1” above the ground. WWW.ZIPPITY-OUTDOOR.COM...
- Page 11 Use a 1¾” diameter auger bit (commonly used for planting tulips) as illustrated ($15-$20 on Amazon.com). Drill a hole about 12” to 16” deep at the desired location, and fill the holes with water as illustrated. Push the wing posts into the holes. WWW.ZIPPITY-OUTDOOR.COM...
- Page 12 Backfill and compact dirt around the base of each wing post to strengthen the unit. STEP 6.5 Push the post caps down over the tops of the wing posts as illustrated. The post caps will lock into place. WWW.ZIPPITY-OUTDOOR.COM...
-
Page 13: Install The Gate
(4) 1/2” black self-drilling stainless steel screws. STEP 7.2 Align the latch catch with the latch body and pre-drill two holes into the wing top rail of the gate wing. Fasten with (2) 1/2” black self-tapping stainless steel screws. WWW.ZIPPITY-OUTDOOR.COM... - Page 14 Drive the 3/4” white self-tapping stainless steel screws and the joiner clips included with your Burbank Fence Kit (ZP19057) to connect the gate wings to the fence panels as shown below. Note: It is not recommended to install this gate without connecting the wings to fence panels. WWW.ZIPPITY-OUTDOOR.COM...
- Page 15 ZP19071 ASSEMBLY INSTRUCTIONS 6935 Reames Rd. Ste. K. Charlotte, NC 28216 support@zippity-outdoor.com 704-892-5222 877-234-6196 WWW.ZIPPITY-OUTDOOR.COM WWW.ZIPPITY-OUTDOOR.COM...


Need help?
Do you have a question about the BURBANK ZP19071 and is the answer not in the manual?
Questions and answers