Advertisement
Quick Links
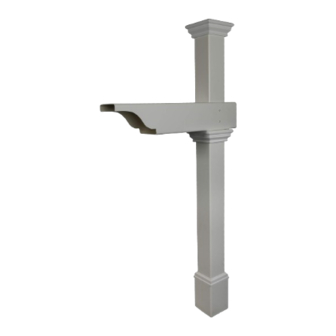
ASSEMBLY INSTRUCTIONS
CLASSICA
VINYL MAILBOX POST
WITH NO-DIG STEEL
PIPE ANCHOR KIT
(56 1/2"H X 19"W)
Approximate assembly time
Want to see a video on how to
assemble this product?
WWW.ZIPPITY-OUTDOOR.COM
WWW.ZIPPITY-OUTDOOR.COM
60 MIN
Scan the QR code
ASSEMBLY
INSTRUCTIONS
ZP19013
*
*
Mailbox and mounting
hardware not included
ZP19013
VER. 011521
1
Advertisement

Related Manuals for Zippity CLASSICA ZP19013


Summary of Contents for Zippity CLASSICA ZP19013
- Page 1 WITH NO-DIG STEEL ZP19013 PIPE ANCHOR KIT (56 1/2”H X 19”W) 60 MIN Approximate assembly time Want to see a video on how to assemble this product? Scan the QR code Mailbox and mounting hardware not included WWW.ZIPPITY-OUTDOOR.COM VER. 011521 WWW.ZIPPITY-OUTDOOR.COM...
- Page 2 If you experience any further trouble with your product, please contact our customer service department. parts.nychbrands.com support@zippity-outdoor.com 704-892-5222 877-234-6196 Customer service agents are available to take calls weekdays from 9am- 5pm EST. If you call outside of business hours, please leave a voicemail.
- Page 3 ZP19013 ASSEMBLY INSTRUCTIONS 26 1/2 in 19 in 5 in 4 in Ground 3 in 1 3/4 in WWW.ZIPPITY-OUTDOOR.COM...
- Page 4 Post Arm (1) 5” x 5” x 25½” 1” Stainless Steel Screw (2) Post Trip Cap (1) Post (1) 4” x 4” x 56” Pipe Anchor (1) Base Molding (1) 1¼” Stainless Steel Screw (5) 1⅝” Diameter x 46¾” WWW.ZIPPITY-OUTDOOR.COM...
- Page 5 STEP 2.3 Slide Post Trim Cap into position under post arm as illustrated. Install a 1 ¼” stainless steel screw as illustrated beneath the post trim cap. This will prevent the post trim cap from sliding down the post. WWW.ZIPPITY-OUTDOOR.COM...
- Page 6 Check that the pipe is level in both directions at about 6” intervals as you pound the pipe into the ground. Usually, after the pipe is about 18” into the ground, the trajectory of the pipe is established, and you cannot straighten it. 10 lb Sledgehammer WWW.ZIPPITY-OUTDOOR.COM...
- Page 7 INSTALL MAILBOX POST OVER PIPE ANCHOR STEP 4: STEP 4.1 Orient post correctly and slide the assembled unit over the pipe anchor and at least 3” into the ground. Slide the base molding down to the ground as illustrated. WWW.ZIPPITY-OUTDOOR.COM...
- Page 8 Install Post Cap (A). Push down on cap to lock to post. ½” Fasten (2) 1” Stainless Steel Screws through the back of the mailbox post as shown. The screws should be at the same height as previously measured in step 3.2. WWW.ZIPPITY-OUTDOOR.COM...
- Page 9 ZP19013 ASSEMBLY INSTRUCTIONS WWW.ZIPPITY-OUTDOOR.COM...
- Page 10 ZP19013 ASSEMBLY INSTRUCTIONS 6935 Reames Rd. Ste. K. Charlotte, NC 28216 support@zippity-outdoor.com 704-892-5222 877-234-6196 WWW.ZIPPITY-OUTDOOR.COM WWW.ZIPPITY-OUTDOOR.COM...
Need help?
Do you have a question about the CLASSICA ZP19013 and is the answer not in the manual?
Questions and answers