Advertisement
Quick Links
ASSEMBLY INSTRUCTIONS
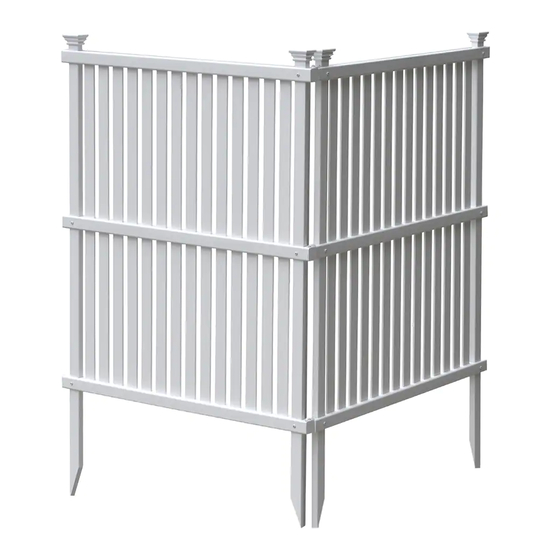
WILMINGTON
PRIVACY SCREEN
(36" W X 45"H)
Approximate assembly time for 2 screens
Want to see a video on how to
assemble this product?
WWW.ZIPPITY-OUTDOOR.COM
WWW.ZIPPITY-OUTDOOR.COM
2-PACK
45 MIN
Scan the QR code
ASSEMBLY
INSTRUCTIONS
ZP19008
ZP19008
1
VER. 071221
Advertisement

Related Manuals for Zippity WILMINGTON ZP19008


Summary of Contents for Zippity WILMINGTON ZP19008
- Page 1 ASSEMBLY INSTRUCTIONS WILMINGTON ASSEMBLY INSTRUCTIONS PRIVACY SCREEN 2-PACK ZP19008 (36” W X 45”H) 45 MIN Approximate assembly time for 2 screens Want to see a video on how to assemble this product? Scan the QR code WWW.ZIPPITY-OUTDOOR.COM WWW.ZIPPITY-OUTDOOR.COM VER. 071221...
- Page 2 If you experience any further trouble with your product, please contact our customer service department. parts.nychbrands.com support@zippity-outdoor.com 704-892-5222 877-234-6196 Customer service agents are available to take calls weekdays from 8am- 5pm EST. If you call outside of business hours, please leave a voicemail.
- Page 3 ZP19008 ASSEMBLY INSTRUCTIONS 36 1/2 in 1 in 45 1/2 in 43 in 2 5/8 in 33 3/8 in WWW.ZIPPITY-OUTDOOR.COM...
- Page 4 Middle Rail (2) Top and Bottom Rail (4) 1½" x 1½" x 36½" 1½" x 1½" x 36½" Post Anchor (4) Rail End Cap (12) (6 1/8" Steel Drill Bit (1) ¾" x 1¼" x 16" installed, 6 loose) WWW.ZIPPITY-OUTDOOR.COM...
- Page 5 (towards the locking tabs). Top of screen STEP 2.3 Align the pre-drilled holes in the posts with the pre-dilled holes in the top and middle rails. Fasten together using (8) ¾" self-drilling stainless steel screws (I). Align holes WWW.ZIPPITY-OUTDOOR.COM...
- Page 6 (4) total holes in posts. Insert each picket into the bottom rail. the post anchor through the pre-drilled holes in the bottom rail. Drive (4) 3/4" self-drilling stainless steel screws into the pre-drilled holes in the bottom rail. WWW.ZIPPITY-OUTDOOR.COM...
- Page 7 Move the screen to its final Attempt to push the unit into the location, and identify the ground as illustrated. All 10" of the location of posts. post anchors should be inserted into the ground, so that they are no longer visible. WWW.ZIPPITY-OUTDOOR.COM...
- Page 8 6” or 7” of the ground with a claw hammer as illustrated. Add water to loosened soil. Use a block of wood to protect the top of post, and gently hammer the post into the ground. Block of wood WWW.ZIPPITY-OUTDOOR.COM...
- Page 9 If your ground is really hard, you may need to dig a hole large enough to accommodate one post from each panel into the same hole - Approximately 8” in diameter and 10” deep. Backfill and compact the dirt. WWW.ZIPPITY-OUTDOOR.COM...
- Page 10 ZP19008 ASSEMBLY INSTRUCTIONS FASTEN JOINER CLIPS STEP 5: STEP 5.1 Fasten screens together with joiner clips using the 1" self-drilling stainless steel screws as illustrated. 45° degree 90° degree application application WWW.ZIPPITY-OUTDOOR.COM...
- Page 11 ZP19008 ASSEMBLY INSTRUCTIONS FASTEN POST CAPS STEP 6: STEP 6.1 Push the post caps down over the posts to lock into place. WWW.ZIPPITY-OUTDOOR.COM...
- Page 12 ZP19008 ASSEMBLY INSTRUCTIONS 6935 Reames Rd. Ste. K. Charlotte, NC 28216 support@zippity-outdoor.com 704-892-5222 877-234-6196 WWW.ZIPPITY-OUTDOOR.COM WWW.ZIPPITY-OUTDOOR.COM...
Need help?
Do you have a question about the WILMINGTON ZP19008 and is the answer not in the manual?
Questions and answers