Table of Contents
Advertisement
Quick Links
Advertisement
Table of Contents

Subscribe to Our Youtube Channel
Related Manuals for DentalEZ Heritage


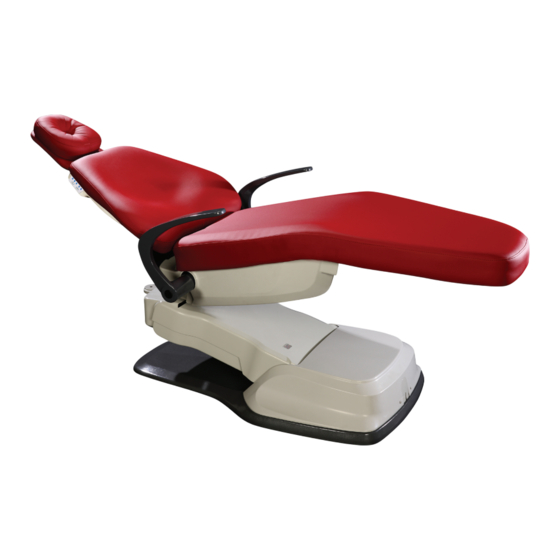
Summary of Contents for DentalEZ Heritage
- Page 1 NUSIMPLICITY CHAIR USER MANUAL...
-
Page 2: Table Of Contents
TABLE OF CONTENTS SECTION I - INTRODUCTION Product Overview ..........................1 Product Features..........................2 Dimensions ............................3 Range of Motion ..........................4 Specifications............................5 Recommended Environmental Conditions ..................5 Classifications ............................. 6 Explanation of Symbols & Signs ......................6 Safety Precautions ..........................7 SECTION II - PREINSTALLATION Packaging ............................ - Page 3 CHAIR SECTION VI - USER SERVICE INFORMATION Service Instruction ..........................33 Disposal of Equipment ........................33 SECTION VII - PARTS LIST Replacement Parts ........................... 34 DENTALEZ Parts Online ........................34 EMC INFORMATION ........................... 35 LIMITED WARRANTY .......................... 37 866-DTE-INFO dentalez.com...
-
Page 4: Section I - Introduction
After the chair is installed, review the features, operation procedures, and care guidelines with the doctor’s staff. LEAVE THIS MANUAL IN THE DOCTOR’S OFFICE. ® Installation by an authorized DENTALEZ dealer service technician is recommended. NOTICE For any questions about an order, please contact a DENTALEZ Equipment customer service representative at 866-DTE-INFO. HEADREST BACK TOUCHPAD ARMREST... -
Page 5: Product Features
Exclusive air glide for ease of movement and repositioning of the chair in the operatory. IV arm board, IV bag stand and body straps for oral surgery. USB port for today’s technology needs. 866-DTE-INFO dentalez.com PN: 2717-256F... -
Page 6: Dimensions
SECTION I - INTRODUCTION DIMENSIONS 72½" TOP RECLINING 8⅝" 18⅛" 27½" 25¼" 9⅞" 26" 22¼" 18⅛" SIDE RECLINING 17½" 19½" 17" 13¾" 42" 12½" SIDE UPRIGHT 64¾" 56¼" 36½" 30½" 26¾" FIGURE 2. DENTAL CHAIR DIMENSIONS... -
Page 7: Range Of Motion
SECTION I - INTRODUCTION NUSIMPLICITY CHAIR RANGE OF MOTION 30° 30° FIGURE 3. DENTAL CHAIR RANGE OF MOTION 866-DTE-INFO dentalez.com PN: 2717-256F... -
Page 8: Specifications
SECTION I - INTRODUCTION SPECIFICATIONS 115V 220V Voltage (AC) 115, 60 Hz, as applicable 220, 50/60 Hz, as applicable Breaker Size (Amps) 15-Amp fused branch circuit F1/F4 - 8A @ 250V Fuses F2 - 1A @ 250V Chair: 425 (193 kg) Shipping (Package) Weight (lbs) Chair/Delivery Unit/Light (typical assembly): 570 (258 kg) Empty Weight (lbs) -
Page 9: Classifications
= Do Not Trash = Box Must Remain Upright = Do Not Place Box on Unlevel Surface = Do Not Stack Box 74ºC = Box Contents Safe Temperature Range (165ºF) -29ºC (-20ºF) = Box Contents Safe Humidity Range 866-DTE-INFO dentalez.com PN: 2717-256F... -
Page 10: Safety Precautions
The plug cannot be located in a position that requires tools to access. Do not modify the chair without permission from DENTALEZ. The use of ACCESSORY equipment not complying with the equivalent safety requirements of this equipment may lead to a reduced level of safety of the resulting system. Consideration relating to the choice shall include: ... - Page 11 Increase the separation between the equipment and receiver. Connect the equipment to an outlet on a circuit different from that to which the receiver is connected. Consult the dealer or an experienced radio/TV technician for help. 866-DTE-INFO dentalez.com PN: 2717-256F...
-
Page 12: Section Ii - Preinstallation
SECTION II - PREINSTALLATION PACKAGING During transportation, the chair must be at its lowest height and all attachments must be WARNING secured in their lowest and most central positions possible. Failure to comply may result in injury and/or damage to equipment. ... - Page 13 Upholstered seat Upholstered armrests Headrest Optional foot control Any ordered options Hardware package UPHOLSTERED BACK ASSEMBLY UPHOLSTERED SEAT CHAIR CONTROLS HEADREST OPTIONS HARDWARE PACKAGE UPHOLSTERED ARMRESTS FIGURE 4. DENTAL CHAIR UPHOLSTERY PACKAGING 866-DTE-INFO dentalez.com PN: 2717-256F...
-
Page 14: Permanent Placement
SECTION II - PREINSTALLATION PERMANENT PLACEMENT To prevent injury as a result of chair tipping, chair must be placed on a smooth, hard and level WARNING floor. DO NOT position the chair any place where it would interfere with unplugging the chair power cord. -
Page 15: Section Iii - Installation
FIGURE 7. ACTUATE AIR REGULATOR TOGGLE SWITCH 5. Check for proper air glide operation. 6. Make sure the doctor and staff receive proper air glide feature operation instructions (see SECTION IV - OPERATION - AIR GLIDE). 866-DTE-INFO dentalez.com PN: 2717-256F... -
Page 16: Left And Right Spring Covers
SECTION III - INSTALLATION LEFT AND RIGHT SPRING COVERS The left and right spring covers are now factory installed. Follow the instructions below if there is a NOTICE need to replace them. TOOLS REQUIRED Phillips-head Screwdriver REPLACING SPRING COVERS Remove the following hardware from the bag of supplies: ... -
Page 17: Wired Touchpad Control
FIGURE 9. AUXILIARY WIRING HARNESS An optional wireless touchpad control can be mounted on the delivery head of the console mounted unit. For additional information, refer to the instructions supplied with the wireless touchpad control package (PN: 2565- 596). 866-DTE-INFO dentalez.com PN: 2717-256F... -
Page 18: Wired Foot Control
SECTION III - INSTALLATION WIRED FOOT CONTROL To prevent any chance of electrical shock, always disconnect power when indicated. WARNING TOOLS REQUIRED Phillips-head Screwdriver CONNECTING FOOT CONTROL 1. Disconnect the chair power. 2. Using a Phillips-head screwdriver and the two 10-32 × 3/8 screws supplied in the kit, attach the bracket to the lower lift arm casting located in the base (FIGURE 10). -
Page 19: Wireless Controls
SWITCH ON/OFF ON/OFF SWITCH SWITCH (SHOWN IN OFF POSITION) FIGURE 12. ON/OFF SWITCH AND PAIRING SWITCH FIGURE 13. ON/OFF SWITCH AND PAIRING SWITCH FOR WIRELESS FOOT CONTROL FOR WIRELESS TOUCHPAD CONTROL (Continued on the next page.) 866-DTE-INFO dentalez.com PN: 2717-256F... - Page 20 SECTION III - INSTALLATION WIRELESS CONTROLS (CONTINUED) (Continued from the previous page.) 5. Hold down remote switch on main chair power control board for a minimum of four (4) seconds (FIGURE 14). LED display on chair cantilever cover will change to “IP” and chair will start beeping (FIGURE 15).
-
Page 21: Upholstery
18). 2. Firmly press each blind grip fastener onto its corresponding stud. 3. Tug on each stud location to ensure the upholstered chair back is secure. 1/4-20 THUMB SCREW SUBSTRATE FIGURE 18. INSTALL 1/4-20 THUMB SCREWS 866-DTE-INFO dentalez.com PN: 2717-256F... -
Page 22: Headrest
SECTION III - INSTALLATION HEADREST DOUBLE ARTICULATING HEADREST STANDARD FIXED HEADREST Slide the blade of the double articulating headrest into the Slide the blade of the standard fixed headrest into the opening of the back casting, making sure the blade aligns opening of the back casting, making sure the blade aligns with the nylon guides inside the chair back (FIGURE... -
Page 23: Installation Checklist
Do all chair functions operate smoothly and quietly? Do the armrests lock into position? Answering NO to any of these questions is the result of improper installation or a product malfunction. After ensuring all connections, call DENTALEZ technical service at 866-DTE-INFO. 866-DTE-INFO dentalez.com PN: 2717-256F... -
Page 24: Delivery Units
SECTION III - INSTALLATION DELIVERY UNITS Install console mounted and post mounted delivery units according to the manufacturer's instructions supplied with the delivery unit. CONSOLE MOUNTED DELIVERY UNIT POST MOUNTED DELIVERY UNIT... -
Page 25: Section Iv - Operation
FIGURE 23. MOVE CHAIR BRAKE HANDLE TO THE RIGHT 2. Swivel the chair to the desired position. 3. Lock the chair brake by moving the brake handle to the left. 866-DTE-INFO dentalez.com PN: 2717-256F... -
Page 26: Armrests
SECTION IV - OPERATION ARMRESTS Both of the chair’s armrests are designed to be lowered, allowing easy patient entry and exit from either side of the chair. The armrests SHOULD NOT be used as a means of support when entering, exiting or leaning CAUTION against the chair. -
Page 27: Standard Headrest
3. Release the mechanism to lock the headrest in place. NOTE: The use of disposable headrest covers is recommended to prevent soiling of the headrest. These covers may be purchased through a local dental supplier. 866-DTE-INFO dentalez.com PN: 2717-256F... -
Page 28: Air Glide (Optional)
SECTION IV - OPERATION AIR GLIDE (OPTIONAL) The optional air glide aids the operator in repositioning the chair. To operate the air glide option: Make sure the chair is on a smooth, hard, level and non-obstructive surface. 2. Activate the air regulator toggle switch on the base cover at the rear section of the chair (FIGURE 27). -
Page 29: Manual Chair Positioning
Select the direction of travel: base up, base down, back up, or back down. 2. Depress and hold the corresponding button to move chair to factory-set travel limit. NOTE: The chair will continue running until the directional button is released. 866-DTE-INFO dentalez.com PN: 2717-256F... -
Page 30: Automatic Chair Positioning
SECTION IV - OPERATION AUTOMATIC CHAIR POSITIONING VIEW ONLINE INSTRUCTIONS Scan QR code for video instructions on chair positioning and travel limits settings. PROGRAMMING AUTO POSITIONS The chair standard controls are capable of executing three auto preset positions, an auto return (exit) mode, and a last position mode. -
Page 31: Programming Chair Travel Limits
= Open in Base Down Safety Circuit 4. Press on the chair mounted touchpad for four (4) seconds. = Base Potentiometer Error 5. A double beep will confirm lower limits have been set correctly. = Back Potentiometer Error 866-DTE-INFO dentalez.com PN: 2717-256F... -
Page 32: Control Hydraulic Valve Speed Adjustment
SECTION IV - OPERATION CONTROL HYDRAULIC VALVE SPEED ADJUSTMENT WEAR SAFETY GLASSES while adjusting the valve. Flow control valves should not be turned out WARNING farther than the top of their heads being even with the valve body surface. Adjustment of the flow control valves beyond the valve body surface may result in oil leakage with uncontrolled motion of the chair and the possibility of a valve being ejected from the valve body. -
Page 33: Section V - Care & Maintenance
2. To remove heavy soil: Dampen a soft, white cloth with lighter fluid (naphtha) and rub the area gently. Using a soft cloth, rinse thoroughly with clean water and pat surface dry. 866-DTE-INFO dentalez.com PN: 2717-256F... - Page 34 SECTION V - CARE & MAINTENANCE CLEANING (CONTINUED) 3. To remove stains using bleach: Prepare a solution comprised of one (1) part household bleach (sodium hypochlorite) and nine (9) parts water. Apply the bleach solution to the stain using a dampened, soft, white cloth. ...
-
Page 35: Disinfecting
CaviCide is recommended for disinfecting all other surfaces of the chair. The use of any disinfectant other than CaviCide may cause premature staining, discoloration or damage to the chair’s materials. CaviCide is a trademark of Metrex Research, LLC. 866-DTE-INFO dentalez.com PN: 2717-256F... -
Page 36: Section Vi - User Service Information
SECTION VI - USER SERVICE INFORMATION SERVICE INSTRUCTION DISPOSAL OF EQUIPMENT If the area of concern is not addressed in this manual, DISPOSAL AND DECOMMISSIONING OF contact DENTALEZ customer service at 866-DTE-INFO. DENTALEZ PRODUCTS (See LIMITED WARRANTY.) NOTE: All local regulatory requirements for disposal Please have the following product information available. -
Page 37: Section Vii - Parts List
Arm Assembly (Left) 3802-463 Arm w/Holes for Pad, LH 3802-499 Brake Handle 3802-465 Air Glide Caster 3801-680 DENTALEZ PARTS ONLINE Air Glide Regulator 3801-791 Air Glide Toggle Switch 3801-792 To view parts online, visit Rear Spring Mount Upgrade Kit 3658-475 DENTALEZPARTS.COM... -
Page 38: Emc Information
EMC INFORMATION Use only replacement cable listed in SECTION VII - PARTS LIST. Other cables and accessories WARNING may negatively affect EMC performance. When the chair is used adjacent to other equipment, observe the chair to verify normal operation. - Page 39 NOTE 1: At 80 MHz and 800 MHz, the separation distance for the higher frequency range applies. NOTE 2: These guidelines may not apply in all situations. Electromagnetic propagation is affected by absorption and reflection from structures, objects and people. 866-DTE-INFO dentalez.com PN: 2717-256F...
-
Page 40: Limited Warranty
We are not responsible for shipping damages. We will, however, help you file a claim with the freight carrier. Written repair estimates are available. DENTALEZ warrants all equipment and parts to be free of defects in material and workmanship, under normal usage under the following terms:... - Page 41 DENTALEZ Alabama, Inc. 2500 Highway 31 South Bay Minette, AL 36507 T: 866-DTE-INFO DENTALEZ.COM © 2021 DENTALEZ, Inc. DENTALEZ is a registered trademark. PN: 2717-221D July, 2021 Printed in USA...
Need help?
Do you have a question about the Heritage and is the answer not in the manual?
Questions and answers