Advertisement
Quick Links
Advertisement

Subscribe to Our Youtube Channel
Related Manuals for DentalEZ RAMVAC Utility


Summary of Contents for DentalEZ RAMVAC Utility
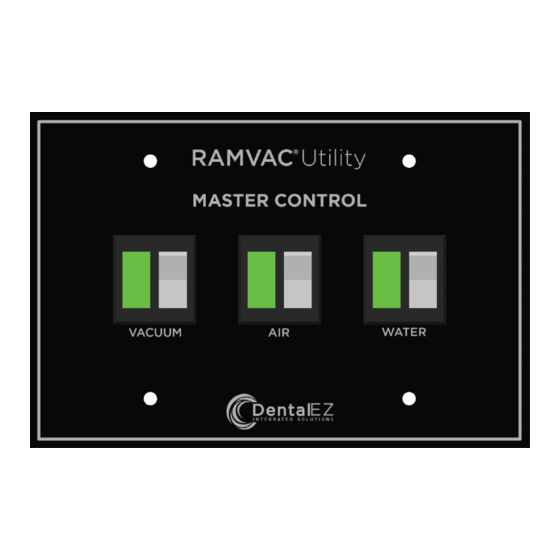
- Page 1 Master Control Panel User Manual...
-
Page 2: Table Of Contents
MP - 100 / 300 ........................7 MP - 400 ..........................8 MP - 700 ..........................9 MP - 900 ..........................10 MP - 1000 ..........................11 MP - 1100..........................12 MP - 2000 ..........................13 MP - 2200 ..........................14 Limited Warranty .......................15 www.DentalEZ.com www.DentalEZ.com 866-DTE-INFO (opt 4) -
Page 3: Main Control Box
16 AWG CV-102 18 AWG 16 AWG MC-201 18 AWG 16 AWG MC-202 18 AWG 16 AWG Air Compressor 18 AWG 16 AWG MWCV Solenoid Valve 18 AWG 16 AWG MWCV Transformer 18 AWG 16 AWG www.DentalEZ.com www.DentalEZ.com 866-DTE-INFO (opt 4) -
Page 4: Relay Box Connection (Single/Dual Vacuum Pump)
7. Reinstall the relay box cover and tighten the top and bottom retainer screws. 8. Run and connect the low-voltage wires to the main control panel mounting box according to the applicable wiring schematic in Section II, Wiring Schematics. www.DentalEZ.com www.DentalEZ.com 866-DTE-INFO (opt 4) -
Page 5: Vacuum Pump Relay Box Wiring Schematic
Vacuum Pump Relay Box Wiring Schematic MOTOR BLUE BLACK GREEN & YELLOW BLACK BROWN WHITE BLUE BLACK BROWN L2/N YELLOW GREEN & YELLOW LIGHT BLUE BROWN BLACK PURPLE BROWN & WHITE PN: 64529265_E October, 2017 www.DentalEZ.com www.DentalEZ.com 866-DTE-INFO (opt 4) -
Page 6: Master Water Control Valve Connection
OFF position, simply reverse the wires 5. Connect the two low-voltage wires from the numbered 2 and 3 on the switch. The light transformer according to the applicable master should then operate correctly. control panel wiring schematic in Section II. www.DentalEZ.com www.DentalEZ.com 866-DTE-INFO (opt 4) -
Page 7: Air Compressor Remote Connections
MP - 2200A 64568175 Connect to an S1 Electrols as follows: Terminal #4 - connect to S1 terminal "G" VAC Switch Terminal #3 - connect to S1 terminal "H" Terminal #2 - connect to S1 terminal "F" www.DentalEZ.com www.DentalEZ.com 866-DTE-INFO (opt 4) -
Page 8: Section Ii Wiring Schematics
MP - 100 / 300 One Switch, Single Vacuum Brown Vacuum Pump Relay Box Yellow Black L2 T2 L1 T1 Load (To Vacuum Pump) Line Voltage (To Source) Wall-Mounted Switches Shown from Vacuum Back of Switch Plate Junction Box www.DentalEZ.com www.DentalEZ.com 866-DTE-INFO (opt 4) - Page 9 Yellow Yellow uum pumps on. To wire pumps so that either Black Black switch will turn the vacuum pumps off, use the circuit shown in the diagram to the left. Vacuum Pump Relay Box www.DentalEZ.com www.DentalEZ.com 866-DTE-INFO (opt 4)
- Page 10 One Switch, Air Compressor Brown Compressor Relay Box Yellow Black Black L2 T2 L1 T1 Load (To Air Compressor) Line Voltage (To Source) Wall-Mounted Switches Shown from Air Compressor Back of Switch Plate Junction Box www.DentalEZ.com www.DentalEZ.com 866-DTE-INFO (opt 4)
- Page 11 Master Control Panel User Manual Section II Wiring Schematics MP - 900 Three Switch, (Dynamic Dry) Single Vacuum, Air Compressor, Water www.DentalEZ.com www.DentalEZ.com 866-DTE-INFO (opt 4)
- Page 12 Section II Wiring Schematics MP - 1000 Three Switch, Single Vacuum, Air Compressor, Water www.DentalEZ.com www.DentalEZ.com 866-DTE-INFO (opt 4)
- Page 13 Master Control Panel User Manual Section II Wiring Schematics MP - 1100 Four Switch, Dual Vacuum, Air Compressor, Water www.DentalEZ.com www.DentalEZ.com 866-DTE-INFO (opt 4)
- Page 14 Section II Wiring Schematics MP - 2000 Two Switch, Single Vacuum, Air Compressor www.DentalEZ.com www.DentalEZ.com 866-DTE-INFO (opt 4)
- Page 15 Master Control Panel User Manual Section II Wiring Schematics MP - 2200 Three Switch, Dual Vacuum, Air Compressor www.DentalEZ.com www.DentalEZ.com 866-DTE-INFO (opt 4)
-
Page 16: Limited Warranty
Limited Warranty Master Control Panel DentalEZ and its employees are proud of the products we provide to the dental community. We stand behind these products with a warranty against defects in material and workmanship as provided below. In the event that you experience difficulty with the application or operation of any of our products, please contact our technical service department at our expense at (866)DTE-INFO. - Page 17 212 North Main Street Spearfish, SD 57783 866-DTE-INFO (opt 4) www.dentalez.com © DentalEZ® Alabama, Inc. Printed in USA PN: 64710071D January, 2018...
Need help?
Do you have a question about the RAMVAC Utility and is the answer not in the manual?
Questions and answers