Table of Contents
Advertisement
Quick Links
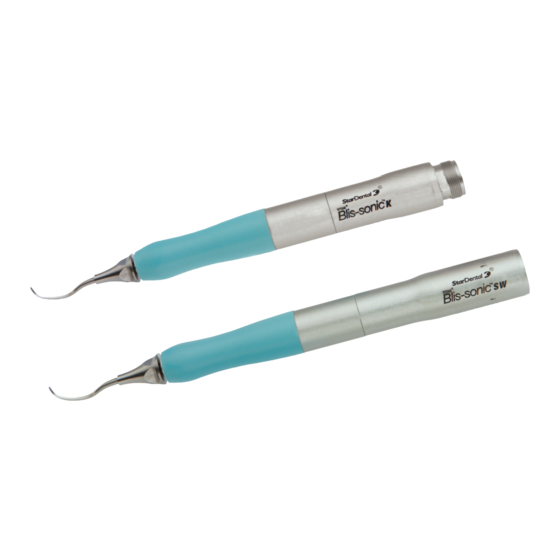
Blis-sonic
Scaler
™
Instruction Manual
Division of DentalEZ® Group
Lancaster, PA 17601 U.S.A.
Printed in the U.S.A.
2010 DentalEZ, Inc.
©
DentalEZ Dental Products (GB) Ltd.,
Cleveland Way,
Hemel Hempstead, Hertfordshire
HP2 7DY, ENGLAND
Caution: Federal law restricts this device to sale by or on the order of a dentist.
866.DTE.INFO (383.4636)
0344
www.DentalEZ.com
M A K E S
Y O U R
P R A C T I C E
DO NOT USE FOR ORAL SURGERY
Contents
Blis-sonic
SW and K Ergonomic Sonic Scalers – read all instructions carefully before using scaler.
™
• Specifications
• Cleaning
• Blis-sonic SW & Blis-sonic K Installation
• Lubricating
• Air Pressure and Water Flow Adjustments
• Sterilization
• Tip Installation
• Troubleshooting
• Tip Operation
• O-Rings & Rear Seal Replacement
Specifications (Nominal)
Blis-sonic K 2/3-Line: StarDental
®
Part #264564
®
Blis-sonic K 4-Line: StarDental
Part #264565
Air Pressure: 40 psi (2.7 atmospheres)
at the scaler
Air Flow: 1.5 SCFM (42.0 SLM)
Water Flow: 25 cc/min. @ 15 psi
Length (with tip): 6.7 inches (17.0 cm)
Length (with tip): 6.8 inches (17.3 cm)
Weight: 1.8 ounces (50.7 grams)
135°C
Sterilizable up to 135°C
Blis-sonic SW & K Installation
Note: Use softened and deionized water. Be sure filters operate efficiently. Before installing scaler, thoroughly purge both the dental
unit air line and water line. Verify recommended filtration of 10 microns air and 25 microns water.
CAUTION: If delivery unit has oil/mist lubrication, detach and drain.
Blis-sonic SW Scaler
Push the Blis-sonic SW
scaler onto swivel until it
snaps into place.
Blis-sonic K Scaler (4-line)
Connect the Blis-sonic K
by threading to the tubing
coupler.
The Blis-sonic SW requires a separate installation of either a 2/3-line
swivel, StarDental Part #261550, or a 4-line swivel, StarDental Part #261547,
depending on the handpiece tubing configuration.
1. Grasp the swivel in front of the bearing assembly between the thumb and
index finger as shown.
2. Slide tubing coupler back until the end of the ISO connector is exposed. Hold
in hand as shown with fingers securing the tubing.
3. Align and insert swivel tubes into the ISO connector holes.
4. While applying slight pressure to hold fittings in the connector holes, slide coupler forward and engage threads. Continue threading
clockwise until hand tight against the swivel.
Wrench
5. Using the universal wrench, StarDental Part #203048, hold the
swivel stationary while tightening the tubing coupler until snug.
Be sure to turn tubing coupler, not swivel. Do not overtighten.
6. Snap scaler onto swivel.
®
Note: To disconnect scaler from swivel, grasp
scaler firmly with one hand and pull tubing
coupler with the other. Do not pull on tubing.
Swivel remains with tubing as shown.
Note: The swivel tubing connection joint may loosen over time, resulting in water leaks and/or loss of power. Check for tightness
periodically.
Air Pressure and Water Flow Adjustments
1. Thread the selected tip. With the scaler operating, rotate tip a 1/4 turn with fingers.
CAUTION: To prevent damage to the scaler, do not tighten tips with the universal wrench. Use the wrench only to remove tips
as shown in Tip Installation.
2. Mount 4/6-line pressure gauge, StarDental Part #262591, between the scaler and the air supply tubing for the
Blis-sonic K Ergonomic Scaler. Mount the pressure gauge between the swivel and air supply tubing for the
Blis-sonic SW Ergonomic Scaler. Snap scaler onto swivel.
3. Turn water OFF.
4. Fully depress foot control. Adjust air supply on
delivery unit until gauge shows 40 psi, 2.72 kg/cm
NOTE: Do not exceed 40 psi. Patient sensitivity and tooth damage may result.
5. After adjustment, uncouple the pressure gauge and install scaler directly to the tubing.
6. With scaler running and tip held vertically, adjust water flow until water atomizes at tip. When water
P E R F E C T ®
atomizes, the water flow needed is optimized (see illustration above).
Tip Installation
Note: Do not sharpen or alter tips in any way.
1. Thread the selected tip onto the scaler with the scaler operating until it stops turning.
Rotate slightly with fingers until tight.
• Rotor & Seal Rings Replacement
• Blis-sonic K Muffler Replacement
CAUTION: To prevent damage to the scaler, do not tighten tips with the universal wrench.
• Blis-sonic K Water Tube Gasket Replacement
Use the universal wrench ONLY to remove tips. Use the wrench as illustrated.
• Replacement Part Numbers
2. When the procedure is complete and the scaler is no longer in use, remove the tip and
• Warranty
blow compressed air through the tip to remove water trapped inside the tip. Cap it with
the cover provided, StarDental Part #261358. This practice prevents injury to patient or
staff.
3. To change tips, always loosen or tighten with the scaler running. The vibration makes
changing tips easier.
Blis-sonic SW: StarDental
®
Part #264563
Air Pressure: 40 psi (2.7 atmospheres)
at the scaler
Tip Operation
Air Flow: 1.5 SCFM (42.0 SLM)
Water Flow: 25 cc/min. @ 15 psi
Weight: 1.9 ounces (54.6 grams)
Remember:
1) Use the last 1/16" of tip
2) Use the edges of the tip, not the flats
3) Keep the tip moving in either of two
motions as shown.
Operation of the Blis-sonic SW and K Ergonomic Sonic Scaler Tip is similar to that of an ultrasonic scaler. Follow these steps to
minimize the risk of damage to restorations.
1. Always scale with tip at an angle to the restoration margin.
Tubing Coupler
Swivel
2. Use a "feather touch," one to two ounces applied pressure.
3. Move tip in a crosshatching, circular or wave fashion (see illustration).
WARNING: ALWAYS USE WATER.
Note: Normal use results in tip wear. Replace tips annually. Use the tip lengths indicated to determine more frequent replacement.
Replace if shorter by .02" (1/2 mm) or more.
Tubing Coupler
4-line Tubing connector
Use tips for subgingival scaling and fine access. Select a tip according to the following applications.
Universal - StarDental Part #261668
• Use for all surfaces, medium and heavy calculus
ISO Connector
Swivel
Tubing
Coupler
Sickle - StarDental Part #261667
• Recommended for sensitive patients
Bearing
Assembly
• Less energetic than the Universal Tip
Tubing
• Less suitable for deep root scaling
Turn tubing coupler
Tubing
Perio - StarDental Part #261669
while holding
Coupler
Perio Left - StarDental Part #263397
swivel in place
Perio Right- StarDental Part #263398
• Recommended for lingual supragingival scaling of
mandibular incisors and deep local pockets
• Provides the same energy as the Universal Tip
• Use to break up heavy calculus deposits
Swivel
Tubing Coupler
Scaler
Tubing
Pressure Gauge
2
.
Cover
Star Dental
R
1/16" (1.5 mm)
Flats are
Edges of
Effective
Not
Tip are
Effective
Effective
Edge
Ineffective
Portion
Ineffective Motions
Effective Scaling Motions
.950 in.
24 mm.
.970 in.
24.6 mm.
PERIO LEFT
PERIO RIGHT
PERIO
.930 in. (23.6 mm.)
CLEANING The Tips
WEEKLY - Blow compressed air through the tip to remove water trapped inside the tip.
Next, clean outside of tip with toothbrush and isopropyl alcohol. Then run cleaning wire,
StarDental Part #256719, through entire tip starting at opening in front.
CLEANING Blis-sonic SW or K Water Tube
On a regular basis or if a water tube blockage occurs, remove the
tip (and on the Blis-sonic SW also disconnect from swivel). Push
the cleaning wire through the internal water tube using needle nose
pliers at the front on both the Blis-sonic SW and K as shown. Push
small lengths of 3 to 4 mm at a time until the wire emerges at the
opposite end. Pull wire completely out.
CLEANING the Swivel
Note: To insure peak performance and proper functioning of scaler, clean swivel and mating
components daily or as needed. Do not attempt to disassemble swivel.
1. Disconnect swivel from scaler and tubing. Depress foot control; verify that water exits
tubing.
2. Connect swivel to tubing. Depress foot control; if almost no water exits front of swivel,
clean as follows.
3. Detach swivel from tubing and find water tube
4. Insert cleaning wire, StarDental Part #256719, into water tube. When the
wire will not insert, move wire back and forth to loosen debris at blockage.
5. Remove wire and apply a blast of air into water tube with syringe air.
CLEANING Mating Parts of the Swivel
To optimize operation of the swivel, disconnect
Bearing/Spring Assembly
mechanism and swab all internal surfaces of scaler
Internal Surfaces
with a cotton swab soaked in isopropyl alcohol until
clean. Dry using syringe air.
Clean area in the bearing/spring assembly at rear of
Clean
swivel using isopropyl alcohol and a toothbrush. Dry
using syringe air.
Lubricating
LUBRICATING Blis-sonic SW and Blis-sonic K
Always lubricate scaler prior to each autoclave sterilization with DentaLube
®
CAUTION: Use of lubricant other than StarDental "DentaLube for Titan Sonic Scaler" can result in failure of the scaler.
1. To remove Blis-sonic K Scaler from tubing: Unthread from the tubing coupler. Disconnect
the Blis-sonic SW from the swivel by grasping the scaler with one hand, pull coupler with
other hand. Do not pull on the tubing. When separated, the swivel remains with the
tubing coupler.
2. Find drive air on Blis-sonic K or notched hole inside of Blis-sonic SW (see illustration).
3. Insert lubricator tip firmly into nozzle. Spray a short burst of DentaLube for Sonic
Scalers into the Blis-sonic K drive air tube or in a notched hole of the Blis-sonic SW.
4. Thread tubing coupler onto the Blis-sonic K or snap Blis-sonic SW onto swivel; attach
tip.
Note: Never run scaler without the tip in place.
5. Run scaler for 20 seconds to circulate lubricant; remove the tip.
6. Steam sterilize, see Sterilization.
Sterilization
The scaler, tip, grip and wrench must be cleaned and sterilized between patient use.
1. Wear puncture resistant gloves to prepare scaler for sterilization.
2. After each patient, flush air and water by running scaler.
3. Remove tip from scaler.
4. Lube scaler as described in Lubricating.
5. Attach Blis-sonic K to tubing by turning coupler clockwise. Attach Blis-sonic SW by snapping onto swivel.
6. Attach tip to scaler. Never run scaler without tip in place.
7. Run scaler 20 seconds to expel excess lube; remove tip, clean tip per instructions in Cleaning.
8. Detach scaler by reversing Step 5.
9. Clean all external surfaces using a small toothbrush with isopropyl alcohol.
10. Dry thoroughly.
11. Place scaler, tip, grip* and wrench in a sterilization bag; use paper or paper/plastic bags only. Follow the sterilization guidelines
as stated by the manufacturer of your sterilizer.
12. Remove scaler, tip, grip* and wrench from sterilizer after drying cycle ends and allow to cool in bag.
*
Replaceable rubber grip can be autoclaved while attached to the nosecone OR by removing from the nosecone.
NOTE: By removing the rubber grip and wiping the nosecone with gauze and isopropyl alcohol, the operator will be able to
replace with another grip (new or autoclaved) and continue use.
The scaler, tip, grip and wrench must be cleaned and sterilized between patient use.
A wrapped scaler, tip, grip and/or wrench should be steam sterilized at 132° C for a minimum of 10 minutes or at 121° C for a minimum
of 50 minutes. Do not exceed 135° C.
An unwrapped scaler, tip, grip and/or wrench should be steam sterilized at 132° C for a minimum of 8 minutes or at 121° C for a minimum
of 30 minutes. Do not exceed 135° C.
Note: An unwrapped scaler, tip, grip and/or wrench needs to be used immediately or sterility is not maintained.
Do not exceed the sterilizer manufacturer's guidelines for load capacity. Use only paper or paper/plastic bags. Always use complete
dry cycle of sterilizer. Always allow product to cool in bag to room temperature prior to using. Contact your sterilizer manufacturer
if moisture remains inside bag and on product after drying.
CAUTION: Use steam sterilization exclusively for complete sterility. Never dry heat sterilize, ultrasonically clean, expose to
chemical disinfection or cold sterilization by:
•Immersion techniques
•Surface wipes, hand soaps or detergents
•Surface spray
•Handpiece pouches that contain disinfectants.
Opening
Cleaning Wire
Blis-sonic SW
Front
Blis-sonic K
Water Tube
Insert Wire
for Sonic Scalers, StarDental Part #261818.
Blis-sonic SW
Notched
Blis-sonic K
Hole
Drive Air
Drive Air
Notched Hole
Advertisement
Table of Contents

Related Manuals for DentalEZ StarDental Blis-sonic K


Summary of Contents for DentalEZ StarDental Blis-sonic K
- Page 1 Note: To insure peak performance and proper functioning of scaler, clean swivel and mating Blis-sonic K Ergonomic Scaler. Mount the pressure gauge between the swivel and air supply tubing for the DentalEZ Dental Products (GB) Ltd., components daily or as needed. Do not attempt to disassemble swivel.
- Page 2 9. If power is inadequate after replacing rotor, reverse the rotor on the shaft as shown. Cause: Rear seal leaks Anyone wishing to return any DentalEZ Group product to a DentalEZ facility MUST obtain the proper RETURN AUTHORIZATION NUMBER from Correction: Tighten tubing coupling. If leak persists, refer to O-Rings & Rear Seal Replacement.
Need help?
Do you have a question about the StarDental Blis-sonic K and is the answer not in the manual?
Questions and answers