Advertisement
Quick Links
NOTICE: Please check contents of package for any damage and make sure all parts fit
correctly and you are happy with the product before removing protective film. Once the
film is removed you cannot return the product for a full refund.
1. Be sure to read these instructions thoroughly before opening and installing the Kawasaki
Teryx 4 Aero-Vent Lexan Windshield.
2. Check over the parts included in the cartons with the parts list shown below:
17/8" Loom Clamps
1" Stainless Steels Bolts
Stainless Steel Washers
Plastic Thumb Nuts
Lock Nuts
Slide Fasteners
Rubber Gasket
Lexan Brace
Lexan Vent Sliders
Lexan Windshield
3. Before beginning installation, please test fit the windshield on your vehicle. Once
the protective film is removed you can no longer return for a refund.
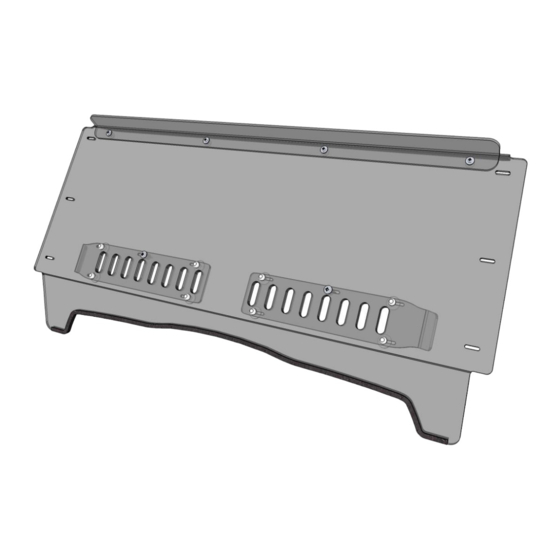
4. Start by pulling it out of the box and find a clean area to lay it down and install the
hardware. Begin by peeling off the protective film. Next take the piece of rubber gasket
and starting at one end firmly place across the bottom of the windshield. You may need
to trim off excess gasket. The diagram below show where to install the gasket.
2515 Bypass Rd. Flemingsburg, KY 41041
606-845-7439
Instructions for Installation and Care of
Kawasaki Teryx 4
Aero-Vent Lexan Windshield
KAW-TERYX4-WD05
6 each
12 each
16 each
8 each
4 each
8 each
1 each
1 each
2 each
1 each
Advertisement

Summary of Contents for FALCON RIDGE KAW-TERYX4-WD05
- Page 1 Instructions for Installation and Care of Kawasaki Teryx 4 Aero-Vent Lexan Windshield KAW-TERYX4-WD05 NOTICE: Please check contents of package for any damage and make sure all parts fit correctly and you are happy with the product before removing protective film. Once the film is removed you cannot return the product for a full refund.
- Page 2 5. Next install the sliding vent panel on the inside of the windshield as shown in the diagram below. To install slide fasteners push through holes with thumbs until it is completely through the hole in the windshield and locked in place.
- Page 3 6. Now the Windshield is ready to be installed. With the help of a friend, place the Windshield on the Teryx 4, setting it up onto the hood. 7. Take the remaining hardware and install the windshield to the roll cage as shown in the diagram below.
- Page 4 8. Now you can install the top brace if you want. If you do not have a Falcon Ridge Cab enclosure to work with this windshield, the top brace is not needed but can be installed for extra strength. Below is a diagram showing how the brace is to be installed.
- Page 5 10. Now you are ready to take it out and enjoy. To clean the windshield, always clean using a liquid of some sort to decrease the chance of scratches. We recommend using micro fiber cloths that are readily available at any dollar store. Any window cleaner will work fine;...


