
Related Manuals for ZKTeco F18I


Summary of Contents for ZKTeco F18I
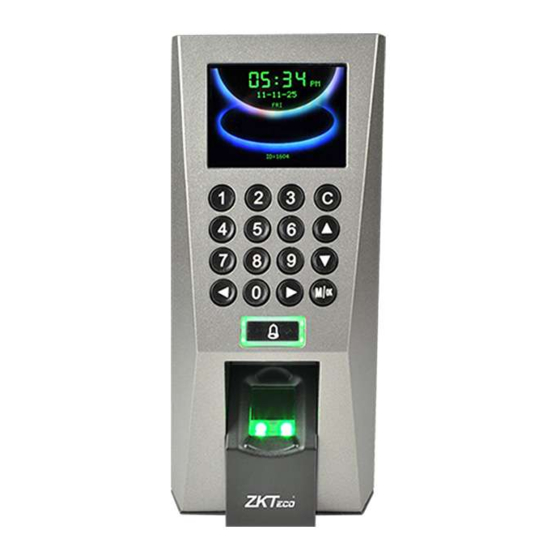
- Page 1 F18 User Manual Version: 1.3 Date: June 15, 2013 Introduction: This document mainly introduces interface and operation of 2.4 Inches color products.
- Page 2 About this manual “ ”Means optional functions, not all devices have this function. There is a slight difference between the photo and the real product. The later prevails. Key functions of various models are different. Please read the key board instruction in appendix firstly.
-
Page 3: Table Of Contents
Contents Contents 1. Operating Instruction ................- 1 - 1.1 Abbreviated Operating Procedures ........- 1 - 1.2 Introduction to Fingerprint Recognition technology .... - 2 - 1.3 About Verification Mode ............- 3 - 1.4 Connection with PC ............- 11 - 1.5 Main menu ................ - Page 4 Contents 2.4.7 Anti-passback Setting★ .......... - 43 - 2.4.8 RS485 Reader Function★ ........- 46 - 3.1 Network option ..............- 47 - 3.2 Serial port option★ ............- 48 - 3.3 Security ................- 49 - 3.4 Wiegand option★ ............... - 50 - 3.4.1 Input configuration ..........
- Page 5 Contents 7.3 Keyboard test ..............- 70 - 7.4 Sensor test ................- 70 - 7.5 Real-time clock ..............- 70 - 8. Query Record ..................- 71 - 9. System Information ................- 74 - 9.1 Record capacity ..............- 74 - 9.2 Device information .............
-
Page 6: Operating Instruction
1. Operating Instruction 1. Operating Instruction 1.1 Abbreviated Operating Procedures Step 1: Install the device and power it up. Step 2: Enroll users by registering his/her fingerprints, passwords or card. Assign users’ security privileges directly on the device. Step 3: After enrolling users, verify that his/her enrolled fingerprint, passwords or card is valid. -
Page 7: Introduction To Fingerprint Recognition Technology
2.4 inch color screen series User Manual 1.2 Introduction to Fingerprint Recognition technology Enroll fingerprint by pressing index finger, middle finger or ring finger . Proper press: Make finger center pressed on the sensor window Improper press: Upright Too lean Slant Too downward Please adopt the correct way to place the finger to avoid improper... -
Page 8: About Verification Mode
1. Operating Instruction 1.3 About Verification Mode When the device is on initial interface, only after successful fingerprint or password or Card verification, user can save attendance record on the device. Initial Interface (As shown below): Notice: 1) If the device have ID module, so Interface of Matrix and Magic style can be displayed "Press fingerprint or punch card". - Page 9 2.4 inch color screen series User Manual Fingerprint Matching (1) 1:N fingerprint matching Verify the fingerprint pressed on the sensor at present with all fingerprint data in the fingerprint reader. Step 1: Press fingerprint properly on the sensor on initial interface. Step 2: If device says ‘Thank you”, the verification is completed.
- Page 10 1. Operating Instruction Return Step 1 for the second operation. (2) 1:1 fingerprint match(User ID+fingerprint) Verify the fingerprint pressed on the sensor at present with the fingerprint related with user number. Use this method when it is difficult to identify user’s fingerprint. Step 1: Input User ID of employee to be verified on initial interface.
- Page 11 2.4 inch color screen series User Manual Step 2: Press fingerprint properly on the sensor. Step 3: If device says ‘Thank you”, the verification is completed. Notice: If device says “Please press again”, return Step 2 for the second operation. - 6 -...
- Page 12 1. Operating Instruction If device says “Error ID”, that means you input ID number is wrong, please return Step 1 for the second operation. Password Matching Step 1: Input User ID of employee to be verified on initial interface. Then press OK.
- Page 13 2.4 inch color screen series User Manual Step3: Input password when the interface appears. Step 4: If device says ‘Thank you”, the verification is completed. - 8 -...
- Page 14 1. Operating Instruction When the screen displayed "password error" and "Input password again" as shown below: - 9 -...
- Page 15 2.4 inch color screen series User Manual Please return Step 3 input password again for the second operation. Ranges of the input password time is 0~9. Employee can set default time what you want. For details please refer to 4.4 Display Setting.
-
Page 16: Connection With Pc
1. Operating Instruction Step 3: If the card has not registered yet, prompt that card is not registered. 1.4 Connection with PC The device only records attendance time. The statement can be disposed by software on PC. Therefore, it is necessary for device to connect PC to download attendance record to attendance software. - Page 17 2.4 inch color screen series User Manual Subnet mask: Default subnet mask as 255.255.255.0. You can modify it if it is necessary. Gateway address: Default gateway address0.0.0.0. You can modify it if it is necessary. Network speed: There are three options: ATUO, 10M, and 100M. Connection password: Set it in “Menu-Communication option-...
-
Page 18: Main Menu
1. Operating Instruction is set, input corresponding numerical value on connection interface of PC software. Set device: Enter Menu-Communication option to set the following items: Device ID: Set it in “Security”. It can be set from 1-254. USB: Set it in “RS232/485”.Select “Yes” for USB communication. Communication password: Set it in “Security”. - Page 19 2.4 inch color screen series User Manual Communication: Set up communication parameters between the equipment and the PC, including IP address, gateway, subnet mask, baud rate, device number, communications password etc. System: Manage the data and set the system parameters, including basic parameters, interface parameters, fingerprint and attendance parameters, to maximize meet user’s needs in the functional, display and other areas.
-
Page 20: User Management
2. User Management 2. User Management The user’s basic information on the device includes fingerprint, password and management access. In company’s attendance management, for employee’s change, the information on the device also needs modification. Therefore, operations including “add, delete, check, modify and so on” can be done on the device. 2.1 Add user Firstly, enroll employee’s fingerprint or password in the device. - Page 21 2.4 inch color screen series User Manual Notice: Only some models have name and card options. ID.NO: Staff's attendance number. FP (Fingerprint): enroll employee’s fingerprint. Ten fingerprints can be enrolled at most. The employee with fingerprint enrolled can use fingerprint to record attendance.
- Page 22 2. User Management is unable to entry the menu until the manager status is confirmed, after the success can entry the menu: For example: the following is the flow for add user. Input User ID 1) Allocate User ID by default. 2) Press “...
- Page 23 2.4 inch color screen series User Manual Input password (1~8) according to device’s prompt, and press OK to verify it. Then press OK save it or press ESC to exit without saving it. After saving, display will be on the device, which means the password has been set.
-
Page 24: Manage User
2. User Management Scroll the▲/▼ key and local cursor on the "Privilege" option box, scroll key to choose privilege. Save/exit user registration To confirm the registration information is correct, after getting confirmation, save it. The way for saving: 1) Scroll ▲/▼key to locate cursor on the "completes ( )"button, please press "OK"... -
Page 25: Search User
2.4 inch color screen series User Manual Notice:1) means this employee is the administrator. means password has been enrolled. means ID Card has been enrolled. 2) The picture may be different from your device. The real product prevails. Press menu on the above interface, and the operating menu will pop out: Press ▲/▼... -
Page 26: Query Attendance Record
2. User Management device has provided “User ID” to search the employee. Press menu on manage user interface to get operating menu. Select “Search user” or press any numeric key to enter the following page: Input User ID of employee to be queried. Press OK, after successful query, the blue cursor will point to the employee. -
Page 27: Edit User
2.4 inch color screen series User Manual Notice: The picture may be different from your device. The real product prevails. Press ▲/▼ to read attendance record. Press OK/menu to query detailed information. Then press “ESC” to return to manage user interface. 2.2.3 Edit user Edit user information saved in the device. -
Page 28: Delete User
2. User Management Use ▲/▼ or query user on manage user interface to select employee to be edited. Then press menu to select “edit” or press shortcut to verify it, and all enrolled information can be displayed on the device: ... -
Page 29: Add User
2.4 inch color screen series User Manual 1) When employee’s fingerprint or password is not needed any more. 2) When employee leaves the position. Press ▲/▼ on manage user interface or use query user to select the employee to be edited. Click menu to get operating menu, and then select “delete user”. -
Page 30: Card Management
2. User Management 2.3 Card management ★ Support Mifare non-touch intelligent card with working frequency of 125KHz. Integrate fingerprint attendance to other systems and support multi-verification mode to meet the demands of different people. Operation: Press ▲/▼ to select your desired item, press OK to execute the current selected item. - Page 31 2.4 inch color screen series User Manual Step 2: press keyboard to input the number to be enrolled(if the number has been there already, the device will prompt you to copy the information to the card.), and then press OK. Step 3: The device prompts to show card.
-
Page 32: Enroll Fingerprint Card
2. User Management verification mode as RF, or verification won’t be successful. 2.3.2 Enroll fingerprint card Enroll fingerprint and write fingerprint into card. Operation: 1. Enrollment Step 1: Select enroll fingerprint card and press OK. Step 2:Use keyboard to input the number to be enrolled(if the number has been there already, the device will prompt you to copy the information to the card.), and then press OK. - Page 33 2.4 inch color screen series User Manual Step 3: Press finger properly three times. Step 4: Device prompts “please show card”. Step 5: Put the card in the induction area, waiting for the device to read fingerprint data into card until the enrollment succeeds. 2.
-
Page 34: Clear Card Information
2. User Management 2.3.3 Clear card information Delete all the information in the card being operated at present. Operation: Put the card in the induction area, waiting for device to delete all the information in the card. If the card data has been stored in the device, the device will remind you whether to delete the information in the device or not. -
Page 35: Set Card Parameter Value
2.4 inch color screen series User Manual Press ▲/▼ to select “only copy user information” or “copy user information and fingerprint”, and then press OK. 2.3.5 Set card parameter value Set password of Mifare card and decide whether the information should be saved or not. - Page 36 2. User Management Save the information: Decide whether to save the enrolled information to the device when enrolling card or fingerprint card. “No” means the information is only saved in the card. “Yes” means the information is saved in both card and device. Operation: Press ▲/▼to move cursor to the item to be set.
-
Page 37: Access Control Option
2.4 inch color screen series User Manual 2.4 Access Control Option ★ Access control option is to set user’s open door time zone, control lock and related device’s parameters. If the device support external facial instrument, it can not support the camera and advanced access control at the same time. -
Page 38: Time Zone Setting
2. User Management 2.4.1 Time Zone Setting Time zone is the minimum unit of access control option. The whole system can define 50 time zones. Every time zone defines seven time sections (namely, a week). Every time section is the effective time zone within 24 hours everyday. -
Page 39: Holidays Setting
2.4 inch color screen series User Manual then the time zone setting will displayed automatically. Press ▲/▼, to move the cursor to the input box, press numeric key on small keyboard to input value. Then press Menu to save it and press ESC to exit. - Page 40 2. User Management Press ▲/▼ to move cursor to the input box. Press numeric key on small keyboard to input the value. After setting, press Menu to save it. Then press ESC to exit. Edit holidays Select the line to be edited. Press OK directly or press Menu to select edit in operating menu.
-
Page 41: Group Time Zone Setting
2.4 inch color screen series User Manual Notice: If holiday access control time is set, user’s open door time zone during holiday subject to the time zone here. 2.4.3 Group time zone setting Grouping is to manage employees in groups. Employee in groups use group time zone by default. - Page 42 2. User Management Notice: 1) If holiday is effective, only when there is intersection between group zone and holiday time zone, can the group member open the door. 2) If holiday is ineffective, the access control time of group member won’t be affected by holiday. Press ▲/▼to move cursor to the item to be set.
-
Page 43: Set Unlock Combination
2.4 inch color screen series User Manual Press ▲/▼to move cursor to the item to be set. If it is the input box, press numeric keys on small keyboard to input the value. If it is the roll to switch values. After setting, press Menu directly to box, press return to the last interface. - Page 44 2. User Management Add unlock combination Press Menu to get operating menu: Press ▲/▼ to select add. For example, to add an unlocking combination, this needs the verification of both group 1 and 2, as shown below: Press ▲/▼ to move cursor to the input box. Press numeric key on small keyboard to input value.
-
Page 45: Access Control Parameters
2.4 inch color screen series User Manual Edit unlock combination Select the line to be edited. Press OK directly or press Menu to select edit in operating menu. Press ▲/▼ to move cursor to the input box. Press numeric key on small keyboard to input value. - Page 46 2. User Management door is closed normally. Door sensor alarm: When abnormal door sensor state is detected, alarm will be given off after some time. This time is door sensor alarm. (effective value: 1~99 seconds) Alarm count: When the failed press times reach the set times, alarm signal will come out.(effective value 1~9 times) NC time zone: Set time zone for access control NC.
-
Page 47: Duress Alarm Parameters
2.4 inch color screen series User Manual Press ▲/▼to move cursor to the item to be set. If it is the input box, press numeric keys on small keyboard to input the value. If it is the roll box, press to switch values. -
Page 48: Anti-Passback Setting
2. User Management Press ▲/▼to move cursor to the item to be set. If it is the input box, press numeric keys on small keyboard to input the value. If it is the roll to switch values. After setting, press Menu directly to box, press return to the last interface. - Page 49 2.4 inch color screen series User Manual Operation: Press Menu -> User Management -> Access Setting -> Anti-Passback setting (as shown below). The choice of Machine models: Press ▲/▼ to switch the input box. Press to modify the setting. Select Anti-Out, refer to out anti-pass back, only user’s last record is in-record, the door can be open.
- Page 50 2. User Management setting, press Menu directly to return to the last interface. Press “ESC” to cancel setting and return to the last interface. Anti-passback Function: The master machine control OUT and the slave machine control IN. In anti-passback (APB-In): ...
-
Page 51: Rs485 Reader Function
2.4 inch color screen series User Manual 2.4.8 RS485 Reader Function ★ Equipment supports RS485 reader function, can be through the RS485 communication connected reader; meanwhile, it can act as Master-slaver which device for master, reader for slaver, achieve RS485 Anti-passback functions. -
Page 52: Network Option
2. User Management 3. Communication Option When the device and PC are used to transmit data, it is necessary to use communication wire to set communication parameters in the device. When the device is in communication, “communicating…” appears. Don’t operate the device then. ... -
Page 53: Serial Port Option
2.4 inch color screen series User Manual necessary. Gateway address: It is 0.0.0.0 by default. If the device and PC are in different net segment, it is necessary to set address. Net speed: Set the speed according to the LAN where the device is. Operation: Press ▲/▼to move cursor to the item to be set. -
Page 54: Security
2. User Management RS485: Whether use RS485 to communicate. Select “ON” if RS485 is to be used. USB: Whether use USB to communicate. Select “ON” if USB is to be used. RS232, RS485 and USB cannot be used at the same time. Operation: Press ▲/▼to move cursor to the item to be set. -
Page 55: Wiegand Option
2.4 inch color screen series User Manual to be set here. Connection password must be input when PC software is to connect device to read data. Connection Password: System password is 0 by default. ( namely, there is no password. ) it can be set as other value. After setting, the password must be input if software is to communicate with device. -
Page 56: Input Configuration
2. User Management 3.4.1 Input configuration User defined format: User defined Wiegand input format Bit digit: Wiegand data digit length Pulse width: Pulse width is 100 microseconds by default, which can be adjusted from 20 to 800. Pulse interval: It is 900 microseconds by default, which can adjusted between 200 and 20000. -
Page 57: Output Configuration
2.4 inch color screen series User Manual Input the name of user-defined format. Press ▲/▼to move cursor to the item to be set. If it is the input box, press numeric keys on small keyboard to input the value. If it is the roll box, press to switch values. - Page 58 2. User Management Input the name of user-defined format. Press ▲/▼to move cursor to the item to be set. If it is the input box, press numeric keys on small keyboard to input the value. If it is the roll box, press to switch values.
-
Page 59: System Option
2.4 inch color screen series User Manual 4. System Option Set system parameters to meet user’s demand as many as possible. 4.1 System parameters 1: 1 matching threshold value: The similarity of ID + fingerprint verification and the enrolled template 1: N matching threshold value: The similarity of verification and the enrolled template Recommended matching threshold value:... - Page 60 4. System Option Time format: Time format displayed on initial interface. Press set 24H or 12H. Date format: Press to select format. The fingerprint sensor supports ten date format: YY-MM-DD, YY/MM/DD, YY.MM.DD, MM-DD-YY, MM/DD/YY, MM.DD.YY, DD-MM-YY, DD/MM/YY, DD.MM.YY and YYYYMMDD. Select your desired date format. Press to set 24H or 12H.
-
Page 61: Data Management
2.4 inch color screen series User Manual keyboard to input the value. If it is the input box, press numeric keys on small keyboard to input the value. If it is the roll box, press switch values. After setting, press OK or menu directly to save the setting and return to the last interface. -
Page 62: Upgrade Firmware
4. System Option Operation: Press “▲/▼” to preview the propaganda pictures in the device. Click OK to delete all these pictures. After deletion, the next picture will appear. Click “delete all” to delete all the propaganda pictures in the device. Then press “ESC” to return to data management interface. 4.3 Upgrade firmware Update the firmware by utilizing the USB Pen Drive (flash drive) ... -
Page 63: Display Setting
2.4 inch color screen series User Manual 4.4 Display Setting ◀ /▶ Press ▲/▼ or to move cursor to the input box. Press numeric key on small keyboard to input the number. After setting, press menu directly to save the setting and return to the last interface. Press “ESC” to cancel setting and return to the last interface. -
Page 64: Picture Cycle Interval
4. System Option 4.4.3 Picture cycle interval Picture cycle interval means how soon will the picture be changed (effective value is 3~999 seconds.) Display propaganda picture: User can display some propaganda pictures on the screen. The operation refers to this manual 10.4 Propaganda picture upload rules 4.4.4 Clock display delay Time display delay means the clock picture display time length after... -
Page 65: Reset
2.4 inch color screen series User Manual interface success, machine displayed: "Standby Interface modified success ". T hen you should restart the device. Notice: "4.4.3 Picture cycle interval" and "4.4.4 Clock display delay" functions are fit use common mode of interface style only. When you select matrix or magic mode, these... -
Page 66: Other Options
4. System Option keyboard definition to that of factory. Reset bell option: Only reset bell option to factory state. Reset other parameters: only reset communication option, system parameter and interface option and so on to factory state. Press ▲/▼ to move cursor to the button to be operated. Press OK to start operation. - Page 67 2.4 inch color screen series User Manual Fingerprint image display: Select whether to display the fingerprint image on the screen when it is enrolling or verifying there are 4 options: display upon both enrollment and verification, only display upon enrollment, only display upon verification, not display upon enrollment and verification.
-
Page 68: Date Time
5. Date Time 5. Date Time 5.1 Date Time option Accurate attendance time is based on accurate time date. Enter time date to set options: Operation: Press ▲/▼ to move cursor to the input box. Press numeric key on small keyboard to input the value. - Page 69 2.4 inch color screen series User Manual The regulations are different in different countries. At present, nearly 110 countries adopt DLST. To meet the demand of DLST, a special option can be customized on our RF Card Time & Attendance recorder. Make the time one hour forward at XX (minute) XX (hour) XX (day) XX (month), and make the time backward to the standard time at XX (minute) XX (hour) XX (day) XX (month) if necessary.
- Page 70 5. Date Time 3) Press /“OK” to save setting. Press “ESC” to exit without saving. - 65 -...
-
Page 71: Pendrive Management
2.4 inch color screen series User Manual 6. PenDrive Management Import user information, fingerprint template, attendance data and so on in the device to attendance software or import user information and fingerprint to other devices through U disk. 6.1 Download data 1. -
Page 72: Upload Data
6. PenDrive Management device ID). 2. Download user data Save all users’ information and fingerprint in the device to U disk. Operation: Insert USB flash disk into USB slot of the device, press “▲/▼” to download user, then user.dat (user information) and template.dat (fingerprint template) will be saved in U disk. - Page 73 2.4 inch color screen series User Manual Insert U disk into USB slot of device. Press “▲/▼” to preview the pictures of U disk. If you want to upload the picture, click OK. Then the next picture will appear automatically. After upload, press ESC to exit. - 68 -...
-
Page 74: Auto Test
7. Auto Test 7. Auto Test The device can test various modules automatically to help operator to judge the module with fault quickly. Auto test include TFT display Test, Audio Test, Keyboard Test, Sensor Test and RTC Test. Press “▲/▼” to select the item to be selected. Press OK to start it. 7.1 TFT display test The device can automatically test TFT color display effect through color display, white display and black display) to see whether the screen... -
Page 75: Keyboard Test
2.4 inch color screen series User Manual Press OK to continue and press ESC to exit. 7.3 Keyboard test The device can automatically test various keyboards to see whether the keys work normally or not. Press any keyboard on the test interface (except for OK and ESC) to check whether the pressed keyboard is in accordance with that displayed on the screen. -
Page 76: Query Record
8. Query Record 8. Query Record Employee’s attendance records will be saved in the device. For convenience, query record function is provided. According to user’s input query condition, the record will be displayed on the screen for user to check. ... - Page 77 2.4 inch color screen series User Manual Press “▲/▼” to move the cursor to the line to be queried. And press OK to check attendance record. For example, the detailed attendance information of employee 10001 on May8th as follows: At the bottom of the screen, there are some remark, and the capital letters with their meanings: Verification: F: means Fingerprint verification...
- Page 78 8. Query Record It is the attendance status. The code displayed in the list is the status code. And status name will be displayed in the information column. - 73 -...
-
Page 79: System Information
2.4 inch color screen series User Manual 9. System Information Use system information to check the current device’s saving status, its version information and so on. 9.1 Record capacity Display the count of enrolled users, administrator, password enrollment, the current enrolled fingerprint and the current saved attendance record. Also display the capacity of the fingerprint and attendance record, as show below: 9.2 Device information... -
Page 80: Appendixes
10. Appendixes 10. Appendixes 10.1 Keyboard Different device has different kinds of keyboard, and the function of the keyboard is different. Please check the fallows: Keyboard type 1: function Numeric 1. 0~9 , used to input employee number, password and so 2. - Page 81 2.4 inch color screen series User Manual Keyboard type 2: function Numeric 1. 0~9,used to input employee number, password and so 2. 0 on manage user interface is shortcut of “query user”. ▲ 1. Upward. 2. Shortcut. ▼ 1. Downward. 2.
- Page 82 10. Appendixes Keyboard type 3: function Numeric 1. 0~9,used to input employee number, password and so 2. 0 on manage user interface is shortcut of “query user”. ▲ 1. Upward. 2. Shortcut. ▼ 1. Downward. 2. Shortcut. 1. Right. 2. Shortcut. 1.
-
Page 83: Usb
2.4 inch color screen series User Manual 10.2 USB USB Host The device will may be used as USB Host to exchange data with external U disk. The data transmission speed is quick, the traditional fingerprint machine only supports the RS232, RS485 or Ethernet way data transmission, when as a result of physical condition limit, data quantity big, and the data transmission cost quite long time. -
Page 84: Propaganda Picture Upload Rules
10. Appendixes fingerprint or password verification in 10 minutes. For example: the employee with User ID of 1 can check his intraday attendance record by pressing after fingerprint verification. Notice: The picture may be different from your device. The real product prevails. -
Page 85: Card Support (Id/Em, Mifare Card)
2.4 inch color screen series User Manual The picture’s resolution is 320 wide and 240 high. It is better not to be more or less than it. The propaganda pictures’ count should be 10 at most. If you want it, please contact our businessman or technician. 10.5 Card support (ID/EM, MIFARE Card) ★... -
Page 86: Web Time & Attendance
10. Appendixes 10.6 Web time & attendance ★ Summary The T & A system is based on Web Server technical, use Page Request technical to process and manage data, it integrate many feature ,such local data collection , intellectualized port (RS232/RS485), communication protocol conversion, image collection, alarm data stored up , and WEB server etc. -
Page 87: Digit Code
2.4 inch color screen series User Manual Fully compatible with our company Inc program WEB Server platform may be fully compatible with current program each other entirely is mutually beneficial, ability to much more flexible to meet customer need. More reliable, fast through long distance transfer data Through WEBSERVER ,... -
Page 88: Master-Slave Function
10. Appendixes This function can be set in the fingerprint machine option, Press Manu key, enter the Date Time. In the XX Month XX Date XX minute move forward an hour, and that in the XX Month XX Date, XX Minute move Back an hour. - Page 89 2.4 inch color screen series User Manual You can set every few hours to synchronize. (With range of 0-99, only the device is set as master unit, this setting is valid) 2) Connection Choose the master unit and slave unit. Connect them to the LAN through the switch.
-
Page 90: About The Human Rights Privacy Statement
10. Appendixes 10.11 About the human rights privacy statement Dear customer: First thank you for using Multi-biometric identification product we design and produce. As one of the global famous fingerprint identification core technology provider, we are constantly carrying on the development and research, also we believe such action is necessary to: (a) comply with the law or legal process served on Our company;... -
Page 91: Environmental Protection
2.4 inch color screen series User Manual not any legal liability for any damage it cause. Note: There are limited rights to privacy and human rights in the Chinese Constitution. The personal dignity of citizens of the People's Republic of China is inviolable and further, that insult, libel, false accusation or false incrimination directed against citizens by any means is prohibited, the protection of freedom of the person and the residence .The Constitution... - Page 92 10. Appendixes The toxic and harmful substances or elements Part name Cr6 + PBDE × ○ ○ ○ ○ ○ resistor × ○ ○ ○ ○ ○ capacitor × ○ ○ ○ ○ ○ inductance × ○ ○ ○ ○ ○...
- Page 93 2.4 inch color screen series User Manual FCC Note This device complies with part 15 of the FCC Rules. Operation is subject to the following two conditions: (1) This device may not cause harmful interference, and (2) this device must accept any interference received, including interference that may cause undesired operation.
- Page 94 10. Appendixes such modifications could void the user’s authority to operate this equipment Changes or modifications not expressly approved by the party responsible for compliance could void the user's authority to operate the equipment. “This equipment complies with FCC RF radiation exposure limits set forth for an uncontrolled environment.
- Page 95 Manufacturer: ZKTECO CO., LTD. Address: No.26, Pingshan 188 Industry zone, Tangxia Town, Dongguan City, Guangdong Province, China Hereby, ZKTECO CO., LTD. declares that this device is in compliance with the essential requirements and other relevant provisions of Directive 2014/53/EU Importers: ZKTECO EUROPE SL...
Need help?
Do you have a question about the F18I and is the answer not in the manual?
Questions and answers