Table of Contents
Advertisement
INSTALLATION AND CARE GUIDE
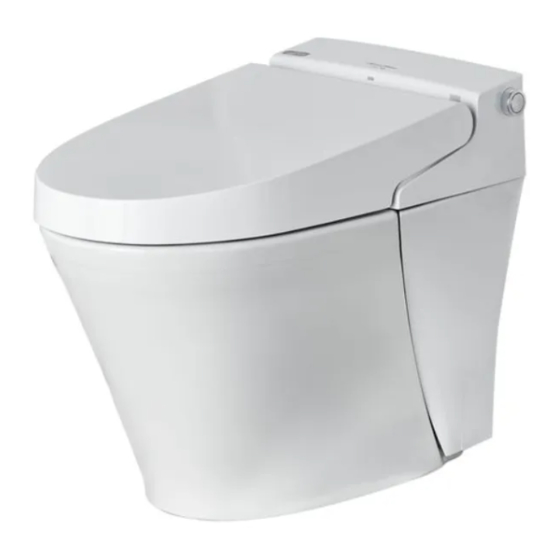
ELECTRONIC WASHLET TOILET :B0950S/B0960S
Compliance with the following codes & standard:
• 2015 Uniform Plumbing Code
• 2018 International Plumbing Code
• 2018 International Residential Code
• CSA B45.5 / IAPMO Z124-2017- Plastic Plumbing Fixtures
SCC Accredited
ICC
TM
LISTED
Accrédité
Customer Service Phone: 562-229-0088. (Monday - Friday 9 AM - 5 PM Pacific Time)
WOODBRIDGE
CB-P/S
ANSI
ACCREDITED
ISO/IEC 17065
OCPS
Product Certification Body
CCN
#1000
Or Email: help.woodbridge@gmail.com
www.woodbridgebath.com
R
( UPC )
®
( IPC )
®
®
( IPC )
PREFERED
EDUCATION
PROVIDER
191218 REV. 3
Advertisement
Table of Contents
Troubleshooting

Related Manuals for Woodbridge B0950S


Summary of Contents for Woodbridge B0950S
- Page 1 INSTALLATION AND CARE GUIDE WOODBRIDGE ELECTRONIC WASHLET TOILET :B0950S/B0960S Compliance with the following codes & standard: ( UPC ) • 2015 Uniform Plumbing Code ® ( IPC ) ® • 2018 International Plumbing Code ® ( IPC ) • 2018 International Residential Code •...
-
Page 2: Tools Required For Installation
ELECTRONIC WASHLET TOILET WOODBRIDGE READ ALL INSTRUCTIONS BEFORE UNPACKING THE PRODUCT INSTRUCTIONS THAT, IF IGNORED COULD RESULT IN DEATH OR SERIOUS INJURY CAUSED BY INCORRECT HANDLING OR INSTALLATION OF THE PRODUCT. THESE INSTRUCTIONS MUST BE OBSERVED FOR SAFE INSTALLATION. 2 PEOPLE ARE REQUIRED TO LIFT AND DURING... -
Page 3: Important Safeguards
ELECTRONIC WASHLET TOILET WOODBRIDGE IMPORTANT SAFEGUARDS When using electrical products, especially when children are present, basic safety precautions shouldalways be followed, including the following: 1.The appliance is not to be used by persons (including children) with reduced physical, sensory or mental capabilities, or lack of experience and knowledge, unless they have been given supervision or instruction. -
Page 4: Grounding Instructions
ELECTRONIC WASHLET TOILET WOODBRIDGE CAUTION – Indicates that failure to follow the instruction may cause body injury or property damage. 1. Do not install or use the product in wet places as steam room etc.This product must be connected to properly grounded power outlet socket. - Page 5 ELECTRONIC WASHLET TOILET WOODBRIDGE AC 110V-120V,50/60Hz Rating pressure 1200W-1400W Rating power Main Unit Minimum water pressure 0.07MPa (20L/min. flow). Water pressure Maximum water pressure 0.8MPa (Hydrostatic pressure) range length is about 1.8m Electrical wire 1.6/1.1GPF(6.0/4.0 L) Flush volume Siphonic jet...
-
Page 6: Dimensions/Technical Data
ELECTRONIC WASHLET TOILET WOODBRIDGE DIMENSIONS/TECHNICAL DATA 15 3/8" 28 3/4" 17 7/8" 22 5/8" 16" IMPORTANT INFORMATION • Measurements are +3/8" and subject to change without notice • Please note that installer(s) must be certify or warranty will be voided. -
Page 7: Parts Identification
ELECTRONIC WASHLET TOILET WOODBRIDGE PARTS IDENTIFICATION Bumper Left side Power indicator Energy saving indicator Human body sensing window Human body Remote sensing window sensing window Rear cleaning button Seat Drying button Power button Ceramic toilet Flush button Front cleaning button... - Page 8 ELECTRONIC WASHLET TOILET WOODBRIDGE Installation of ceramic toilet 1.Water supply angle valve installation 3.Ceramic toilet installtion •Draw drain outlet centerline on the floor, •Install sealing flange into drain outlet, Install angle valve at proper position on without bolts fixation; wall according to dimension of toilet.
- Page 9 ELECTRONIC WASHLET TOILET WOODBRIDGE 5.Installation of hose •Connect water inlet and angle valve by new hose. Note: Recommend strongly to install floor fixing bolt!lt can make product more stable to avoid damage of toilet or toilet or personal injury because of shifting or turning over by misusing(squat or stand on toilet).
- Page 10 ELECTRONIC WASHLET TOILET WOODBRIDGE Previous preparateion 1.Turn on the angle valve Check thread connection,make sure no leakage is found. Angle valve 2.Switch the power supply Grounded Insert electric leakage protection plug into power socket. outlet Indicator light Electric leakage test button...
-
Page 11: Daily Maintenance
ELECTRONIC WASHLET TOILET WOODBRIDGE Daily maintenance Main unit care and maintenace Spray nozzle maintenance and care 1.Shut off power supply at maintenance. 1.Nozzle self-cleaning Press “nozzle cleaning” button and nozzle will move forward and self-clean. 2.Turn the seat upward open,... -
Page 12: Emergency Troubleshooting
ELECTRONIC WASHLET TOILET WOODBRIDGE Emergency Troubleshooting Electricity and water supply cut-off 1. Power failure •Manually press button of full/half flush to perform the toilet flushing. Operation panel 2.Water failure •Put around 8L water into a barrel and flush the bowl of ceramic. - Page 13 ELECTRONIC WASHLET TOILET WOODBRIDGE Failure of remote control When the product is left unused for long time 1.Operate the panels on ebidet seat to perform. •Especially in winter season,the water inside the tank should be discharged to avoid freezing. To discharge water 1.Turn off the water supply angle valve...
- Page 14 ELECTRONIC WASHLET TOILET WOODBRIDGE The illustration of main unit keys 1. Long press "power" button to enter standby mode; and then quick press "power" button to restore functional mode. Power 2. When people sit, press "power" button to stop the function of rear, front cleaning or drying.
-
Page 15: Troubleshooting Guide
ELECTRONIC WASHLET TOILET WOODBRIDGE Troubleshooting Guide Problem Cause Solution water supply hose buckling solve the buckling causes block turn on the fill valve fill valve is off No flushing Connect water supply and Water supply is cut off wait for the water... - Page 16 The purchasing dte is subject to the purchasing invoice or receipt. Please keep this warranty and invoice/receipt available for repair or maintenance. Thank you for using WoodBridge products! Customer Service Phone: 562-229-0088. (Monday - Friday 9 AM - 5 PM Pacific Time) Or Email: help.woodbridge@gmail.com...
- Page 17 INSTALLATION AND USER MANUAL WOODBRIDGE Remote Control Illustration ENERGY NOZZLE SAVER CLEANING MASSAGE STOP AUTO TEMPERATURE WATER SEAT Thank you for choosing our product.Please read the instructions carefully before installation and keep it available for future maintenance or reference. Customer Service Phone: 562-229-0088. (Monday - Friday 9 AM - 5 PM Pacific Time) Or Email: help@woodbridgebath.com...
-
Page 18: Remote Control Installation
REMOTE CONTROL ILLUSTRATION WOODBRIDGE Remote control installation Remote control hanger installation (1)Drill two holes, which are parallel to the floor, on the wall with depth of 35mm, and center distance between two holes of 106mm. Make sure end-user be able to reach the remote control when sitting on the seat. - Page 19 REMOTE CONTROL ILLUSTRATION WOODBRIDGE Remote control illustration Front Flush button Rear Nozzle cleaning Energy saver Massage Drying U R E P R E S S Auto rear/front cleaning Auto Front cleaning Auto rear cleaning Water pressure adjustment Temperature adjustment Adjustment of nozzle position...
-
Page 20: Drying Operation
REMOTE CONTROL ILLUSTRATION WOODBRIDGE Rear/Front cleaning Press “Rear”/“Front” button, the water comes out of wand to clean the rear/front portion of body. It automatically stops after a cycle of cleaning. If press “STOP” button when using, the function will stop immediately. -
Page 21: Auto Function
REMOTE CONTROL ILLUSTRATION WOODBRIDGE Auto function Full-automatic function can be achieved by three “AUTO” buttons, convenient and practical. User can pre-set the suitable nozzle position, water pressure and temperature and save the setting. Full-automatic function will be activated by pressing the related function button when using afterwards. -
Page 22: Energy Saver
REMOTE CONTROL ILLUSTRATION WOODBRIDGE Energy saver Setting energy saver time Press “ENERGY SAVER” button, LCD screen shows energy saver and figures. It shows three options of energy saver period as 3-6-9-off, which can be selected accordingly. For example, user can set from 9:00 to 15:00 as energy saver according to following operation. - Page 23 REMOTE CONTROL ILLUSTRATION WOODBRIDGE Spray nozzle position adjustment During “REAR” or “FRONT”, press spray nozzle button of “ ” and “ ”, to move the position forward and backward by adjusting 5 levels. Water pressure adjustment During “REAR” or “FRONT”, press water pressure button of “+” and “-”, to adjust pressure for rear and front cleaning.
-
Page 24: Temperature Adjustment
REMOTE CONTROL ILLUSTRATION WOODBRIDGE Temperature adjustment Water temperature adjustment: Press “TEMPERATURE” button one time, “WATER ” light is on,icon on the screen lights on, then adjust WATER water temperature by “+”, “-” button. It is regarded as operation completed if there is no operation in 5 seconds,... -
Page 25: Full Flush
REMOTE CONTROL ILLUSTRATION WOODBRIDGE Full flush Press “FLUSH” button to activate full flushing. Auto lid open/close (Only for toilet with this function) Press “ ” button to close seat cover. Press “ ” button to open lid and close seat. -
Page 26: Nozzle Cleaning
REMOTE CONTROL ILLUSTRATION WOODBRIDGE Nozzle cleaning Nozzle self-cleaning by quick press: Quick press “NOZZLE CLEANING” button, the nozzle self-cleans for a while and moves to the front position (no spray). People can continue to clean nozzle manually. self-clean for Nozzle self-cleaning by long press 90 seconds. - Page 27 REMOTE CONTROL ILLUSTRATION WOODBRIDGE Set Auto Function Activate/Deactivate some functions with combination button Auto open/close Press and hold “STOP” button (step 1), then press and release “ ” ,button (step 2) , it is the mode of auto open/close, lastly release the “STOP” button (step 3). Repeat above action to stop this function.
- Page 28 REMOTE CONTROL ILLUSTRATION WOODBRIDGE Set Auto Function Set automatic Rear cleaning function The default setting of automatic function is water pressure on level three, nozzle position on level three, water temperature, wind temperature and seat temperature on level three, the massage function is in the off state. User can re-set based on personal preference.
-
Page 29: Quiet Mode
REMOTE CONTROL ILLUSTRATION WOODBRIDGE Set Auto Function Quiet mode To activate/deactivate the Quiet mode, press and hold the “STOP button (step 1), ” then press and release“MASSAGE” button (step 2), lastly release the “STOP button ” (step 3). Make sure you hear a beep sound to confirm the setting is completed or you will have to restart the same process again.Repeat the process to start buzzer function. - Page 30 REMOTE CONTROL ILLUSTRATION WOODBRIDGE Set Auto Function Set automatic Front cleaning function (1)Press spray nozzle position adjustment button to adjust nozzle to suitable position; Press “+”, “-” to adjust water pressure; set temperature level; open/ close massage function. (2)Press “...
- Page 31 REMOTE CONTROL ILLUSTRATION WOODBRIDGE Set Auto Function Set automatic Rear and Front cleaning combination function Note: During using toilet, user can find the suitable level and temperature after comparing repeatedly. Please set the automatic Rear and Front cleaning combination function during using toilet.
- Page 32 REMOTE CONTROL ILLUSTRATION WOODBRIDGE Set Auto Function Remark: By pressing the button, the signal indicator will flash which means the signal is sent out;Then the buzzer rings “click” means the main unit receives the signal andexecutes the instruction. If the signal indicator doesn't flash, that means the button is not efficiently pressed and needed to be re-pressed.
Need help?
Do you have a question about the B0950S and is the answer not in the manual?
Questions and answers
B0960S TOILET SEAT DOES NOT HEAT
The Woodbridge B0950S toilet seat may not be heating due to the following possible causes:
1. Seat temperature is set to normal temperature level: Reset the seat temperature to a higher level.
2. In standby mode: Shift the toilet to function mode for at least 3 minutes.
If these steps do not resolve the issue, further troubleshooting or contacting the service provider may be necessary.
This answer is automatically generated