
Subscribe to Our Youtube Channel
Related Manuals for GRE PSR-600


Summary of Contents for GRE PSR-600
- Page 1 ADVANCED DIGITAL BASE/MOBILE SCANNING RECEIVER WITH OBJECT ORIENTED USER INTERFACE Ownerʼs Manual A Guide to Getting The Most From Your PSR-600 Advanced Digital Scanner GRE America, Inc., 425 Harbor Blvd., Belmont, CA 94002...
- Page 2 Please take the time to read this manual completely before using your new scanner. IMPORTANT NOTICE: The PSR-600 Advanced Digital Scanner will not receive encrypted radio communications, or radio transmissions that utilize ProVoice digital modulation. FCC ID ADV0716 This device complies with part 15 of the FCC Rules. Operation is subject to the following two conditions: (1) This device may not cause harmful interference, and (2) this device must accept any interference received, including interference that may cause undesired operation.
-
Page 3: Table Of Contents
LMIT ....................SRVC ....................SWPR ....................The FCC Wants You To Know ..............Scanning Legally ..................Getting Familiar With Your PSR-600 ..............PSR-600 Front View ..................PSR-600 Rear View ..................PSR-600 Included Accessories ..............Understanding the Display Icons ............... Understanding the Keypad ................ - Page 4 Using DUPE to speed up object entry ..........Basic Scanning Operation ..............Browsing Objects ................... Advanced Startup Topics ................About Object Numbering ............... Using the Object ID to directly access an object ......More About Wildcard Scanning ............. Displaying Memory Usage ..............
- Page 5 Saving Main Memory To A V-Scanner Folder ......Loading A Stored V-Scanner Folder To Main Memory ....Erasing V-Scanner Folders ............Cloning Your Radio to Another PSR-600 or PSR-500 Scanner ....Standard Text Entry Method and QuickText ..........Entering and Editing Alphanumeric Information .........
- Page 6 Appendix F - About CTCSS, DCS and P25 NAC ........... CTCSS ....................DCS ....................P25 NAC ................... Appendix G - Finding More Information ............Learning About Scanning and your PSR-600 ........Finding Frequencies and Trunked System Information ....Index ......................... Warranty ......................
-
Page 7: Introduction
Welcome to an exciting new world of radio scanning! Recognizing that contemporary scanning receivers are too hard to program and use, GREʼs engineers conducted extensive research to determine the functional requirements for an entirely new scanning receiver user interface. We call this new user... -
Page 8: Features
GRE's Exclusive V-Scanner Technology - Allows you to save complete radio configurations within the radio, for recall into main memory as needed in the field. This is similar to having a laptop computer and programming software available anytime. - Page 9 LTR trunking systems when the home repeater order is not known. Enter the LTR system frequencies in any order, and the PSR-600 will automatically move the frequencies to the proper home repeater slots as transmissions are received on the system.
-
Page 10: Overview Of The Object Oriented User Interface
P25 Network Access Code (NAC) is used to provide selective squelch operation on conventional digital channels. Your PSR-600 will detect the NAC that is being used on a P25 conventional digital channel, and allow you to program NAC codes to block transmissions that do not have a matching NAC, including analog traffic on the same frequency! - Page 11 Until recently, trunking functionality was forced into the traditional bank/channel scanner design. This confused and frustrated users, who had to learn two PSR-600 User Manual Page...
- Page 12 – one for conventional, non-trunked channels, and another for trunked systems and talkgroups. GREʼs engineers carefully studied the challenges of programming and operating todayʼs current crop of trunked scanning receivers. We have also carefully studied how scanning hobbyists like to use their radios, and the role the Internet plays in the scanning hobby.
- Page 13 Much of what you see in the design of your new GRE scanner with Object Oriented User Interface is intended to meet the...
-
Page 14: What Is Object Oriented Scanning
Scanning makes it easy to group Scannable Objects in Scan Lists, a powerful and flexible grouping system. Object Oriented Scanning makes it easy to search for new frequencies or talkgroups to monitor, and add them to existing or new Scan List PSR-600 User Manual Page... -
Page 15: A Few Things To Remember About Object Oriented Scanning
Scan Lists. Mapping a Scannable Object to one or more Scan Lists does not change the physical location of the object in the memory system. Even when an object is mapped to one or more Scan Lists, the object itself has not PSR-600 User Manual Page... -
Page 16: About This Manual
About this manual Object abbreviations used in this document We described how your new GRE scanner utilizes an Object Oriented User Interface in the Introduction and Overview sections of this manual. You learned that the key components of this new user interface are the Scannable Objects, which are, of course, “things that can be scanned”. -
Page 17: Conv
The FCC Wants You To Know This equipment has been tested and found to comply with the limits for a scanning receiver, pursuant to Part 15 of the FCC Rules. These limits are designed to provide reasonable PSR-600 User Manual Page... -
Page 18: Scanning Legally
However, there are some transmissions you should never intentionally listen to. These include: • Telephone conversations (cellular, cordless, or other means of private telephone signal transmission) • Paging transmissions • Any intentionally decoded scrambled or encrypted transmissions PSR-600 User Manual Page... - Page 19 In some areas, mobile use of this scanner is unlawful or requires a permit. Check the laws in your area. It is also illegal in many areas to interfere with the duties of public safety officials by traveling to the scene of an incident without authorization. PSR-600 User Manual Page...
-
Page 20: Getting Familiar With Your Psr-600
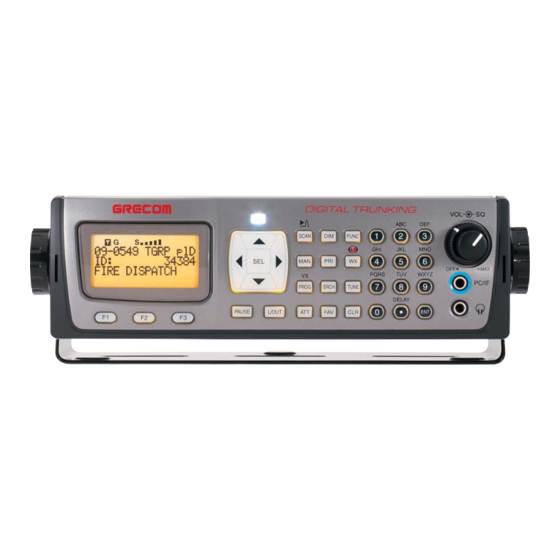
Getting Familiar With Your PSR-600 The following illustrations are provided to help you get familiar with your PSR-600ʼs controls and accessories. PSR-600 Front View Figure 1 - PSR-600 front view PSR-600 User Manual Page... -
Page 21: Psr-600 Rear View
PSR-600 Rear View Figure 2 - PSR-600 rear view PSR-600 User Manual Page... -
Page 22: Psr-600 Included Accessories
PSR-600 Included Accessories Mobile Mounting DC Cable Bracket with Rubber Feet, Rubber Washers and Knurled Knobs AC Adapter Antenna USB Cable Figure 3 - PSR-600 Included Accessories (Compact Disc not shown) PSR-600 User Manual Page... -
Page 23: Understanding The Display Icons
Understanding the Display Icons Your PSR-600 features a high contrast, backlit Liquid Crystal Display (LCD) to provide important information about the status of the radio while you are programming and using it. The LCD includes a row of icons at the top that provides information about the status of the scanner while it is operating. -
Page 24: Softkeys
Your PSR-600 features an easy-to understand backlit keypad with 34 keys that are used to control and program the radio. Figure 5 highlights the various keys and their basic functions. Five Way Numeric Pushbutton Keypad Operational Keys Softkeys Figure 5 - Keypad layout... -
Page 25: Five Way Pushbutton Pad
Favorites Scan List FUNC WX - Activates Weather scan, activates Skywarn mode - Places scanner in Program Mode for editing radio-wide FUNC options, adding new objects or editing existing objects, accesses V-Scanner mode PSR-600 User Manual Page... - Page 26 L/OUT - Toggles Temporary Lockout on active or selected object, FUNC L/OUT applies permanent lockout (can be changed in the GLOB menu) - Enter key PAUSE - Pauses scan or search operation on active object PSR-600 User Manual Page...
-
Page 27: Getting Started
Getting Started First Time Startup We believe that your new PSR-600 is so easy to use that scannists with minimal experience in the hobby should be able to get up and running in a matter of just a few minutes. If you... -
Page 28: Mobile Operation
You may also use the mounting bracket such that it is located underneath of the radio, PSR-600 User Manual Page... - Page 29 flat surface in your vehicle. Your PSR-600 is also designed to fit into a DIN-E compatible sleeve, which makes it easy to mount the radio in an existing radio or CD player dashboard opening.
- Page 30 WARNING: You must use a power source that supplies 12-14.4 VDC and is rated for 600 mA. Its center tip must be set to positive and its plug must fit the scannerʼ s DC 13.8V jack. The supplied DC power adaptor meets these specifications. Using a DC adaptor PSR-600 User Manual Page...
-
Page 31: Connecting An Extension Speaker
Avoid increasing the volume once you set it. Over time, your sensitivity to a volume level decreases, so volume levels that do not cause discomfort might damage your hearing. PSR-600 User Manual Page... -
Page 32: Traffic Safety
Additionally, you may wish to disconnect your radio from the outdoor antenna during electrical storm activity to prevent damage. The diagram below provides an example of a proper antenna grounding system. PSR-600 User Manual Page... -
Page 33: Turn The Radio On
The squelch is now set to the optimum point. Please note the position of the squelch control for future reference. Once the squelch setting is PGM to exit TUNE mode. complete, you may press PSR-600 User Manual Page... -
Page 34: Creating Your First New Objects
Essential Conventional Channel parameters CONV objects are the simplest objects supported by the radio. By this we mean that there really isnʼt that much for you to do if PSR-600 User Manual Page... - Page 35 We also see three new softkeys: Save Exit Dflt The Save softkey will save your new CONV object to the file system when pressed (but donʼt press it yet!). The Exit softkey PSR-600 User Manual Page...
- Page 36 Ownerʼs Manual. Use the keys to scroll the screen until the flashing cursor appears next to the Freq: label. Key in a known local frequency key, or press the DONE softkey - either one and press the PSR-600 User Manual Page...
- Page 37 Scan Lists. NOTE: When entering data into a numerical field, you can start typing as soon as you have scrolled to the desired field, which will replace the PSR-600 User Manual Page...
-
Page 38: Talkgroup Object (Tgrp)
The first time you make a TGRP for a particular trunked radio system, you must also create a TSYS that contains the system parameters associated with that trunked radio system. Once you create a TSYS object for the trunked radio system, you can use PSR-600 User Manual Page... - Page 39 Type: field as-is. Itʼs a good idea (in fact, a REALLY good idea, for reasons you will see as you proceed) to give your TSYS a unique name. Press the down arrow key once PSR-600 User Manual Page...
- Page 40 SAVE softkey, then press the SAVE softkey again. This will store the new TSYS into memory and return you to the TGRP parameter entry. Your display will now appear as follows: Scan Lists: TSYS:My System Wildcard Save Exit Dflt PSR-600 User Manual Page...
- Page 41 “POLICE DISPATCH” for the tag. Scroll to the Tag: field and press the key on the 5-way pushbutton pad. Using the text entry methods that you have previously employed for naming your PSR-600 User Manual Page...
- Page 42 Also with regard to trunked radio systems, it is important to note that a talkgroup object may be configured in one of four different PSR-600 User Manual Page...
-
Page 43: Using Dupe To Speed Up Object Entry
TGRP objects before continuing. You might consider using DUPE on your wildcard TGRP object to make a duplicate, then set the Type to Private, so youʼll have a TGRP wildcard for talkgroup calls, and another for private calls. PSR-600 User Manual Page... -
Page 44: Basic Scanning Operation
To pause the scanner on an active object so that the scanner PAUSE does not resume scanning, press the (Pause) key while PAUSE SCAN the scanner is stopped on that object, and press PSR-600 User Manual Page... - Page 45 When the scanner is stopped on a TGRP while scanning, or paused in Manual Mode, the display will appear as follows: When the scanner is stopped on a conventional channel while scanning, or while paused in Manual Mode, the display will appear as follows: PSR-600 User Manual Page...
-
Page 46: Browsing Objects
Browsing Objects The 5-way pushbutton pad makes it easy for you to browse the stored objects in your PSR-600 when in Manual or Program , then use the keys on the modes. Press 5-way pushbutton pad to move around in the scannerʼs memory as follows: : navigates “up”... -
Page 47: About Object Numbering
About Object Numbering Your PSR-600 is different from other types of scanners in how it stores your Scannable Objects in memory. Instead of fixed channels and banks, objects are stored in the first available block of free memory and assigned an Object ID. -
Page 48: Displaying Memory Usage
Use the keys to scroll the display. Search Object Types A very powerful feature of your PSR-600 is the ability to define different types of frequency searches and process them while scanning. Frequency searches are just another type of Scannable Object in the hierarchy of the radioʼs memory... -
Page 49: Limit Search Object (Lmit)
Once your LMIT object is saved, you can use it while scanning, or launch the LMIT search by itself by pressing the SRCH softkey SRCH (note that we are referring to the SRCH softkey, and not the PSR-600 User Manual Page... -
Page 50: Spectrum Sweeper Object (Swpr)
HINT: It can take some time for the PSR-600 to process all of the frequencies in a LMIT search. You can experiment with different size frequency ranges to find a LMIT search setup that does not interfere excessively with scanning of other object types. -
Page 51: Essential Spectrum Sweeper Parameters
6: 470-512 MHz UHF-T Band 7: 764-806 MHz 700 MHz Band 8: 806-869 MHz 800 MHz Band 9: 896-1300 MHz 900 MHz Band, 23 cm Amateur Band In Public Safety, the sub bands are defined as follows: PSR-600 User Manual Page... - Page 52 Spectrum Sweeper object by itself by pressing the SWPR softkey after navigating to the SWPR object in Manual Mode. When the SWPR object stops on an active frequency, the display will appear as follows: PSR-600 User Manual Page...
-
Page 53: Service Search Object (Srvc)
2: 138-150 MHz Military Voice (excludes 2m Amateur) 3: 225-400 MHz Military Voice Ham - Searches amateur radio frequencies. Groups are as follows: 0: 28.0-29.7 MHz 10m Band 1: 50-54 MHz 6m Band 2: 144-148 MHz 2m Band 3: 222-225 MHz 1.25cm Band 4: 420-450 MHz 70cm Band PSR-600 User Manual Page... - Page 54 To resume searching, press the key. Now, take a few moments to practice setting up each of the different search object types by experimenting and creating some SRVC, LMIT and SWPR objects. PSR-600 User Manual Page...
-
Page 55: Grouping Objects With Scan Lists
How you group objects in Scan Lists is entirely up to you! Here are some examples of how objects can be grouped: Geographically You may wish to group your Scannable Objects according to the areas where they are used. For example, assume that you PSR-600 User Manual Page... -
Page 56: By Trunking System
Scan Lists that it is mapped to in the normal Scan List map. When you press the key, the radio suspends scanning of all objects in the radio except for those that are set to FAV=YES in their object menus. PSR-600 User Manual Page... -
Page 57: Mapping Objects To Scan Lists
Scan List number indicates that the object is a member of that Scan List. Press the Save softkey to save the modified object. Objects can be members of as many Scan Lists as you see fit, without limitation to the number of Scan Lists an PSR-600 User Manual Page... -
Page 58: Naming, Enabling And Disabling Scan Lists
Scan List sub menu, then press the Save softkey again to save the changes to the Global menu. Scan Lists may be enabled or disabled while actively scanning, or by accessing the individual Scan List in the Global Settings (GLOB) menu. PSR-600 User Manual Page... - Page 59 Scan List, you can use the keys to scroll to the objects found there and edit the Scan List setting by pressing the key, then the EDIT and CURR softkeys to see the objectʼs menu. PSR-600 User Manual Page...
-
Page 60: Other Advanced Startup Topics
PSR-600 with other owners! Finding Stored Objects Easily The PSR-600ʼs browse feature makes it easy to scroll to the Scan Lists and Scannable Objects you have created, using the keys on the 5-way pushbutton pad while the scanner is in PGM or Manual Mode. -
Page 61: Filtering By Object Type
Scan List. Locking out an object locks it out “radio-wide” until it is enabled by toggling the lockout setting. Four types of lockout functions are available in the PSR-600, temporary lockout, permanent lockout, search lockout and talkgroup lockout. - Page 62 By using Temporary Lockout, it is possible to “zoom in” on the objects that are carrying communications related to the incident L/OUT of interest by pressing every time an unrelated object becomes active. Eventually you will narrow down your monitoring PSR-600 User Manual Page...
-
Page 63: Permanent Lockout
LMIT searches, some SRVC searches, and SWPR objects. Frequency lockout is used to lock out undesired frequencies that are found during searches. To apply search lockout during a search, press the FrL/O softkey while the scanner is stopped on the undesired frequency: PSR-600 User Manual Page... -
Page 64: Talkgroup Lockout
Talkgroup lockout is similar to search lockout, as it allows you to lockout undesired talkgroups while searching for new talkgroup activity with wildcard TGRP objects. To apply lockout on an undesired wildcard hit, press the TGL/O softkey while the scanner is stopped on the undesired talkgroup: PSR-600 User Manual Page... -
Page 65: Setting The Default Scan List
Enter a new Scan List number to use as the default Scan List. The following numbers are valid: 0: The “not scanned” (ns) Scan List - objects that have no Scan List mappings can be found here 1-20: The twenty normal Scan Lists 21: The FAV Scan List PSR-600 User Manual Page... -
Page 66: Deleting Objects
Deleting Objects Objects that you no longer need to use can easily be deleted from the PSR-600ʼs memory, making room for new objects. , then use the keys to To delete an object, press FUNC CLR navigate to the object you wish to delete. - Page 67 Your PSR-600 includes a Multi-site feature that can enhance the operation of the scanner when monitoring Multi-site systems. Multi-site can be enabled by editing the trunking system (TSYS) parameters for a Motorola or P25 system.
-
Page 68: Ltr Home Repeater Automove
TSYS, then press the Save softkey to save your changes. When AutoMove HRs is turned on, you may enter the LTR system frequencies in any order, and the PSR-600 will automatically move the frequencies to the proper home repeater slots as transmissions are received on the system. -
Page 69: Turning Object Priority On Or Off
Priority CONV object for activity. TGRP Priority Scan When Object Priority is set to Yes for one or more TGRP objects, the scanner will give those TGRPs priority over other TGRPs while checking a particular trunking system for activity. TGRPs PSR-600 User Manual Page... -
Page 70: Hit Counters
Hit Counters Your PSR-600 includes a unique Hit Counter feature that keeps track of how many transmissions are received for each object type. The Hit Counter for an object is incremented each time a transmission is received on an object, making it possible for you to determine the objects that are the least and most active. -
Page 71: Audible Alarm And Alert Led Settings
White LED color setting ( LED COLOR: 0 ), or when comparing one PSR-600 to another. You can compensate for these slight variations by fine-tuning the Red/Green/Blue (RGB) LED settings for each color. See the COLOR settings in the GLOB menu in Detailed Menu Reference section at the end of this manual. -
Page 72: Dedicated Search Modes
Using Dedicated Spectrum Sweeper (SWPR) Mode Dedicated SWPR mode lets you access and run the Spectrum FUNC SCAN Sweeper easily and quickly. Press while in the Manual, Program or Scan Modes to access the Spectrum Sweeper dedicated mode. PSR-600 User Manual Page... - Page 73 1: 108-137 MHz VHF Aircraft Band 2: 137-174 MHz VHF High Band 3: 216-300 MHz 220 MHz Commercial/Amateur Band 4: 300-406 MHz UHF Military Air Band 5: 406-470 MHz UHF Band 6: 470-512 MHz UHF-T Band PSR-600 User Manual Page...
-
Page 74: Using Dedicated Tune Mode
TUNE screen. By default, TUNE mode is paused when first activated. Press PAUSE to begin searching from the current frequency. Press the or keys on the 5-way pushbutton pad to change the search direction. PSR-600 User Manual Page... - Page 75 SID=System ID, and S=Site Number qq% Nnnn W:wwwww P25 9600 BPS control channel Sys:sss Rrr Stt where qq=decoding quality of the control channel data, N=NAC, W=WACN, SYS=System ID, R=RFSS, and S=Site Number PSR-600 User Manual Page...
-
Page 76: Using Dedicated Limit And Service Search Modes
“VC: lsTGID” readings should be expected. You may wish to use the PSR-600ʼs Tune LED feature to obtain a visual indication of signal strength using the tri-color LED. To , then the GLOB softkey. Press activate the Tune LED, press the ... -
Page 77: Using Dedicated Srvc Mode
SRVC object. SRCH To activate dedicated SRVC search mode, press the on the keypad repeatedly until the desired service search is PSR-600 User Manual Page... - Page 78 5: 902-928 MHz 33cm Band 6: 1240-1300 MHz 23cm Band CB - Searches the citizenʼs band radio frequencies Marine - Searches the VHF-FM marine radio band FRS/GMRS/MURS/DOT/STAR (F/G/MURS) - Searches the FRS, GMRS, MURS, DOT and STAR radio frequencies PSR-600 User Manual Page...
-
Page 79: Using Weather Modes
Press the STOR softkey to create a new CONV object using the found frequency. Using Weather Modes Your PSR-600 also functions as a powerful weather alert receiver. There are three modes of weather alert operation available to you. NOTE: Your scanner incorporates weather alert as one of its features and is an extremely sensitive high quality receiver on the weather frequencies. -
Page 80: Weather Radio Mode
To activate Weather Priority Mode, follow the steps above listed above in Weather Radio Mode to find the strongest weather radio transmitter for your area. Once the radio is tuned to the PSR-600 User Manual Page... -
Page 81: Same Standby Mode
Entering the entire 048113 code will cause the radio to receive all SAME alerts that match the code for Dallas County. Suppose you wanted to receive any alert for any county in the entire state (provided that the alert is sent by your local NWS PSR-600 User Manual Page... -
Page 82: Same Entry Examples
SAME Entry Examples Using the Dallas County, TX example above: SAME Entry 1: Code: 048113 Event: *** Entry: ON Lockout: OFF SAME Entries 2-10: Code: ****** Event: *** Entry: OFF Lockout: OFF PSR-600 User Manual Page... -
Page 83: Entering Same Location And Event Codes
The following steps are used to create a SAME entry that provides all weather alerts for a given location. Press the key to enter Weather mode. Press the SAME softkey to add or edit SAME entries. The scanner display will show the following: PSR-600 User Manual Page... - Page 84 5-way pushbutton pad to edit the selected SAME entry. The scanner display will appear as follows: With the Entry: field selected, press on the 5-way pushbutton pad to turn the entry on. PSR-600 User Manual Page...
- Page 85 SAME location code. Use the keypad to enter a SAME code. NOTE: The PSR-600 supports entry of Extended SAME codes, which can include numbers and letters. The text entry mode is used to enter both numerical SAME codes and extended SAME codes. To enter a numerical SAME code, simply precede each number in the SAME code with “1”.
-
Page 86: Activating Same Standby Mode
SAME warning starts. You may reset standby mode by pressing the STBY softkey twice at any time. Using V-Scanner Storage Your PSR-600 features two types of memory storage. Main memory is used to store your programming that is used for everyday monitoring and scanning. V-Scanner memory is used to store complete copies of your scannerʼs main memory for later... - Page 87 Scanner”. Your PSR-600 features 21 V-Scanner storage locations, each capable of storing a copy of your scannerʼs main memory, including all of your objects and global radio-wide settings. Having 21 Virtual Scanners is like having 21 scanners in one. You can custom tailor a main memory configuration to suit your needs for the type of scanning you do in different situations, then store that configuration for later use.
-
Page 88: Saving Main Memory To A V-Scanner Folder
Load softkey. The scanner will ask you to confirm that you wish to overwrite the current contents of main memory. Press the YES softkey to proceed, or the NO softkey to abort. The data transfer takes approximately 4 seconds to complete. PSR-600 User Manual Page... -
Page 89: Erasing V-Scanner Folders
Press the YES softkey to proceed, or the NO softkey to abort. Cloning Your Radio to Another PSR-600 or PSR-500 Scanner Your PSR-600 features a high speed data interface that can be used to transfer the data from your scanner to another PSR-600 or PSR-500 scanner from GRE. -
Page 90: Entering And Editing Alphanumeric Information
Your scanner uses a simple text entry method that allows entry of all uppercase and lowercase letters of the alphabet, numbers, and punctuation symbols. Your scanner also features GREʼs exclusive QuickText feature, which allows you to store up to 10 commonly used text items for instant recall while editing alphanumeric fields. -
Page 91: Using Quicktext
FUNC CLR press to clear the entire field. The PSR-600 character set and corresponding entry codes are FUNC provided below for reference. Pressing to toggle the shift lock status will produce lower case characters for letters, and a second set of punctuation marks for special characters. -
Page 92: Customizing Quicktext
Once you are finished editing your QTXT storage location, press the SAVE softkey to save the QTXT, then press the SAVE softkey again to save the changes you made to the GLOB menu. PSR-600 User Manual Page... -
Page 93: Power-On Configuration Key Sequences
Power-On Configuration Key Sequences Your PSR-600 features power-on keypress sequences that are used as shortcuts to configuration items, like attenuator settings, backlight settings and memory information. Power-on key sequences are also used to place your scanner into firmware upgrade mode for CPU and DSP firmware upgrades. -
Page 94: Birdie Frequencies
If you believe your scanner is defective, you should contact your dealer for assistance. However, before you do so, check that the fault was caused by a human error. Carefully reread the relevant section in the Owners Manual. PSR-600 User Manual Page... -
Page 95: Troubleshooting
If your scanner does not appear to be functioning properly, you can reset the global radio parameters to their factory state without losing any of your programmed data. Any custom changes you have made to the radioʼs global parameters will be lost. PSR-600 User Manual Page... -
Page 96: Initializing The Scanner To Factory Defaults
This procedure clears all information you stored in the scannerʼs working memory, AND resets the global parameters to factory defautls. Initialize the scanner only when you are sure the scanner is not working properly. V-Scanner memory is not affected when the scanner is initialized. PSR-600 User Manual Page... - Page 97 5. Press any key on the keypad to proceed. The scanner will next display: GLOB EEPROM area Initialized to defaults. Press any key. 6. Press any key on the keypad to proceed. The scanner will reboot with file system and global parameters reset to factory defaults. PSR-600 User Manual Page...
-
Page 98: Detailed Menu Reference
We recommend that users not change the settings found in the FUNC GLOB menu unless instructed to in this manual or directed to do so by GRE Technical Support personnel. Should you experience difficulties after changing any of... -
Page 99: Glob Menu Reference
Brit, Dim, Off to Yes, also controls Alert LED intensity. Accessed from front panel using key. When On, DIM key and Light Level GLOB menu Dim LED On or Off parameter also control intensity of Alert LED. PSR-600 User Manual Page... - Page 100 1-250 x 10 mS Flash, this is the amount of time the LED stays turned on. Number of priority CONV channels to check during Pri Channels 0-250 a priority scan sampling. “0” samples all CONV priority channels. PSR-600 User Manual Page...
- Page 101 Yes or No previously stored TGRPS that are mapped to disabled Scan Lists. For Motorola and P25 systems, shows current ShowCCInfo Yes or No control channel index (from TSYS frequency list) and frequency alternating with the voice frequency. PSR-600 User Manual Page...
-
Page 102: Conv Menu Reference
ALERT LED. Controls whether the backlight should be on or Backlight On, Off or Flash flashing while the object is active. “Off” setting is ignored by the PSR-600. PSR-600 User Manual Page... - Page 103 On or Off object is active Increments each time a transmission is received on Hit Count Numeric value the SWPR object. Global “Hit Counts” must be set Dflt to ON. Press the softkey to reset to 0. PSR-600 User Manual Page...
-
Page 104: Tgrp Menu Reference
Audible Alarm is selected, the selected alarm will Alarm Ring, 2-Chirp, Fast Hi-Lo, play at the beginning of each transmission on the DTMF# TGRP object, or anytime the scanner stops for activity on the TGRP object while scanning. PSR-600 User Manual Page... - Page 105 On or Off object is active Increments each time a transmission is received on Hit Count Numeric value the SWPR object. Global “Hit Counts” must be set Dflt to ON. Press the softkey to reset to 0. PSR-600 User Manual Page...
-
Page 106: Tsys Menu Reference
Narrow FM Yes or No radio systems utilize NFM modulation. This setting has no effect on digital trunked radio system performance. Activates 6 dB audio level boost for all activity on AudioBoost Yes or No this TSYS PSR-600 User Manual Page... - Page 107 For Motorola and P25 systems only - sets custom T Tables channel tables. Use ,to select option, press Normal, Splinter, Custom on Custom to enter custom table information Fleet Map For Motorola Type I systems only - sets fleet map PSR-600 User Manual Page...
-
Page 108: Lmit Menu Reference
AM modulation, FM to force FM modulation, NFM to force narrow FM modulation. When on, applies 20 dB of attenuation to all hits Atten On or Off received on the LMIT search. Useful in areas where interference from nearby strong signals is present. PSR-600 User Manual Page... - Page 109 Search Dir Up or Down active. Increments each time a transmission is received on Hit Count Numeric value the SWPR object. Global “Hit Counts” must be set to ON. Press the Dflt softkey to reset to 0. PSR-600 User Manual Page...
-
Page 110: Srvc Menu Reference
Railroad - searches the Association of American Railroads (AAR) VHF railroad frequencies used in the US and Canada to scroll, SEL to toggle Toggle search groups when Pub Safety, Aircraft and Groups on/off Amateur service searches are used. PSR-600 User Manual Page... - Page 111 Search Dir Up or Down active. Increments each time a transmission is received on Hit Count Numeric value the SWPR object. Global “Hit Counts” must be set Dflt to ON. Press the softkey to reset to 0. PSR-600 User Manual Page...
-
Page 112: Swpr Menu Reference
L/Out On or Off accessed by pressing while the scanner is stopped on the SWPR object. Controls whether the ALERT LED flashes or LED Mode Solid or Flash remains on solid when the ALERT LED is used. PSR-600 User Manual Page... - Page 113 Search Dir Up or Down active. Increments each time a transmission is received on Hit Count Numeric value the SWPR object. Global “Hit Counts” must be set Dflt to ON. Press the softkey to reset to 0. PSR-600 User Manual Page...
-
Page 114: Appendix A - Remote Control Protocol
"Specifications") AS IS for the convenience of scanning hobbyists and programmers who wish to develop software applications for use with the PSR-600. Use of the Specifications shall be AT YOUR OWN RISK. GRE does not provide Memory File Format, CCDump Protocol, PC/IF Clone Protocol and Remote Control Protocol technical support. -
Page 115: Get Status
3: HD2 state (in DG, P25 CC detect, in CTCSS/DCS, reverse burst/turn off code detect) bit 4: HD5 state (CTCSS/DCS/NAC detect) bit 5: set to 1 if Mobile (PSR-600), 0 otherwise bit 6: set to 1 if bit 5 == 1 and backlight level is "Dim" Get LCD Command: STX L ETX <sum>... -
Page 116: Send Key
0-2: RSSI bars level, 0-5 bit 3: S icon bit 4: Batt icon ON (N/A for PSR-600) bit 5: Batt icon BLINKING (N/A for PSR-600) icons2: bit 0: 'F' icon bit 1: 'G' icon... -
Page 117: Tune
Code Code Code Code PAUSE Tune Command: STX T <freq0> <freq1> <freq2> <freq3> <rxmode> ETX SUM Response: (no response) PSR-600 User Manual Page... -
Page 118: Appendix B - Ccdump
"Specifications") AS IS for the convenience of scanning hobbyists and programmers who wish to develop software applications for use with the PSR-600. Use of the Specifications shall be AT YOUR OWN RISK. GRE does not provide Memory File Format, CCDump Protocol, PC/IF Clone Protocol and Remote Control Protocol technical support. - Page 119 Chan 0-6, if in TUNE mode, “AAAA”) <CC data> = the "osw" from the CC. The format necessarily depends on the system type: P25: <X1><X2><X3><X4><X5><X6><X7><X8><X9><XA><XB><XC> <X1> - <XC> = 12 2-digit hexadecimal bytes from the last msg M36: <cmd> <dir> <id> PSR-600 User Manual Page...
- Page 120 (since commands are variable length) <ppppppp> = remainder of msg, after removing the <ccc> command value WXS: <SAME Message> One code at a time WXT: "1050Hz Detect" <decoded description> = If present, how the radio SW interpreted the msg. PSR-600 User Manual Page...
-
Page 121: Appendix C - Frequency, Step And Mode Specifications
894.00000 - 901.987500 MHz 12.5 kHz FM 902.00000 - 939.987500 MHz 12.5 kHz FM 940.00000 - 960.000000 MHz 6.25 kHz FM 1240.0000 - 1300.00000 MHz 6.25 kHz FM *Excludes frequencies utilized by the Cellular Mobile Radiotelephone Service: 824-848.9875 MHz and 869-893.9875 PSR-600 User Manual Page... -
Page 122: Appendix D - General Specifications
VHF High 137.00000 - 174.00000 MHz 216.00250 – 224.9950 MHz 225.00000 – 299.93750 MHz UHF Low/T 300.00000 – 512.00000 MHz UHF High 796.00000 – 960.00000 MHz* 1240 .00000 – 1300.0000 MHz *Excludes frequencies utilized by the Cellular Mobile Radiotelephone Service PSR-600 User Manual Page... - Page 123 64 mm 8 ohms dynamic Operating Voltage 12-14.4 VDC, 13.8 VDC nominal, 16 VDC maximum Dimensions Approximately 7.3(w) x 5.3(d) x 2.2(h) inches, 185(w) x 135(d) x 55(h) mm Weight Approximately 27.7 ounces, 790 grams (not including mounting hardware and antenna) PSR-600 User Manual Page...
- Page 124 V-Scanner data files), USB PC/IF cable, AC-DC adapter, mounting bracket/desk stand, knurled knobs, rubber washers for mounting bracket, rubber feet for mounting bracket, fused DC automotive power lead Memory backup No backup battery required, utilizes non-volatile EEPROM memory PSR-600 User Manual Page...
-
Page 125: Appendix E - About Trunked Radio Technologies
In radio, trunking works in a very similar way. Instead of each radio user or user group having their own dedicated radio channel, a small group of radio channels is shared amongst a PSR-600 User Manual Page... - Page 126 In distributed control, there is no single dedicated control channel. PSR-600 User Manual Page...
- Page 127 The other users switch to the free repeater and the voice call proceeds there. LTR systems operate using distributed control. Your scanner utilizes the data sent by each controller on each channel to track the activity on an LTR system. PSR-600 User Manual Page...
-
Page 128: Appendix F - About Ctcss, Dcs And P25 Nac
PSR-600 can search for and display the selective squelch type and squelch tones or codes in use on a particular frequency. The three types of selective squelch available in the PSR-600 are as follows: CTCSS CTCSS stands for Continuous Tone Coded Squelch System. In CTCSS, the transmitter sends a special, low level audio tone continuously while a transmission is in progress. -
Page 129: Dcs
If the DCS code is not present, or an incorrect code is found, the receiver will remain muted. Additionally, the PSR-600 can detect the DCS code that is in use on a transmitter, and will allow you to store the code value with a CONV object when a DCS transmission occurs. -
Page 130: Appendix G - Finding More Information
PSR-600 users. For starters, we recommend www.radioreference.com, where you will find a discussion forum dedicated to the PSR-600, along with dozens of other scanning discussion forums devoted to the scanning hobby. We also suggest groups.yahoo.com. Search the Yahoo Groups for PSR-600, and join groups that include active discussions related to the PSR-600. - Page 131 USA and the world. One of the more enjoyable aspects of the scanning hobby is finding new frequencies on your own. Your PSR-600 includes powerful Limit Search (LMIT) and Service Search (SRVC) search capabilities that will help you find active frequencies in your area, and a Spectrum Sweeper (SWPR) that quickly searches through selected frequency bands to find nearby transmitters.
-
Page 132: Index
..............Birdie Frequencies 94 ..............Browsing Objects 46 ..............Care 94 ..................CCDump ................Cloning Your Radio to Another PSR-600 or PSR-500 89 ..CONV (Conventional Channel), creating your first 34 ....CONV Menu Reference 102 ............CTCSS, about 128 ..............CTCSS, DCS and P25 NAC, about 128 ........ - Page 133 Initializing Global Parameters to Factory Defaults 95 ....Initializing the Scanner to Factory Defaults 96 ......Introduction 7 ................Keypad, Understanding 23 ............Learning About Scanning and your PSR-600 130 ..... LED, Alert 70 ................Limit and Service search modes, dedicated 76 ......Limit Search Object (LMIT) 49 ...........
- Page 134 QuickText, how to use 91 ............Rear View, PSR-600 21 ............. Remote Control Protocol ............. SAME Entry Examples 82 ............SAME Location and Event Codes, how to enter 83 ....SAME Standby Mode 81 ............SAME Standby Mode, how to enter 86 ........Scan Lists, enabling and disabling 58 ........
- Page 135 Weather Priority Mode 80 ............Weather Radio Mode 80 ............PSR-600 User Manual Page...
-
Page 136: Warranty
12 months from the date of sale to the end user. GRE America will correct defects. There will be no charge for labor for a period of 12 months from the date of original sale, except as provided below. Overtime premiums and/or expedited handling and shipping costs must be paid by the owner. - Page 137 PSR-600 User Manual Page...
Need help?
Do you have a question about the PSR-600 and is the answer not in the manual?
Questions and answers
I have a HEAP era 21DD one F 21E4 this error message. I am looking to try to clear. The scanner scans, both digital and analog without a problem except push pushing any numeric buttons sent it into the heap era Looking to clear this from happening. Maybe if I reset the whole thing and reprogrammed it I don’t know.